
Amazon Relational Database Service, a service provided by Amazon Web Services, is a fully managed SQL database cloud service that allows you to create and operate relational databases. With Amazon RDS, one can access all the files and database anywhere in a cost-effective and highly scalable way.
Snowflake is a cloud-based platform that helps data professionals get rid of separate data warehouses, data lakes, and data marts. Additionally, it allows secure data sharing across the organization. Snowflake is built on top of the Amazon Web Services, Microsoft Azure, and Google Cloud infrastructure. This tool is ideal for those organizations that don’t want to dedicate resources for setup, maintenance, and support of in-house servers as Matillion does not need hardware or software to install, configure, or manage it.
Matillion ETL is a cloud-based data integration tool which helps data teams to transform their business with data. Matillion is used to move data faster and do more on it with an easy-to-use visual approach. This tool provides a low-code interface for integration and transform data workflows. Matillion is a cost-effective tool for data professionals to get faster results in their cloud environment.
In this article, we are going to walk through a use case for loading data from Amazon RDS to Snowflake using the Matillion ETL Tool. Below is the prerequisite to perform these actions.
Prerequisites:
- A Matillion account
- A Snowflake account
- An AWS account to create Amazon RDS database
In the case that you do not have these accounts you can utilize the free trials to perform this use case. You can create a free trial of an AWS account for 1 year, a free trial for Snowflake for 1 month, and a free trial for Matillion for 14 days. Below are the steps to perform this use case of loading data from Amazon RDS to Snowflake using Matillion ETL.
Steps:
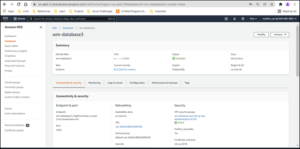
- After creating an AWS account go to the Amazon RDS database service. Click on create an Amazon RDS database of PostgreSQL engine type. Once the database instance is created, you will get the endpoint and port which will help us connect the RDS server and creating databases within it.

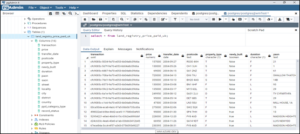
- Once the PostgreSQL engine is created, we can use RDS endpoint to connect to the RDS instance using pgAdmin, pgAdmin is a web-based GUI tool used to interact with the Postgres database instances, both locally and remote servers as well. Using this GUI tool, we will create our database in it.
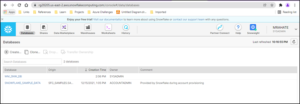
- The next step is to create a database in Snowflake, which is where we are going to load our source database from Amazon RDS. Once the snowflake account is created, we can see the database icon to the right of the Snowflake logo, here we can create database by clicking create.
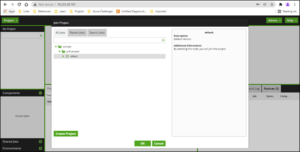
- Next, we will create a Matillion account. Matillion instances can be created on Azure or AWS, in this use case the Matillion instance will be created on AWS. Access the Matillion instance and create a project.
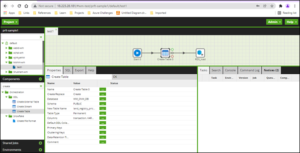
- Create a folder (Mohini-wm), add a orchestration job (test1). Then from the component, add ‘Create Table’ component. We will be using ‘Create Table’ component for creating a table in Snowflake. We have specified the ‘Database’ name which was already created in Snowflake. Specified ‘Schema’, ‘New Table Name’ and column names will need to be created in Snowflake.
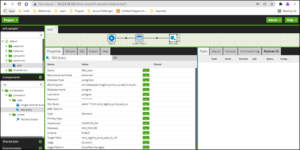
- We will be using the ‘RDS Query’ component next. This component will help us to connect to the Amazon RDS service. Specify parameters as shown below of Database Type, RDS Endpoint, etc.
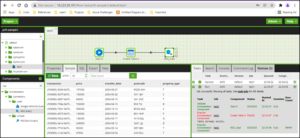
- Right click on the canvas and run the job. In the right-side section we can see the status of job, And in the left-hand side we can preview the data.
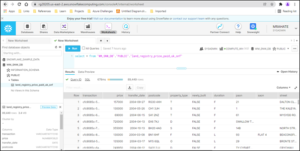
- In Snowflake we can see the new table is created and data from Amazon RDS server is loaded to the snowflake using Matillion. For a preview of the data we will have to run the SELECT query.
At this point you have successfully loaded the data from Amazon RDS database and into Snowflake using Matillion ETL tool.
How Can Perficient Help You?
Perficient is a certified Amazon Web Services partner with more than 10 years of experience delivering enterprise-level applications and expertise in cloud platform solutions, contact center, application modernization, migrations, data analytics, mobile, developer and management tools, IoT, serverless, security, and more. Paired with our industry-leading strategy and team, Perficient is equipped to help enterprises tackle the toughest challenges and get the most out of their implementations and integrations.
Learn more about our AWS practice and get in touch with our team here!
Nice Blog Mohini, Good Work.
Nice blog..! Its very helpful for us.