
Hello Trailblazers!
Salesforce Lightning Experience is packed with powerful tools that allow users to visualize, analyze, and act on their data more efficiently. Dashboard are an integral part of this functionality, providing real-time insights into your Salesforce data with visually compelling charts, graphs, and tables.
One of the key features in Salesforce Lightning is the ability to embed these dashboards directly into Lightning pages. This makes it easier for users to view important metrics without navigating to the separate Dashboard tab.
In this blog, we’ll explore how to add dashboards to Lightning Pages in Salesforce Lightning, including use cases, step-by-step instructions, and best practices for maximizing dashboard effectiveness.
Step-by-Step Guide to Adding Dashboards to Lightning Pages
Step 1: Create a Dashboard in Salesforce
Before embedding a dashboard into a Lightning page, you need to have a dashboard ready. If you don’t already have one, follow these steps to create a dashboard in Salesforce:
- In Salesforce Lightning, navigate to the Dashboards tab from the App Launcher.
- Click the New Dashboard button in the upper right corner.
- Give the name and description (optional). Choose a folder to store the dashboards in it.
- Use the + Component button to add various components to your dashboard. Select reports, choose the chart type (e.g., bar, line, pie), and configure filters as needed.
- Once you’re done configuring the dashboards, click Save to make it available for use.
In our previous blog on Salesforce Dashboards, we provided a detailed explanation on how to create dashboards in Salesforce Lightning. If you’re interested in learning more, feel free to follow this link.
Step 2: Open the Lightning App Builder
Next, you’ll use the Salesforce Lightning App Builder to add the dashboard to a Lightning page.
Navigate to Lightning App Builder:
- In Salesforce, go to Setup by clicking the gear icon at the top-right corner.
- In the Quick Find box, type Lightning App Builder, and click Lightning App Builder as shown below.

Choose a Page to Edit or Create a New Page:
- You can either edit an existing Lightning page or create a new one.
- Select where to embed the dashboards (Note: Record pages do not support embedded dashboards).
To embed a dashboards on an app page, choose “App Page.”
To embed a dashboards on the Home tab, choose “Home Page.” - Click Next.
- Give a label to your app page or home tab layout. Then, click Next.
- Choose a layout. Then, click Done.
Step 3: Add a Dashboard Component to the Lightning Page

Here we’re adding the dashboard to the Home Page.
- In the Lightning App Builder canvas, locate the Dashboard component from the list on the left panel.
- Drag and drop the Dashboard component onto your Lightning page in the desired location as shown in the figure below.

Configure the Dashboard Component:
After placing the component, a panel will appear on the right-hand side. Here, you can configure the settings for the dashboards component:
- Select Dashboard: Choose the dashboard you want to display from the drop-down list.
- Height: Adjust the height of the dashboard component to ensure it fits well on the page.
- Filters: If your dashboard contains filters, configure them as needed.
- View as User: You can select a specific user to view the dashboard as, or you can choose to display it based on the current user’s permissions.
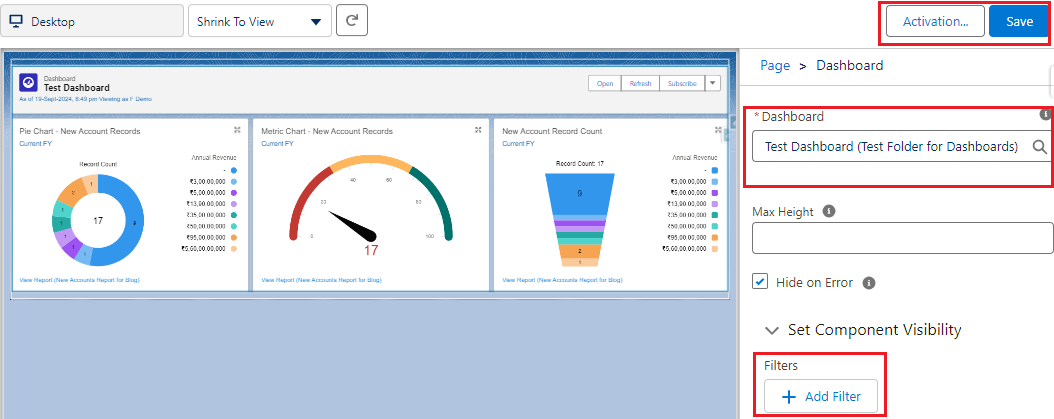
Step 4: Save and Activate the Page:
- After configuring the dashboard component, click Save.
- To make the page live for users, click Activate. You can choose to assign this Lightning page as the default for specific apps, profiles, or record types.
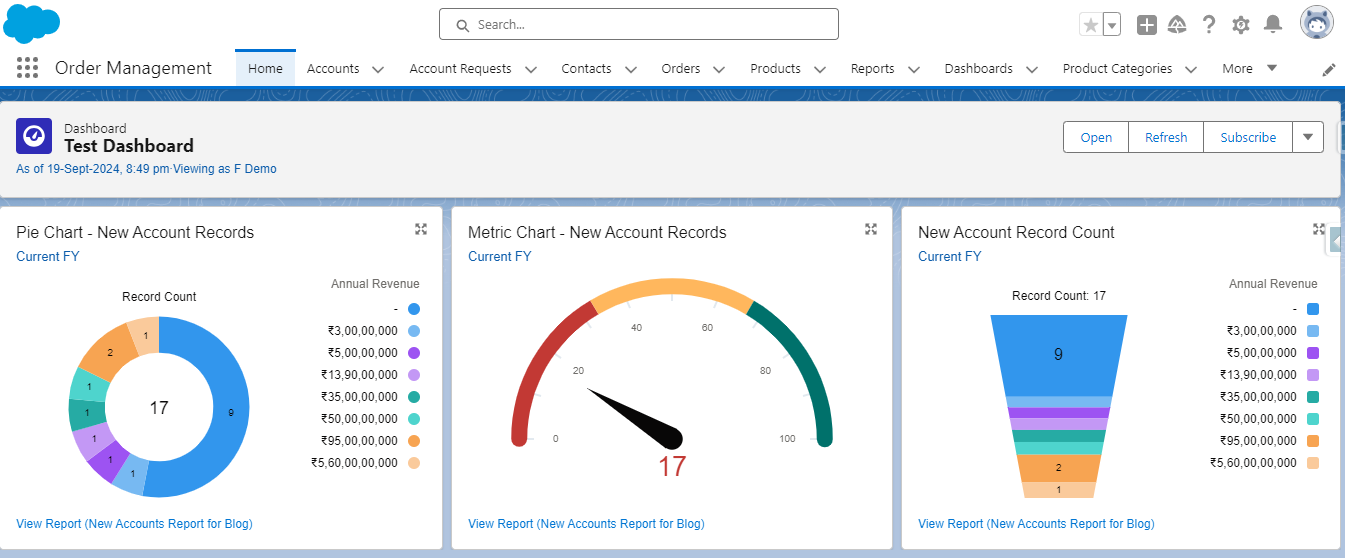
Thus, the dashboard on the Home page will look like this:
Note: If you’re interested in learning more about Salesforce Dashboards, how to create them, and the various dashboard components available in Salesforce Lightning, please feel free to explore this link.
Best Practices for Placing Dashboards on Lightning Pages
- Choose Relevant Dashboards: Make sure the dashboard is relevant to the Lightning page it’s being added to. For example, add a sales performance dashboard to the Opportunity record page, or add a customer service dashboards to the Case page.
- Optimize Dashboards Size: Adjust the height of the dashboards component so that it fits well on the page without overwhelming other important components.
- Use Dynamic Dashboards: Take advantage of Dynamic Dashboards that show data based on the logged-in user’s access and permissions, ensuring that the dashboards reflects data relevant to each user.
Conclusion
Adding dashboards to Lightning pages in Salesforce can significantly enhance user experience by providing quick and easy access to important data. By embedding dashboards directly into Lightning pages, users can gain real-time insights, streamline workflows, and improve decision-making. Following the steps outlined in this guide, you can easily configure and embed dashboards into your Salesforce Lightning pages, customizing the experience to suit the needs of your organization.
Happy Reading !!
The journey of learning never ends; every moment is a chance to grow.
Related Posts:
You Can Also Read:
1. Introduction to the Salesforce Queues – Part 1
2.Mastering Salesforce Queues: A Step-by-Step Guide – Part 2
3.How to Assign Records to Salesforce Queue: A Complete Guide
4. An Introduction to Salesforce CPQ
5. Revolutionizing Customer Engagement: The Salesforce Einstein Chatbot