
Hello Trailblazers!
Welcome to our comprehensive guide on Mastering Salesforce Queues! In today’s fast-paced world of growing businesses, efficiency and organization are key to success. Salesforce Queues are a powerful feature designed to help businesses streamline their workflow, improve team collaboration, and enhance overall productivity.
In the previous part of this blog, we discussed “What is Salesforce Queue?” What is its purpose along with its advantages? Check out part one here. It’ll help you understand the core concept of Salesforce Queues.
In this blog post, we’ll learn how to create Queues in Salesforce, and how we can add users or members as well as assign records to them.
So let’s get started…
How to Create Salesforce Queues
To create a Salesforce Queue, follow the below steps:
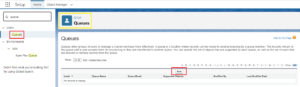
Step 1: Go to the Setup.
Step 2: Enter Queue in the Quick Find Box and click “Queues.” You will see all the queues here if there are any. If not, you’ll see a blank list.
Step 3: Click on New as shown in the figure below.
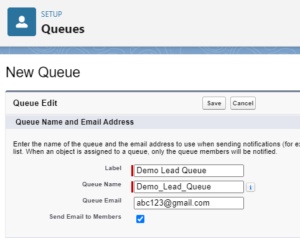
Step 4: Give a label to the Queue, and the Queue_Name will automatically populate.
Step 5: Queue Email – If you put an email value here, the notification will be sent to this address whenever a new record is added to the queue. Because this is ideal when the team has shared inboxes. (Optional)
Step 6: Send Email to Members – If you check this box, it means that all the queue members will receive email notifications separately when a new record is added to the queue. (Optional)

Supported Objects in Salesforce Queues
There are a few supported objects that support Salesforce Queues. We have already discussed them in the previous part of this blog. If you have not read it yet, you can read it here.
Step 7: Available Objects – For which object do you want to create a queue? Here, I’m selecting the “Lead” object to create the queue and pushing it to the Selected Objects box as shown below.

Salesforce Queue Members
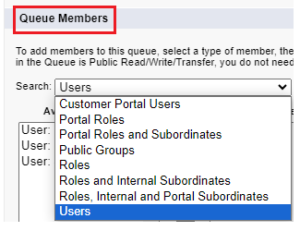
Step 8: To add members, you need to select the “type of member.” There are Users, Roles, Public Groups, Portal Roles, etc. available as a type of member.
Step 9: After selecting the type, select the type of member from “Available Members” and push them to the “Selected Members”. So here I selected “Users” as a type of member and selected two users to be the members of the queue.
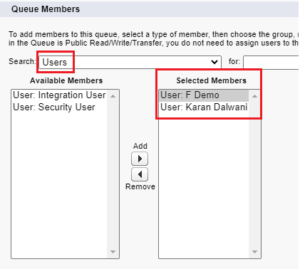
Step 10: Click Save.
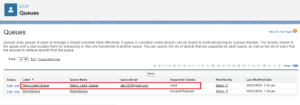
So once you save this, your SF_queue will appear here and look like this.
How to Add Records to the Salesforce Queue
There are two ways to add records to the Salesforce Queues in which records can be assigned to any owner or user. To add them, you only need to update the record owner.
This can be done Manually or with the help of an Assignment Rule.
- Assignment Rules: With the help of the Assignment Rule, the records are automatically added to the queue when they are created by defining certain specific criteria. For e.g. Lead Assignment Rule.
- Manually: We can add records to the queue by simply going to the record page and updating the owner field to queue (created). For e.g. change the lead record owner field to the recently created queue i.e. Demo LeadQueue.
In the next part of this blog, we’ll learn how to add to/test records in the queue, adding them manually and by assignment rule respectively.
Happy Reading…
Life is like a canvas, and you are the artist of it. Every brushstroke you make, every color you choose, and every decision you take shape the masterpiece that is your life. Embrace your creativity, trust your instincts, and paint a beautiful picture that you will be proud to call your own.


What a thought-provoking piece! Your commitment to providing valuable insights is apparent throughout the article.
Best School in Sonipat
I’m genuinely impressed by the depth of research and thoughtfulness in your writing. This is a valuable contribution to the field.
best school sonipat