Often times, clients want to empower their customers to export their eCommerce transactions, such as order history, approval lists, and saved orders, and other data, like wish lists and cart lists, by themselves without admin involvement. These features removed dependency on Insite admins, subsequently improving the user experience, efficiency, and overall satisfaction for Insite users.
Export data into Excel sheet using typescript and jQuery in front-end site in Insite Commerce 4.X version (SDK and Cloud)
To facilitate these in-demand functionalities, we created an elegant solution using typescript and jQuery that can be implemented on an Insite Commerce website. The solution below works in Insite Commerce 4.x SDK, as well as Cloud version (4.0 to 4.5), and can help reduce the development hours needed to export transaction data. The code below exports data into an Excel spreadsheet, but with modification can allow exporting into other formats like CSV.
Example: Exporting Order History data
The example shown below showcases how to export order history data into an Excel sheet in B2B Commerce Cloud by Insite (formerly Insite Commerce) 4.5 on the cloud. However, you can export any data, including wishlists, order approval lists, and more. To export data, follow the steps below:
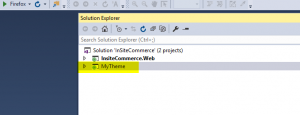
- Create a new theme in your B2B Commerce Cloud by Insite project using the Windows PowerShell command. In the example below, the new theme name is MyTheme.
- Download full.min.js: https://github.com/SheetJS/sheetjs/blob/master/dist/xlsx.full.min.js
- After downloading full.min.js, please add this JS file to your MyTheme project under the Scripts folder.
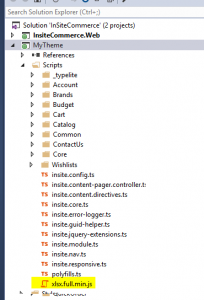
- Open the JSON file in the MyTheme project and ensure this “Scripts/*” is under the BodyEndScripts section in the theme.json file.
- Add the function below exportToExcel and XLSX variable in Order List Controller typescript file for export data into excel sheet.
Typescript File name:\Scripts\Orders\insite.order-list.controller.tsXLSX: any; exportToExcel(data: any) { if (typeof (XLSX) === "undefined") { $.getScript("/Themes/MyTheme/Scripts/xlsx.full.min.js", () => { this.XLSX = XLSX; }); } else { this.XLSX = XLSX; } /* make the worksheet */ var ws = XLSX.utils.json_to_sheet(data); /* add to workbook */ var wb = this.XLSX.utils.book_new(); XLSX.utils.book_append_sheet(wb, ws, "Export Orders"); /* generate an XLSX file */ XLSX.writeFile(wb, "exportorders.xlsx"); } - Open the \Views\Widgets\OrdersView\Standard.cshtml widget in the MyTheme project and add Export Orders button in this widget.
   <button type="button" id="export" class="btn primary btn-search"
   ng-click="vm.exportToExcel(vm.orderHistory.orders);"> [% translate 'Export Orders' %]</button>
- Call this function “exportToExcel” on Export Orders button and pass order history JSON data parameter. See the source code below.
- Run the project and go to Home > My Account > Order History
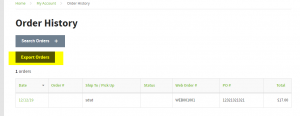
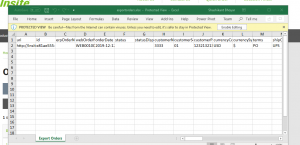
- Click on Export Orders button, open popup, and save excel sheet.
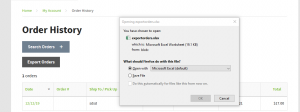
- Open this excel sheet and verify the data.
Helpful Tips:
- To export custom properties, you will have to export each property as a separate column. You will have to modify the JSON data to support this.
- You can create a new JSON object (except existing objects such as carts, orders, wishlists etc.) and pass this customized JSON object to this typescript export function.
This helpful addition to B2B Commerce Cloud by Insite will enhance the shopping experience and empower users who want to export their shopping data. For more information on B2B Commerce Cloud by Insite, check out our other blogs.


Awesome Shashi
Awesome
Great Shashi