Hello Trailblazers!
In Salesforce Lightning Web Components (LWC), the Navigation Service plays a crucial role in creating a seamless user experience by enabling easy, programmatic navigation between different pages, records, or external links.
In the previous Part 1 of this blog we saw the basics of the Navigation Services and how to navigate a user to the record page. If you would like to learn, please follow this link.
In this blog post, we’ll try to cover all the possible scenarios/examples for Navigation Services in Lightning Web Components.
So let’s get started…
Examples of Common Navigation Scenarios in Lightning Web Components
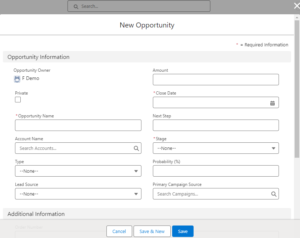
1. Navigate to the New Opportunity record creation page:
Please find below the code snippet that demonstrates how the Navigation Service can be used to navigate to the New Opportunity record creation page when the ‘Create New Opportunity’ button is clicked.
navigationTest.html
<template>
    <lightning-card title="Navigation Service Demo">
        <div class="slds-p-left_medium">
            <lightning-button label="Create New Opportunity" onclick={navigateToNewOppPage}></lightning-button>
        </div>
    </lightning-card>
</template>
navigationTest.js
import { LightningElement } from 'lwc';
import { NavigationMixin } from 'lightning/navigation';
export default class NavigationTest extends NavigationMixin(LightningElement) {
 navigateToNewOppPage() {
        this[NavigationMixin.Navigate]({
            type: 'standard__objectPage',
            attributes: {
                objectApiName: 'Opportunity',
                actionName: 'new'
            },
        });
    }
}
navigationTest.xml
<?xml version="1.0" encoding="UTF-8"?>
<LightningComponentBundle xmlns="http://soap.sforce.com/2006/04/metadata">
    <apiVersion>61.0</apiVersion>
    <isExposed>true</isExposed>
    <targets>
        <target>lightning__AppPage</target>
        <target>lightning__HomePage</target>
        <target>lightning__RecordPage</target>
    </targets>
</LightningComponentBundle>


2. Navigate to the Opportunity Home Page
navigationTest.html
<template>
    <lightning-card title="Navigation Service Demo">
        <div class="slds-p-left_medium">
            <lightning-button label="Go to Opportunity Home Page" onclick={navigateToOpportunityHome}></lightning-button>
        </div>
    </lightning-card>
</template>
navigationTest.js
import { LightningElement } from 'lwc';
import { NavigationMixin } from 'lightning/navigation';

export default class NavigationTest extends NavigationMixin(LightningElement) {
 navigateToOpportunityHome() {
        this[NavigationMixin.Navigate]({
            type: 'standard__objectPage',
            attributes: {
                objectApiName: 'Opportunity',
                actionName: 'home'
            }
        });
    }

}


3. Navigation to external URL
handleNavigateToExternalPage() {
    this[NavigationMixin.Navigate]({
        type: 'standard__webPage',
        attributes: {
            url: https://blogs.perficient.com/author/amasane/'
        }
    });
}
4. Navigating to a List View
To navigate to a list view, use the standard__objectPage type. You can also specify a filter in the filterName attribute.
handleNavigateToListView() {
    this[NavigationMixin.Navigate]({
        type: 'standard__objectPage',
        attributes: {
            objectApiName: 'Contact',
            actionName: 'list'
        },
        state: {
            filterName: 'Recent' // Optional filter for list views
        }
    });
}
5. Navigating to a Custom Tab
If you have a custom Lightning app page or a Visualforce tab, use the standard__navItemPage type.
handleNavigateToCustomTab() {
    this[NavigationMixin.Navigate]({
        type: 'standard__navItemPage',
        attributes: {
            apiName: 'MyCustomTab'
        }
    });
}
6. Navigating to a Related List
If you want to take users to a related list for a particular record, use the standard__recordRelationshipPage type.
handleNavigateToRelatedList() {
    this[NavigationMixin.Navigate]({
        type: 'standard__recordRelationshipPage',
        attributes: {
            recordId: this.recordId,    (you can also put recordId manually)
            objectApiName: 'Account',
            relationshipApiName: 'Contacts',
            actionName: 'view'
        }
    });
}
Conclusion
Through the examples provided above, we’ve demonstrated how developers can effectively utilize Navigation Services within their Lightning Web Components to enhance navigation and user experience.
Happy Reading !!
The journey of learning never ends; every moment is a chance to grow.
Related Posts:
You Can Also Read:
1.A Comprehensive Guide to Custom Report Type in Salesforce
2.Mastering Salesforce Queues: A Step-by-Step Guide – Part 2
3.How to Assign Records to Salesforce Queue: A Complete Guide
4. An Introduction to Salesforce CPQ
5. Revolutionizing Customer Engagement: The Salesforce Einstein Chatbot

