
In today’s ever-changing world, data is essential for every kind of organization, customer, or business. These days, most businesses use cloud storage to store data that is recoverable, quickly available, and safe. Users always want upgrades and the most recent technology to apply to their applications. Users won’t be able to obtain continuous data updates if data is updated on premises, so to obtain continuous updates of data, we use cloud storage, which is why Snowflake integrates a way to load data from cloud storage (AWS, GCP, or Azure).
Importance of Cloud Storage:
Anyone has the ability to save digital data and access it from anywhere, thanks to cloud services for the same. Digital data, like documents, images, videos, and other kinds of media, is saved digitally on virtual or cloud servers that are hosted by other parties using a cloud-based storage data deposit model. It lets you move data to an offsite storage system and retrieve it whenever you need to. A cloud computing approach called cloud storage enables customers to store media files or critical data on distant servers owned by third parties. Through the internet, users can reach these servers whenever they want. A cloud-based service provider runs and oversees cloud storage, often known as utility storage.
AWS offers faster and more secure storage in the cloud than other providers:
Cloud computing security is like on-premises data center security, except for not needing to pay for building and hardware maintenance. Security is the most crucial component of data storage. AWS provided a third-party platform with ample room for data storage in the 2000s.As you utilize the AWS cloud, security gets better. No matter how much data your business has, the AWS infrastructure will keep it safe.
Snowflake Integrate AWS for its Data Operation:
AWS is a worldwide network that provides infinite scalability, concurrency, and performance for moving data across many organizations. Organizations can combine their siloed data, perform a range of analytic functions, and share restricted data in an efficient and secure way by utilizing Snowflake’s Data Cloud on AWS. Snowflake provides a uniform and smooth experience across multiple public clouds, regardless of the location of users or data. Join Snowflake and AWS, as well as your clients, associates, and data suppliers, who are now pushing the boundaries of their organizations into the data cloud.
In this blog, we’ll explore configuring the Snowflake AWS S3 integration. The security and access management policies on the S3 bucket must allow Snowflake to access the storage location for it to be allowed to read and write data. This blog helps you get the required steps to integrate Snowflake with AWS S3 bucket data at one place.
Below are the technologies use in the blog:
1.Snowflake
2.AWS
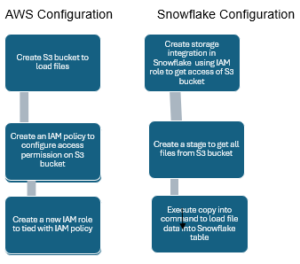
This diagram shows how to load data from AWS to Snowflake tables:
 Flow diagram works as below steps:
- Data files loaded into S3 bucket and create IAM policy in AWS
- Once Snowflake gets access to load the files into table using to create a stage. Copy into command use to load the files into Snowflake tables.
Prerequisites: –
1. Need to create Snowflake account with ACCOUNTADMIN role.
2. Need to create AWS account to a Snowflake supported region.
Steps to load data from S3 bucket to Snowflake tables:
Let us look all above steps in detail:
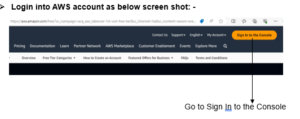
Step 1: – Login into AWS account
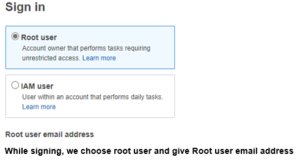
Once you click the console, you will get below screen shot and sign in as root user because we require IAM policies:
Once you login then you get below screenshot:
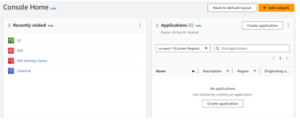
Note: –
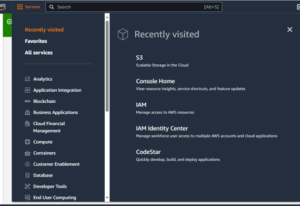
If S3 bucket already created, then will get in the recently visited otherwise go to the Services and search for S3.
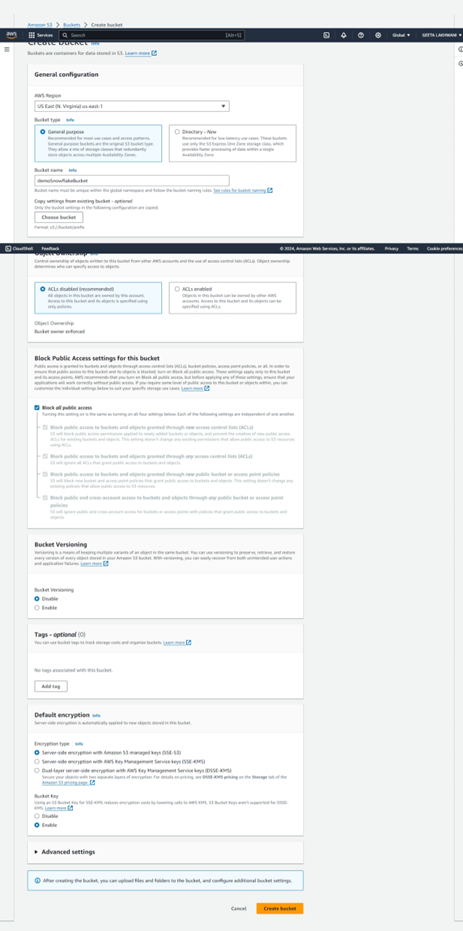
Step 2: – Create the S3 bucket:
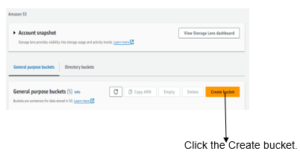

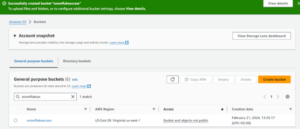
S3 bucket created successfully as in below screenshot:
Step 3: – Now create the IAM policy:
Goto Services in AWS as below:

Click IAM and then click Account Settings:
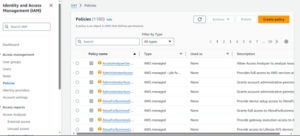
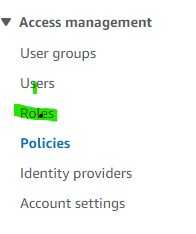
Goto Policies under Access Management as below screen shot:
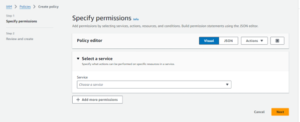
Then, create a policy:
Replace the bucket name as your’ s bucket name.
As in the above screen shot bucket name as “snowflakeaccess”.
Then go to next and give name for policy and policy created:
![]()
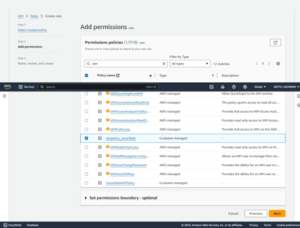
Step 4: – Create role:
It is under IAM —Access Management—-Roles
Refer below screen shot:
![]()
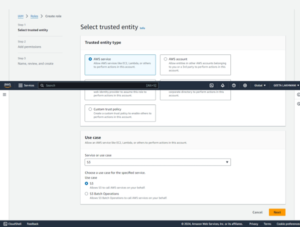
Choose IAM policy which you have created as below scree shot:
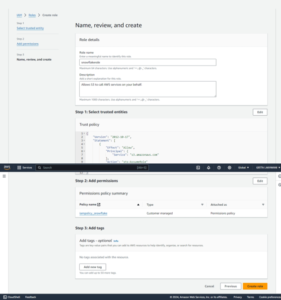
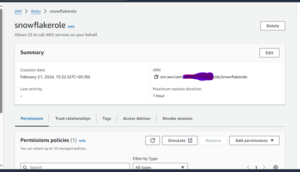
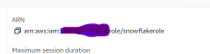
Once role has been created then copy the ARN to create storage integration, as below screenshot:
Now we can proceed for Snowflake Configuration required to get AWS s3 bucket data or files:
Step 1: – Create Storage integration:
A storage integration is an object in Snowflake that provides an interface between third party services.
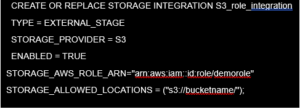
Below is the command we use to create the storage integration: –
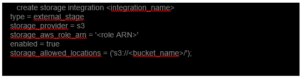
Replace <> brackets value with your configuration values such as AWS_ROLE_ARN replace by ARN after creation a role which you got in as below:
And bucket name as you have given while creating a bucket.
Integrate IAM user with Snowflake storage as below:
Once the storage integration created successfully, execute the below command:
![]() We get below details after execution of the query:
We get below details after execution of the query:
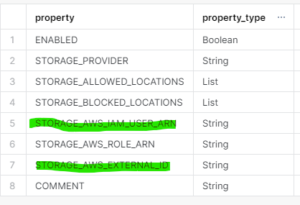
From the above output of the query, we require the highlighted values to create a trust relationship in AWS so that Snowflake gets access to files in S3 bucket.
Then again go to AWS console–IAM—–Roles:
Click the role which you created in the step of creation role:
And edit the trust relationship as given by required values (snowflake_user_arn, snowflake_external_id).
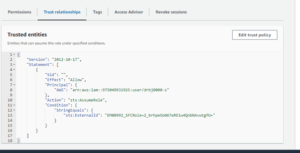
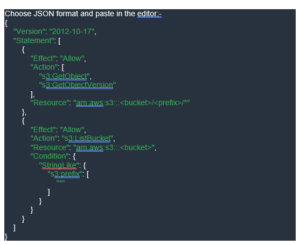
And paste the below JSON in Edit trust policy:
Policy document for IAM role
{

  "Version": "2012-10-17",

  "Statement": [

    {

      "Sid": "",

      "Effect": "Allow",

      "Principal": {

        "AWS": "<snowflake_user_arn>"

      },

      "Action": "sts:AssumeRole",

      "Condition": {

        "StringEquals": {

          "sts:ExternalId": "<snowflake_external_id>"

        }

      }

    }

  ]

}
Once you edit the trust relationship, then create the stage to get files of S3 bucket.
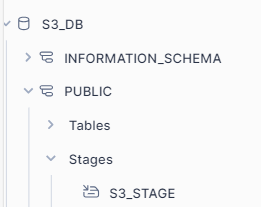
2. Create Stage on Snowflake account:
To create a stage, we need to create the database and schema as in under Role:
Create database s3_db;
Use schema public under database as db_public.
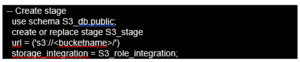
 Execute List @S3_db.public.S3_stage command; to get list of files as below:
![]() Conclusion:
Conclusion:
In this blog, we come to know the steps to integrate Snowflake with AWS. Numerous benefits arise from having the ability to query external files as tables and to link them with other Snowflake tables, including simple building of ETL pipelines and easy access to and joining of data across several cloud platforms.
Happy reading!! Happy learning with Snowflake!!