One of the most powerful features available within Amazon Connect is the visual contact flow editor. Within Amazon Connect contact flows are not just used for interactive menus, they allow supervisors to dynamically update the settings for each call entering the system and make sure callers hear personalized and relevant options. This is an area where even a few slight changes can have a high impact and the tips below will help you deliver a much more pleasant caller experience.
Intelligently break up contact flows
One of the ways Amazon Connect allows supervisors control over each aspect of the call center is through a deep integration between settings and contact flows. Oftentimes the caller’s choices must influence numerous configurations. Some examples include the prompts and options callers should hear while on hold or what part of the call should be recorded. Instead of configuring everything ahead of time and manually managing numerous menus, Amazon Connect allows for updating settings directly in the contact flow.
This approach will deliver a more personalized experience for your callers, but can easily lead to overlapping and difficult to manage contact flows. To avoid this, any design phase should include a careful consideration of how to set up contact flows in a modular fashion. Any menu that will be reused, such as a callback flow, should be set up as a stand alone. Other menus should ideally only have a simple, clearly defined purpose – set queue specific settings or gather client input and do a data dip.
A good approach is breaking out the caller experience, depending on which settings will impact the entire call and which ones are more specific. Start with a general main menu first and continue focusing the experience as we go further down the menu tree. Language, recording type and maybe contact flow logging (if turned on) are all good examples of settings that can be configured in the very first contact flow.
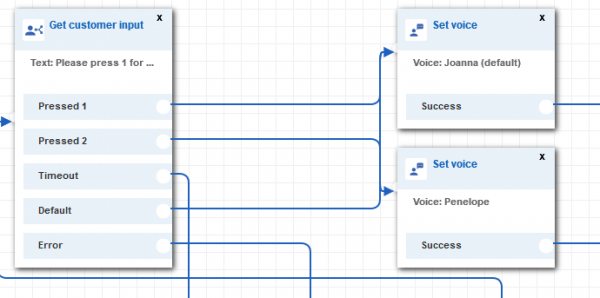
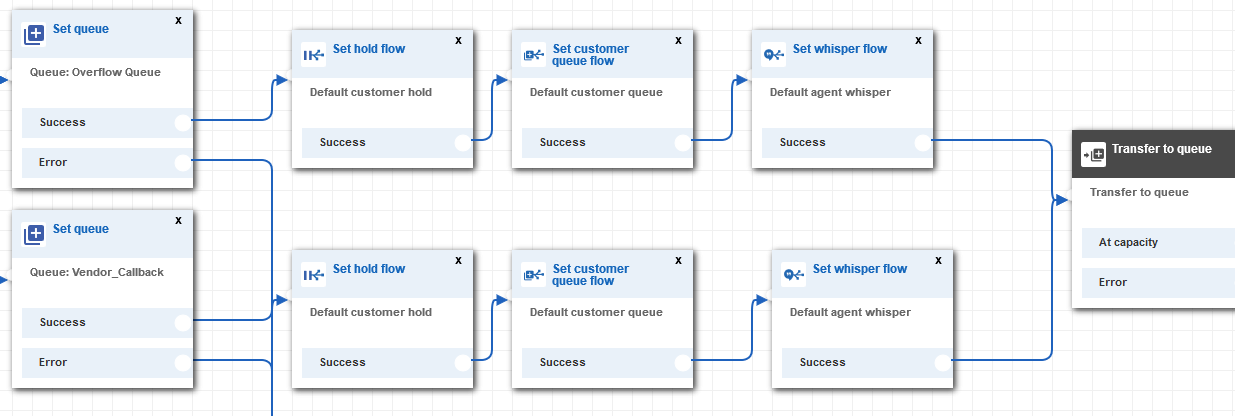
Once global settings are configured a queue selection contact flow can determine (now in the appropriate language) which queue the caller should be paired with. This menu can also set queue specific settings if they will override the defaults. Some of the common settings you will probably want to configure based on the queue selected are customer hold flows, customer queue flows and potentially any whisper flows.
While it might take longer to configure this kind of modular approach it will make managing the call center much easier in the long-term, while still providing a customized caller experience. Keep in mind you can use the transfer to contact flow node at any point to send the caller back to another level of the menu if they made a wrong selection or need to hear the previous options again.
Avoid repeating prompts
It’s good practice to start your contact flow with a main greeting, a prompt letting the caller know they have reached a new menu, maybe inform them about your recording policies or regular business hours. However, you will also most likely have multiple contact flows along with transfer to contact flow nodes that will route callers back to the previous IVR.
This setup can cause some problems as callers will hear the main greeting repeatedly, every time they enter the main menu again. One possible solution is creating a separate contact flow dedicated just to greetings, a menu that can be skipped by subsequent transfers. That being said, setting up a separate menu for just one prompt can become confusing. A better approach is demonstrated in the Sample inbound flow (first call experience) deployed by default in every new instance of Amazon Connect.
This set-up might seem a bit confusing at first, but once you understand how Amazon Connect creates and uses contact attributes you will see opportunities to use them everywhere.
Let’s analyze what is happening in this sample flow: as soon as the caller enters the menu a custom contact attribute, “greetingPlayed” is checked. If it is found and equals true the contact flow skips the greeting. However, since this is the very first entry point into the call center and this attribute has not been defined yet all new calls will go down the “No Match” path. At this point the contact flow defines “greetingPlayed” as a new “true” attribute and attaches it to the call. This attribute will be available even when we transfer to a different contact flow, and will be used to skip the greeting the next time we are back in the main menu, since it will match “true” the second time around.
Another example of where this kind of contact attribute check could be used would be a custom timeout message. Any prompt asking for customer input can route the default or timeout path to a check custom attribute node. If there is no match, in other words this is the first time the caller did not make a selection, maybe they just need to hear the menu again. If it’s their second time, it might be better to let them know the menu cannot read their input and route them to a default customer service queue.
Treat queue hold time as a contact flow
Another area where Amazon Connect takes a slightly different approach from other call centers is the configuration of phone hold behavior while waiting in queue. Instead of setting everything up within a configuration menu supervisors will use the set customer queue flow node and direct the caller to a looping contact flow. While callers are waiting for an agent they are essentially placed in a special contact flow which can be configured to interrupt every few minutes and offer them information or ask for a choice. This makes the queue hold behavior incredibly flexible, but also a bit confusing if you are new to Amazon Connect.
In the example above the contact flow will repeat the loop prompts, or prompt if you are only playing hold music, and periodically interrupt to go down the timeout branch. By changing the timeout setting supervisors can control how often this will happen. In our example we are interrupting every 2 minutes to check the queue status.
By checking the queue status and more specifically the time in queue property we can inform the caller how much longer they have to wait. Some other options available here are: checking staffing, capacity or hours of operation. Ideally we should check hours of operation before placing someone in a customer queue flow, however it is possible someone calling in at 4:59pm will reach a queue that has closed in the meantime.
In our example if the caller has more than 5 minutes to wait we are letting them know there is a delay and offer an option for a callback. Something to keep in mind is that once placed in a customer queue flow there is no straightforward way to transfer the caller back to a previous contact flow such as an earlier menu or a dedicated callback flow. The caller can be transferred to a voicemail via the transfer to phone number option, or be sent to a callback queue using the transfer to queue node.
If the callback option is enabled, consider checking the caller’s phone number and asking them for an input instead of simply using the default phone number. If you need more details on how that can be set up please read our previous blog post on setting up callbacks.
One final consideration is that customer hold flows are different from customer queue flows and as such are more limited. They are only used when an agent places the caller on hold and won’t really offer the caller the option to make a choice in a menu or receive queue status updates. Both contact flows can still invoke Lambda functions though, which can allow custom code to run at pretty much any time during a call.
Make use of AWS Lambda
No discussion about contact flows would be complete without mentioning the invoke Lambda node. A very powerful tool for any contact center the ability to run custom code and read the results can greatly expand what can be accomplished within a contact flow. Processing new support tickets, creating a custom Holiday calendar, or creating a premium contact flow that has customized greetings and “remembers” the last issue the caller encountered are all examples of what is possible by making use of Lambda.
More details on what exactly is passed into the custom function and what can be read back by Connect are available in the official documentation. Finally, remember to keep crucial functions “warm” using the tips in this blog post. For help building your own custom functions or assistance designing your call flows please email Craig Reishus.


