
In my previous blog posts (Part 1 and Part 2), I reviewed the steps to configure the system, so it will read the bank transaction codes. Now I will review the import and upload process, which is the final step in manually loading your bank statements. The process is very simple because it is similar to the process for loading any FBDI or other zip files to the system. Before we get into these steps, first let me give you a few tips on how to be efficient with this whole process.
- Download your files from the bank website in bulk. You should be able to download several bank accounts at once with a specified date range. By doing this, you can download all of your accounts for a full month, or possibly several months, depending on the limitations brought on by your bank. One of my clients had over 30 bank accounts and they were able to download a month’s worth of statements for all of them at once.
- If each bank account’s statements download in separate files, just copy and paste the data into one file. This allows you to make one import/upload.
- You MUST save the files in .txt format, then again as a .zip file. Fusion will not be able to read anything in the actual BAI format, but it can read .txt format.
- When saving the files and the zip file, do not leave any spaces between the characters of the file name. For example, “BBVA JAN 2017” will not work, but “BBVA-JAN-2017” will. Don’t worry, though, if you upload with spaces, the process will end in error and the log file will tell you this is the issue.
Now that we’ve hit some key success tips, I’ll walk you through the import/upload process.
First, go to the “File Import and Export” screen and load using the ‘fin/cashManagement/import’ account option.


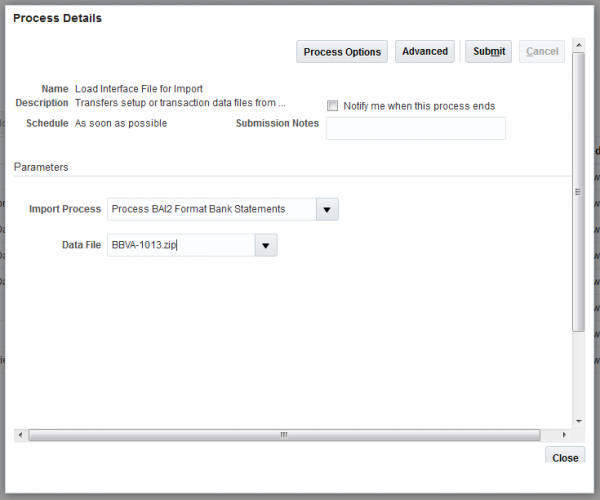
Then, go to “Scheduled Processes.” You will use the ‘Load Interface File for Import’ process, then use the ‘Process BAI2 Format Bank Statements’ as the Import Process and choose your zip file as the Data File.
If you do happen to receive errors or a warning, go to the Bank Statements and Reconciliation work area to see if the ‘Import error’ link gives you a reason for the rejection. If you see it’s because there is a missing transaction code, go add the transaction code, then click the Retry icon to resubmit the import process for that statement. Please see my previous blogs Part 1 and Part 2 for steps on adding transaction codes.

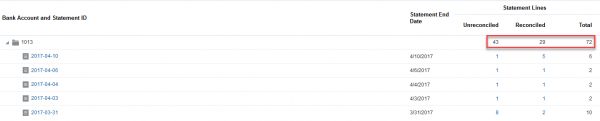
If no errors exist, you can start reconciling your statements right away! Notice that as you start reconciling, you can track how many lines are still unreconciled for each date (statement).
In the upcoming blogs, I’ll cover the reconciliation process along with autoreconciliation rules. You’ll be clearing out your statements in no time! 🙂