Kubernetes (K8s) is an open-source platform that manages containerized workloads and services and expedites declarative configuration and automation. K8s is often described as a container orchestration platform.
Containers provide a lightweight mechanism for isolating an application’s environment. For example, containerizing an application not only means building a package that holds an application but all the dependencies that are needed to run that application. As a container orchestration platform, K8s manages the entire life cycle of containers, spinning up and shutting down the resources as needed.
How to Create K8s
K8s can be created in single node and multi-node. For creating a single node cluster, we can use minikube, where we can run a single node K8s cluster on a laptop or desktop. In the production environment, we need a cluster with high compute resources, as a single node cluster cannot satisfy this need, and it fails high availability feature for the cluster as it only has one node.
There are many ways to build a multi-node K8s cluster. One of them is using the tool, kubeadm, which provides “kubeadm init” and “kubeadm join” as a best practice for creating a cluster. In this article, we are going to configure the multi-node Kubernetes cluster on Amazon Web Services (AWS) and Azure Multi Cloud, which includes AWS and Azure cloud providers. The AWS Cloud will have a master and worker node whereas Azure will have another worker node.
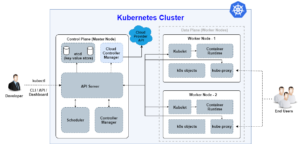
Below are the resources you’ll need to create a cluster:
- Master and one worker node on AWS
- Another worker node on Azure
- Terraform for provisioning instances on AWS and Azure
- Bash script for configuring master and slave nodes
The following are the prerequisites you need:
- Have an AWS account
- Have an Azure account
- AWS CLIv2 must be installed and configured
- Azure CLI must be installed and configured
- Terraform: An infrastructure as code tool that allows you to build, change, manage and version your infrastructure. Its only purpose is to provide one workflow for provisioning the infrastructure.
Below, we can see the Terraform code for provisioning master and worker nodes on AWS and Azure cloud through a single Terraform script.

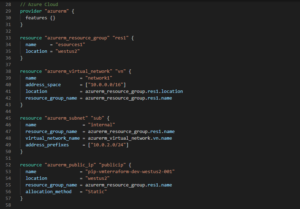
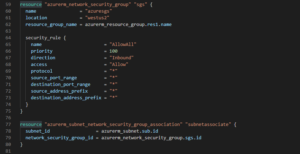

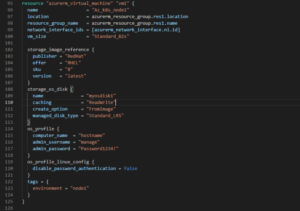
The steps below will show you how to create a multi-node Kubernetes cluster on AWS and Azure:
Step 1: Supply the master and one worker node on AWS Cloud and another worker node on Azure.
As per the above Terraform code, you can create master and worker nodes on AWS and Azure.
- While creating instances on AWS, it’s required to use instance_type=t2.medium (2vCPU, 4GiB RAM) with os Amazon Linux 2. The security group is already created and used here.
- While provisioning this instance on Azure, it’s required to use “vm_size=Standard_B2s(2vCPU, 4GiB RAM)”, os should be “rhel8.” To login, we will need to create a username and password.
Run the following command for provisioning:
| terraform init
terraform apply |
Below is your output:
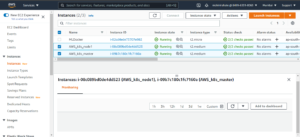
- AWS master and worker node provisioned using Terraform
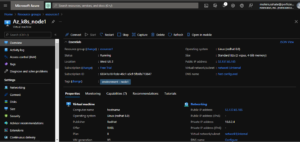
- Below is the Azure worker node created using Terraform:
Developers can save time for writing commands by utilizing bash scripting. Bash script is the series of commands in plain text file, so when you have a set of commands that you’ll perform frequently, consider writing bash script for it.
Step 2: Configure the K8s Master
We have now created bash script for configuring the master and slave nodes. The master node is launched on AWS Cloud using Terraform. Next, log in to the virtual machine (VM) and configure the master node using bash script. In bash script, we’ll first have configured the repo for installing “kubeadm,” “kubectl,” “kubelet,” and “docker,” then start and enable the “docker” and “kubelet” service. Then, you’ll need to change the “docker cgroupdriver” into “systemd.”
To initialize the control-plane node, we need to pass the argument with “kubeadm init” with relevant parameters to make it highly available. Finally, you’ll make directories for storing “kube” configuration files and the final step is to apply flannel.
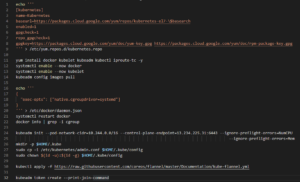
Below is the output:
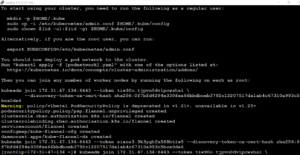
Step 3: Configure the Worker Node in the AWS
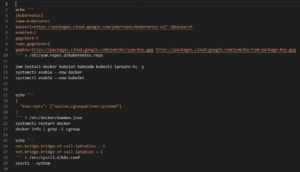
In the worker node, we need to configure the repo for K8s for installing “kubelet,” “kubeadm,” “kubectl,” and “docker.” You will start and enable the service of “kubectl” and “docker.” Then, change the “cgroupdriver” of “docker” into “systemd.” Now, we are configuring the IP tables and run the “join” token command.
Step 4: Configure the Worker Node in Azure
We have used the Red Hat Enterprise Linux (RHEL 8) operating system for Azure and Amazon Linux 2 for AWS. Now, the same configuration needs to be done for the Azure worker node so we can configure the repo for the K8. The following steps are the same as the AWS node. Last need to run the token join command provided by the master node.
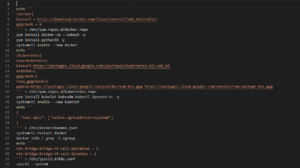
After running the respective bash script in the AWS and Azure worker nodes, we then need to run the join command provided by the master node:
| kubeadm join VM_PUBLIC_IPv4:6443 –token TOKEN –discovery-token-ca-cert-hash CERT_HASH |
Finally, you’ll run the “kubectl get node” command on the master node:

This is the final output where we can see the first node is the Azure worker node, the second one is the AWS master node, and the third one is the AWS worker node. This way, we have configured the multi-node K8s cluster on AWS and Azure using Terraform. For more information on these processes, contact our experts today.


Great work Mohini, this is very helpful. Thank you once again!!
Good Job Mohini !!! Keep it up.
Great work mohini. Loved your work and blog.🙌
Great work mohini. Loved the blog and your work.
I love this blog. I don’t know what compliment is better for you and thanks for your great info! Thank you so much!@Mohini