Amazon Connect makes use of queue specific hours of operations to route callers based on the time and day of the week. It’s an excellent feature to use for any call center that has regular operation hours or dedicated shifts. However, a preconfigured calendar doesn’t work very well for unpredictable events. In case your supervisors can’t reach the admin web page to update the hours or the call center is closed for an unknown amount of time you still want to make sure your callers will still hear an appropriate message and are directed to the right voicemail or overflow queue.
Luckily, making use of Lambda and DynamoDB it’s easy to set up a small database that can store an emergency flag which can then be used within any of your call flows.
Set-up
This post will show you how to use AWS services to store and retrieve information Amazon Connect will use when routing calls. If you are not familiar how to set up Lambda so it can be invoked by Connect the Amazon documentation provides more details or you can follow the steps described in this previous blog.
There are several database options available within AWS. DynamoDB is a NoSQL database perfect for storing and retrieving simple information such as custom text-to-speech messages, more details about the caller or flags that help route a client down different paths. For more complex data Amazon Connect can also make use of RDS or stream data into Redshift for historical archiving and SQL reporting.
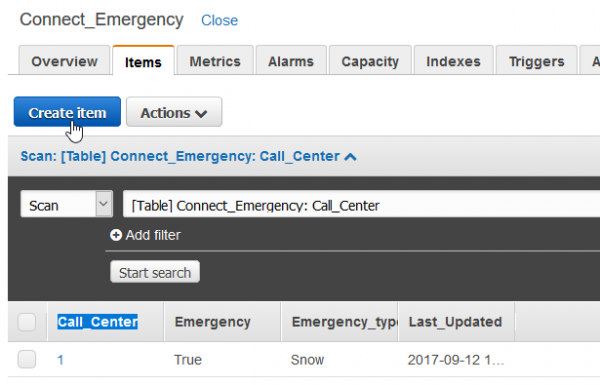
To follow along with this blog, log into DynamoDB and create a table labeled “Connect_Emergency”. We want different messages for each contact flow and/or call center instance that will make use of this table so use a number primary key labeled “Call_Center”. Leave the other settings as default and create the table.
After the table is created you can add new items using the create item button. Using either the tree menu or the text entry you will want to add the following items along with a value for each:
Boolean “Emergency”

String “Emergency_type”

String “Last_Updated”
We will read our emergency info from this table and update it based on information received from Amazon Connect. When updating the table we will check if the emergency mode is turned on, play a different message based on the emergency type and also make sure we keep track of when the entry was last updated. If multiple supervisors will be making changes to this table it could be a good idea to also add an “Updated_by” item which will take the callers phone number or a unique ID.
The last step needed before we can set up the Lambda functions and Amazon Connect contact flows is to make sure an IAM role with permissions to access DynamoDb is available for the Lambda functions.
Setting up the Lambda functions
The first Lambda function will read the entries in the DynamoDb emergency table and pass the results to Amazon Connect where the call flow will take a different path depending on the result.
Navigate to the Lambda console and create a new blank function without any triggers. Enter a name that makes sense such as “Select_Db and a description. We will use Python and the boto3 library to communicate with the database.
Lambda will create a connection to the table we created in the previous step and we can use the get_item function to select the appropriate entry for the current call flow. Since we only have one item in the current table we can hardcore the key for now, but it is recommended we ask the caller which call flow they want to modify and pass the value from Connect.
The full body of the function will look similar to:
import boto3

def lambda_handler(event, context):

    dynamodb = boto3.resource('dynamodb')

    table = dynamodb.Table('Connect_Emergency')

    response = table.get_item(Key={'Call_Center':1})

    return response['Item']
Save and test the function. Unless you are passing in a custom value from Connect the standard hello world JSON will suffice for testing purposes. The result should look like this:
{

  "Last_Updated": "2017-09-12 19:27:21",

  "Emergency_type": "Snow",

  "Emergency": "True",

  "Call_Center": 1

}
Please make sure the results Lambda will pass to Connect are flat objects in the format key:value. Connect will throw an error if you try to pass in any nested objects.
Now that we can read the entries in our table it’s time to make sure your call center supervisors can easily update the table without having to go into the AWS console. Once more create a new blank function without any triggers. Name it appropriately and enter a description. We will use Python and the boto3 library, however this time we will use the update_item function and select several values passed in from Connect. We also need to make sure we convert all data types to an appropriate value that can be entered in our table.
The full body of the function will look like this:
import boto3

import datetime


dynamodb = boto3.resource('dynamodb')

table = dynamodb.Table('Connect_Emergency')


def lambda_handler(event, context):

   cc=int(event['Details']['ContactData']['Attributes']['Call_Center'])

   dt= datetime.datetime.now()

   dt=dt.replace(microsecond=0)

   emerg = event['Details']['ContactData']['Attributes']['Emergency']

   emerg_type = event['Details']['ContactData']['Attributes']['Emergency_type']


   table.update_item(

        Key={

            'Call_Center':cc

        },

        UpdateExpression='SET Last_Updated = :val1,Emergency= :val2,Emergency_type= :val3',

        ExpressionAttributeValues={

            ':val1':str(dt),

            ':val2':emerg,

            ':val3':emerg_type

        }

)
You can test this function with the following JSON, make sure you also check the DyanmoDb table and verify the changes were pushed through.
{
 "Details": {
 "ContactData": {
 "Attributes": {},
 "Channel": "VOICE",
 "ContactId": "",
 "CustomerEndpoint": {
 "Address": "1234567890",
 "Type": "TELEPHONE_NUMBER"
 },
 "InitialContactId": "",
 "InitiationMethod": "INBOUND",
 "InstanceARN": "",
 "PreviousContactId": "",
 "Queue": null,
 "SystemEndpoint": {
 "Address": "1234567890",
 "Type": "TELEPHONE_NUMBER"
 },
 "Attributes":{
 "Call_Center": "1",
 "Emergency": "True",
 "Emergency_type": "1"
 }
 }
 },
 "Name": "ContactFlowEvent"
}
Finally make sure you apply the appropriate permissions that will allow Amazon Connect to invoke your two new functions. You can use the AWS CLI to do this, just run the command below with the appropriate function names and amazon account id. Make sure you run it for both of the functions Connect will invoke.
aws lambda add-permission --region us-east-1 --function-name function:%YourFunctionName% --statement-id 1 --principal connect.amazonaws.com --action lambda:InvokeFunction --source-account %YourAmazonAccountId%
With both functions set up it’s time to look at the contact flows that will make use of the emergency table. The first contact flow will check the emergency status and route based on the returned result. You can use it as the entry point into the call center, branching to other contact flows based on the data we get back from our emergency table.
The second contact flow will take inputs from the caller and update the table with the results. This menu should only be accessed by your supervisors and should be paired with a “secret” phone number. Something to consider is adding a password to this contact flow or checking that the phone number matches the caller id of a supervisor, both of which can be easily accomplished by setting up a DynamoDb table containing authorization information.
Setting up the Amazon Connect contact flows
Navigate to your Connect instance and create a new contact flow to check the emergency table. Name it something appropriate like “Emergency_check” and add a description. We will start by adding an invoke AWS Lambda function node and entering the ARN of your “Select_db” function. The next node will be a check contact attributes that will look up an external attribute with the label Emergency. Add a False and True condition for the two states this Boolean item can have and save the node.
If the emergency flag is set to true we will also need to check the emergency type. Add a second check contact attribute node off the true path and select the external item Emergency_type. Add conditions for all the possible entries and make sure to map the default “No Match” path .
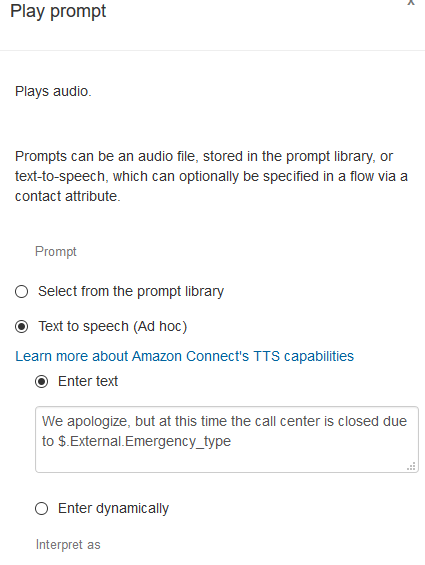
Finally, you will want to add prompts letting the caller know there is an emergency and communicate what type of emergency was encountered. You can refer to the external item using the $.External.”item name” notation.
After playing this prompt transfer the caller to either a new contact flow, a voicemail or provide additional guidance. Make sure all paths are connected to a node, you’re handling errors appropriately and save the call flow. The last step is to assign a phone number and test the call flow. You should hear a message letting you know the call center is closed due to snow. The final call flow should look similar to this:
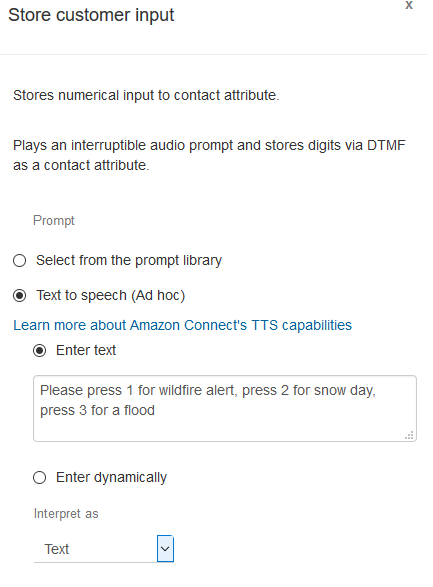
The second contact flow will be used by supervisors to select an entry in the table, check the emergency status and finally update the entry if necessary. The first step will be asking callers what call center entry in the table they want to check and possibly update, we will accomplish this by using a store customer input and a set contact attribute node. After creating and naming a new contact flow, add a store customer input node which will ask the caller what entry in the table they want to check.
You will need to store this entry in a contact attribute to allow Lambda to access it, so add a save contact attribute node.
Now that we have selected the appropriate entry to check, we will re-build some of the nodes we had in the previous contact flow. Add an invoke AWS Lambda function node and call the Select_db” function accessed previously. Depending on the results we find we want to make sure we offer supervisors appropriate menu options. Go ahead and add a check contact attributes node that will check the external emergency item and branch into true or false.
If the emergency mode is turned on we want to offer the supervisor the option to turn the emergency off or leave it on and just update the emergency type. On the other hand, if the emergency mode if turned off we want the option to turn emergency status on and add an emergency type.
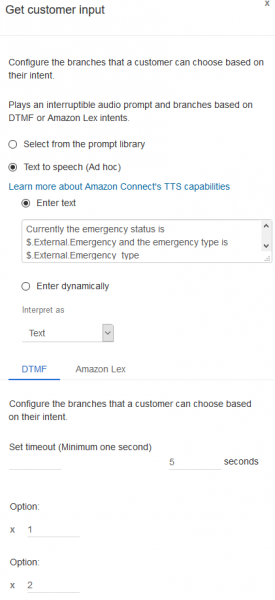
For the true path add a get customer input prompt and read out the emergency as well as the emergency type. You should offer the caller the option to change the emergency or just update the emergency type.
At this point, depending on the caller’s selection we will need to add several set contact attribute nodes. If the supervisor selects option 1 for turning the emergency off we will need two set contact attribute nodes with the following settings: Set destination key: Emergency to Value: False and destination key: Emergency_type to Value: None.
If the supervisor selects option 2 for leaving the emergency turned on and updating the emergency type add a set contact attribute with the following setting: Set destination key: Emergency to Value: True. Add a store customer input and read out the emergency type options so the supervisor can make a choice. Save the customer input into Emergency_type contact attribute by using a new set contact attribute.
After everything is configured this section of the contact flow will look similar to the image below. With the upper path turning the emergency mode off and the bottom one updating the emergency type. The last step will be adding one more invoke AWS Lambda function node and calling the update emergency table function. If all the set contact attribute nodes are set up correctly the Lambda function will find all details in the JSON passed from Connect.
Add one last prompt to let the supervisor know the status has been updated and they can hang up or offer the option to go back to an earlier stage in the contact flow in case they want to update another entry.
You will also need to update the path for the emergency mode is false option so callers can turn it on and set an emergency mode. You can re-use the nodes already built for this path, just make sure you set up a proper get customer input node.
Once all errors are handled and the contact flow is saved you are ready to share this menu with your supervisors who will now be able to quickly flip the call center to emergency mode with just a phone call. While there are many ways to improve on this design, maybe by adding an alert when the emergency mode is turned on or setting up more complex authorization hopefully this post helped get you started using DynamoDB in your call center.
To talk with our experts about our Amazon Connect solutions, email Craig Reishus.


