

The Automate Everything series was written by Rebekah Williamson and Taylon Hammons
In a work-from-home world, companies are moving toward paperless operations. The process of printing forms, delivering them to clients, and scanning them back in is a thing of the past. Save paper, time, and money by shifting to an all-digital approach. By leveraging Microsoft’s Power Platform and Adobe Sign, electronic document workflows and approval processes are easily automated. This integration allows your team to seamlessly create interactive forms, capture signatures, and connect with your organization’s data all in one place.
In this guide, we will give you step-by-step instructions on how you can manage agreements/contracts and create legally binding signatures via Power Apps and Adobe Sign.
Create your Power App
The first step is to create a power app that users can use to manage and send agreements. In Power Apps, create a canvas app from blank.
Connect your App to Adobe Sign.
First, make a data connection to Adobe Sign within the app.
- Click view > data sources > Add data source > select Adobe Sign
- Log into your Adobe Sign account or sign up for a free trial to try it out.
Pro Tip! Make sure you sign up for an Enterprise trial otherwise you will get a connection failure.
Create a Page to Manage Agreements
Next, create a page with a gallery and PDF viewer to house a list of our agreements.
- Rename your screen to Manage Agreements.
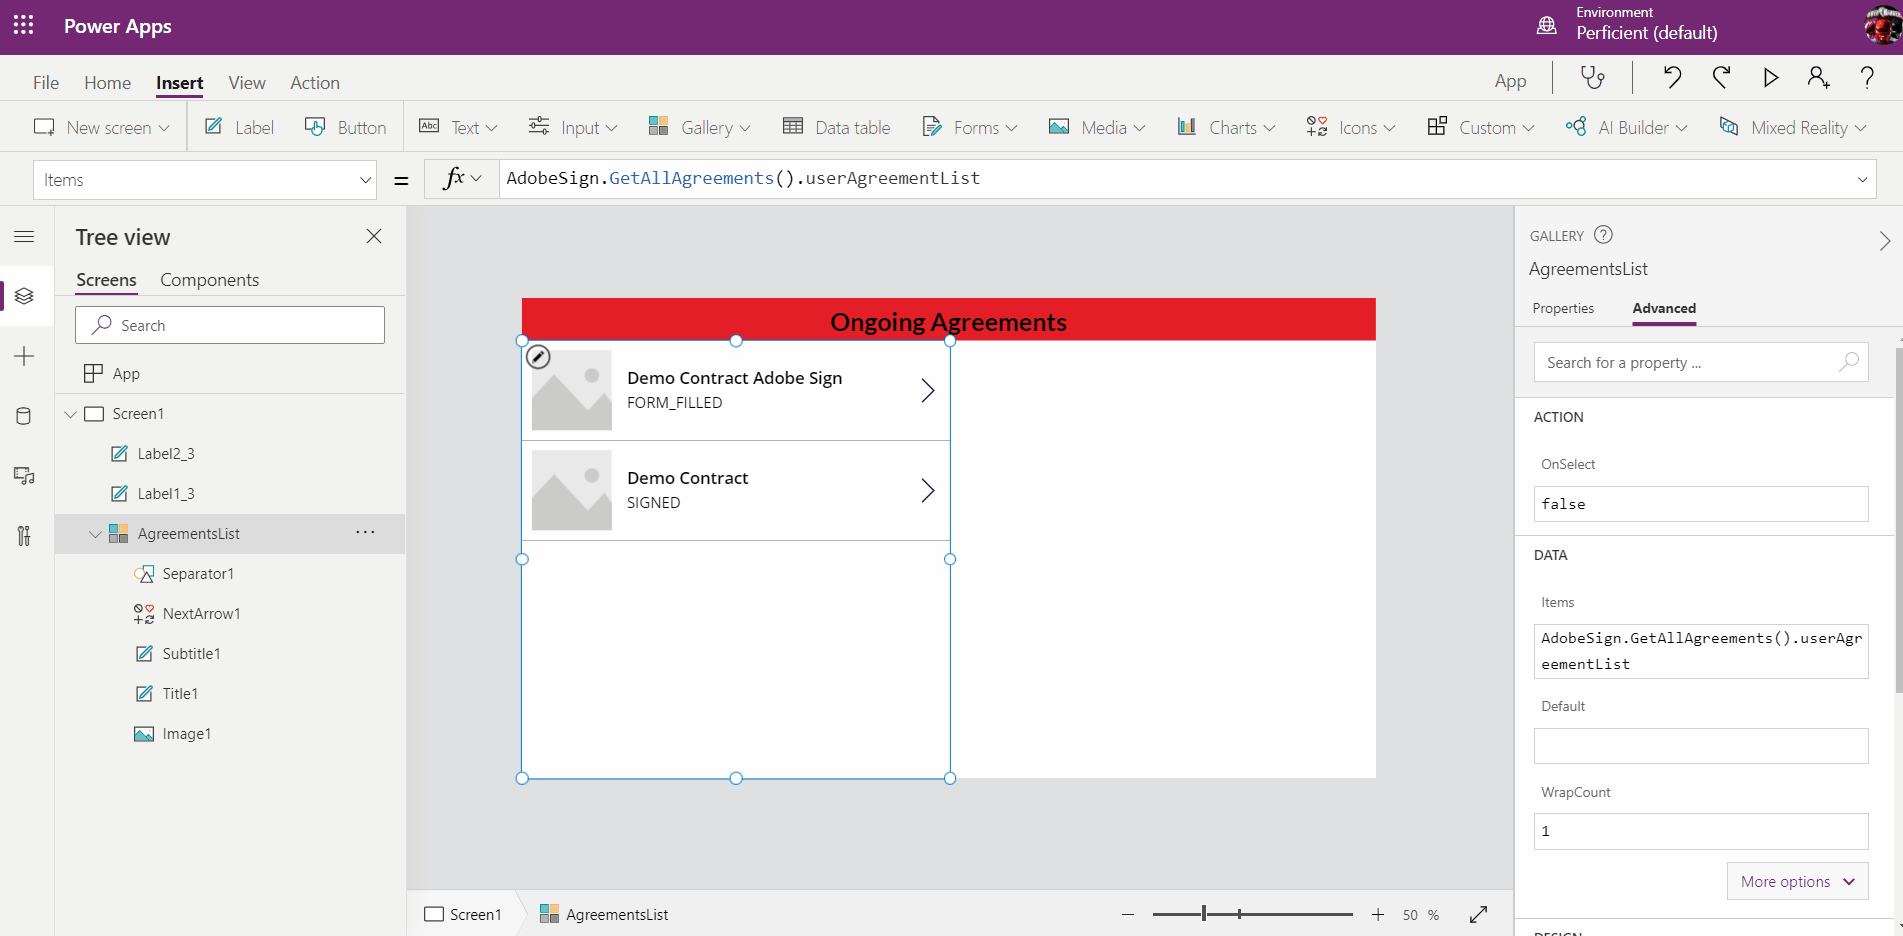
- Insert > Gallery > Vertical Gallery
Rename it AgreementList. In the items field, enter:
AdobeSign.GetAllAgreements().userAgreementList
Pro Tip! Make sure your Adobe Sign has agreements. If you just signed up, create a Library Template, and then create a few agreements.
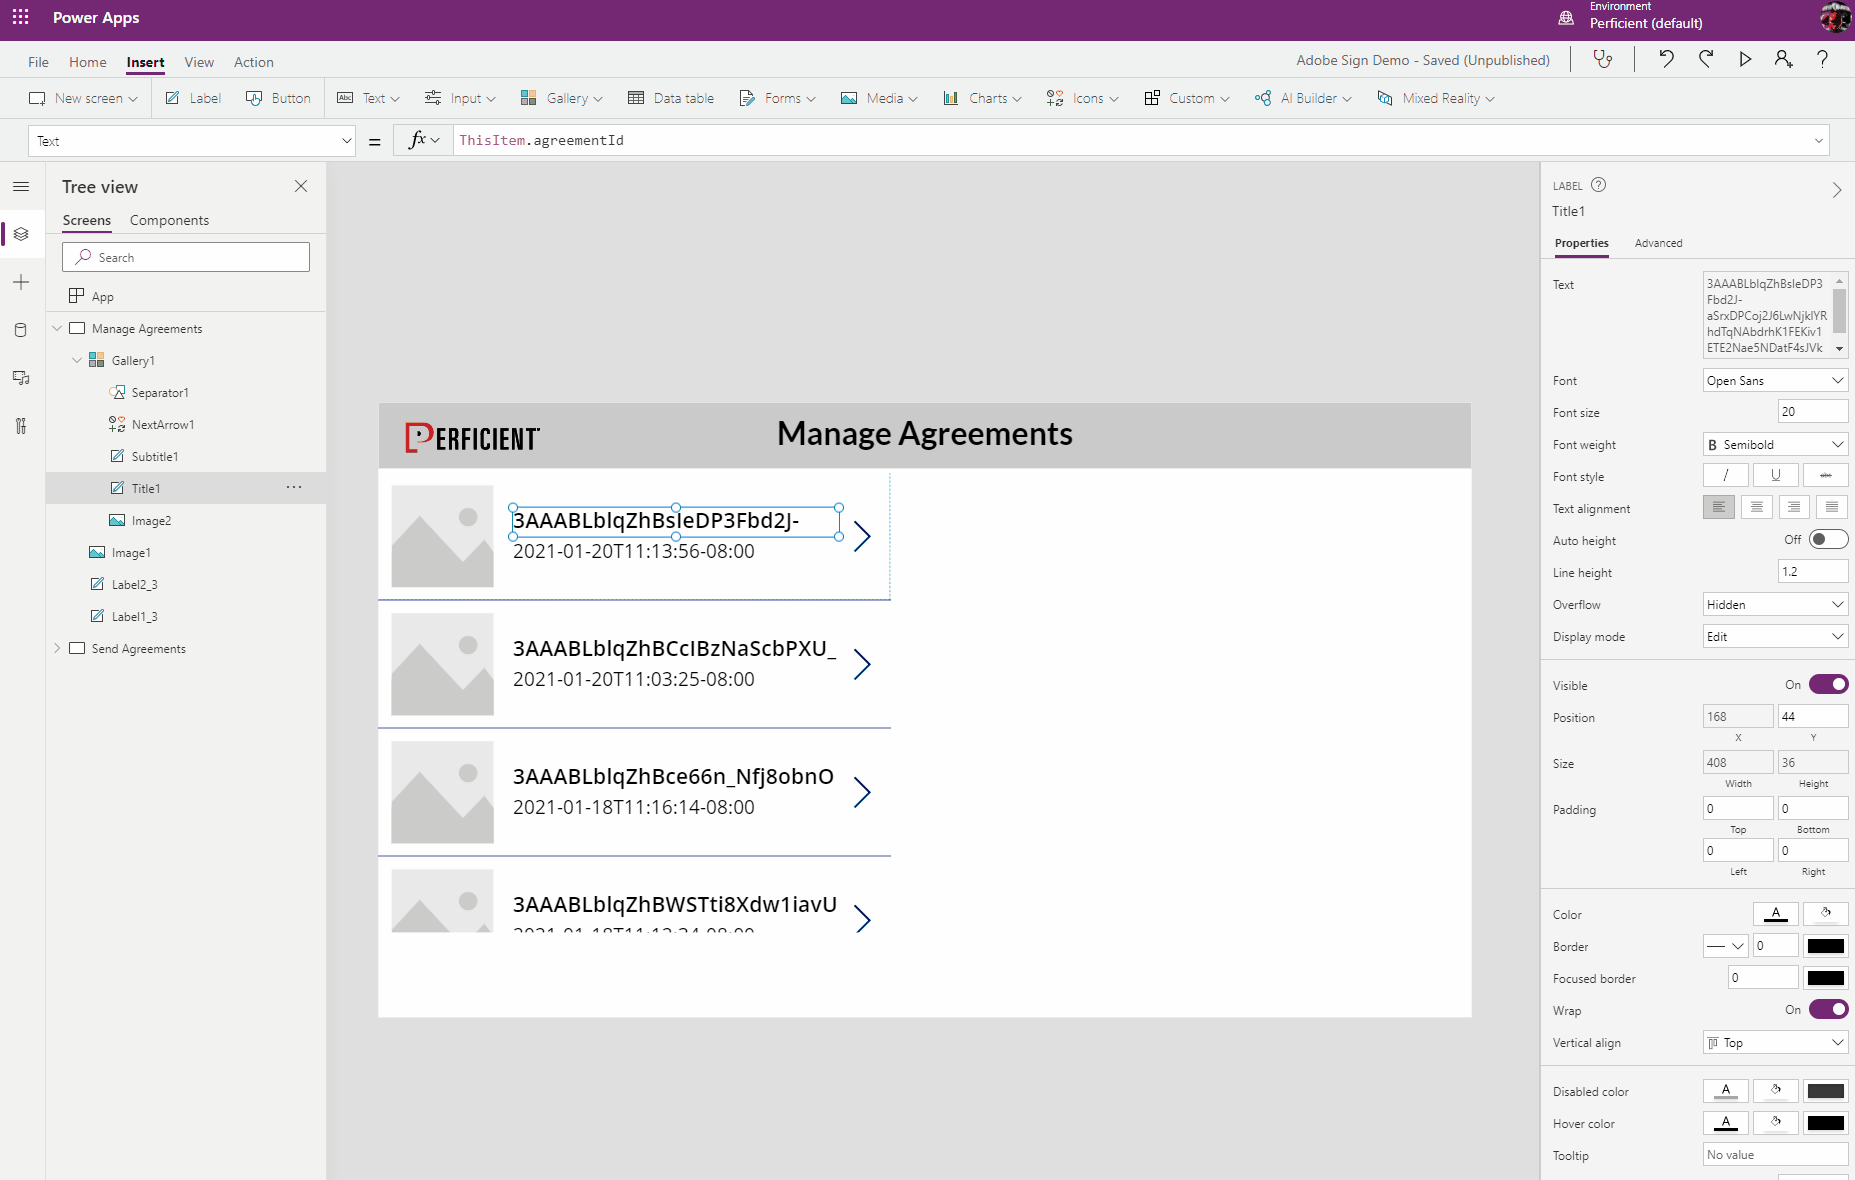
- To customize your gallery, select the Title and update the text property to:
ThisItem.name
- Set the Subtitle text property to:
ThisItem.name
Pro Tip! You can see a full list of the properties you can set in the documentation here: https://docs.microsoft.com/en-us/connectors/adobesign/
Insert a PDF Viewer

Next to that, insert PDF viewer so the user can review the agreements. (Shown in GIF)
- Select Insert > Media > PDF Viewer
- Set the Documents property to:
AdobeSign.GetCombinedDocumentV2(AgreementsList.Selected.agreementId)
This calls the Adobe Sign API and returns a combined PDF of the selected item in the AgreementList gallery.
Create a Page to Send Agreements
Now create a page that allows you to send an agreement for a signature. First, create the page.
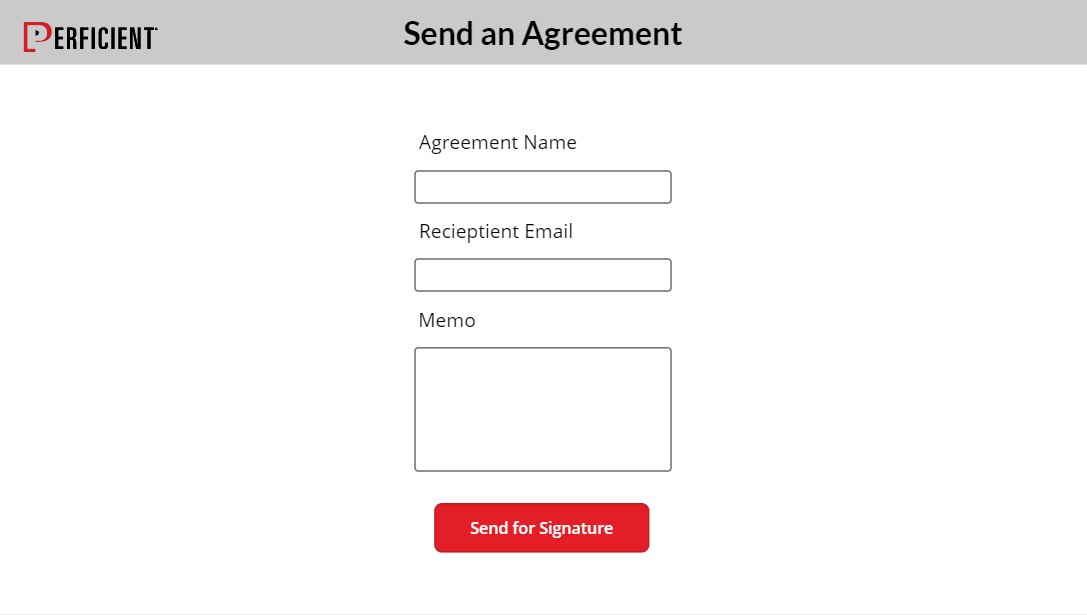
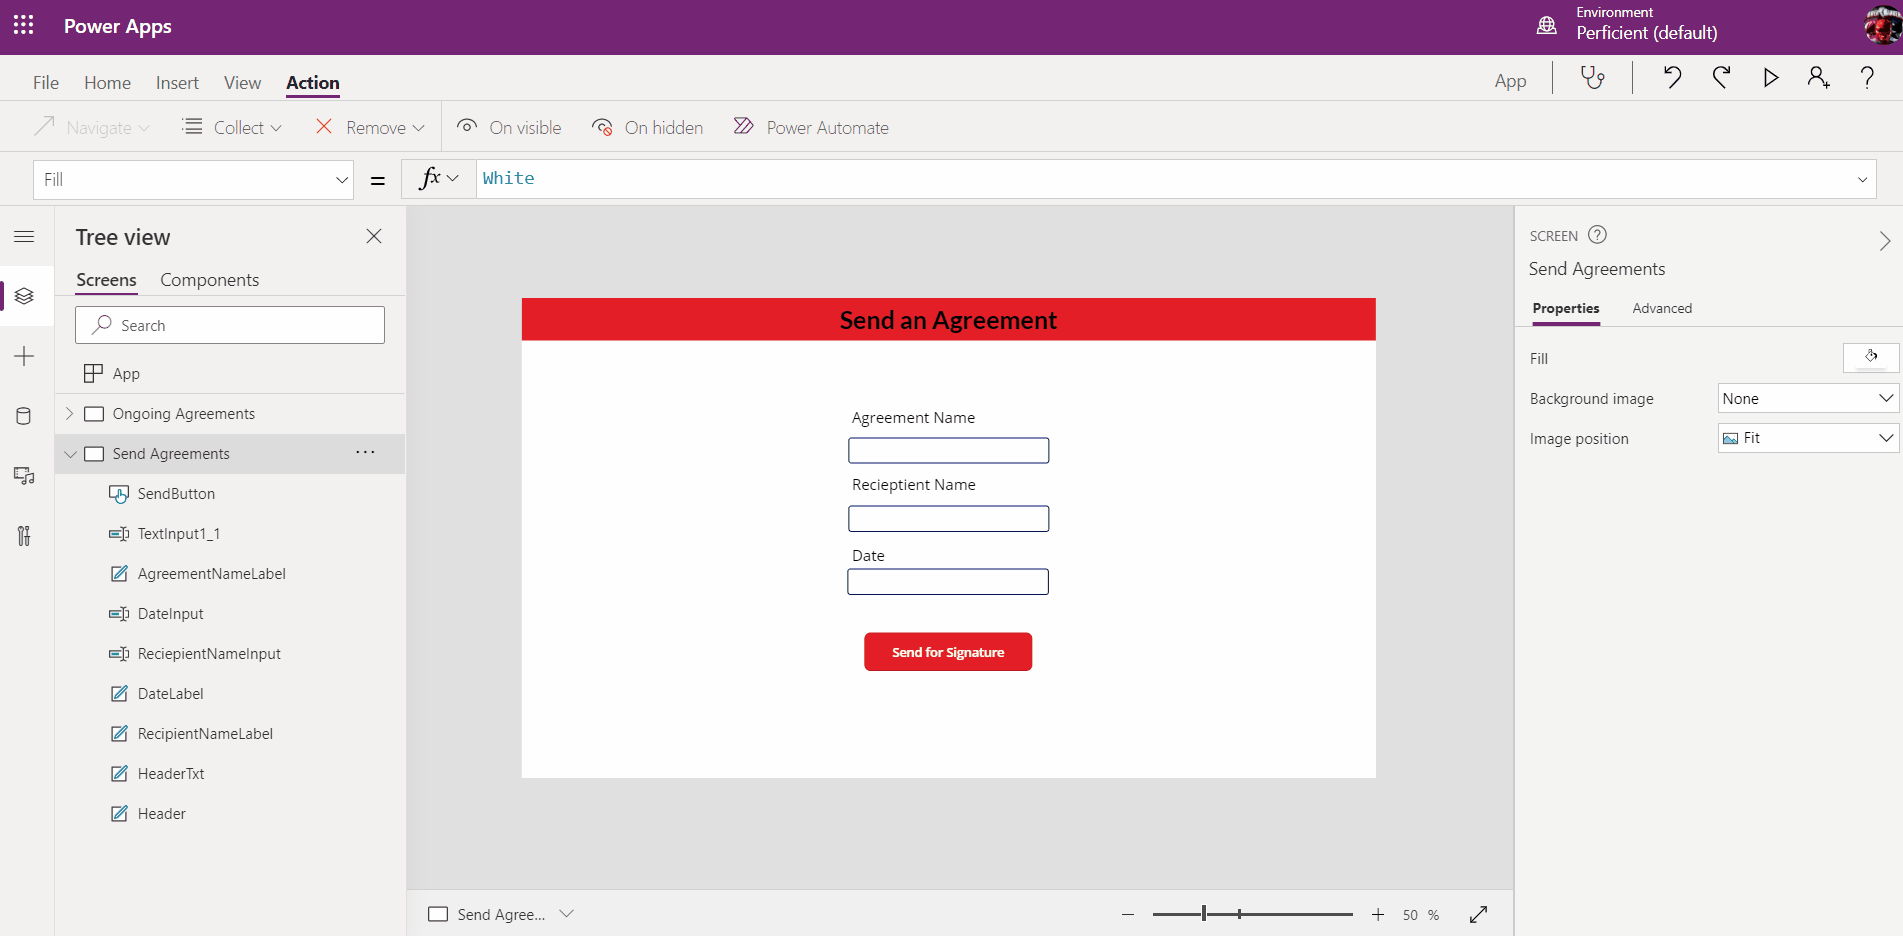
- Create a new screen called “Send an Agreement.”
- Prepare your screen with a text field and label for the recipient’s email and agreement name. You can add a memo if you please!
- Add a button labeled “Send for Signature.”
It can look something like this!
To send the agreement to the recipient, we set up a flow in Power Automate using the Adobe Sign API.
- Click Action > Power Automate > Create New Flow
- Select the flow template Create Power Apps Button to send agreement and Signing URL using Adobe Sign.
Now configure the Power Automate flow:.
- Click into Agreement Name.
- Under Dynamic Content click See More and select Ask in Power Apps.
- Select your Library Template.
- Go to the last step and set the agreementID to be the Agreement ID that is the output from the Receive the Signing URL step.
Connect your Power App to your Power Automate flow
Back in Power Apps on your Send Agreements page:
- Go to Action > Flows in the Ribbon.
- Select your flow.
- Set the OnSelect property of the button to:
Set(AgreementID, [Name of your flow].Run(AgreementName.Text, Email.Text).agreementid)
Insert the name of your Power Automate flow in the above command. This will call your flow and run it with the given Agreement Name and Email. This will also set your Agreement ID. Your Power App is now connected to your flow and your app is ready!
Leveraging Power Platform and Adobe Sign to conquer everyday document workflows will make a huge impact on your company’s day-to-day productivity. By automating routine tasks, you can get back to what really matters to your company. Check out the rest of the blogs in this series, Automate Everything, in which we do a deep dive into the value of Power Platform and what it can do for you.
At Perficient, we continually look for ways to champion and challenge our talented workforce with interesting projects for high-profile clients, encourage personal and professional growth through training and mentoring, and celebrate our people-oriented culture and the innovative ways they serve Perficient and the community.
Learn more about what it’s like to work at Perficient at our Careers page.
Go inside Life at Perficient and connect with us on LinkedIn, YouTube, Twitter, and Instagram.