
In the modern digital landscape, efficient collaboration and streamlined workflows are proven elements of successful project management. Integrating GitHub repositories with Azure Storage proves to be a robust solution for the management of project files in the cloud. Whether you’re a developer, a project manager, or a technology enthusiast, understanding how to push files from a GitHub repository to an Azure Storage container can significantly enhance your productivity and simplify your development process. In this comprehensive guide, we’ll explore the steps required to achieve this seamless integration.
You must be wondering why, although the files already exist in the repository, we are sending them from a GitHub repository to an Azure Storage container. While GitHub repositories are excellent for version control and collaboration, they might not be optimized for certain types of file storage and access patterns. Comparatively, Azure Storage provides a scalable, high-performance solution specifically designed for storing various types of data, including large files, binaries, and media assets.
By transferring files from a GitHub repository to an Azure Storage container, you can leverage Azure’s robust infrastructure to enhance scalability and optimize performance, especially in the below scenarios:
- Large File Storage
- High Availability and Redundancy
- Access Control and Security
- Performance Optimization
Understanding the Solution

Before we dive into the practical steps, let’s gain a clear understanding of the solution we’re implementing:
- GitHub Repository: This is where your project’s source code resides. By leveraging version control systems like Git and hosting platforms like GitHub, you can collaborate with team members, track changes, and maintain a centralized repository of your project files.
- Azure Storage: Azure Storage provides a scalable, secure, and highly available cloud storage solution. By creating a storage account and defining containers within it, you can store a variety of data types, including documents, images, videos, and more.
- Integration: We’ll establish a workflow to automatically push files from your GitHub repository to an Azure Storage container whenever changes are made. This integration automates deployment, ensuring synchronization between your Azure Storage container and GitHub repository. This not only unlocks new possibilities for efficient cloud-based file management but also streamlines the development process.
Prerequisites
-
Basic Knowledge of Git and GitHub: Understanding the fundamentals of version control systems like Git and how to use GitHub for hosting repositories is essential. Users should be familiar with concepts such as commits, branches, and pull requests.
-
Azure Account: Readers should have access to an Azure account to create a storage account and containers. If they don’t have an account, they’ll need to sign up for one.
-
Azure Portal Access: Familiarity with navigating the Azure portal is helpful for creating and managing Azure resources, including storage accounts.
-
GitHub Repository, Access to GitHub Repository Settings, and GitHub Actions Knowledge: Readers should have a GitHub account with a repository set up for deploying files to Azure Storage. Understanding how to access and modify repository settings, including adding secrets, is crucial for configuring the integration. Additionally, familiarity with GitHub Actions and creating workflows is essential for setting up the deployment pipeline efficiently.
-
Azure CLI (Command-Line Interface) Installation: Readers should have the Azure CLI installed on their local machine or have access to a terminal where they can run Azure CLI commands. Instructions for installing the Azure CLI should be provided or linked to.
-
Understanding of Deployment Pipelines: A general understanding of deployment pipelines and continuous integration/continuous deployment (CI/CD) concepts will help readers grasp the purpose and functionality of the integration.
-
Environment Setup: Depending on the reader’s development environment (Windows, macOS, Linux), they may need to make adjustments to the provided instructions. For example, installing and configuring Azure CLI might differ slightly across different operating systems.
Let’s Start from Scratch and See Step-By-Step Process to Integrate GitHub Repositories with Azure Storage
Step 1: Set Up Azure Storage Account
-
Sign in to Azure Portal: If you don’t have an Azure account, you’ll need to create one. Once you’re signed in, navigate to the Azure portal. – “portal.azure.com/#home”
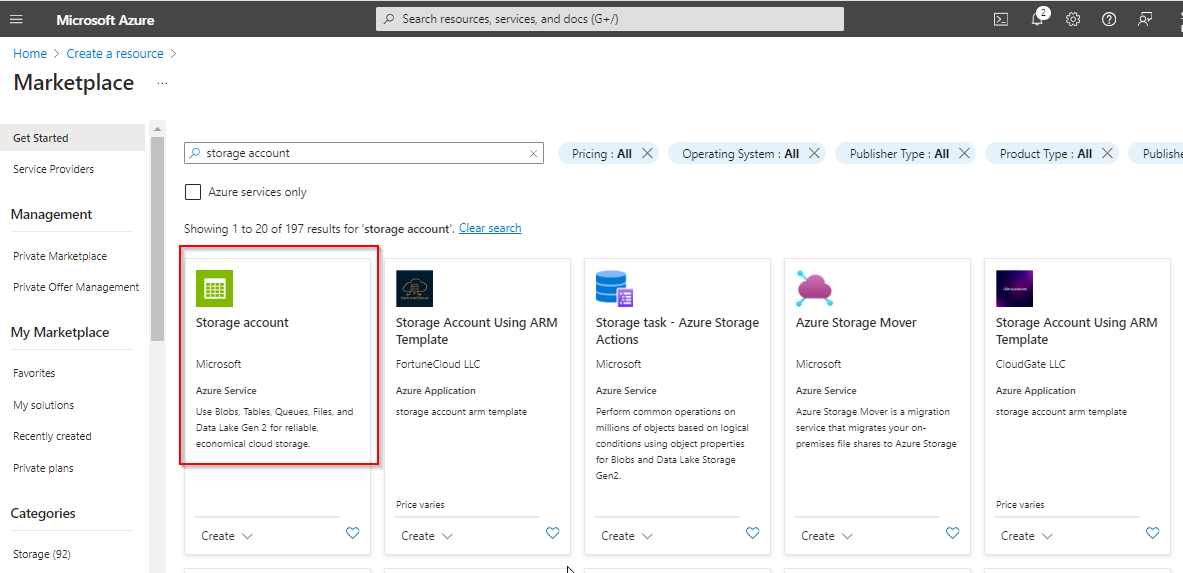
a. Create a Storage Account: In the Azure portal, click on “Create a resource” and search for “Storage account”. Click on “Storage account – blob, file, table, queue” from the search results. Then, click “Create”.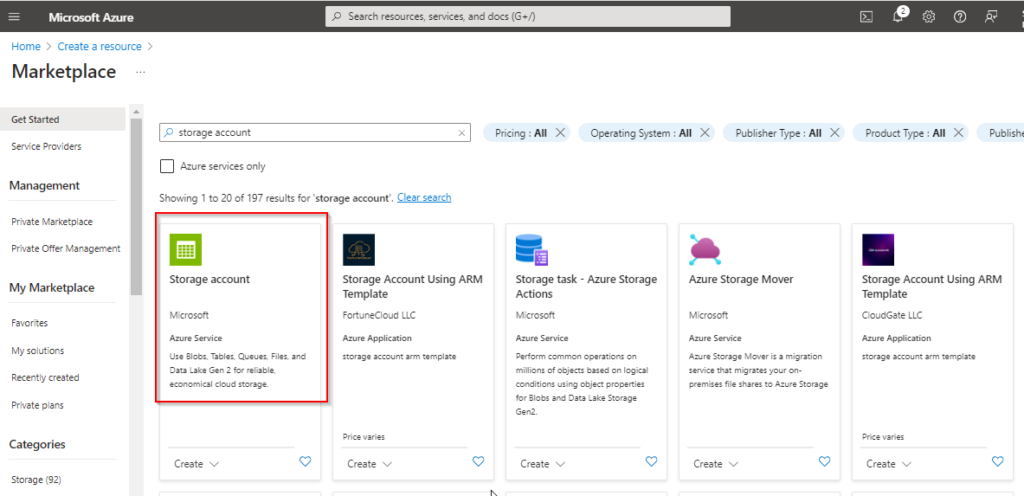
-
Configure Storage Account Settings: Provide the required details such as subscription, resource group, storage account name, location, and performance tier. For this guide, choose the appropriate options based on your preferences and requirements.

-
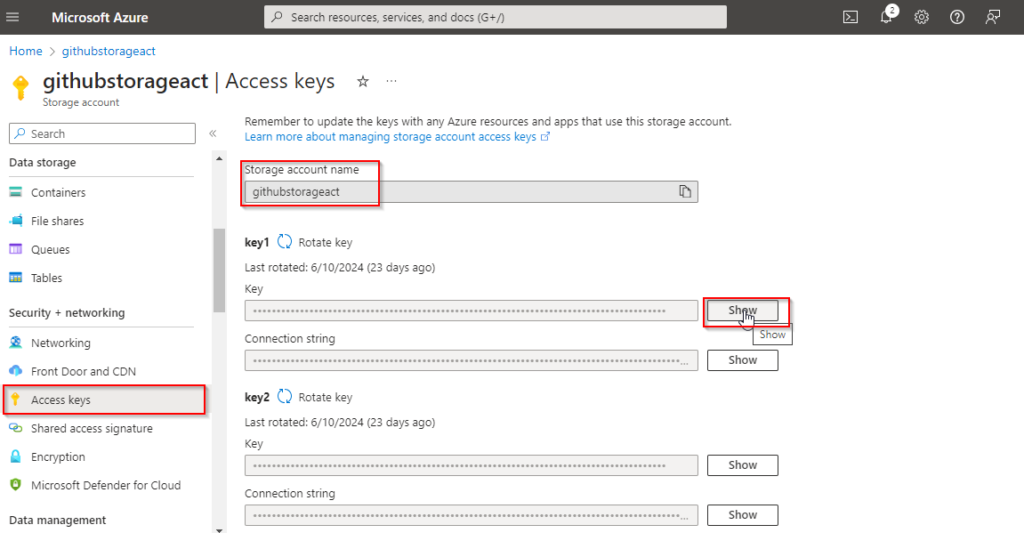
Retrieve Access Keys: Once the storage account is created, navigate to it in the Azure portal. Go to “Settings” > “Access keys” to retrieve the access keys. You’ll need these keys to authenticate when accessing your storage account programmatically.
Note: Click on the show button to copy the Access key.

Step 2: Set Up GitHub Repository

-
Create a GitHub Account: If you don’t have a GitHub account, sign up for one at “github.com”
-
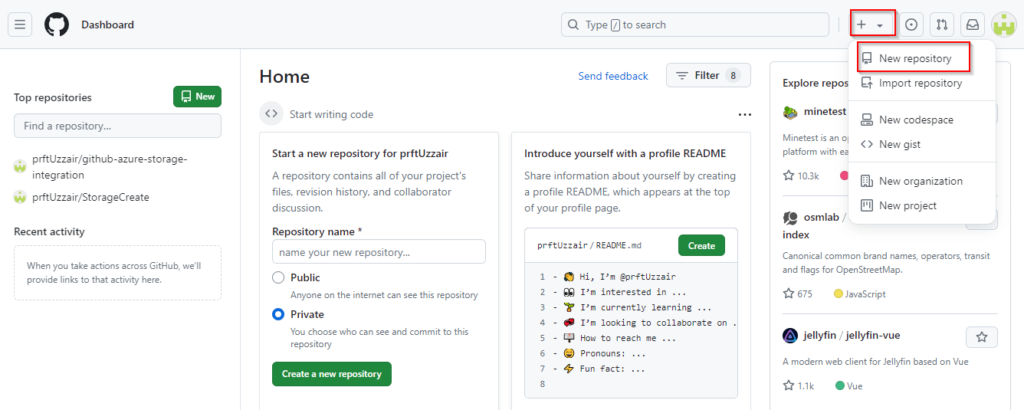
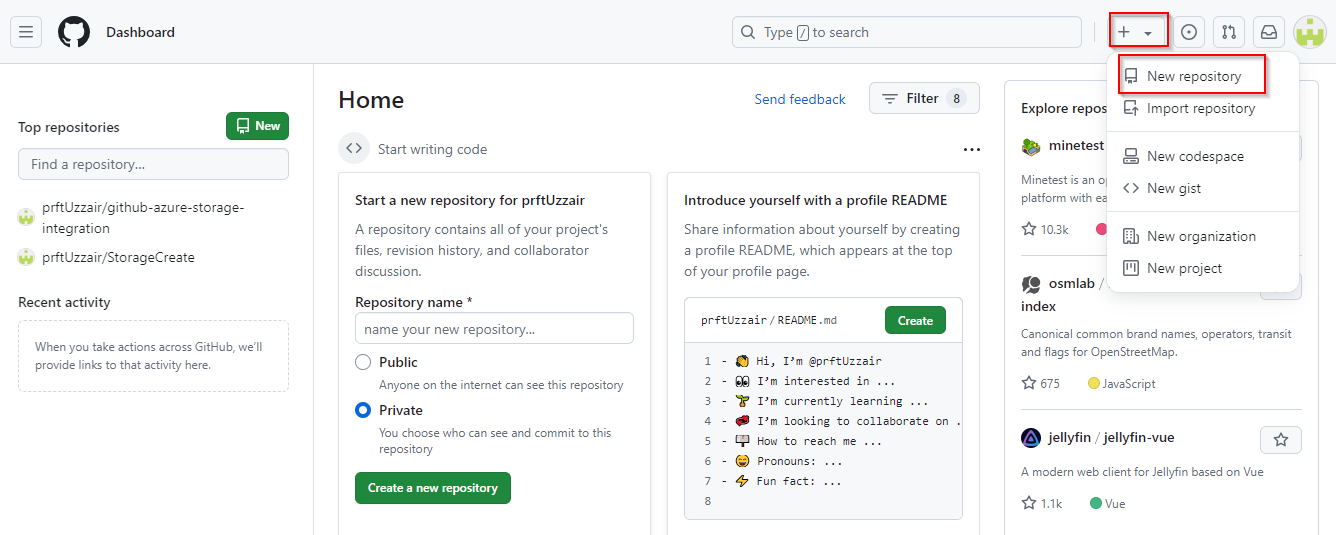
Create a New Repository: Once logged in, click on the “+” icon in the top-right corner and select “New repository”. Give your repository a name, description, and choose whether it should be public or private. Click “Create repository”.
-
Clone the Repository: After creating the repository, clone it to your local machine using Git. You can do this by running the following command in your terminal or command prompt:
Command:git clone https://github.com/your-username/your-repository.gi
Note: Replace ‘your-username’ with your GitHub username and ‘your-repository’ with the name of your repository.

Step 3: Push Files to GitHub Repository

-
Add Files to Your Local Repository: Place the files you want to push to Azure Storage in your machine’s local repository directory.

-
Stage and Commit Changes: In your terminal or command prompt, navigate to the local repository directory and stage the changes by running:
Command:git add .
Then, commit the changes with a meaningful commit message:
Command:git commit -m "Add files to be pushed to Azure Storage
-
Push Changes to GitHub: Finally, push the committed changes to your GitHub repository by running:
Command:git push origin main
Note: Replace `main` with the name of your branch if it’s different.

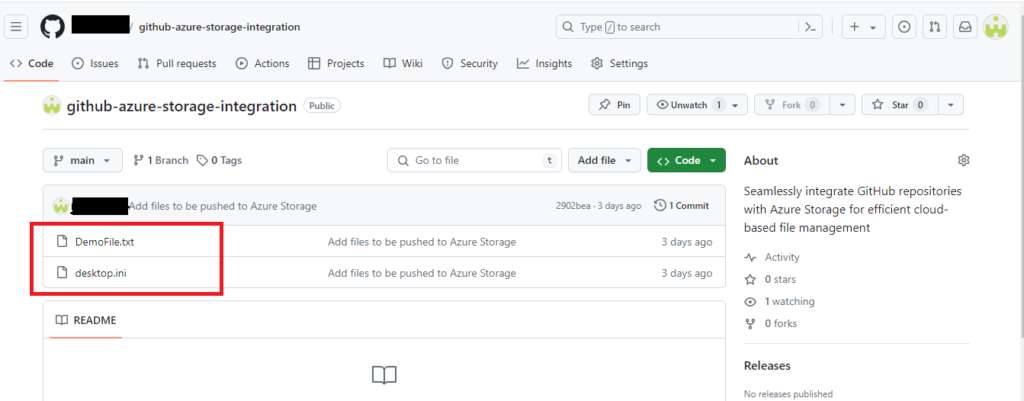
Verify Files in GitHub: Check in your GitHub account file has been uploaded.
Step 4: Push Files from GitHub to Azure Storage

-
Install Azure CLI: If you haven’t already, install the Azure CLI on your local machine.
Note: You can find installation instructions –https://docs.microsoft.com/en-us/cli/azure/install-azure-cli
-
Authenticate with Azure CLI: Open your terminal or command prompt and login to your Azure account using the Azure CLI:
Command:az login
Follow the prompts to complete the login process.

-
Upload Files to Azure Storage: Use the Azure CLI to upload the files from your GitHub repository to your Azure Storage container:
Command:az storage blob upload-batch --source <local-path> --destination <container-name> --account-name <storage-account-name> --account-key <storage-account-key>

Note: Replace `<storage-account-name>` and `<storage-account-key>` with the name and access key of your Azure Storage account, respectively. Replace `<container-name>` and `<local-path>` with your container name and the local path to your repository directory, respectively.

Step 5: Verify Deployment

Once the workflow is complete, navigate to your Azure Storage container. You should see the files from your GitHub repository synchronized to the container. Verify the integrity of the files and ensure that the deployment meets your expectations.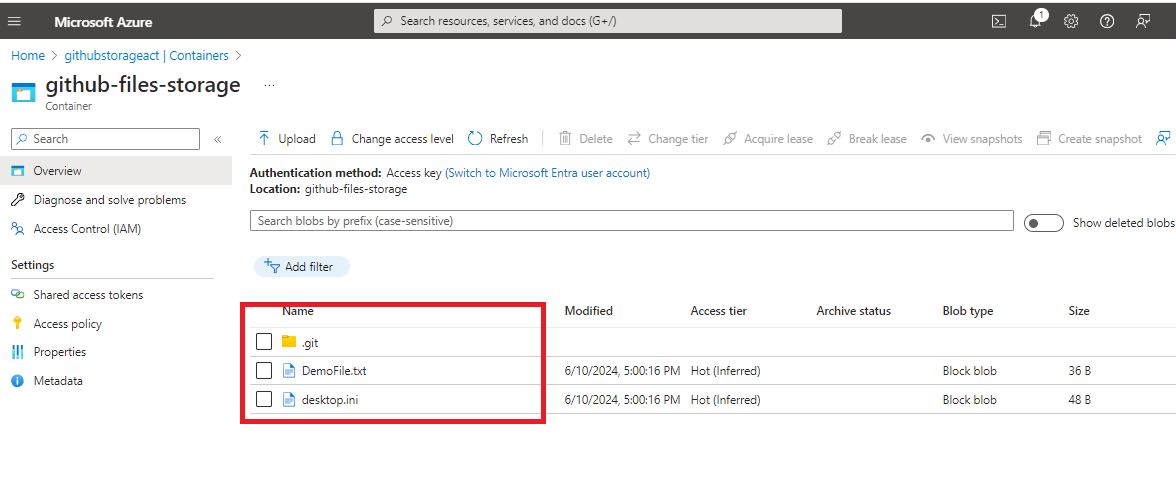
Conclusion
By following these steps, you’ve successfully set up a seamless integration between your GitHub repository and Azure Storage container. This integration automates pushing files from your repository to the cloud, enabling efficient collaboration and simplified project management. Embrace the power of automation, leverage the capabilities of GitHub Actions and Azure Storage, and unlock new possibilities for your development workflow. Happy coding