
Overview:
Data flows are one of the features inside the Azure Data Factory which allows data engineers to develop data transformation logic in a graphical approach without writing code. The resulting data flows can then be executed as activities within Azure Data Factory pipelines that use scaled-out Spark clusters. Your data flows will run on your own execution cluster for scaled-out data processing. ADF internally handles all the code translation, spark optimization and execution of transformation. Data flow activities can be operationalized via the existing Data Factory scheduling, control, flow, and monitoring capabilities.
There are two types of Data flows:
- Mapping Data Flow
- Wrangling Data Flow
We start our discussion with Mapping Data flows
Mapping Data Flow –
- Mapping data flows are visually designed data transformations in Azure Data Factory.
- When there is a situation like you need to perform transformations using two or more datasets then you use a Mapping data flow.
- You can perform several transformations such as Filter, JOIN, Aggregate, Union, Lookup, Sort, etc using mapping data flows.
- Mapping data flows can be executed within ADF pipelines using data flow activities.
- Azure Data Factory handles the code transformation and execution of Mapping Data Flow behind the scenes.
- Mapping Data Flows activity can be created individually or within an Azure Data Factory pipeline.
Steps to create a Mapping Data Flow:
- Open the Azure Data Factory using the Azure portal, then click on Author & Monitor
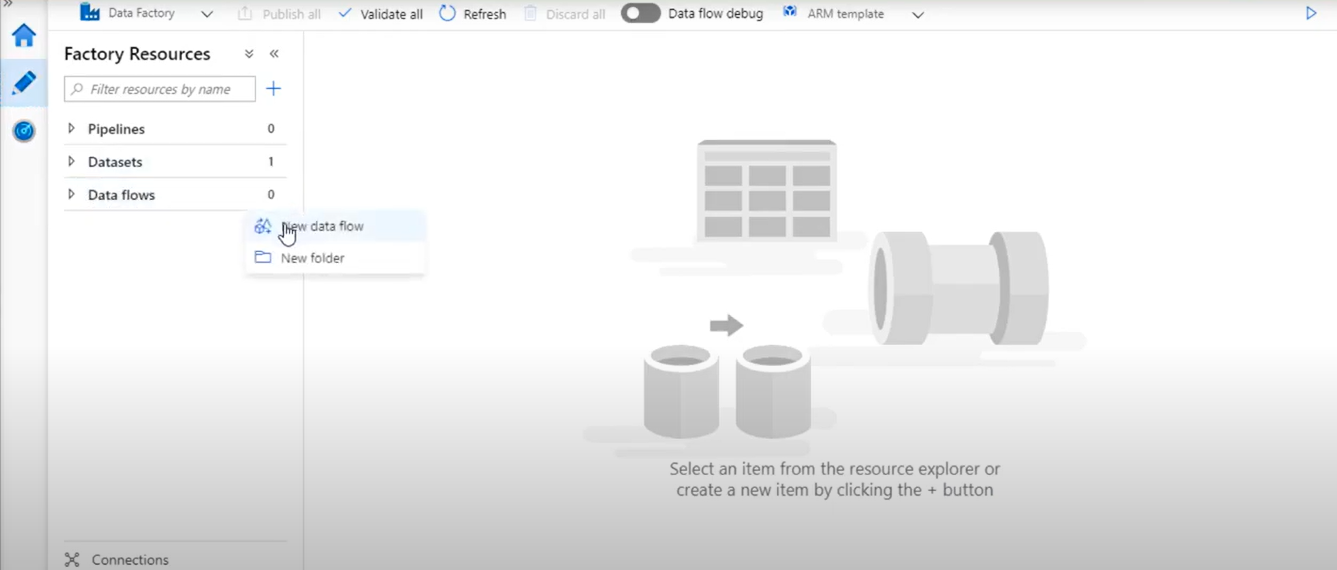
Click on the Author button then click on Data flows option. By clicking on three dots select New data flow option.
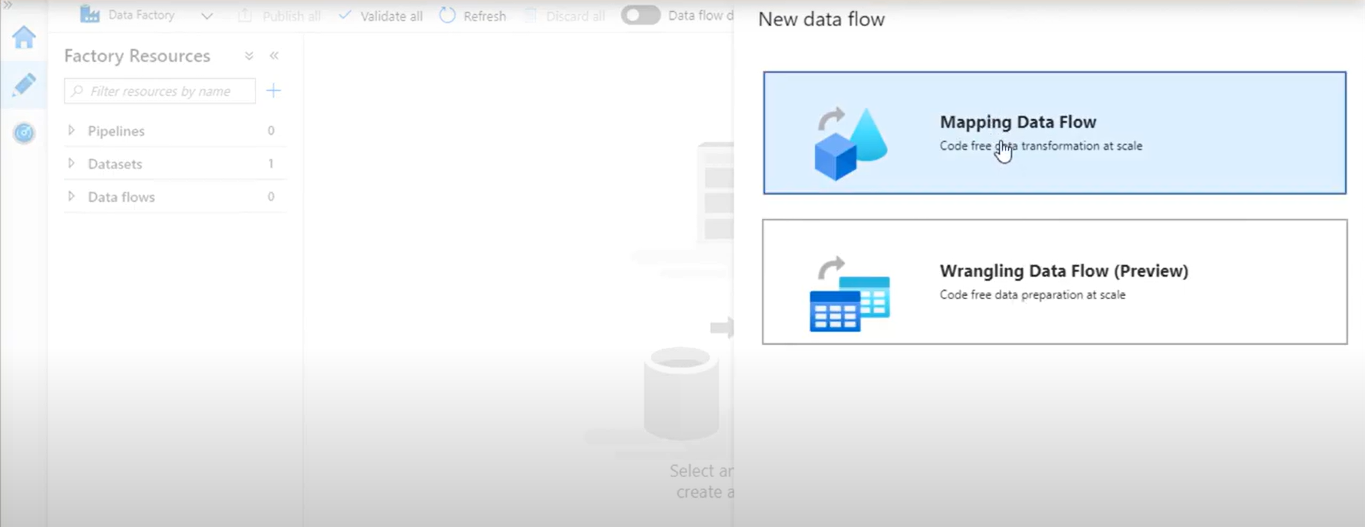
- Select Mapping Data Flow. Click
Steps to build transformation logic in the data flow canvas:
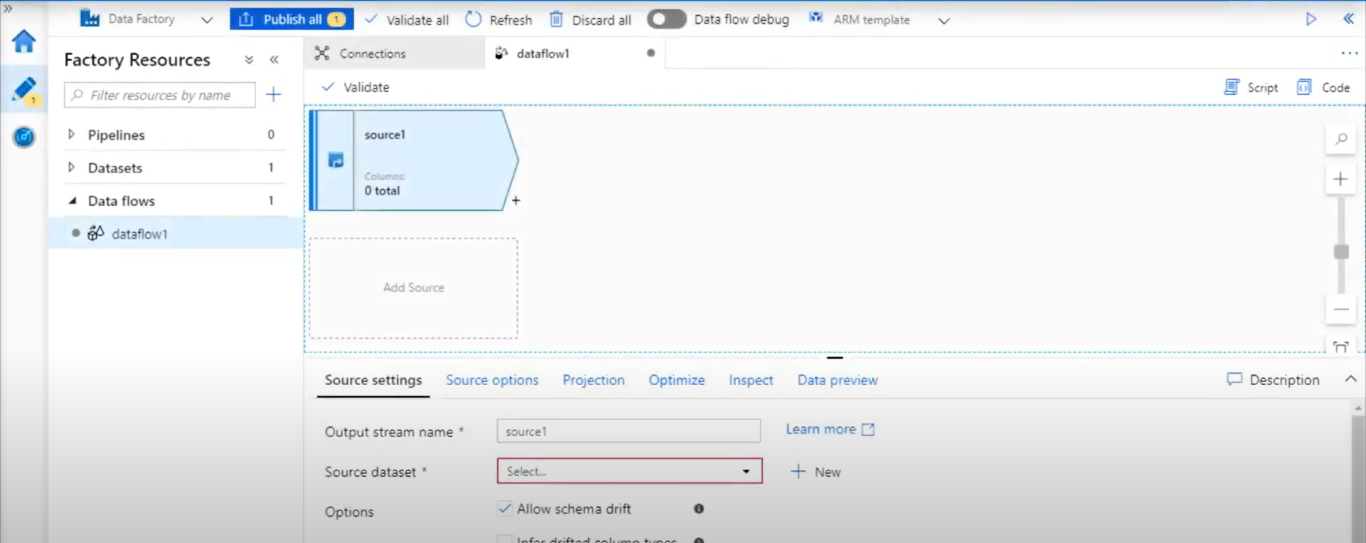
Once you create your Data Flow, you’ll be automatically sent to the data flow canvas.
Note: The assumption is that you are already aware of the basic building blocks of a data factory- like creating linked services, Pipelines, etc. Click Here
- In the data flow canvas, add a source by clicking on the Add Source


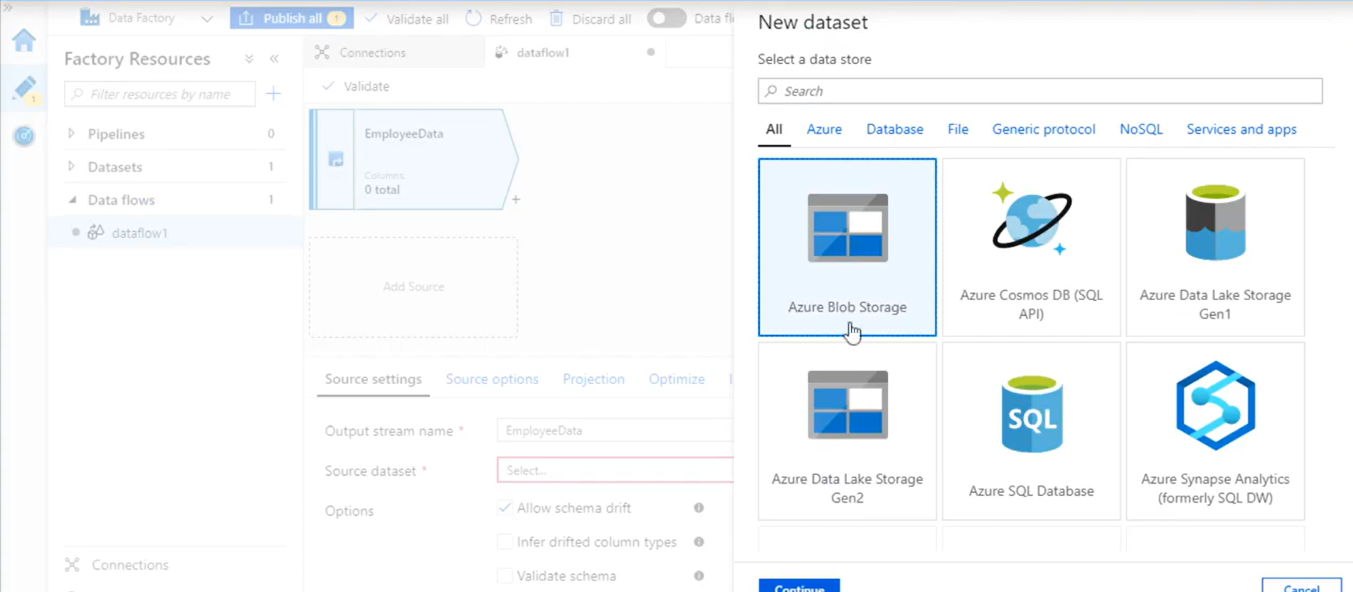
- Name your source. Click on New to create a new source dataset.
- Choose Azure Blob Storage. Click
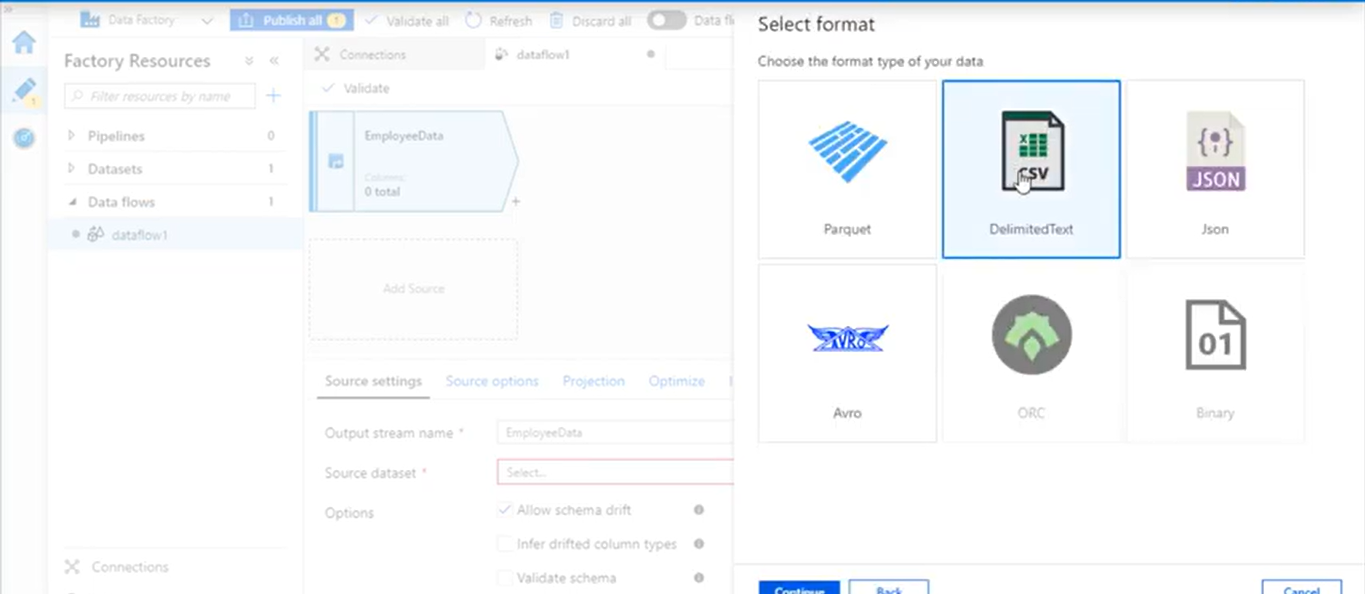
- Choose DelimitedText. Click Continue.
- Name your dataset. Let’s say empDataDataset. In the linked service dropdown choose Linked service if you have created before or you can click +New button to create new linked service.
- Once you’re back at the dataset creation window choose your File path. As the CSV file has headers, check First row as header. Select From connection/store to import the header schema directly from the file in storage. Click OK when done.

- To add a transformation, click on the + icon on the data source which is next to your source node on the data flow canvas as specified in the screenshot below.
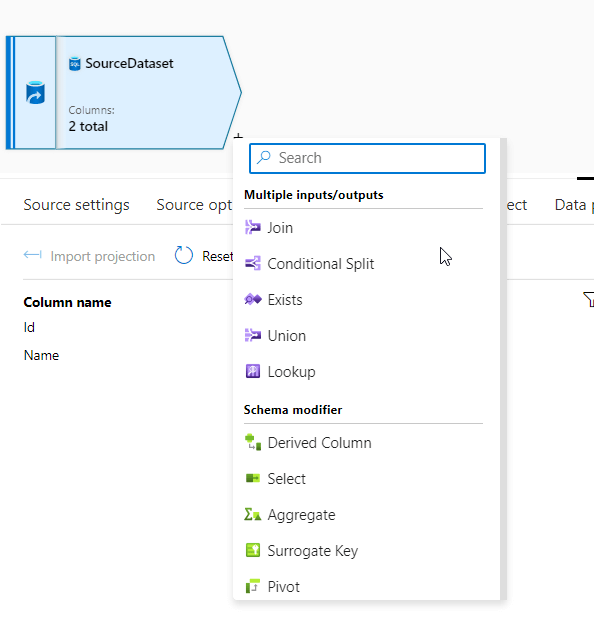
You can see there are various transformations available in the data flow.
For more blogs : Click Here
Nice blog Mohini , Well done!!!
Great Work Mohini !