
Welcome back to my series on DevOps Best Practices related to Sitecore Headless implementations. In Part 2 we are going to create the build pipelines for our Sitecore and Next.js solutions and see how they can be included in the PR process. If you haven’t checked-out Part 1 yet, I recommend doing so before continuing on.
Create Sitecore Build Pipeline
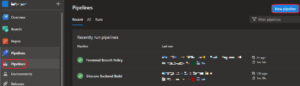
First, open the Azure DevOps portal, click on Pipelines and click on New Pipeline.
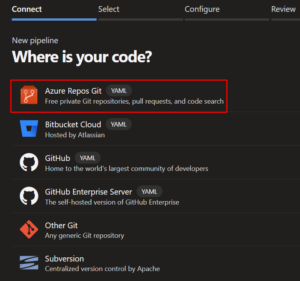
Next, select the service your repository is hosted with. We will be using YAML to create our pipelines so they can be source controlled and since the repository for this example is hosted in Azure, we will select the first choice.
You will then be prompted to select a repository for the YAML to be stored in. I recommend using the same repository that the Sitecore and Next.js solutions are stored in. We will create a dedicated folder for the pipeline YAMLs in a later step.
After selecting the desired repository, scroll down to select Starter pipeline configuration.

We’re almost ready to start adding tasks to our pipeline but first, let’s give the file a descriptive name and ensure the file will be stored in a dedicated folder. Click on the file name at the top of the editor and replace the default with devops/pipelines/sitecore-backend-build.yml. Adding the devops/pipelines path to the file name will create our dedicated folder in the repository.
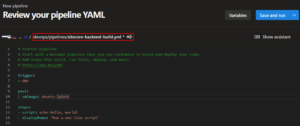
Now we can build out the logic of our pipeline. A copy of the YAML used for this example can be found below. Some things to take note of:
- On Line 1, variables can be used to customize the numbering of pipeline runs. More details can be found here.
- On Line 2, we have a trigger for the
dmzandreleases/*branch to ensure the build runs for completed PRs todmzand anytime a newreleases/*branch is created. - We are using Unicorn for item serialization so there are several copy tasks to add those files/dependencies to our artifact.
- The
TargetFolderproperty of the copy tasks is important to ensure the artifact has the correct structure. Specifically, Line 53 as this structure will be crucial in the delivery of the serialized items to the CM which we will see in Part 3. - On Line 54, we publish the artifact $(Build.ArtifactStagingDirectory) that has been built via the
VSBuildtask on Line 25 and all the copy tasks. This artifact will be used in the release pipelines covered in Part 3. - The last task for the pipeline is the fast-forward of
mastertodmzthat we covered in Part 1.
name: $(SourceBranchName).$(Rev:r)
trigger:
  batch: true
  branches:
    include:
    - dmz
    - releases/*
pool:
  vmImage: 'windows-latest'
jobs:
- job: Job_1
  displayName: Agent job 1
  pool:
    vmImage: windows-latest
  steps:
  - checkout: self
    clean: true
    persistCredentials: true
    fetchDepth: 0
  - task: NuGetCommand@2
    displayName: NuGet restore
    inputs:
      solution: windows/src/HeadlessExample.sln
      selectOrConfig: config
      nugetConfigPath: windows/src/nuget.config
  - task: VSBuild@1
    displayName: Build solution windows/src/HeadlessExample.sln
    inputs:
      solution: 'windows/src/HeadlessExample.sln'
      msbuildArgs: '/p:DeployOnBuild=true /p:PublishProfile=IISProfile.pubxml /p:DeployDefaultTarget=WebPublish /p:DesktopBuildPackageLocation=$(Build.ArtifactStagingDirectory)'
      platform: 'Any CPU'
      configuration: 'Release'
      clean: true
  - task: CopyFiles@2
    displayName: Copy Unicorn Assembly
    inputs:
      SourceFolder: '$(Build.SourcesDirectory)/windows/src/Project/HeadlessExample/bin'
      Contents: |
        MicroCHAP.dll
      TargetFolder: '$(Build.ArtifactStagingDirectory)'
  - task: CopyFiles@2
    displayName: Copy Unicorn Module
    inputs:
      SourceFolder: '$(Build.SourcesDirectory)/devops'
      Contents: |
        Unicorn.psm1
      TargetFolder: '$(Build.ArtifactStagingDirectory)'
  - task: CopyFiles@2
    displayName: Copy Unicorn Files
    inputs:
      SourceFolder: '$(Build.SourcesDirectory)/windows/src/Serialization'
      Contents: |
        **
      TargetFolder: '$(Build.ArtifactStagingDirectory)/Serialization/App_Data/Unicorn'
  - task: PublishPipelineArtifact@1
    displayName: Publish Pipeline Artifact
    inputs:
      targetPath: '$(Build.ArtifactStagingDirectory)'
      artifact: 'BackendOutput'
      publishLocation: 'pipeline'
  - script: |
      ECHO clean
      git add . && git reset --hard
      ECHO git checkout master --quiet
      git checkout master --quiet
      ECHO git merge origin/dmz --ff-only --quiet
      git merge origin/dmz --ff-only --quiet
      ECHO git push origin master --quiet
      git push origin master --quiet
    displayName: Fast-forward master to dmz
    failOnStderr: true
    condition: and(eq(variables['Build.SourceBranch'], 'refs/heads/dmz'), ne(variables['Build.Reason'], 'PullRequest'), not(canceled()))

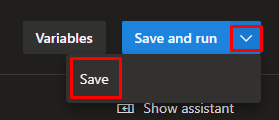
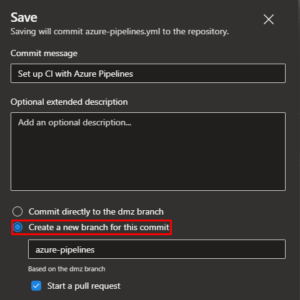
After adding/configuring all the tasks to the pipeline, click the arrow next to Save and run in the top right corner and select Save.
In the dialog that will open, select Create a new branch for this commit and make sure Start a pull request is selected. Update the commit message and add a description if desired then save.
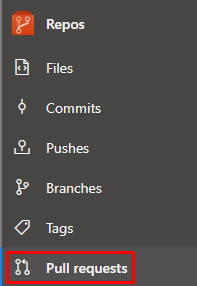
Finally, go to Pull requests and complete the PR created by the save action above.
Next.js Pipeline
As I have mentioned previously, our Next.js application is going to be hosted with Vercel. When we deploy our application to Vercel, it will be complied on their build agents before being distributed to the network of edge nodes. To catch any potential build issues before pushing to Vercel, we will create a simple pipeline to check the compilation of the Next.js application as part of the PR process.
Follow the same steps from the section above to create a new pipeline. Make sure to store the YAML in the devops/pipelines folder of the repository and give it a descriptive name. A copy of the YAML used for this example is below. Some things to take note of:
- On Line 5, we are using ubuntu-latest for our build agent to align with the build agents used by Vercel.
- On Line 20, we have the working directory set to frontend which is the name of the folder in our repository where the Next.js application is stored.
- Since this pipeline is purely used for validation of new code contributed to the Next.js application, there is no artifact generated.
jobs:
- job: Job_1
  displayName: Agent job 1
  pool:
    vmImage: ubuntu-latest
  steps:
  - checkout: self
    clean: true
  - task: NodeTool@0
    displayName: Install Node.js
    inputs:
      versionSpec: 14.x
  - task: PowerShell@2
    displayName: PowerShell Script
    inputs:
      targetType: inline
      script: |
        npm install
        npm run next:build
      workingDirectory: frontend
Follow the same steps outlined above to save the pipeline, create a PR, and complete the PR.
Use Pipeline for PR Validation
Now that we have both pipelines created, we need to revisit the branch policies for dmz and require these pipelines to be successful before new code can be merged in. If you need a refresher on how to access the branch policies, see Part 1.
Once you get to the branch policies setting for dmz, scroll down and click the ‘+’ icon in the Build Validation section.
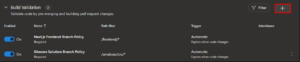
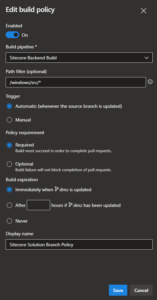
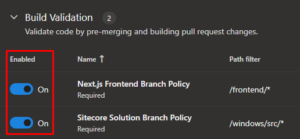
Add a policy for both pipelines we created with the following settings:
- Path filter:
- Sitecore Build Pipeline: /windows/src/*
- Next.js Pipeline: /frontend/*
The path filter setting is important to make sure the correct pipeline(s) runs when changes are detected to either or both of the applications.
- Trigger: Automatic
- Policy requirement: Required
- Build expiration: Immediately when
dmzis updated
Lastly, make sure the two build validation policies added are enabled.
Summary
At this point, we have a single repository for both our applications and DevOps resources with the proper branches, policies, and security to align with Git DMZ Flow. We have a build pipeline that will validate any code added to the Next.js application prior to it being sent to Vercel. We have a second build pipeline that will validate any code added to the Sitecore application, output an artifact of the complied code and serialized Unicorn items, and perform the fast-forward of master automatically per Git DMZ Flow rules.
In Part 3, our final part in this series, we will take a look at how to deploy both applications using Azure DevOps Releases and the Vercel CLI while following a zero downtime model. See you there!
Thank you for sharing the Sitecore Headless DevOps Best Practices.