Yesterday, Amazon announced their newest feature: web and mobile chat for Amazon Connect. This functionality allows your customers to start a chat with an agent or Amazon Lex bot, step away from it, and resume it up to 24 hours later. It’s an asynchronous interaction and your customers can even switch devices and continue the same chat elsewhere.
In this tutorial, we’ll walk through the basic steps of setting up an inbound Amazon Connect Chat contact flow that you can test in your Amazon Connect environment. We split this into two parts. Part 1 focuses on building the contact flows and setting your routing profiles. Part 2 focuses on testing what we built.
With that out of the way, let’s begin!
Part 1: Building your Inbound Chat Contact Flow
In Part 1, we’ll build out our basic chat contact flows.
Step 1 – Set your routing profile:
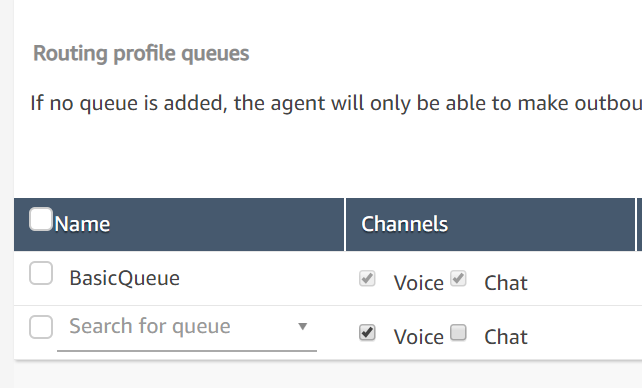
Login to your Amazon Connect instance and check that you’re set up as an agent to receive incoming chats. To do this, click on ‘Routing Profiles’ and make sure the ‘Voice’ and ‘Chat’ boxes are selected for the incoming queue you are testing with.
For information about how to configure agent routing profiles as they relate to chat, please read our tutorial here. For this tutorial, we used the ‘BasicQueue’.
Once you’ve assigned the correct routing profile to an agent, you’re ready to go.
Step 2 – Build your contact flow:
Navigate to the ‘Contact Flow’ page and choose ‘Create Contact Flow’. On the contact flow editor page, give your inbound flow a name and save it.
We’re going to be making an inbound chat flow that you can test within the Amazon Connect interface. The first thing we’ll do is drag in the appropriate blocks that enable logging and set the recording behavior, so go ahead and do that. For the ‘Set Recording Behavior’ block, we selected recording for both the agent and customer, but you can customize it to your needs.
Step 3 – Add a greeting:
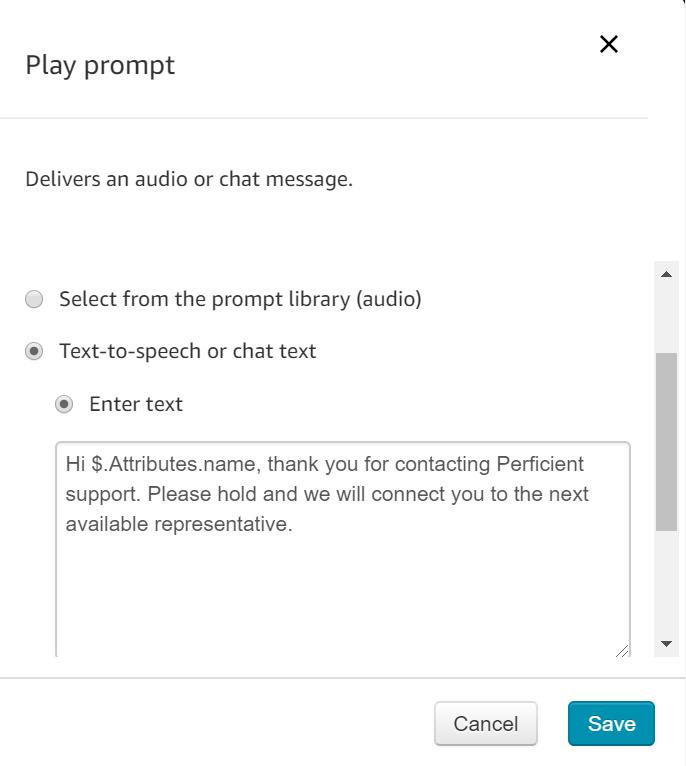
Drag in a ‘Play prompt’ block and write your greeting. This is the message that will appear when the customer begins a chat on your website.
Step 4 – Add a ‘Set Disconnect Flow’ box:
The next step is to drag in a ‘Set Disconnect Flow‘ box to your flow. This box improves your customer experience. By having it in your flow, it lets your customer know if an agent disconnects. Then it tells them that if they still need assistance, they can continue the conversation by sending another message. Without a disconnect flow, the chat a customer is having with an agent disappears without warning.
In order to use the ‘Set Disconnect Flow’ box, we have to set up a separate contact flow.
Step 5 – Setting up your Disconnect Contact Flow:
As mentioned in Step 4, to make the ‘Set Disconnect Flow’ box work, we need a separate disconnect flow. Open a new tab, choose ‘Create Contact Flow’ and then save it. Below is a picture of what your disconnect flow should look like. Once you’ve created this flow, you can go back to editing your minimal Chat Flow and select the new disconnect flow we just made in this step.
For a full explanation of how the disconnect flow works, please read our separate tutorial on the subject.

Step 6 – Set Working Queue, Transfer to Queue and Disconnect blocks:
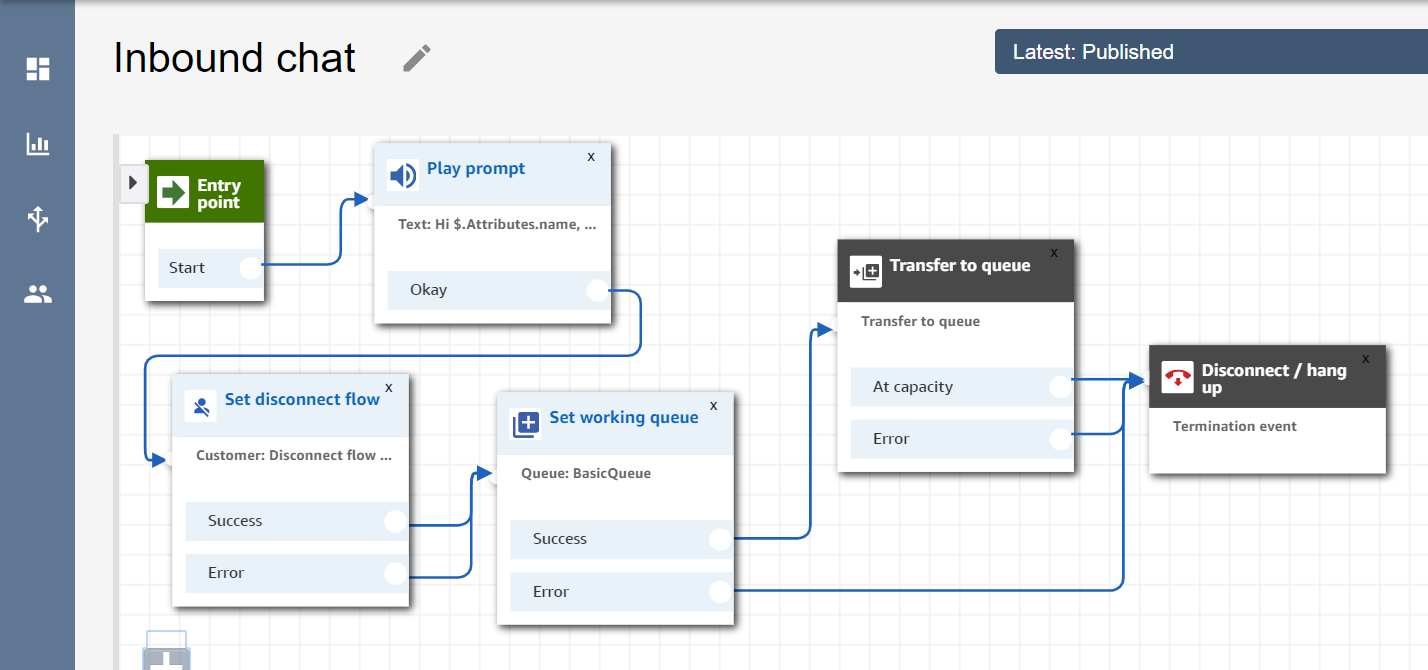
Once your disconnect flow is in the place, you can set the working queue. Drag in a ‘Set Working Queue’ block and select the queue you’re testing with. In our example, it’s ‘BasicQueue’. Then, attach it to a ‘Transfer to queue’ block and a final ‘Disconnect/hang up’ box to wrap everything up.

Below is a diagram of how your final flow should look:
Part 2: Testing the chat flow:
In this part, we’ll test out the chat flow we built in Part 1.
Step 7 – Setting up the Test chat:
Navigate back to the Amazon Connect dashboard and choose ‘Test chat’.

Step 8 – The testing interface:
You should now be on the testing interface. This is where you’ll be able to play the role of agent and customer and see how your messages appear on either end. But first we have to create a link between the contact flow and our test chat client. In the same way we assign contact flows to phone numbers to test them, we have to do the same here.
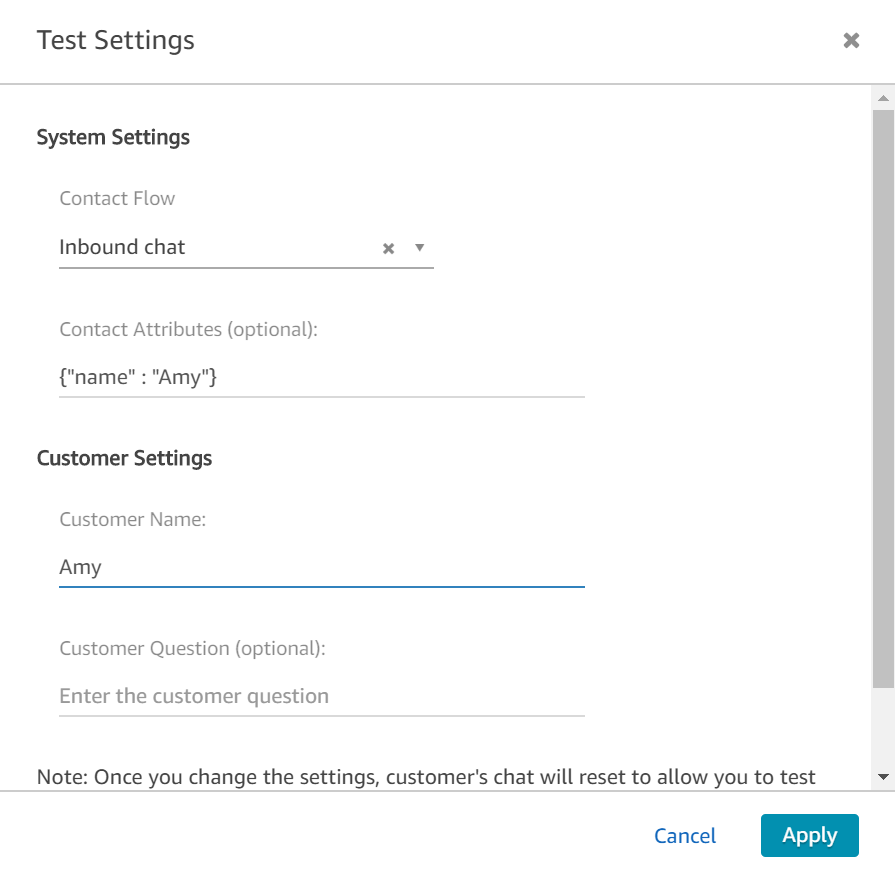
Select ‘Test Settings’ and a window will pop up. Under ‘System Settings’ you’ll see a drop-down menu for ‘Contact Flow’. Select the chat flow you just created.
Although we haven’t done so with the remainder of this tutorial, if you would like to test out using a customer name with your chat you can set that up here as well. Under ‘Contact Attributes’, you can input the customer name in json format, as shown below. Then under ‘Customer Settings’ type the name of the customer again. This can be applied to any other contact attribute you’d like to pass into your Amazon Connect flow.
Step 9 – Login to CCP as agent and send first message as customer:
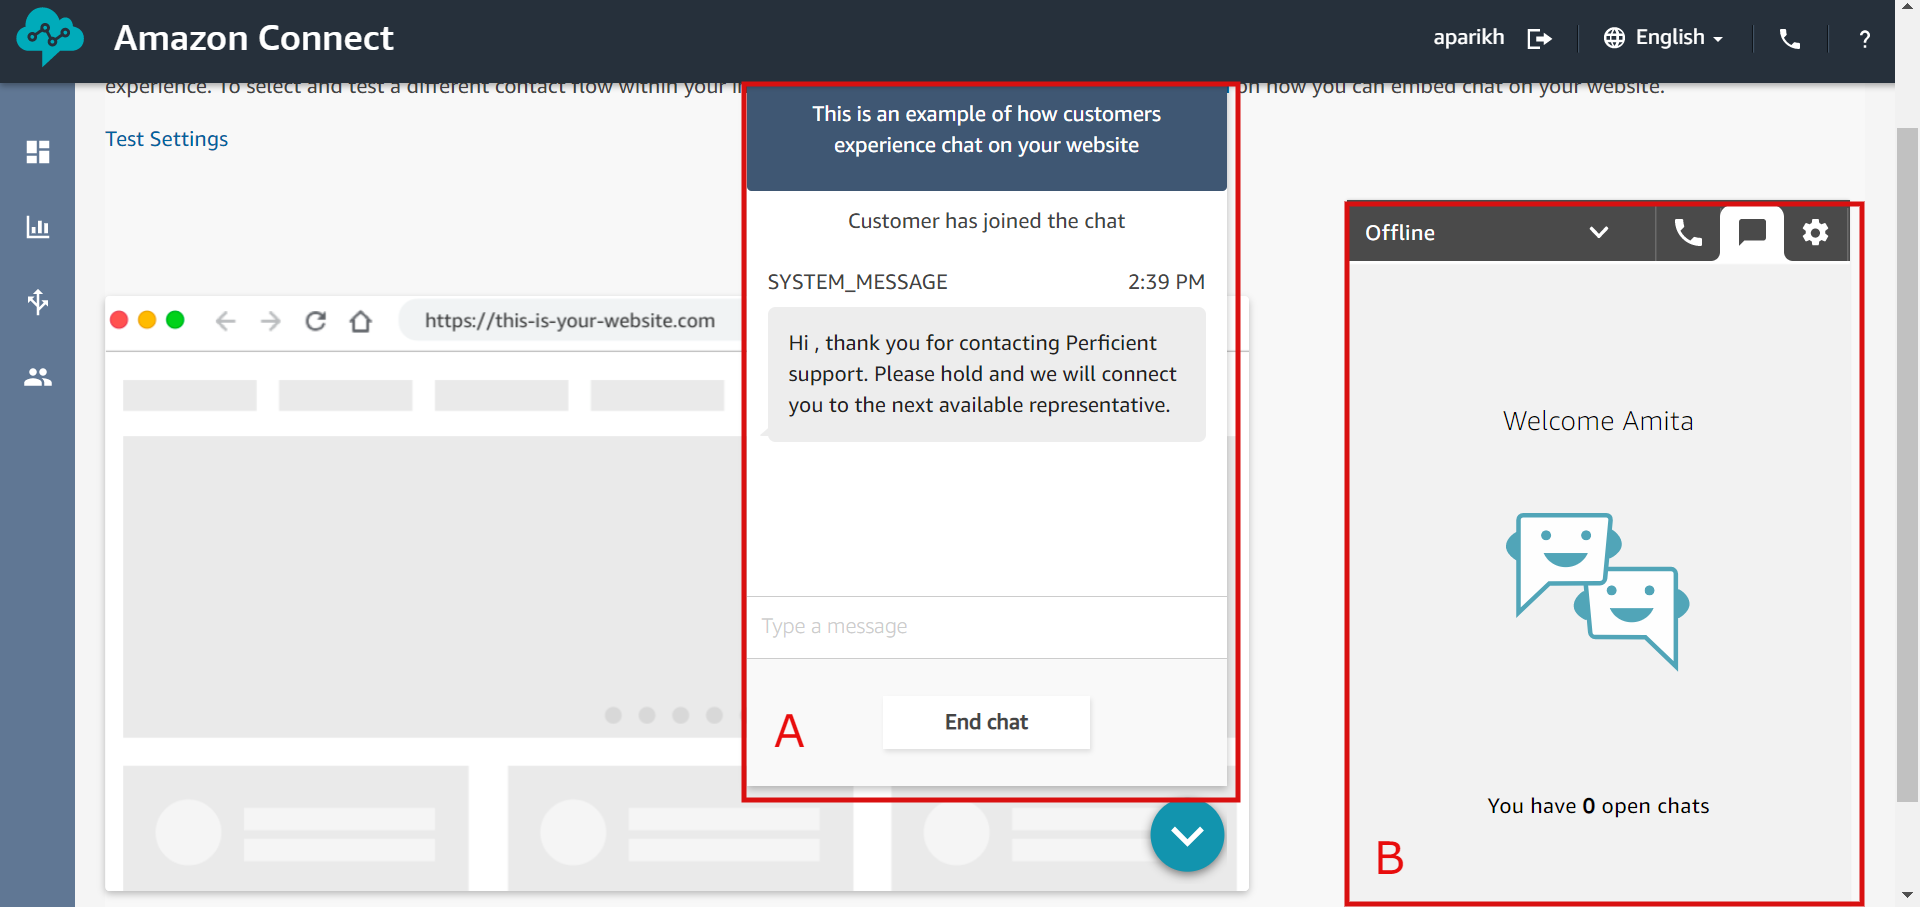
You will have to login as an agent before you can receive or send messages in the test interface, so go ahead and click on the phone icon on the upper right corner. You can set yourself to ‘Offline’ if you don’t want to answer any incoming chats. That’s what we’ve done below and you can see the customer chat window (A) right next to the agent one (B) has the message displayed that we put in the ‘Play prompt’ box in our contact flow.
Step 10 – Change agent status:
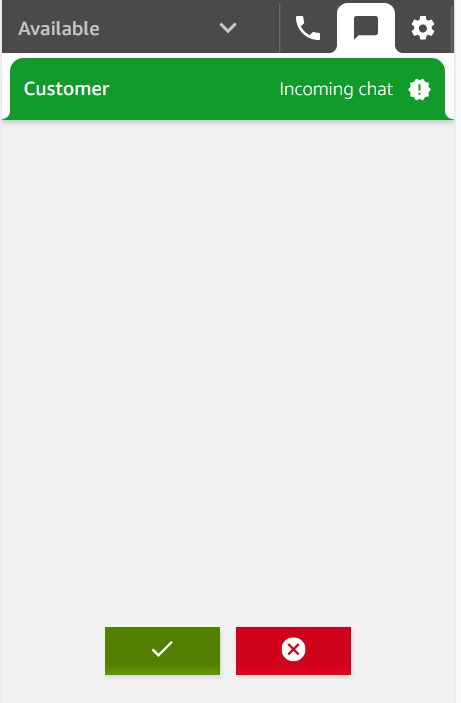
Now let’s set ourselves as ‘Available’ in the agent console. Once we do, you’ll see an ‘Incoming chat’ notification coming through. You can choose to accept or reject it.

Step 11 – Respond to customer:
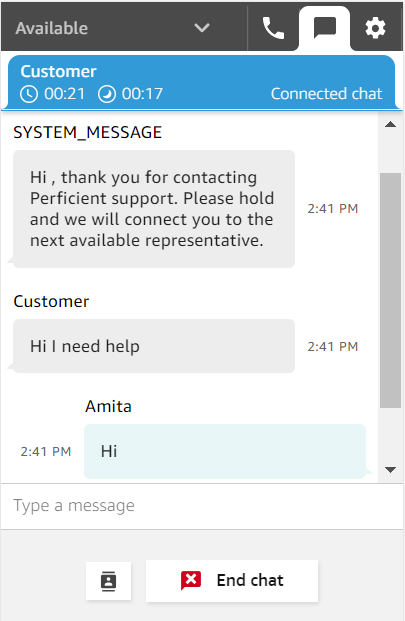
Now that we’ve accepted the chat on the agent side, we can see and reply to messages.
Something we want to highlight in the agent CCP are the two time clocks. On the upper left-hand side of the agent chat window, you can see two small clocks. The first clock is the total time that the agent has been on the chat. The time next to it with the little moon icon is the total time the agent has been idle. This may help the agent navigate between multiple chat windows and manage time effectively.

Step 12 – Agent Disconnect:
If an agent disconnects from the chat, what does the customer experience look like?
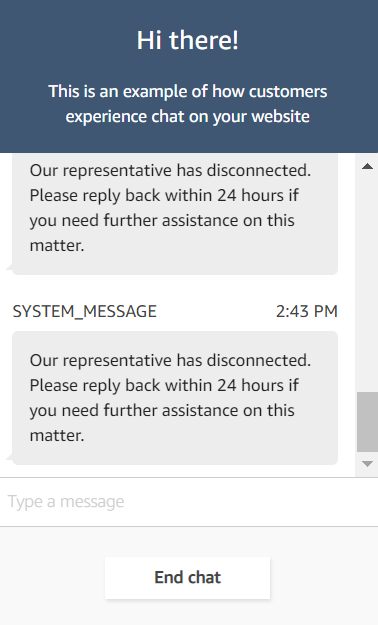
Well, if you’ll recall, we built a separate flow in Part 1 (the disconnect flow) to address this. Now we can see it in practice. You’ll see from the image below that the disconnect flow shows a message to the customer saying that the agent has disconnected, and instructs them to reply back within 24 hours if they wish to receive further assistance.
Please make sure you use the Disconnect flow; otherwise the customer chat window will close with no notice given to the customer.

Step 13: Customer returns to a chat:
What happens if a customer stops replying and returns after several hours? As long as they’re within the timeout window set in the disconnect flow and within 24 hours, they should be able to resume the conversation.
If an agent disconnects from a customer, the customer can still send a message in their chat window. This will then be routed to the next available agent, or the same agent, or another action you configure in the Disconnect flow. When a new agent connects, the previous messages sent in the customer’s chat window will appear in the agent window. However, the timestamps will have changed and a new ContactId will be created in the system.
Video Walk-through:
If you’d prefer to watch this tutorial as a video, we put together a demo that walks you through the steps above:
Further thoughts:
With the release of chat, Amazon has added powerful functionality that will help you better meet and serve your customers. This basic tutorial only grazes the surface of what you can do with chat.
Check out our other posts about Amazon Connect’s chat functionality:
For help integrating Amazon Connect chat into your contact center, please contact us here.