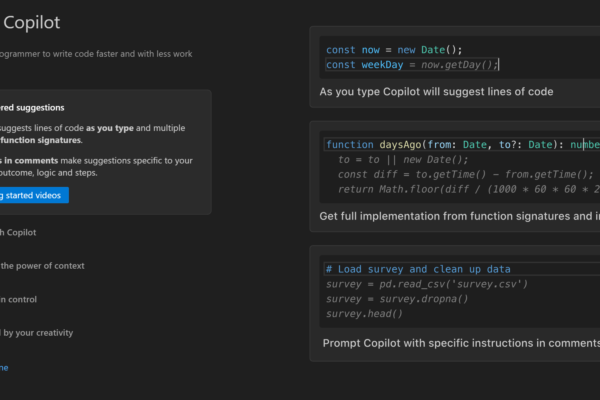
AI has arrived in the ever-evolving world of software development and staying ahead means embracing tools that can boost productivity and streamline workflows. GitHub Copilot, an AI-powered coding assistant developed by GitHub and OpenAI, has been turning heads since its debut. Integrated seamlessly with Visual Studio Code (VS Code), Copilot is more than just an autocomplete tool—it’s like having a coding partner who’s always ready to help.
In this post, we’ll dive into how you can leverage GitHub Copilot within VS Code to enhance your coding efficiency. Whether you’re new to Copilot or looking to unlock its full potential, we’ve got you covered. And if you didn’t catch the initial introduction when you first enabled Copilot, we’ll show you how to access the Welcome Screen to get you up to speed.
Getting Started: Accessing the GitHub Copilot Welcome Screen
Upon enabling GitHub Copilot, you might expect to see an introductory screen outlining its features. However, if you don’t see this initial introduction, don’t worry—you can still access it. From the Welcome screen in VS Code:
- Click on the “More…” Button: In the lower right corner of VS Code, you’ll find a “More…” (represented by three dots or an ellipsis) button.
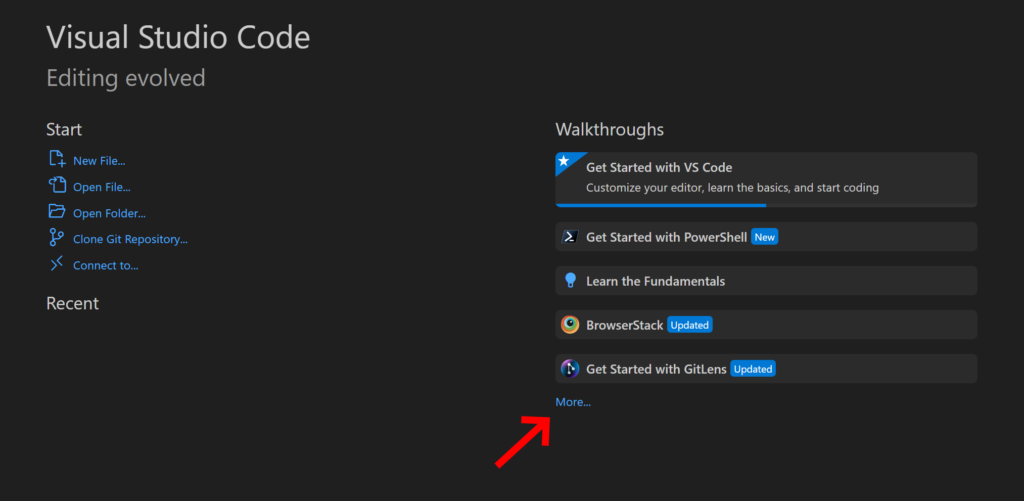
- Select “GitHub Copilot”: From the dropdown menu that appears, choose “GitHub Copilot”.
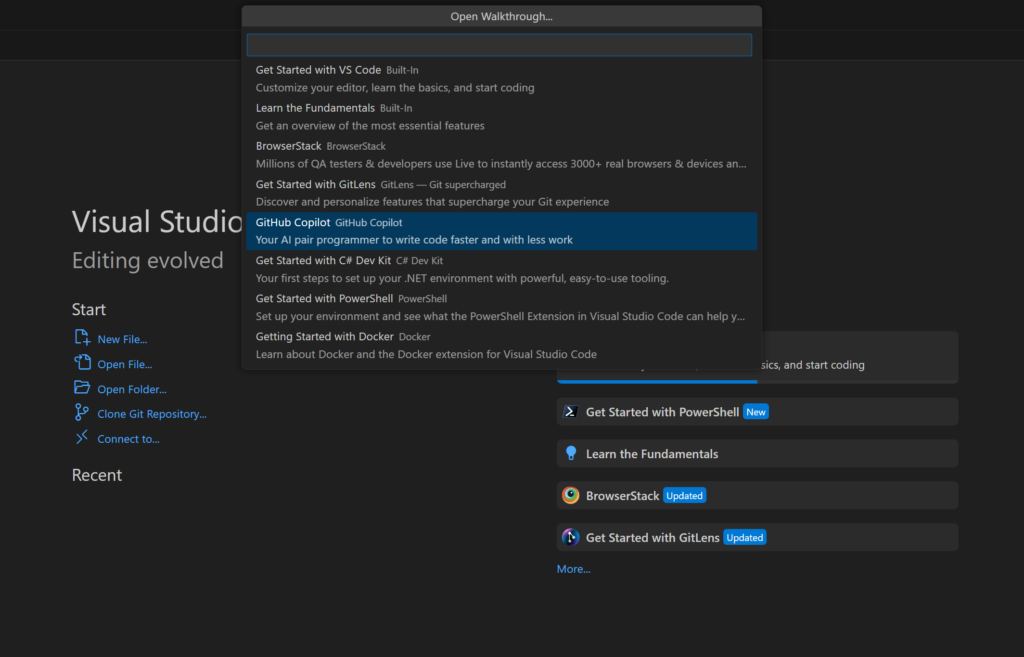
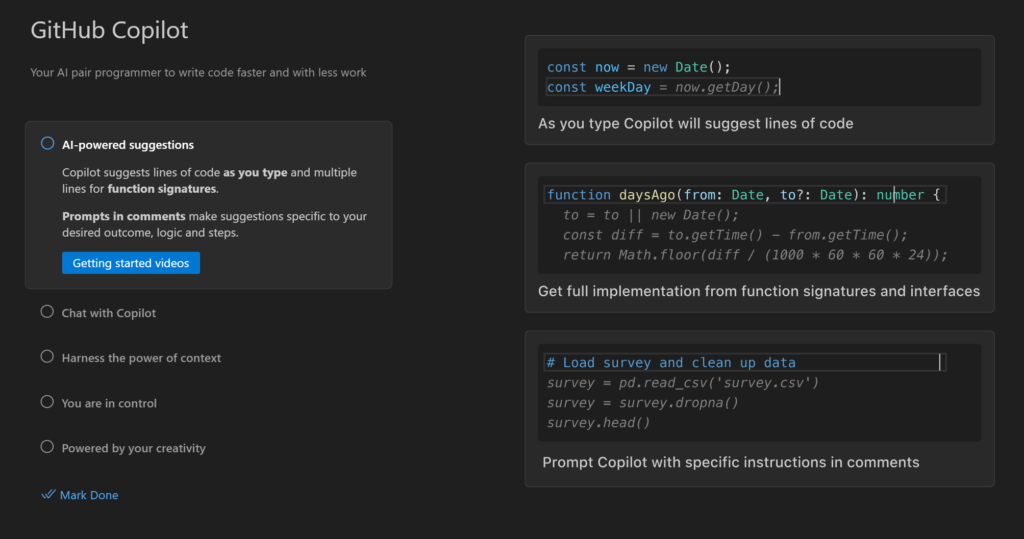
This will bring up the Welcome Screen, providing a snapshot of Copilot’s capabilities. From generating code snippets and entire function implementations to executing specific instructions based on your comments, this screen serves as an excellent primer. It helps you familiarize yourself with the AI assistant that’s poised to become an integral part of your coding workflow.
Leveraging the Chat Functionality
One of Copilot’s most powerful features is its Chat functionality. Think of it as an AI colleague who’s always available to answer questions, explain code, or even help troubleshoot issues—all within the context of your current project.
Key Uses of Copilot Chat:
- Understanding Complex Code: If you’re working with a large or unfamiliar codebase, you can ask Copilot to explain functions, classes, or modules. For example, “Can you explain what the
authenticateUserfunction does inauth.js?” - Exploring the Workspace with
@workspace: Use the@workspacecommand to query across your entire project. This is particularly useful for finding where certain functions are defined or how modules interact. By default chat does not search your full project, so if you’re looking for information about more than just the file you’re in, you’re going to want to use@workspacein your chats. - Troubleshooting and Debugging: Encountering an error? Paste the error message into the chat and ask for potential fixes or explanations.
- Generating Code Snippets: Need a quick example of how to implement a specific feature? Ask Copilot to generate a code snippet, such as “Show me how to parse a JSON file in Python.” or if it’s a huge project you can simply just find out where the files are you’re looking for.
The chat function effectively transforms Copilot into an interactive assistant that’s intimately familiar with your codebase.
Example Interaction:
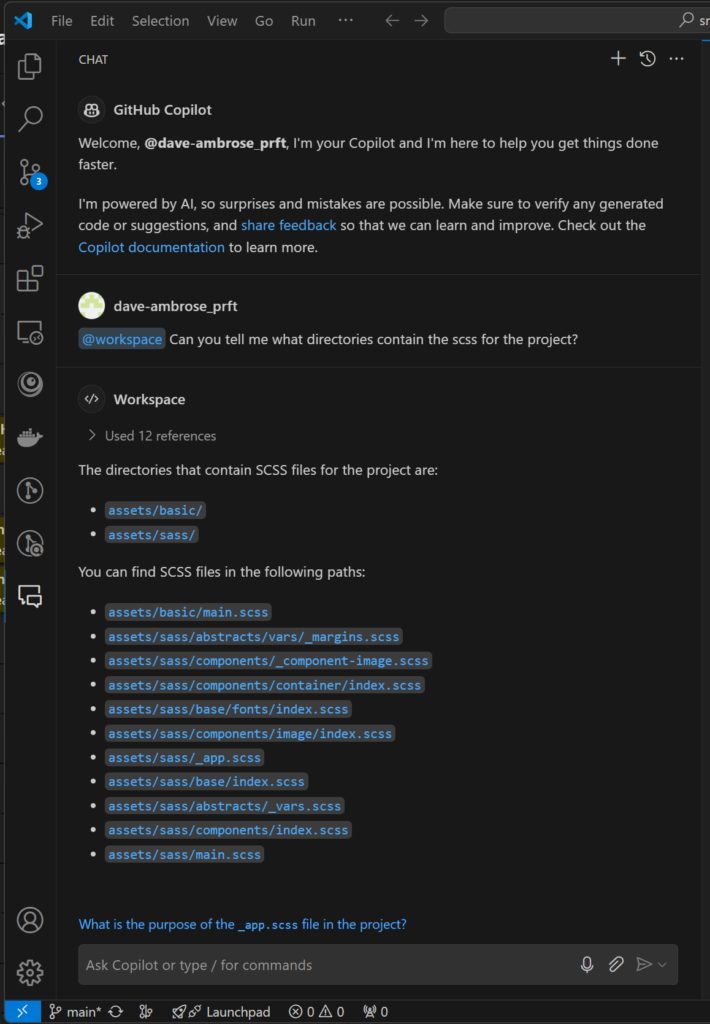
Enhancing Workflow with the New Chat Window Feature
To make the most out of Copilot’s chat capabilities, especially during intensive coding sessions, you might prefer to have the chat in a separate window. This allows you to keep your editor uncluttered and maintain focus on your code while still having immediate access to Copilot’s assistance.
How to Open Copilot Chat in a New Window:
- Open Copilot Chat Panel: Click on the Copilot icon in the sidebar or use the Command Palette (
Ctrl+Shift+PorCmd+Shift+P) and select “GitHub Copilot: Chat”. - Pop Out the Chat Window: In the chat panel, look for the “…” icon and select “Open Chat in New Window”.
- Position the Window: The chat will open in a new window. You can drag it to another monitor or position it alongside your main editor window. Don’t worry, you won’t lose any of your context or history.
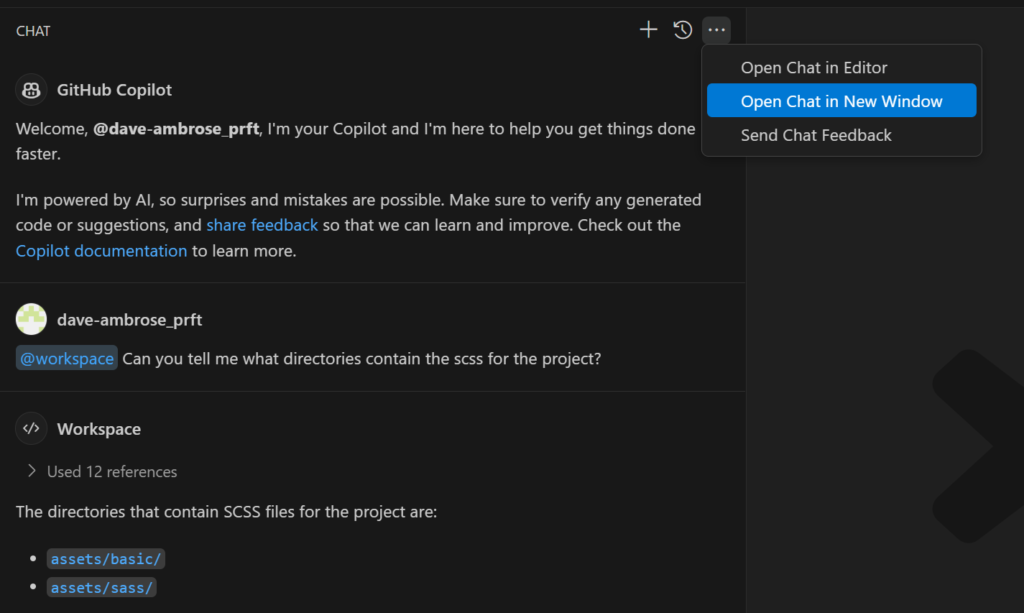
Benefits of Using a Separate Chat Window:
- Uninterrupted Coding Space: Keep your editor free from distractions while still having Copilot readily available.
- Improved Multitasking: Interact with Copilot without constantly switching tabs or splitting your screen within VS Code.
- Customized Workspace Layout: Arrange your tools in a way that best suits your workflow, especially if you’re using multiple monitors.
Customizing Your Experience: Exploring Copilot Settings
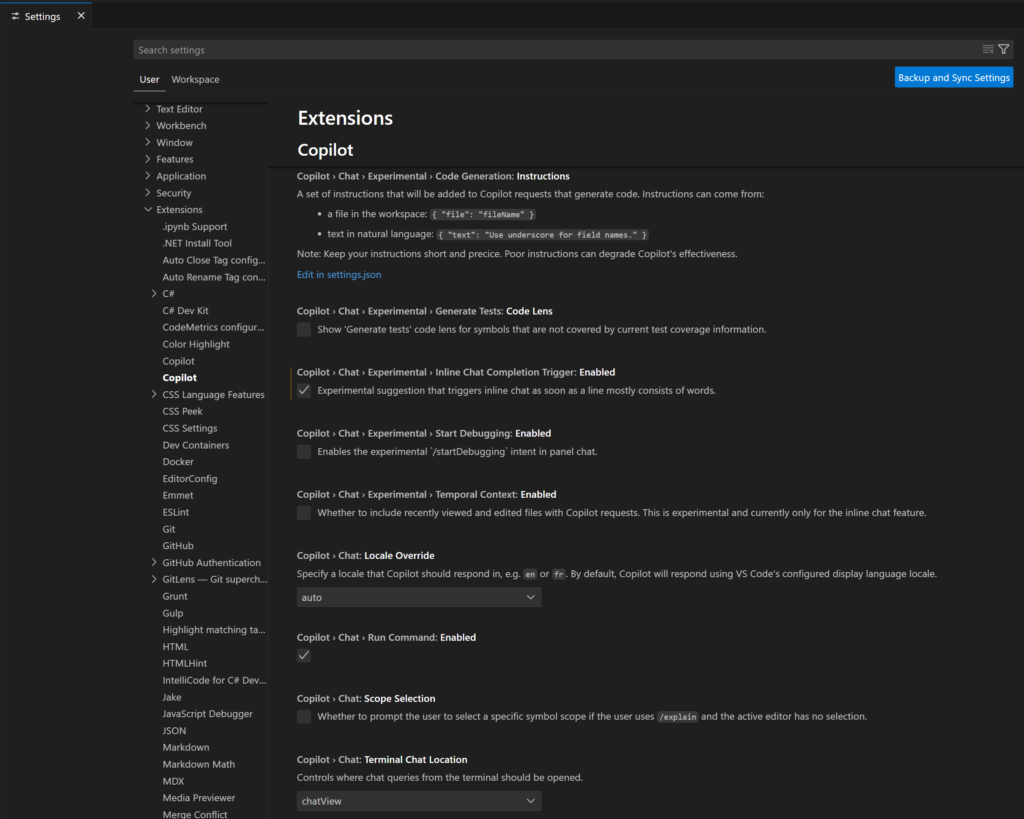
Out of the box, Copilot is a powerful tool, but diving into its settings allows you to tailor its behavior to your specific needs and preferences. Customization can make the difference between a helpful assistant and an indispensable part of your development process.
Accessing Copilot Settings:
- Via Settings Menu: Go to File > Preferences > Settings (
Ctrl+,orCmd+,), then either go down to Extensions or search for “GitHub Copilot.” - Directly Through Command Palette: Open the Command Palette and type “Open User Settings”, then search for “GitHub Copilot.”
There are a lot settings in here and I suggest taking some time to walk through them and read through the options. This area is probably worth a blog post of it’s own, so I’ll put it on the list.
Conclusion
GitHub Copilot is more than a novelty—it’s a transformative tool that can significantly enhance your development workflow. By taking the time to explore its features and customize its settings, you can tailor Copilot to act as a true extension of your coding self. I would advise you to experiment with some of the different options. Don’t hesitate to try out different settings to see what works best for you. Embrace GitHub Copilot as a partner in your coding journey, and watch how it transforms not just how you write code, but how you think about development.
Additional Resources
- GitHub Copilot Docs
- Join discussions on GitHub Community
- Explore tutorials on YouTube for visual guides and walkthroughs.
