If you’re interested in learning a robust, efficient, and scalable enterprise-level server-side framework, you’ve landed on the right blog! 🚀 We’ll start with a quick introduction, and in this post and the ones to follow, we’ll dive straight into the practical part. We’ll build an application that covers various Nest JS fundamental and advanced topics such as Services, Controllers, Modules, Repositories, Pipes, Dependency Injection, and database connectivity using TypeORM. To make things more interesting we’ll deploy this application using top-notch tools (hint: Vercel or StackBlitz) and put it to the test with the powerful Postman tool.
What will we build? take a sneak peak: the deployed version of my app.
Throughout this series expect clear diagram-based explanations, handy GitHub Gists code snippets and complete access to the app source code that we’re crafting. Let’s take a closer look and really understand the Nest JS!
and last thing comments/suggestions are always welcome 🙂
An Overview of Nest JS:
Nest was created by Kamil Mysliwiec. It has more than 62.6 thousand GitHub stars ⭐(updated on 1 Feb 2024) & still growing.
Nest JS is an Angular-inspired server-side Node JS backend framework. Built on top of Typescript Open-source platform. When we say Platform that means it comes with a lot of tools out of the box like Dependency Injection 🔗, Microservices ⛓, Web socket ⚙, Testing utilities 📐 and Supports REST and GraphQL API 🔌
Today top companies like Adidas, Red Hat, GitLab, Mercedes-Benz, IBM, Capgemini and many others use it in their production.
A Closer Look at Nest JS
Nest JS is a backend framework. When I say backend one thing directly comes into mind is HTTP Request/Response. Let’s understand how it works with the help of the diagram below.
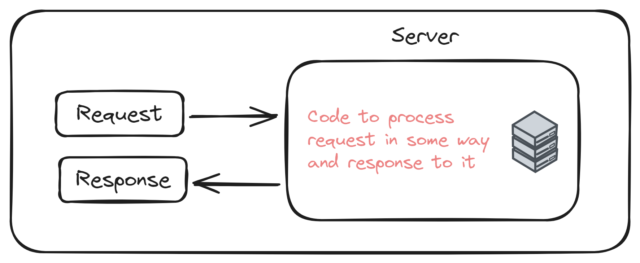
Fig. Client/Server Architecture
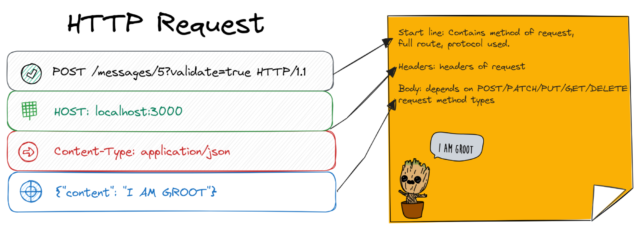
Fig. HTTP request
How HTTP Request Works
Every HTTP server you ever going to create may have a Request/Response cycle.
Users are going to request to your server, inside the server you will have some amount of code that will process that request. You might validate data inside the request, and eventually you might formulate the response and send it back to whoever made that request.
Whenever you build the server the request and response cycle will be almost the same and it will not vary regardless of any Framework, Library, Language or Platform.
Below is a more detailed breakdown of the above Client/Server architecture diagram:
 Fig. Client/Server Architecture Detailed
- 📫 Receive a request
- Might do some 🏳 Validation on the data that is contained in the request (validate some data in the body of the request)
- Make sure the user is 🗝 Authenticated/Authorize to send us a request
- 📡 Route or Point the request to a particular function to handle a request that might result to
- Running a particular 🎲 Business logic and eventually
- Access or 🧰 Store data inside a database.
And then as a result of the entire process we are going to formulate a response and send it back to whoever made that request.
Maybe in some cases we might not do authentication or exclude some of the steps but more or less the process is going to be the same.
Let’s understand in the Nest JS Way
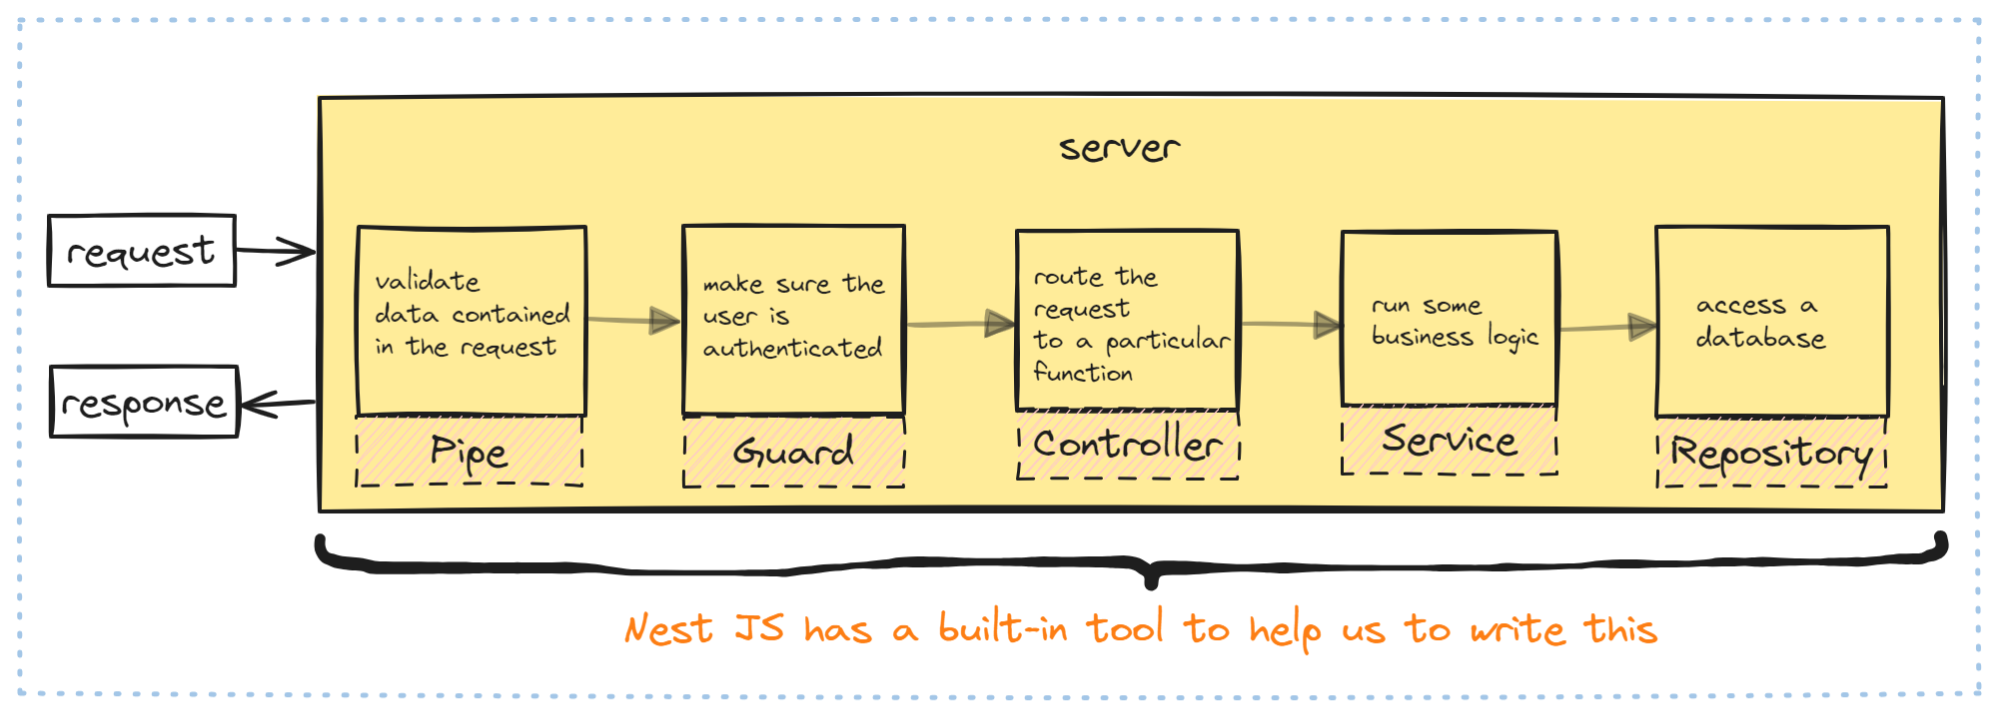 Fig. Nest JS Client/Server Architecture
In Nest JS we have special tools to address each step:
- Pipes: Helps to validate data of incoming requests
- Guard: Make sure the user who is making requests to the application is authenticated/authorized
- Controllers: Routing logic
- Service: Handle data access and business logic
- Repository: Handles data stores in db
Building Blocks of Nest JS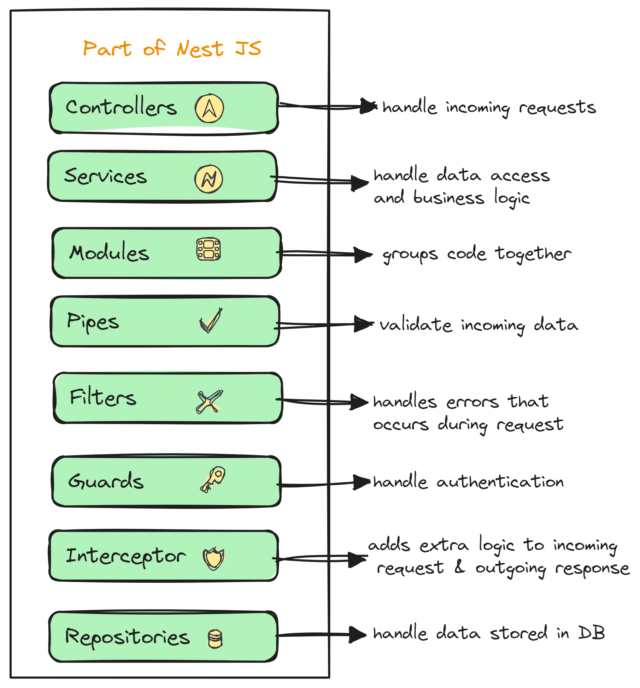
Fig. Parts of Nest JS
Folder structure and important files
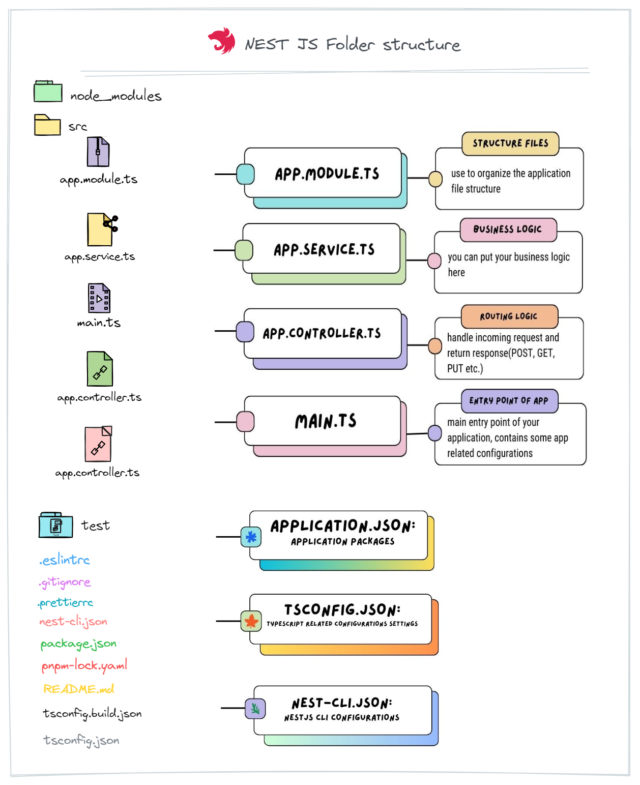
Fig. Nest JS folder structure
Modules: As the name suggests, it is used to organize code, split features into logical-reusable units; every Nest application has at least one root module. it’s used to bootstrap our application same as the Angular framework(Angular bootstrapping)
Fig. app.module.ts
Module Elements:
- Controllers: Entry point of request, handling incoming requests of application and responding answer to the clients
- Imports: List of modules that come under the modules.
- Providers: Instruction for dependency injection system on how to obtain a value for dependency
- Exports: Public API for the module(explicitly export: main diff between Angular and NestJS)
Note: Dependency Injection – This is an important concept to understand in Nest JS and other frameworks. Will plan do explain with building app in upcoming blogs. stay tuned…
- main.ts: Entry point of application
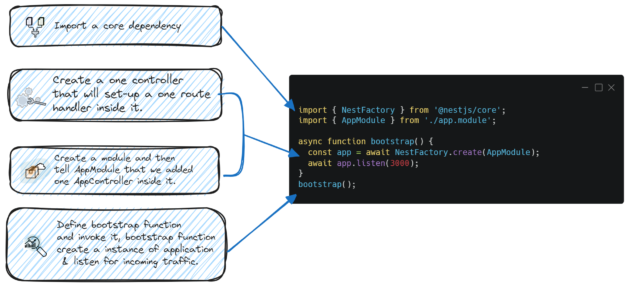 Fig. main.ts file
- Controller: Each controller has more than one route and each route serves different actions like Create, Update, Delete
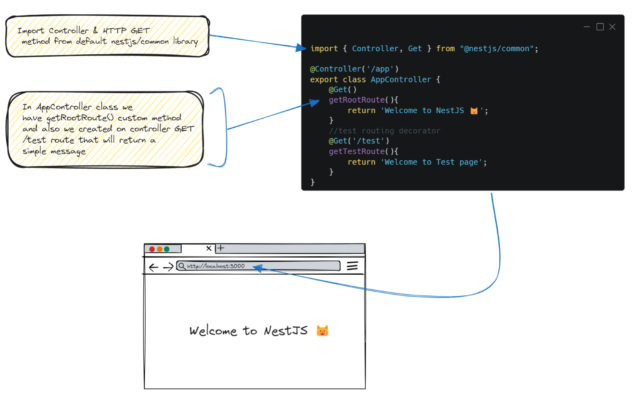
Fig. app.controller.ts
Decorators and its Types
Fig. Types of Decorators
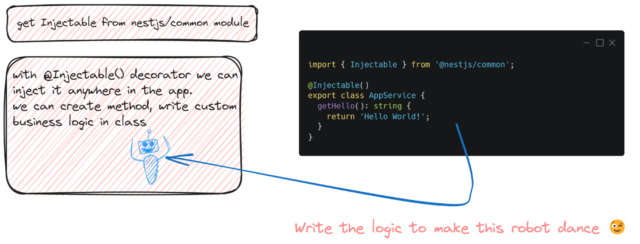
service.ts
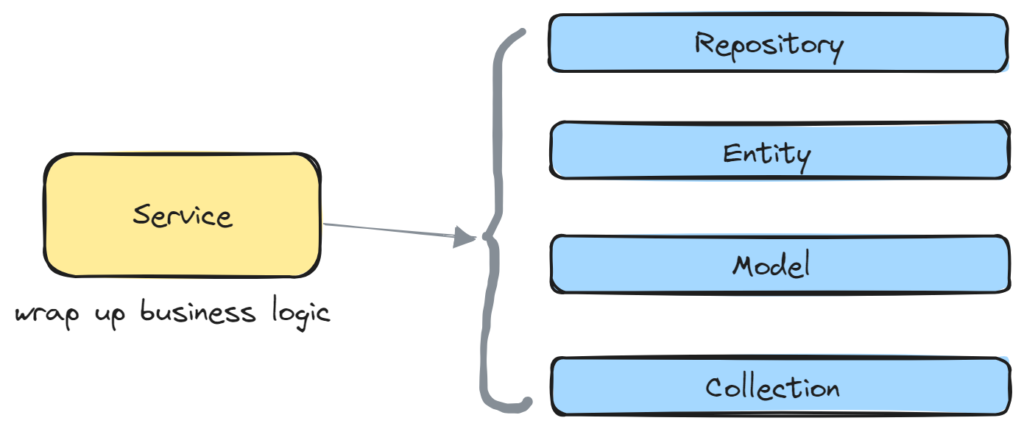
Scaffold Our First Nest JS App with the Nest CLI tool
- Prerequisite: Latest Node JS version
- Installation: To scaffold the project let’s install Nest CLI and run the below command
> npm i -g @nestjs/cli
> nest new project-name
Let’s add some custom code in app.service.ts file. Here we already have getHello() function that returns Hello World! string. As discussed earlier in this file we will be adding all our business logic.
greeting(): string {
  return 'Welcome to NestJS 😺';
}
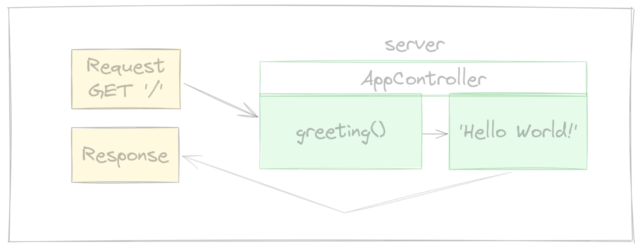
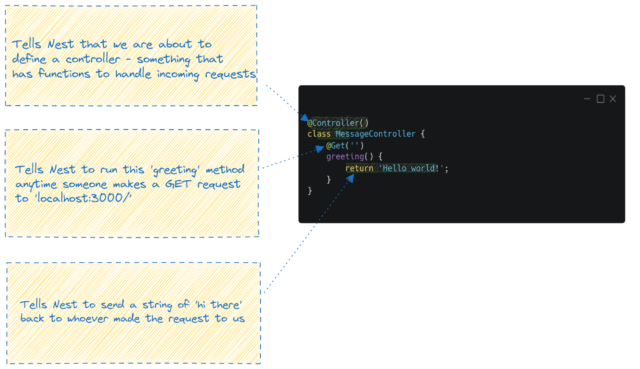
In the above code we added a greeting() method to return a message. In app.controller.ts lets add one custom controller endpoint /hello
@Get('/hello')
  greeting(): string {
  return this.appService.greeting();
}
After adding the lines above you will find an explanation in the diagrams below:
Extra Tips: To deploy your project with Vercel follow the step-by-step guide here. (if you like my content & writing style please give me Clap 👏 on my blog on medium.com)
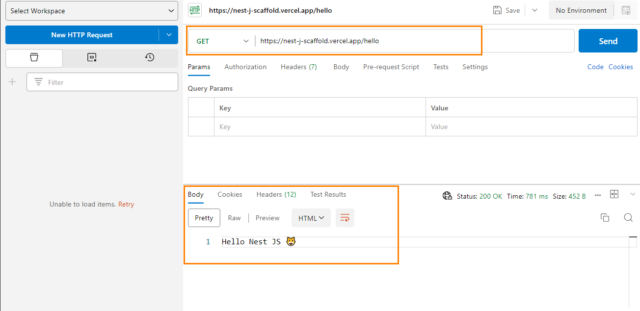
See my deployed demo here: https://nest-j-scaffold.vercel.app/hello
Postman request test: https://nest-j-scaffold.vercel.app/hello


Thanks For your Kind Information
How can I find out more about it?
Thank you for your help and this post. It’s been great.
Very informative Article
Very informative and helpful blog.
Thanks Lilesh, I really appreciate.
Thanks for such a nice and informative post!! Keep it up!!!