As we all know, Virtuoso is an automation tool that significantly enhances your testing efficiency while lowering the amount of manual work necessary to test your web application. Virtuoso test steps are written in natural language syntax with plain English texts. It also uses selectors like Xpath, CSS, JS path, and Hints to interact with the elements.

Picture Courtesy: https://docs.virtuoso.qa/
What are Goals in Virtuoso?
Once a Virtuoso project has been successfully built, it’s essential to create Goals for the various project applications. Goals are testing areas inside a project which can be a small section of an application or a whole application.
For Example: If Google is a project, then Gmail, Google Photos, Google Drive, etc., can be various applications to test.
Version control is independently maintained for each goal’s data. For each distinct aim, each version includes data like tests, an application graph, and insights related to the goal.
Versions offer features related to those found in version management tools like Git. A version is entirely copied when it is forked, but the original version is preserved, and changes can be made separately. A version cannot be modified once it has been committed; however, it can be rolled back to older at any time or fork goal from a specific version.
Creating a Goal inside a Virtuoso Project
1. Click on ‘New Goal’ on the right of the Project Dashboard
-
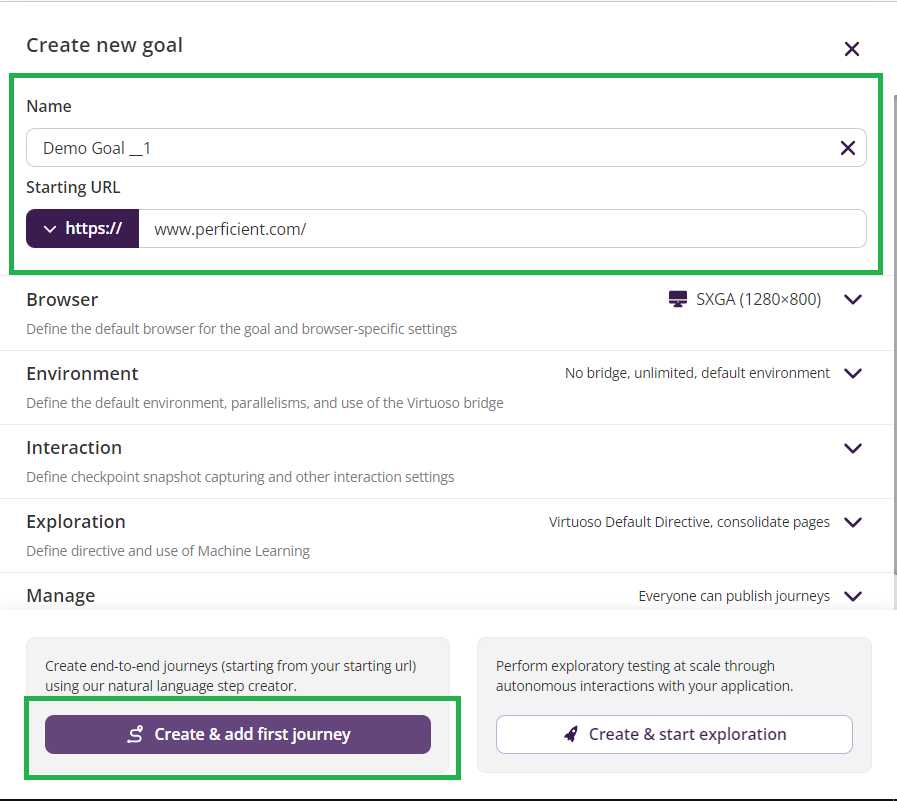
- On selecting ‘New Goal,’ it will open a Form on the right of the page to Create a Goal.
- For Creating a Goal in Virtuoso – The goal name and Starting URL are the mandatory and essential fields.

2. Enter the ‘Goal name’ and ‘Starting URL. ‘
-
- The Starting URL entered by the user will be the standard first checkpoint to navigate on Virtuoso for all the Journeys inside a Goal.
3. Click on ‘Create & add first Journey.’
-
- Once the ‘Create & add first journey is clicked, a New Goal with basic settings will be created, and a first journey will be made by default with the first checkpoint for navigating to the starting URL.

Goal Settings
Once a Goal is created, or while making a Goal, a variety of settings can be modified so that your Virtuoso can create an interaction with the application to be tested.
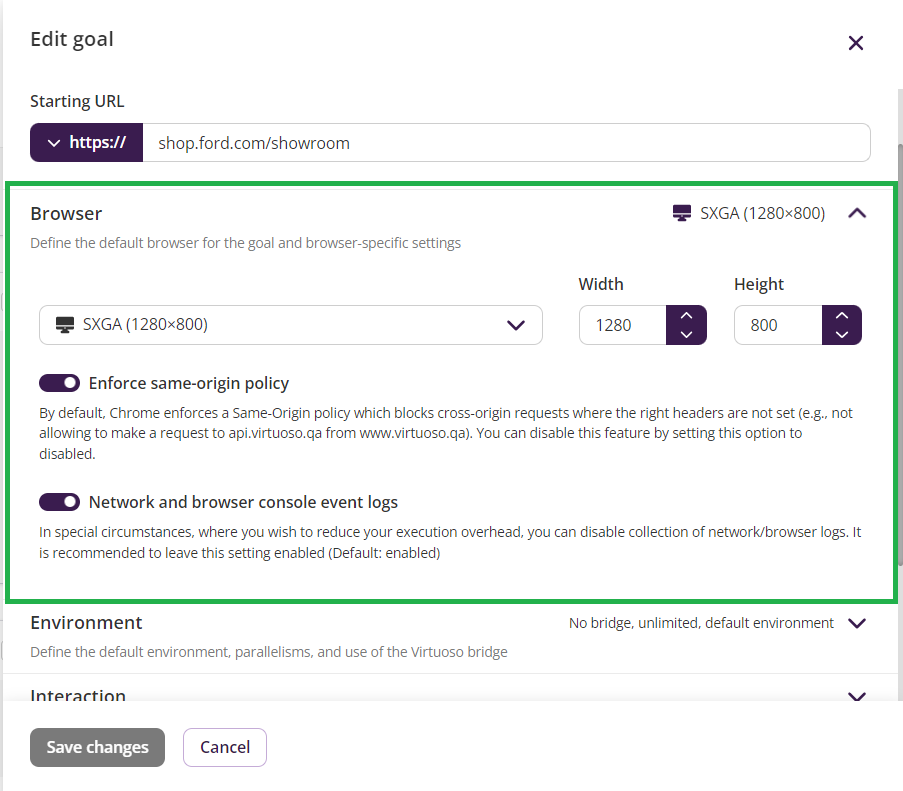
1. Browser
-
- Virtuoso runs all the tests on its own browser, which uses Chromium-based browsers whose default resolution is 1200 x 800.
- Users can also set custom resolutions if needed by adjusting the width and height.
- If needed user can directly select a device resolution from the drop-down given for mobile-specific layouts
- The Virtuoso browser will be used by default for execution at the specified resolution for both the mobile and desktop versions.
- The user can collect all the network/browser logs while running the tests by enabling the’ Network and Browser console event logs toggle. It is recommended to be enabled.

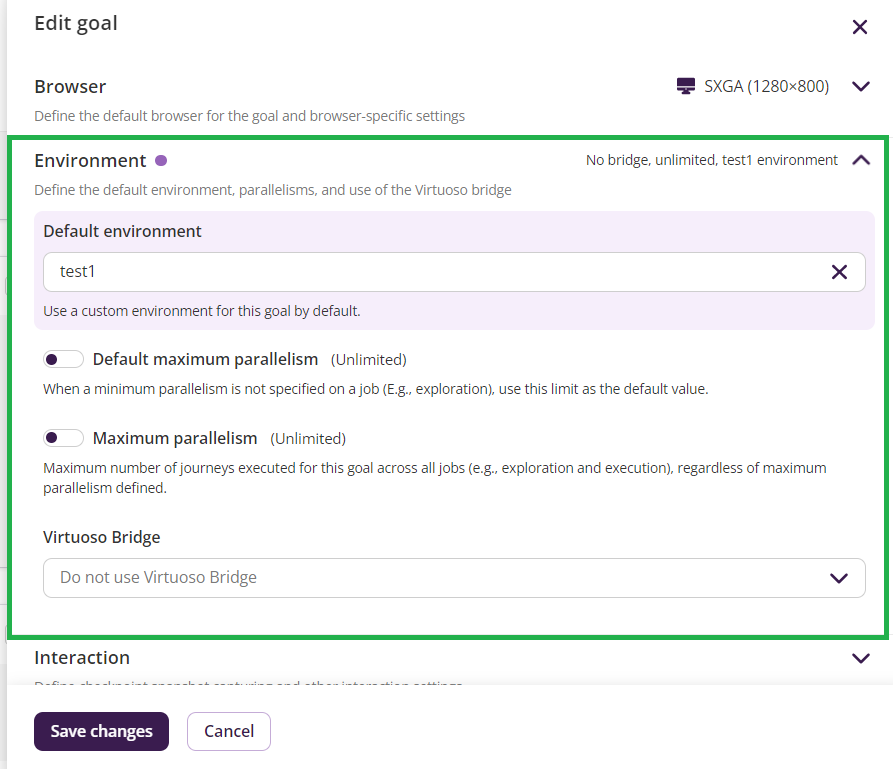
2. Environment
-
- In ‘Default Environment,’ you can set which environment Virtuoso should run your Goals.’
- The parallelism limit for your executions can be specified; no limit is set by default. These limits have an impact on how Virtuoso would carry out travels.
- For instance, if a restriction is not specified, Virtuoso will try to execute as many journeys as your organization would allow. Still, if you run several journeys, each trip will only be completed after the last one.
- When your target application is executing in a limited access environment, ‘Virtuoso Bridge’ provides a proxy connection. For example, localhost, private networks, etc.

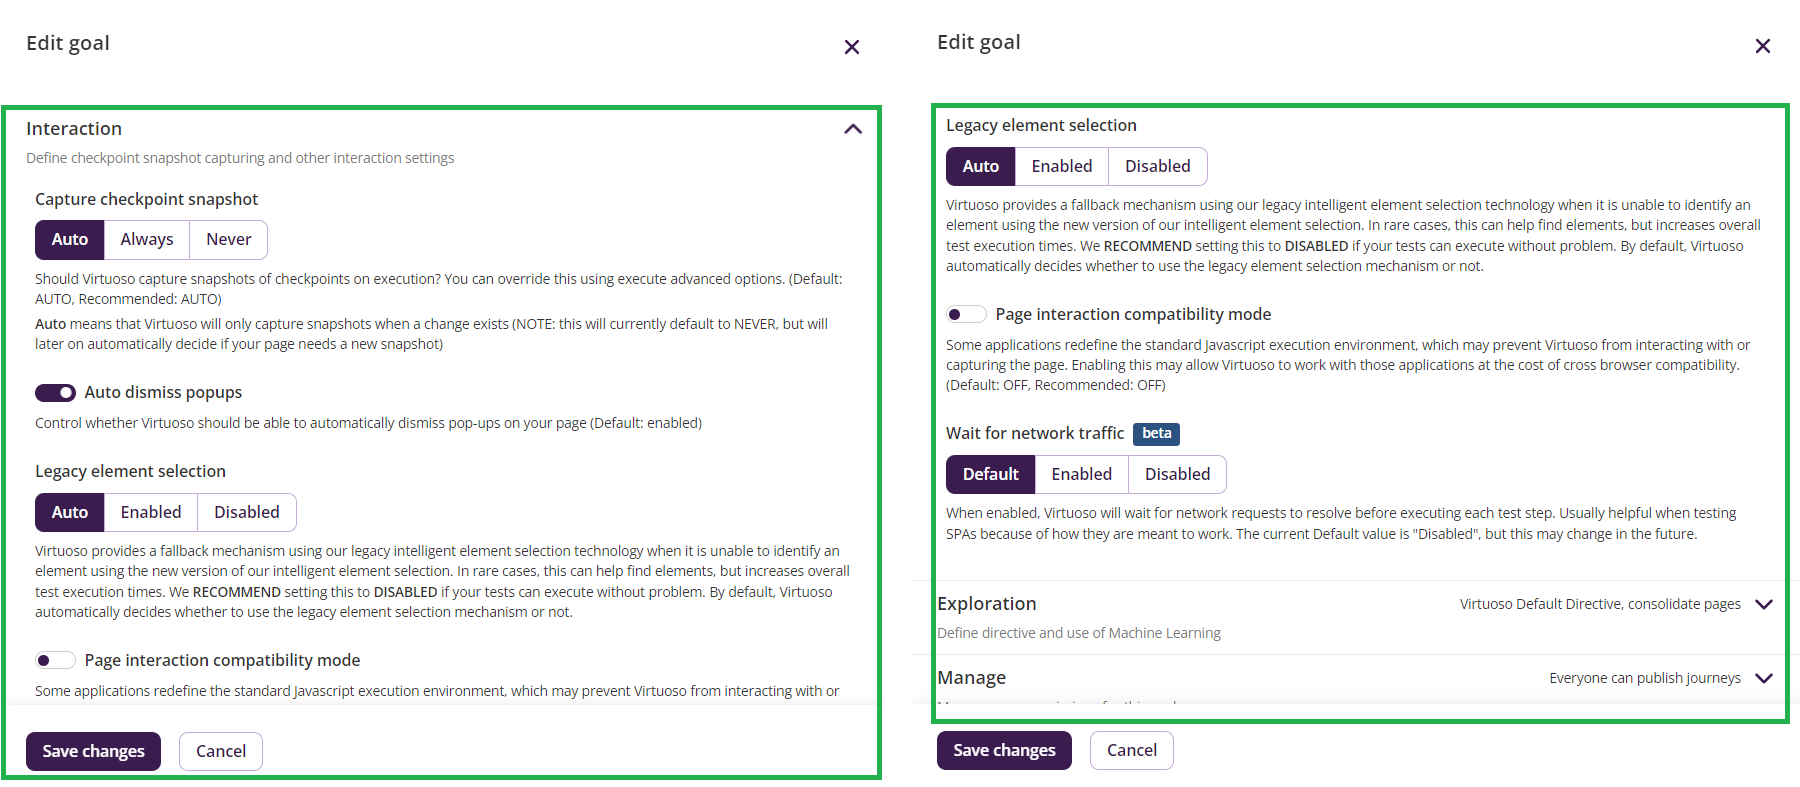
3. Interaction
-
- This group of settings is the advanced setting which may not need to be changed generally.
- When ‘Capture Checkpoint Snapshots’ is enabled, Virtuoso will take Screenshots of the checkpoints ‘while running the journey. This will help you to identify visual defects on the project quickly.
- When ‘Auto Dismiss Popups’ is enabled, Virtuoso will automatically try’ to close the popup without causing the journey to stop executing.
- By enabling ‘Wait for network traffic,’ Virtuoso waits for the dynamic elements, which get updated according to the response by autonomously waiting for pending network requests to get fixed.

Conclusion
I hope this 4-minute read has helped the enthusiast willing to learn Virtuoso and get a broader view of how project applications are called Goals in Virtuoso. We learned how to create a Goal with various Goal settings ( Browser, Environment, Interaction, etc.), which can be helpful according to the requirements and environments to test.


Informative Blog Jeet!
Informative!
Nice!