
Deploying a new version of an application to a production environment is the most critical task in the software development lifecycle. And a small mistake in the release cycle leads to cascading failures and outages.
To deploy a new version of the application, is there an option that reduces the chances of failure or outages and ensures zero downtime during deployment?
Yes, the solution to this problem is the blue-green strategy.
A blue/green is the type of deployment in which it creates two identical environments but with different versions of applications running on them.
The blue environment is where the current version is running, while the green environment is where the new version of the application will run.
In this blog, I have created a pipeline on AWS which uses blue/green deployment strategy to deploy a new version of the application.
Architecture Diagram:
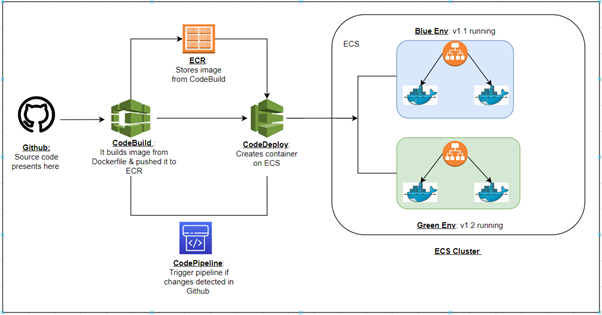
Advantages:
1. Rapid Releasing: With blue-green deployment, one can release an application in a production environment as there is no downtime associated with it, and it has no negative impact on users.
2. Fast Rollbacks: Easy rollbacks are achieved with this approach between the current and new versions of the application, which in turn reduces the risks inherent in experimenting in a production environment
3. Built-in Disaster Recovery: As the blue-green environment uses two identical environments, so the dual production environment is its own hot backup
1. Creation of Roles for Different Services:
We need to create 3 roles to allow services to function.
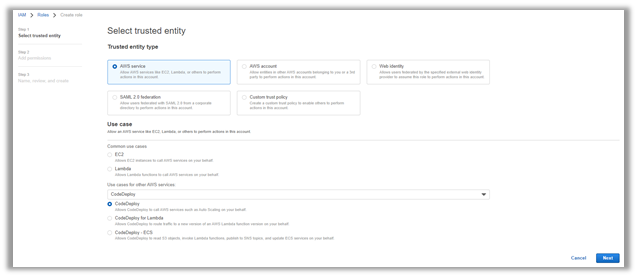
a) CodeDeploy Role:
This role will be used while creating the Deploy stage while creating CodePipeline.
- Go to “IAM” and click on roles.
- Create a role, select the use case as “CodeDeploy”
- Give the name “bluegreencodedeploy” and create a role.
- Likewise, create a role for CodeDeploy – ECS and give the name “bluegreenECS.”
- Also, create a role for CodeBuild Role and give the name “bluegreencodebuild.”
2. Creation of Elastic Container Registry (ECR):
We need to create an ECR to store Docker images.
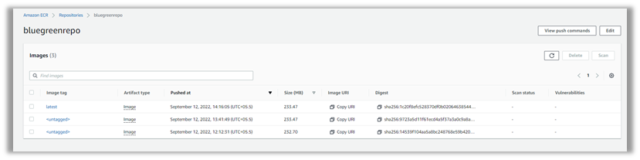
- Go to the “ECR” service and create a repository.
- Give the name “bluegreenrepo” and create a repository.
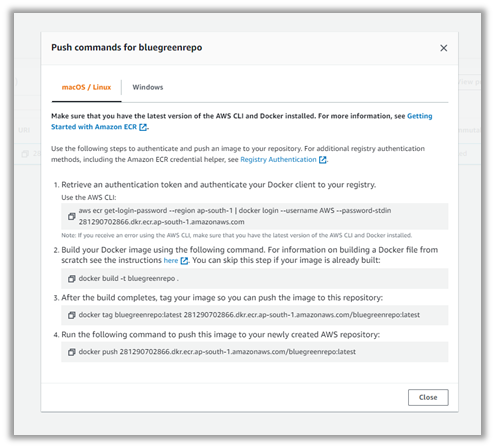
- Initially, we must manually build the image from the Dockerfile for that Launch one EC2 instance and install Git and Docker on it.
- Clone the GitHub repository and create the image.
- Run the below commands shown in an image on an EC2 instance to push the image to ECR.
3. Creation of Target Groups and Load Balancer:
Follow the below steps to create target groups and a load balancer.
- Go to the “EC2” service; on the left side, search for “Target Groups” option and open it.
- Click on create “target group”
- Choose a target type: select “IP addresses”
- Give the name “ALB-Tgroup1” and specify the port as 8080.
- Leave the rest of the settings default and create a target group.

Following the above steps, create a second target group named ALB-Tgroup2 and port 8080.
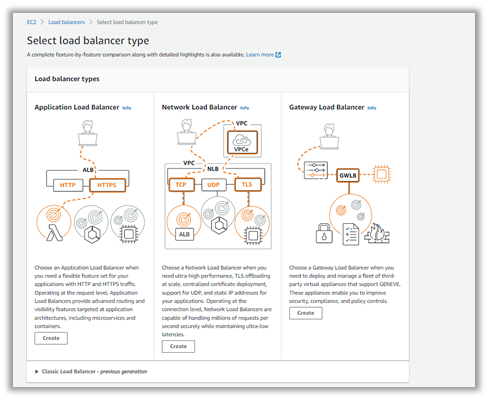
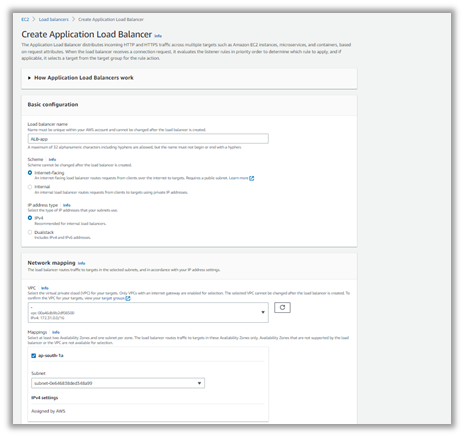
With the below steps, create an application load balancer.
- Go to the “EC2” service, search for the “Load balancers” option and open it.
- Click on “create load balancer” and select the load balancer type as “Application load balancer.”
- Give name as “ALB-app” and scheme type as “internet-facing.”
- Network mappings: select default VPC and select all the subnets.
- The security group should have port 8080 open.
We cannot add 2 target groups at a time while creating a load balancer. We will have to add another target group once our load balancer is created.
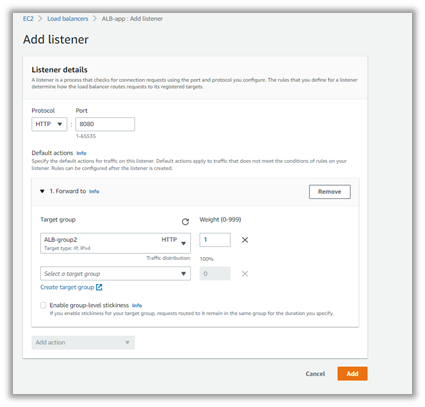
- Once the Load balancer is created, click on it.
- Go to “Listeners & routings”
- Specify port as 8080 and action as “forward” and add another target group.
 4. Creation of ECS Cluster, Task, and Service:
- Create an ECS cluster, task, and service by following the below steps.
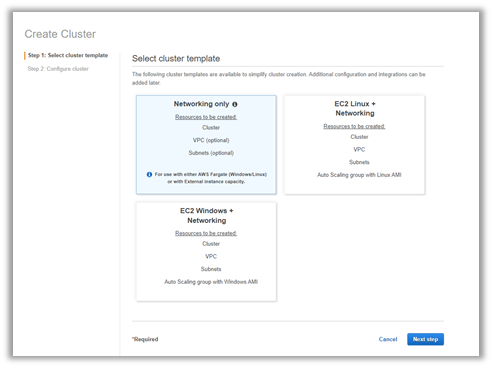
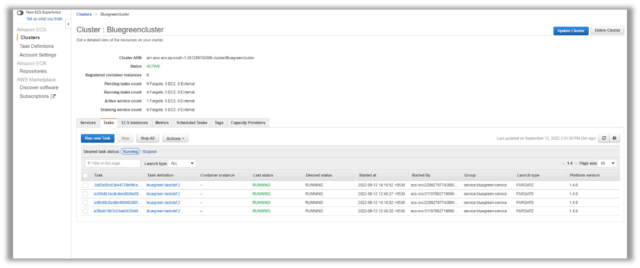
- Go to the “ECS” service on the left side, click on “Clusters” and create cluster.
- Select the cluster template as “Networking only.”
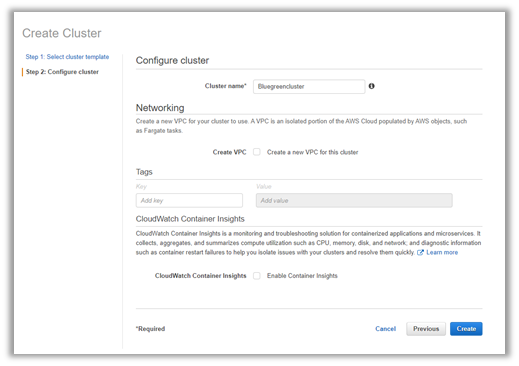
- Give the name “Bluegreencluster.”
- Leave the rest of the settings as default and create a cluster.

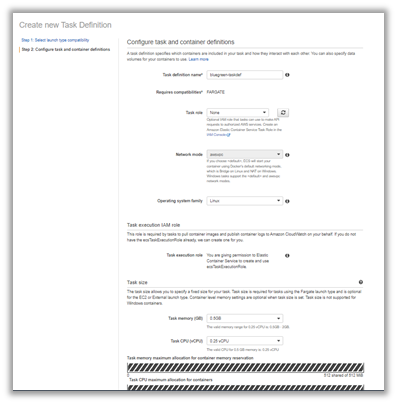
- On the left side, search for the option “Task definition” and create a new task definition.
- Select launch type compatibility as “Fargate.”
- Give name as “bluegreen-taskdef.”
- Select task role as “ecsTaskExecutionRole”.
- Specify task memory as 0.5 Gb and task CPU as 0.25 vcpu.
- Now, click on “Add Container” and give the name “bluegreencontainer.”
- Mentioned the image URL, which can be found in the ECR console.
- Specify memory limit as 128 and port mapping as 8080.

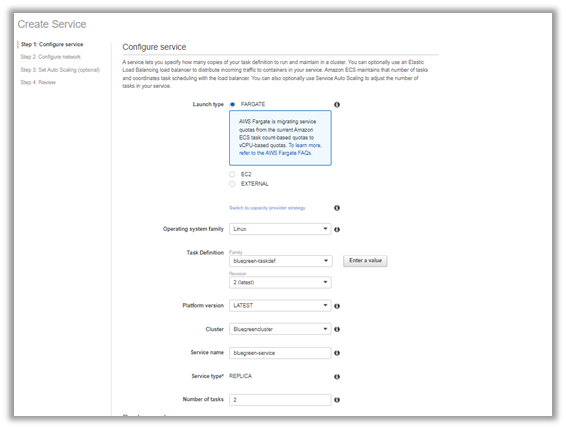
- Once the task definition is created, click on task definition and then click on service.
- Click on “Create service” and select the launch type as “fargate.”
- Give the service name as “bluegreen-service” and the number of tasks as 2.
- Select the deployment type as “Blue/green deployment.”
- Select the service role for codedeploy as “bluegreenECS” (2nd role which we created in step 1).
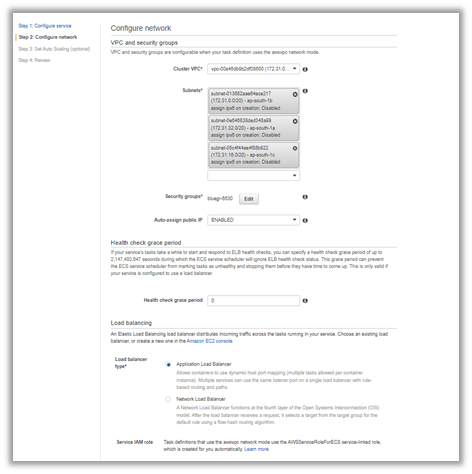
- Select cluster vpc as “default vpc” and select all the subnets.
- Select the load balancer type as “Application load balancer” and specify the port as 80 and the test port as 8080.
- Select both target groups.

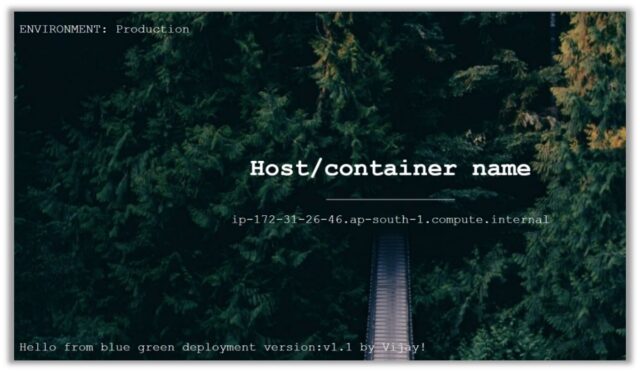
- Once the container is created, copy the public IP of each task and test it in the browser.
- It should host your version v1.1 and test the load balancer DNS endpoint to see if it is working or not.
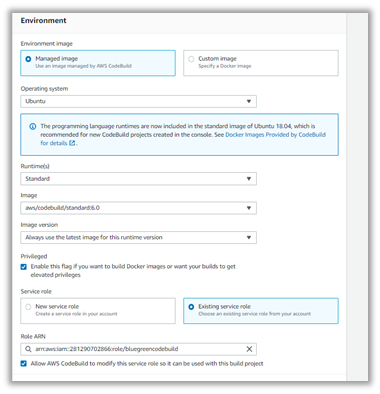
5. Creation of CodeBuild project:
We have to create a codebuild project that will fetch a Dockerfile from GitHub and generate an image from it.
- Go to the “CodeBuild” service and create codebuild project.
- Give name as “bluegreen-Codebuild.”
- Specify the git URL as “https://github.com/Vijaygawate/Blue-Green-Deployment-On-ECS.git.”
- Select the operating system as “Ubuntu” enables the privileged checkbox.
- Select the service role as “bluegreencodebuild” (3rd role which we created in step 1)
- Uncheck cloudwatch logs section.
- Leave the rest of the settings as default and create.

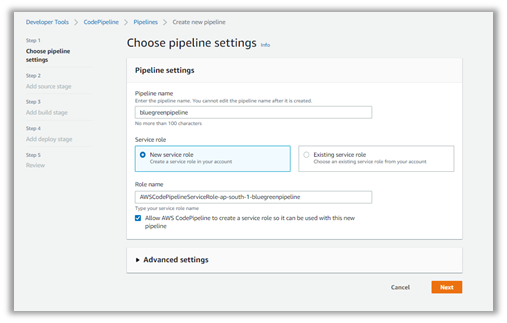
6. Creation of CodePipeline:
Finally, we must combine CodeBuild and CodeBuild, and CodeDeploy by creating CodePipeline.
- Go to “CodePipeline” and create the pipeline.
- Give pipeline name as “bluegreenpipeline” and service role: new service role.
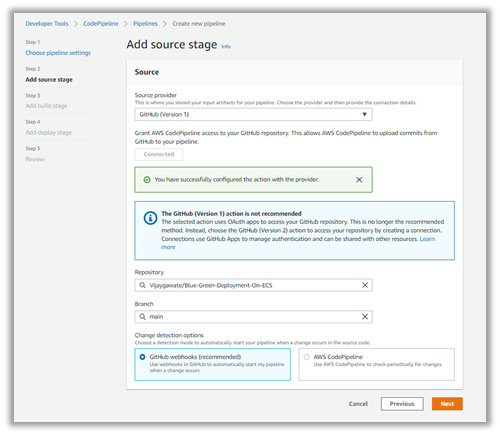
- Select the source as the Github version1 in source stage and click n connect to GitHub
- Select change detection options as GitHub Webhooks.
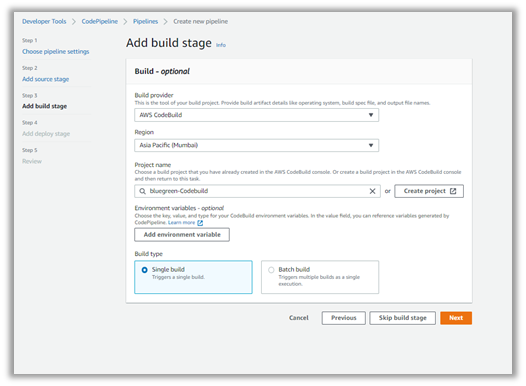
- Add build provider as “CodeBuild.”
- Select the project name “bluegreen-codebuild” and click on the next step.
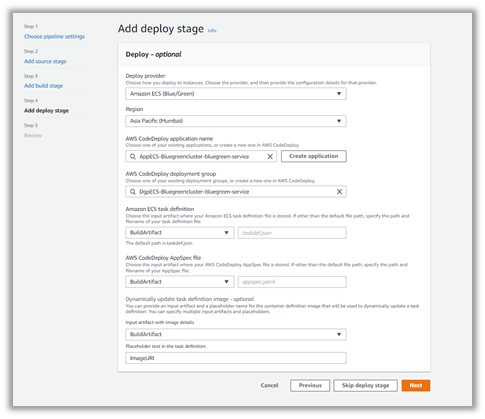
- Select Deploy provider as “Amazon ECS (Blue/Green).”
- Select the CodeDeploy application name and deployment group.
- Amazon ECS task definition: BuildArtifact
- AWS CodeDeploy AppSpec file: BuildArtifact
- Placeholder text in the task definition as “ImageURI.”
- Review and create the pipeline.
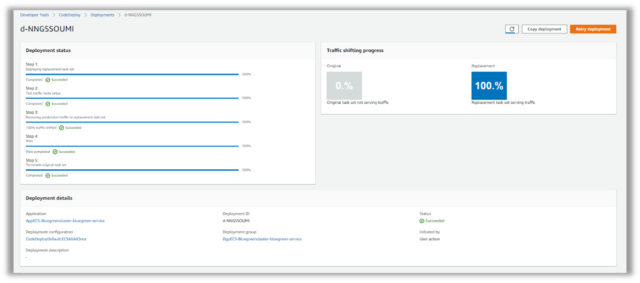
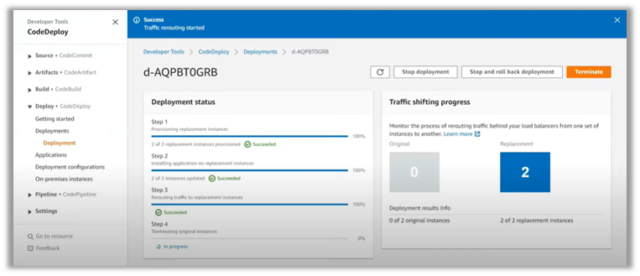
Once the pipeline is triggered, we can see the page below.

Now, if you make some changes to the server.js. It would start a new pipeline that would create a new image from a Dockerfile and push it to ECR, as well as add two new tasks in the ECS cluster.
- Both blue and green environments are available, and we can decide which we would like to keep running.
- If we want to keep version 2 running, we can simply tap on the “Terminate” tab to keep version 2 running while terminating the previous version’s resources.
- And let’s say our version 2 is not performing as expected and would like to roll back to the previous version.
- For that, just tap on “Stop and rollback deployment,” and it will roll back to version 1 while terminating version 2 resources.
Conclusion:
This way, we can achieve zero downtime while switching to different versions of applications, and this type of strategy plays a vital role in deploying critical applications.
Much informative blog!
Great job!