
In the previous article, I promised that I was going to show you how to build a simple chat app from scratch using ASP.NET Core and SignalR. And that’s exactly what we are going to do in this post. So, in case you didn’t read the last article, I invite you to check it out before going through this one – I’m sure you’ll get a better grasp of it all.
In the first post, we gave an overview of how a real-time app works and what are the parts of SignalR that allow us to integrate this functionality. If you don’t remember what our project will be, I’ll do a quick recap.
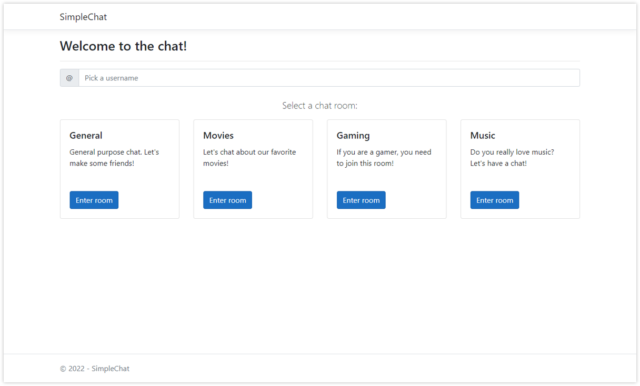
This is the app we want to achieve at the end of this article:
The main features of our chat app are:
- The chat, which has 4 different rooms: general, movies, gaming, and movies.
- Rooms that should only receive messages from other users in the same room.
- Users with the freedom to choose their username, which has to be unique per room.
- Notifications are received by the user when another user joins and leaves their room.
For your reference, I uploaded the final code for this project to a GitHub repository. You can check it out at https://github.com/gerardormz98/simplechat. I will probably omit the less important parts of the code in this article, so you might want to take a look at the whole project.
So, let’s get started!
Building a chat with ASP.NET Core and SignalR
Prerequisites:
- Basic understanding of ASP.NET Core
- Visual Studio with .NET Core installed
1. Preparing the app
First of all, we need to create a new project. Open your Visual Studio and create an ASP.NET Core Web Application project.
NOTE: For this demo, I will be using .NET 5, but the code should be very similar for any version. I will also be using Razor Pages for the views, but that is completely unrelated to SignalR. You can build the views with MVC or even plain HTML if you prefer.
Now, let me take a moment to show the file structure we want to achieve and the classes we need to focus on:
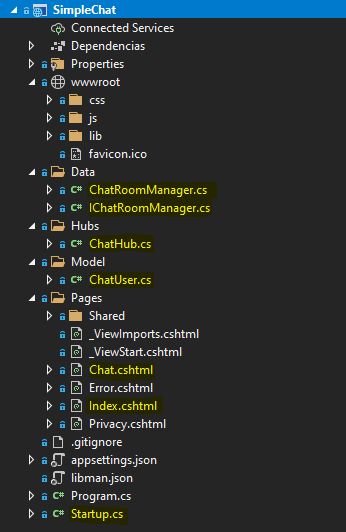
NOTE: It’s important to mention that, of all these files, the only one related to SignalR is ChatHub.cs. Remember that in order to achieve real-time communication with SignalR, the only two things we need are:
- The hub class in the server (in our case, this is ChatHub.cs)
- The SignalR Javascript library and our custom JS in the client (which I will explain later on).
Let’s begin by creating our ChatUser class inside the Model folder. This is a simple POCO class to represent a connected user:
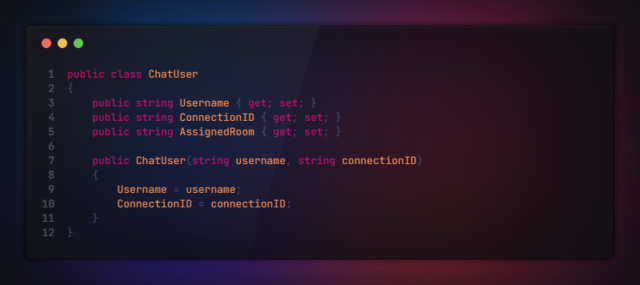
ChatUser.cs
The connection ID is a special ID that is generated by SignalR when establishing a connection with the client. We need a way to map this ID with the username chosen by the user, so that’s why I included it in this class.
We need to create the IChatRoomManager interface and the ChatRoomManager class inside the Data folder. This manager class will help us to persist with the connected clients and provide some helper methods. Persisting the connected clients is NOT required by SignalR, but our chat app needs it to keep track of usernames and room occupancy. In this case, I will simply persist them in memory with the help of a dictionary.
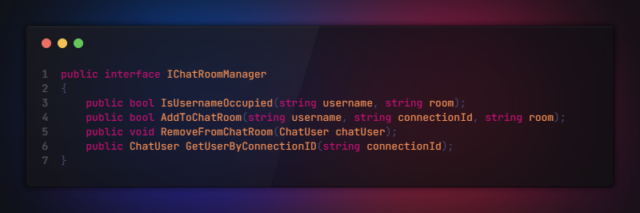
IChatRoomManager.cs

ChatRoomManager.cs
As this class has nothing to do with SignalR, I won’t explain the details. The important point here is that this class provides us with an easy way to handle our data internally and exposes methods to:
- Check if a username is already in use.
- Add/remove a user from a chat room.
- Get a user by its connection ID.
Now, we need to register it in our dependency injection container so that we can inject it into other parts of the application. Inside ConfigureServices method in Startup.cs, register it as a singleton:
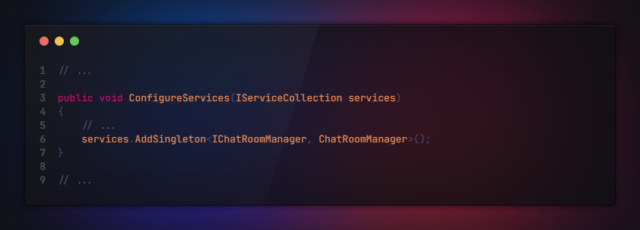
Startup.cs (extract)
2. Preparing the Views
We will only use two views for this app:
- Index page: this is where users can select their username and join a room.
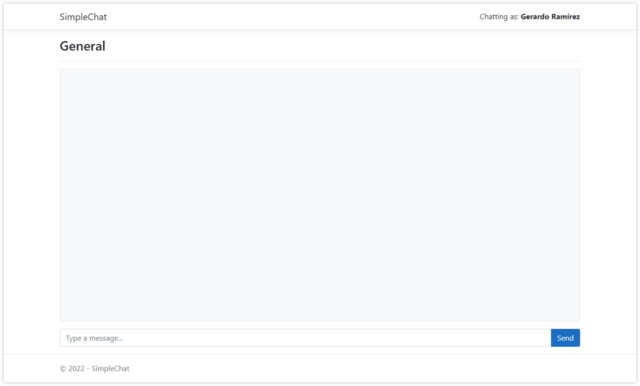
- Chat page: this is where users can send and receive messages.
I will omit the HTML code for simplicity (you can always check it out in the GitHub repository), but this is how they look:
Index Page
Index.cshtml
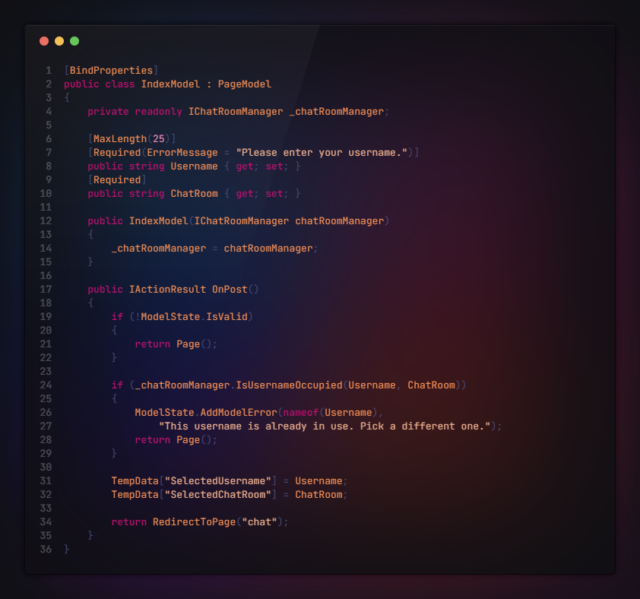
Index.cshtml.cs
For the index page, we only have two properties: Username and ChatRoom, and a single handler method OnPost that will be triggered when the user clicks the “Enter room” button. First, we validate the model, and then we use the ChatRoomManager to verify if the username they entered is not already taken. If these validations pass, we save both values to TempData, so that we can access them on the Chat page, and finally, we redirect the user to the Chat page.
Chat Page
Chat.cshtml
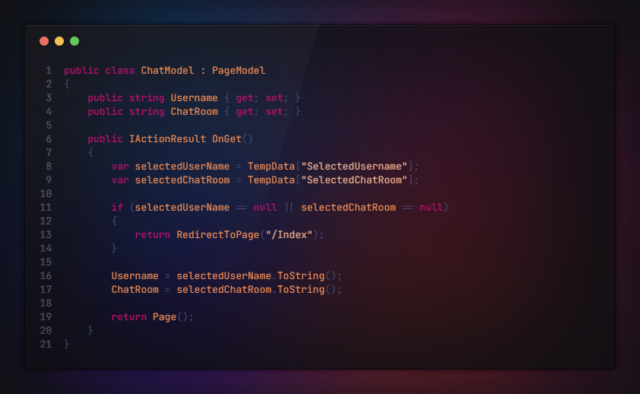
Chat.cshtml.cs
On the Chat page, we have the same two properties: Username and ChatRoom, but the main difference is that on this page, they will not be filled directly by the user input – they will be taken from TempData. And we have a single handler method OnGet that will be executed when the user is redirected to the page.

So, in our OnGet method, we try to get the Username and ChatRoom from TempData. If they don’t exist, we redirect the user back to the Index page. Otherwise, we assign them to our model properties and continue.
It’s important that, in our view, we assign these values to a hidden field because we are going to need them later in Javascript:
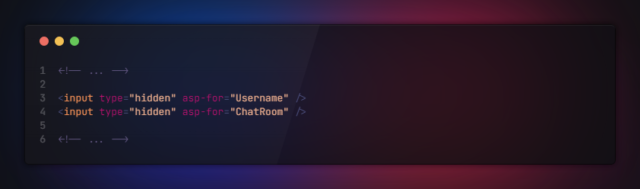
Chat.cshtml (extract)
At this point, we have everything we need to start implementing our main functionality, which is sending and receiving messages using SignalR. Let’s continue!
3. Creating our Hub Class
It’s time to create our hub. Remember that this is the class that will communicate with the clients. Here, we are going to add our custom handlers that will be called by the clients in real time. The method naming is important because this is the way we will be calling them from the client side.
To create it, simply add a new class inherited from the Hub class. Don’t forget to include the reference to Microsoft.AspNetCore.SignalR.

ChatHub.cs
Notice that we are injecting our ChatRoomManager in the constructor. As the hub is just a normal class, we can take advantage of dependency injection.
As we are inheriting from the Hub class, we have three properties available that we can use in our hub: Clients, Groups, and Context.
- Clients: contains properties and methods for communication between server and client.
- Groups: contains methods to add/remove clients from a group.
- Context: contains properties and methods with information about the connection.
Do you remember about the Connection ID we talked about? This is the way SignalR can identify a single client. Thanks to the Context property, we can get that ID.
So, what does our chat hub do? Our hub exposes two methods that can be called by the clients. On these methods, we can do some server-side work and then notify one or multiple clients so that they can update the front-end in real-time:
- JoinRoom: this will add a specific client to a room (in both our in-memory dictionary and in SignalR groups object), and then notify all the other clients in the same room that a new user has entered, passing their username.
- SendMessage: this will get the user object from our in-memory dictionary, and then notify all the other clients in the same room that a new message was sent, passing the username that sent the message, and its content.
When a user is disconnected, OnDisconnectedAsync will be executed. This will get and remove the user object from our in-memory dictionary, and then it will notify all the other clients in the same room that the user has left, passing the username.
There are two event handlers that are executed automatically by SignalR when a client is connected or disconnected: OnConnectedAsync and OnDisconnectedAsync. We can override them to give them a custom functionality, as we did for OnDisconnectedAsync, but this is completely optional.
4. Configuring SignalR (server side)
Now that we have everything ready in our server, we just need to configure SignalR in Startup.cs, so that our server knows how to respond to SignalR requests.
To do this, we need to register SignalR in our app services. So, in the ConfigureServices method, register it with AddSignalR method:
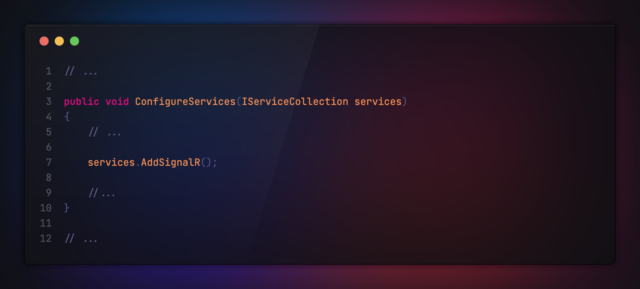
Startup.cs (extract)
And we also need to map the hub we just created to a custom route. In the Configure method, we are going to call MapHub to map the ChatHub class to the route “/hubs/chat”.
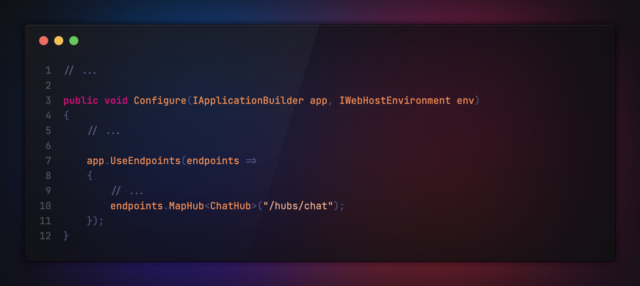
Startup.cs (extract)
And we’re all set on the server side! Let’s now configure the client.
5. Configuring SignalR (client side)
For the client side, we need two things:
- A reference to the SignalR Javascript library in our page.
- Our custom Javascript code to communicate with the hub in the server.
To download the official SignalR Javascript file, we have a couple of options:
- Use npm with the following command: npm install @microsoft/signalr.
- Download it from a CDN such as cdnjs. Or, if you don’t want to download the .js file, you can just reference it directly from the CDN.
Once you’ve downloaded it, put the “signalr.min.js” file inside the wwwroot folder in our app. I recommend the following path: “wwwroot/lib/signalr/signalr.min.js”. You can get more info about this on Microsoft’s official docs.
We also need to create our custom Javascript file “chat.js” in “wwwroot/js/chat.js”. We’re going to leave it empty for now.
Then, in our chat page, we are going to add a script reference to those two files. The SignalR library must be referenced BEFORE chat.js, so that we can use it in our custom code:
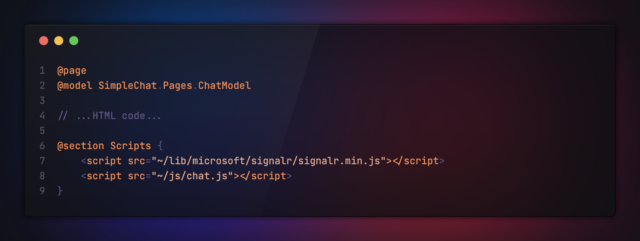
Chat.cshtml (extract)
Now, let’s work on our chat.js file. For simplicity, I will omit the code to manipulate the DOM so that we can focus on the SignalR part (remember you can always check the full code in theGitHub repository). So, this is how it’s going to look:
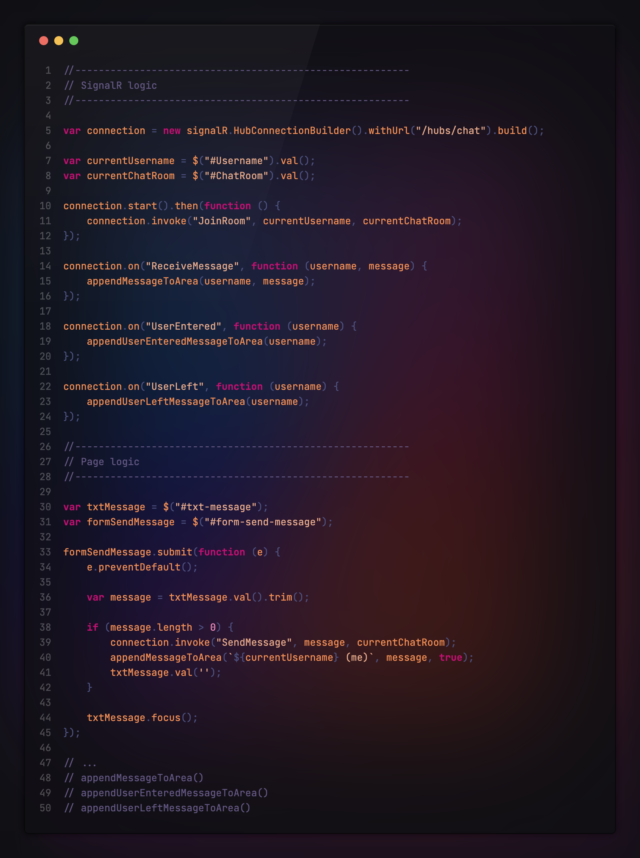
chat.js (extract)
First, we configure the connection to our hub. We achieve this by calling:
var connection = new signalR.HubConnectionBuilder().withUrl(“/hubs/chat”).build();
As you can see, the URL we passed to the withUrl method matches the URL of our hub, as we configured it on Startup.cs file. Then, we call start on our connection to actually connect to the SignalR server.
With the connection object we can do two things:
- Call a method in our hub, by using connection.invoke and passing the method name and its parameters.
- Execute some code when we receive a notification from the server, by using connection.on and passing the name of the notification we want to react to and the function that will be executed.
So, what our chat.js file does is:
- Configure and start the connection to the SignalR server.
- Call JoinRoom function in the hub if the connection is successful.
- Create 3 handlers for the notifications “ReceiveMessage”, “UserEntered” and “UserLeft”. When we receive any of these notifications from the hub, we are going to create and add the message to the DOM.
- Call the SendMessage function in the hub when the form is submitted and the message is validated.
That is all we need to do on the client side. Hopefully, our app can now communicate in real-time with the server and vice-versa.
Summary
We have configured our SignalR server to expose two methods that can be called by the client: JoinRoom and SendMessage. On the other side, we configured our client to expose three methods that can be called by the server: ReceiveMessage, UserEntered, and UserLeft. The clients now have a real-time connection with the server, and they have a two-way connection that will last until we explicitly end it, or until the user closes the browser tab.

And that’s it! Now we have a functional real-time app that covers all the basics of ASP.NET Core SignalR. We have built our chat hub on the server that communicates almost instantly with our Javascript code on the client and vice-versa, by using the most optimal transport.
Remember that you can view the full project code at https://github.com/gerardormz98/simplechat.
Of course, this app has many areas of opportunity and some security flaws we could enhance. But we got a great overview of SignalR and we saw that creating a real-time app with .NET Core is not complicated at all. We can have everything set up in literally minutes! So now you know a different way to enhance your applications and provide a better user experience. I hope you liked it!
References
https://docs.microsoft.com/en-us/aspnet/core/signalr/