Writeback in Power BI Using Power Apps!
Since we are aware that Power BI does not directly allow us for editing or writeback, we may use Power Apps to provide this feature. We learned how to integrate Power Apps on Power BI dashboard in the first part. In this section, we’ll create the same canvas app to utilize it as a writeback option in Power BI.
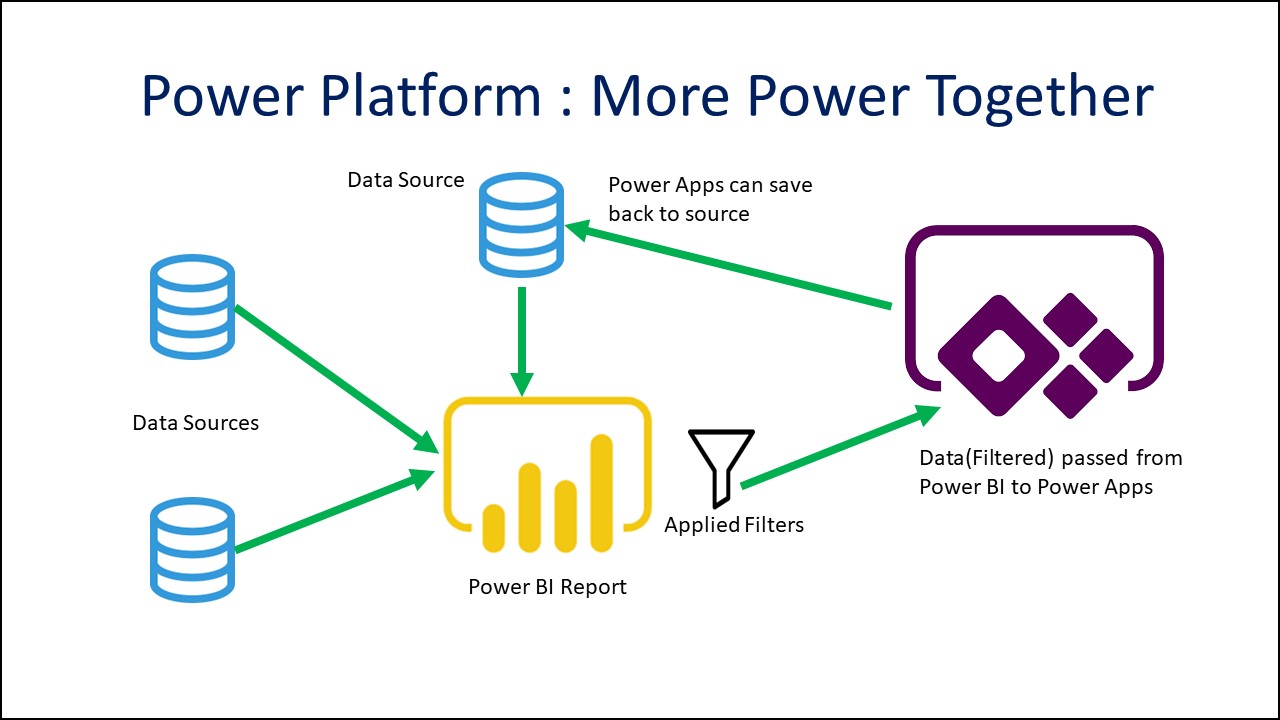
So how we can writeback?
Here are steps to achieve the same
- Go through the first part and integrate Power Apps on Power BI dashboard.
- Open the same app in Power Apps editor by going to make.powerapps.com
- Add same data source in Power App which we used in Power BI report.

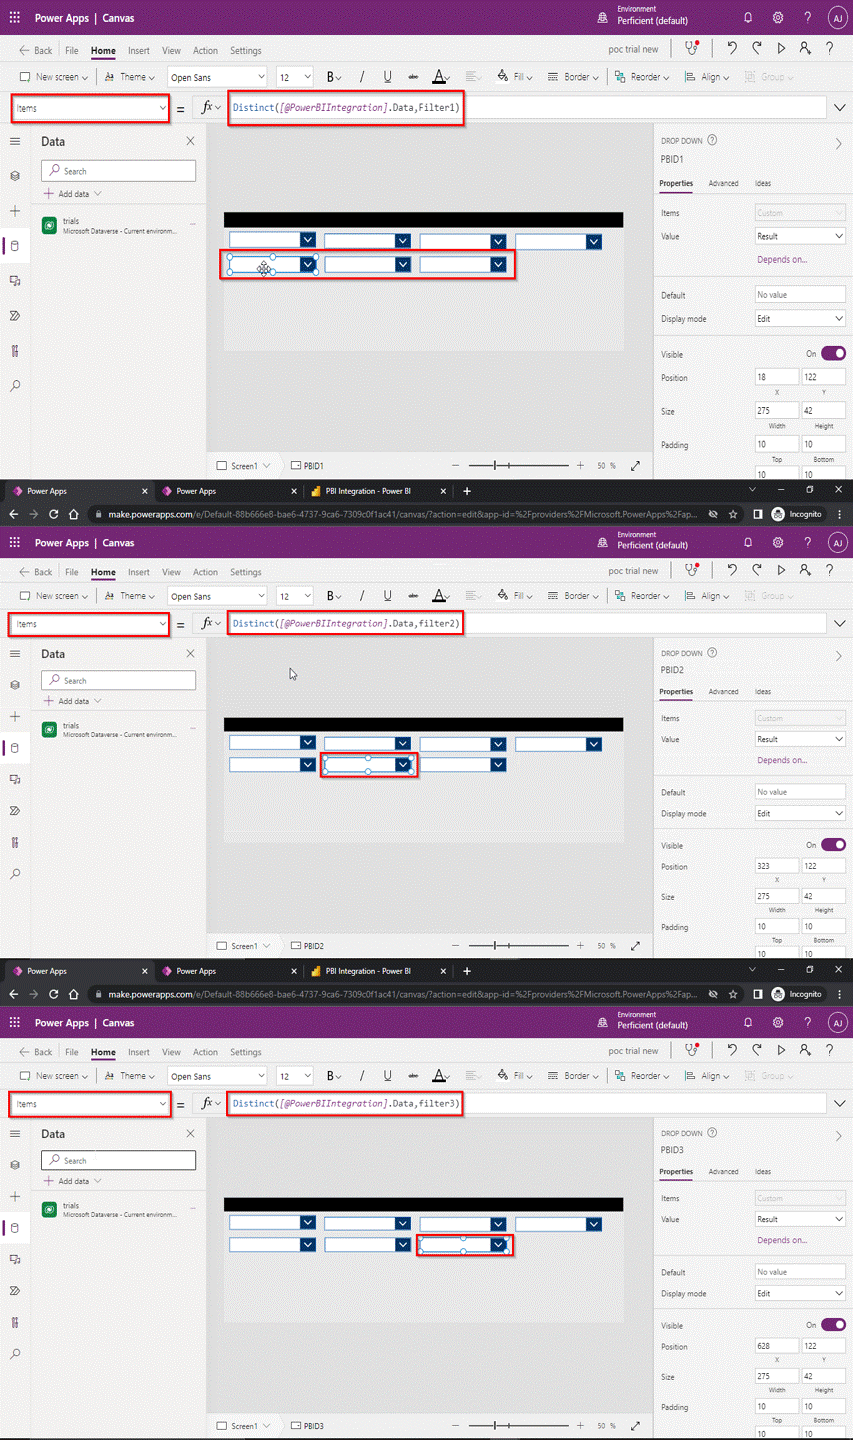
- Insert different dropdowns to get filter data from Power BI and from data source. Set items property of PBI dropdown to the formula shown in the below GIF.
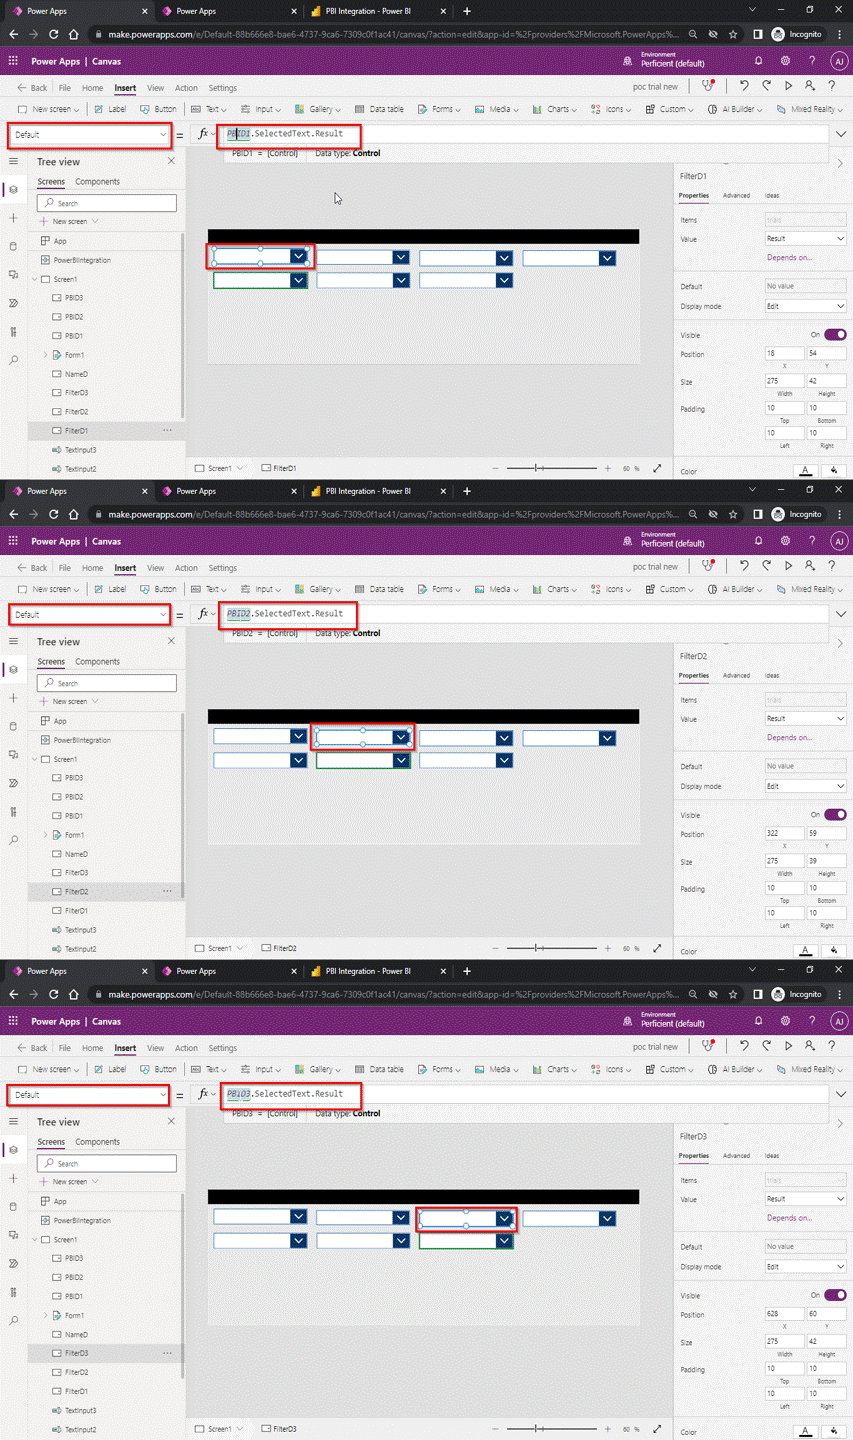
- Set default property of data source dropdown to the formula shown in GIF below, to get the default selected value from Power BI report.
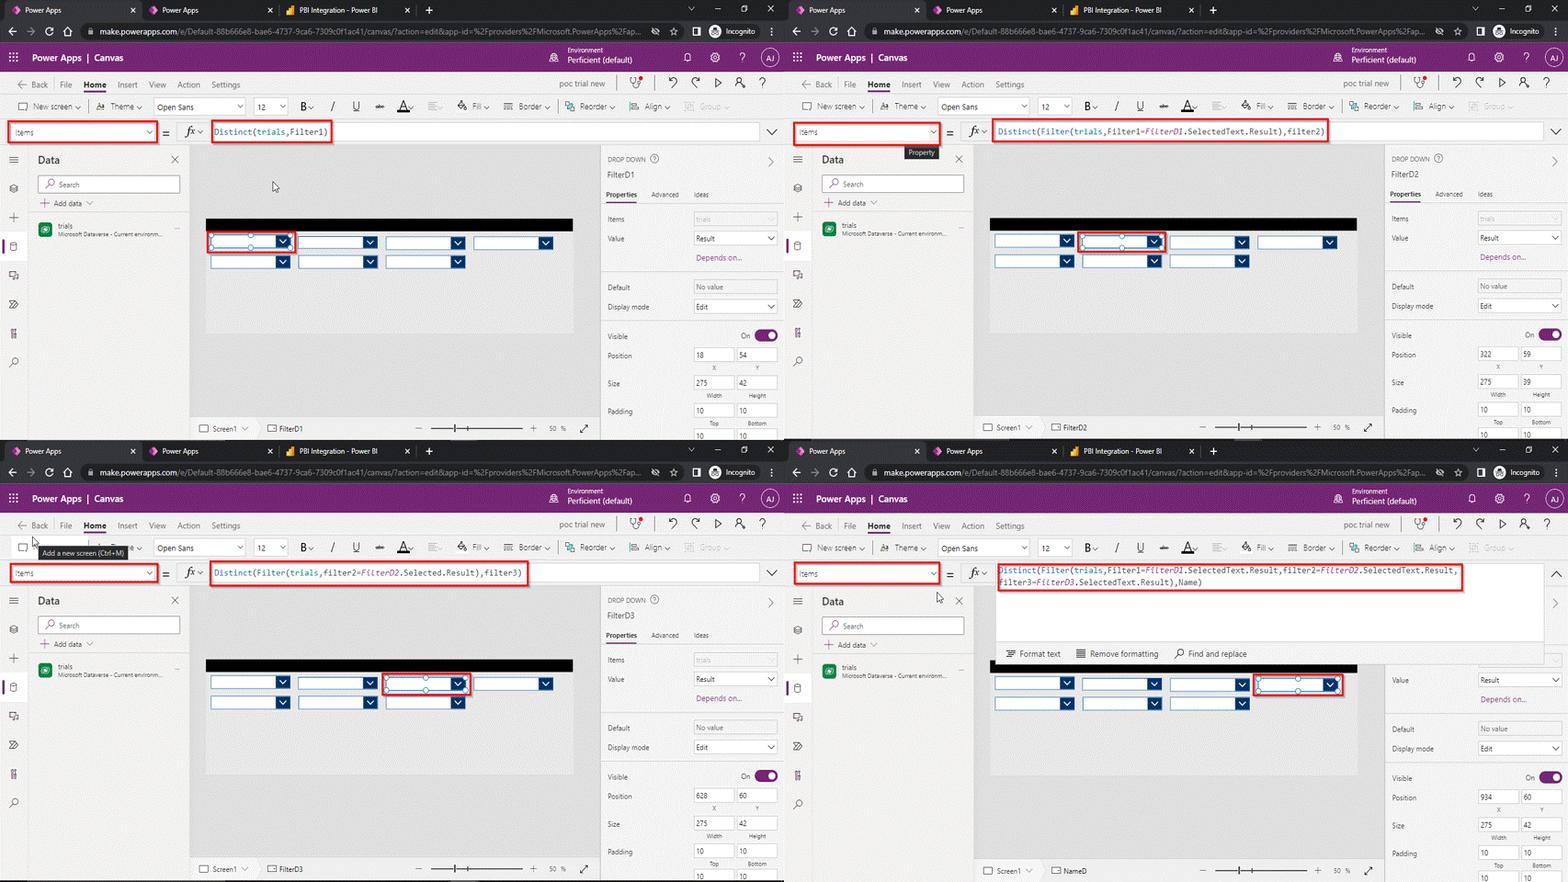
- Set the item property with the formula shown in GIF below to get the data from the data source and make the dropdown dependents.
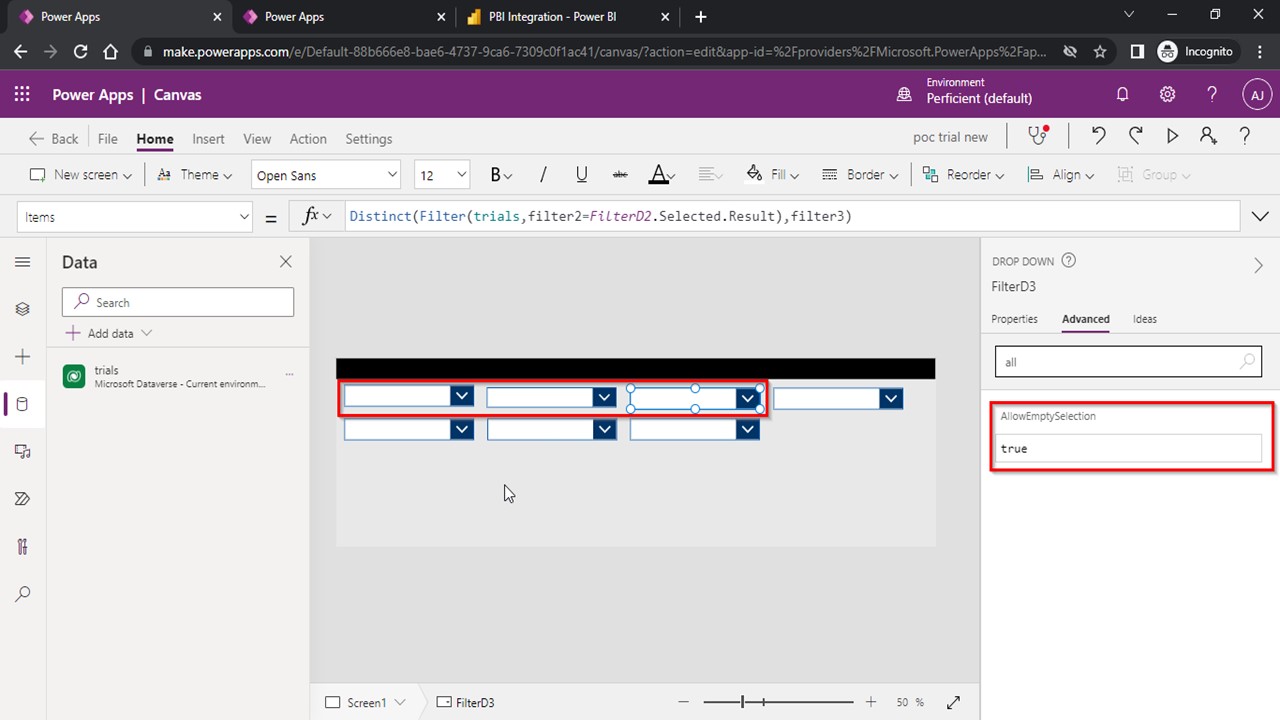
- Select the dropdowns shown in below image and set it’s allow empty selection property to true.
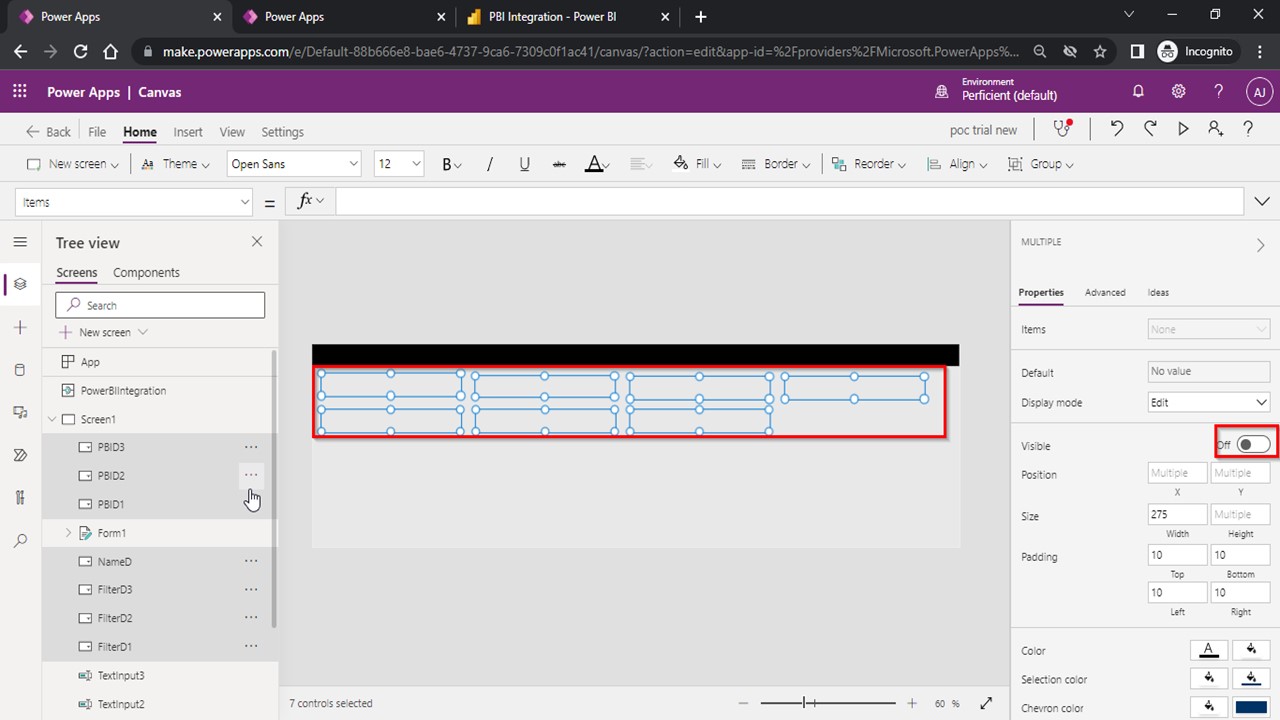
- Select all the dropdowns and make visible property false (Optional as per requirement)
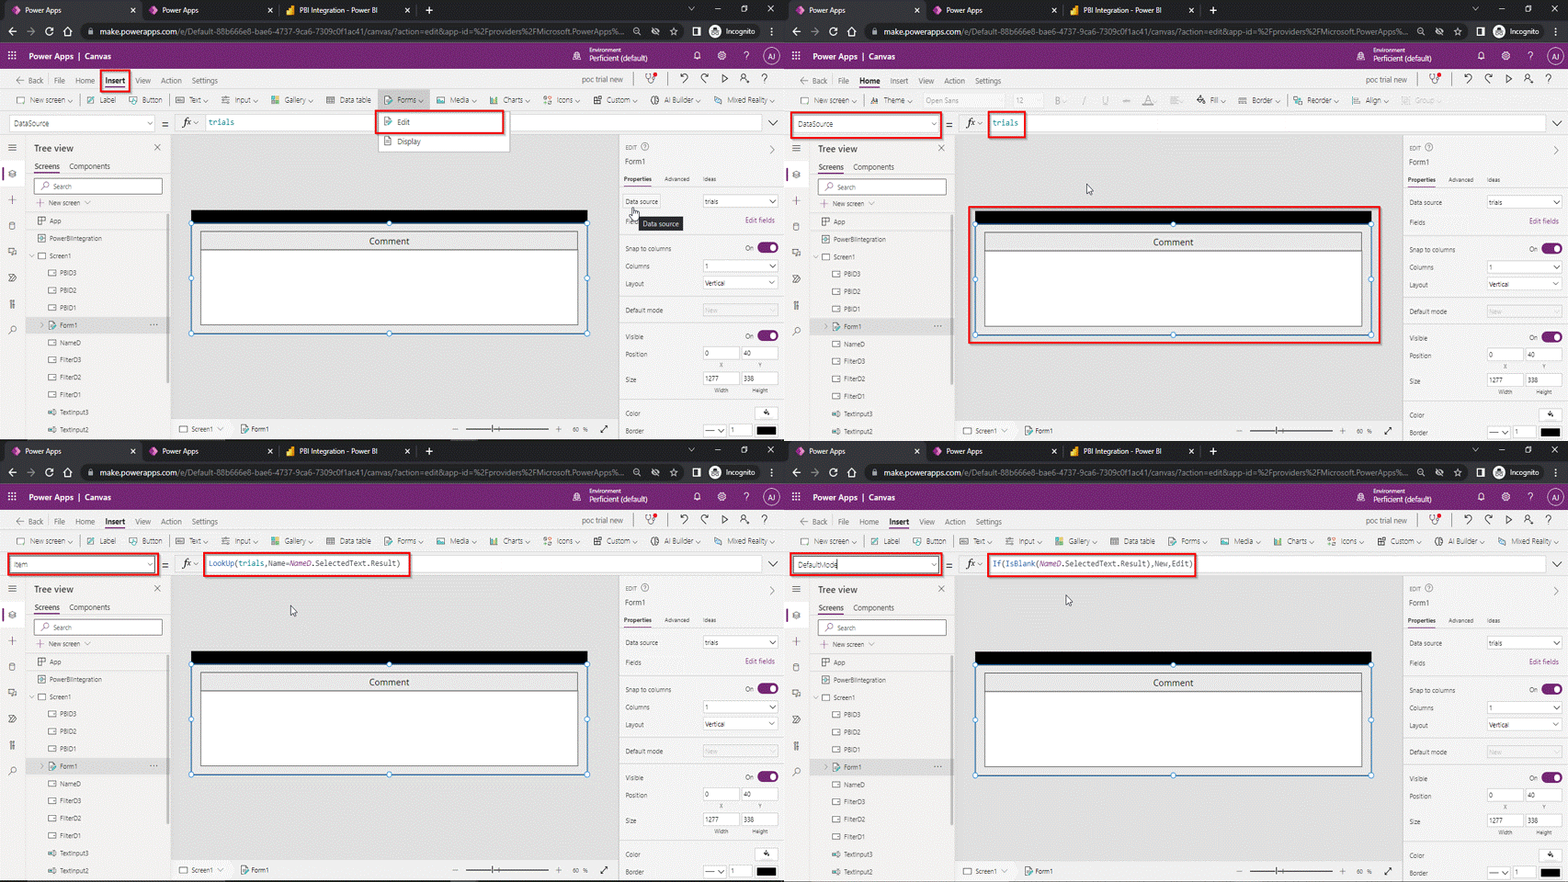
- Insert edit form on screen and configure it as shown in the below GIF.
- Save and publish the app, now the app is ready. Open the Power bi report and use the app for writeback in the power bi.
Read More:
The integration of Power Apps on Power BI dashboards blog series continues with this second post. We learned how to integrate Power Apps on a Power BI dashboard in the first section. This section demonstrated how to create same Power Apps for use as writeback in a Power BI dashboard. We’ll go over how to alter the Power Apps’ visuals and data fields provided to the app in the next section.


Informative Article Ankit!!