
Optimizely is a leading digital experience commerce platform with more out-of-the-box B2B commerce capabilities for providing customization based on clients’ specific needs.
During the integration of Optimizely B2B Commerce for one of our clients, we ran into a scenario where there was a need to extend the Optimizely B2B Commerce admin console. Optimizely has a restriction over the B2B commerce admin console regarding the customization of the default admin page. However, we can build the extension/custom page inside the Optimizely B2B commerce admin console.
Below are the steps to add a new page in the Optimizely B2B commerce admin console.
Step 1: Create a view (CSHTML) page in the InsiteCommerce.Web project.
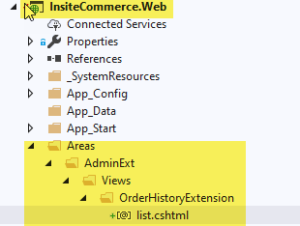
You can follow the folder structure as defined in your project. I tried to follow the same structure as other admin pages follow, “Area/AdminExt/Views.”
Step 2: Add “Insite.Admin” reference to your extension project (library).

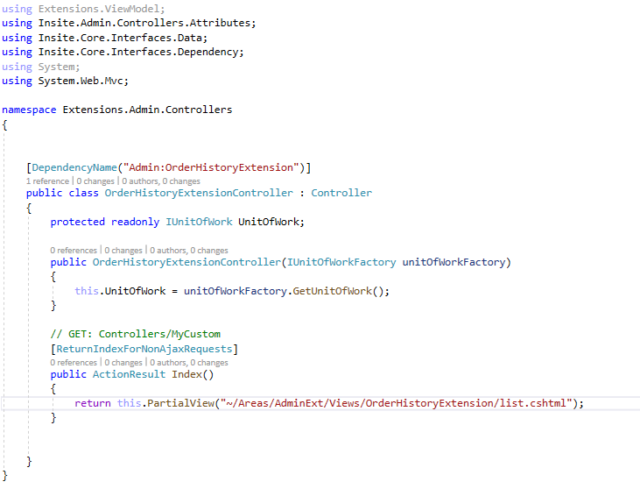
Step 3: Create a “controller class” in the extension project/library and follow the naming convention. In my case, I am trying to create an extension page for the table, “Order History Extension.”

Step 4: Add the dependency name attribute to a controller class.

Note: Adding a dependency name attribute will define the URL pattern for the Admin console page. In my case, the URL for my order history page will be “https://domainname/admin/OrderHistoryExtension.”
Step 5: Create an entry on “AdminConsoleMenuExtensions.json”. Adding the entry in this file will create a link into the Admin Menu/Navigation panel.

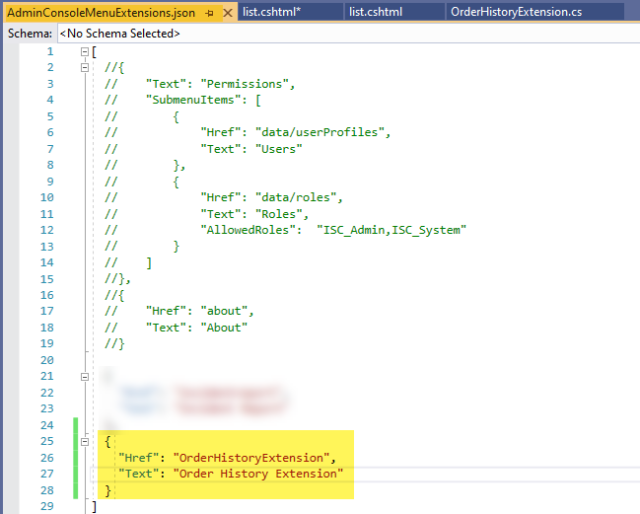
Note: The value in the “Href” needs to match with the dependency name attribute in step four.
Step 6: Define the “index” method and add the attribute “ReturnIndexForNonAjaxRequests” and return the partial view. The purpose of this attribute is to render the custom page inside the Insite Admin master layout.
Once all of the above steps are completed, you’ll do the following:
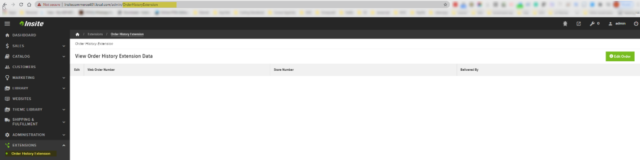
- Log in to the admin console.
- On the “admin left navigation menu,” you will see the extension menu.
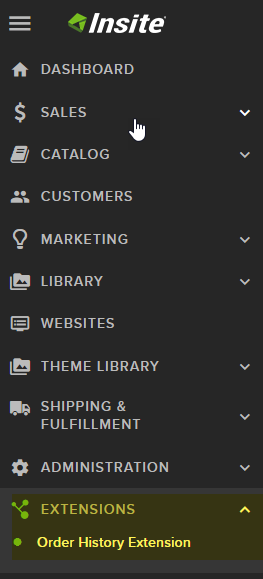
- Click on the “Order History Extension” link, and on the right-hand side, you will see the OrderHistoryExtension list view.
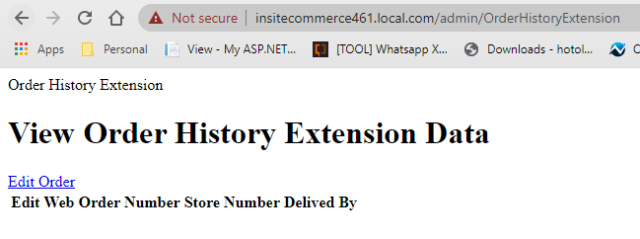
Note: Attribute “[ReturnIndexForNonAjaxRequests]” is required for method define on the controller. If attribute [ReturnIndexForNonAjaxRequests] is missing from the controller method then the custom page will look as shown in the below screenshot.
Once the above is completed, you’ll pull the data from your custom table either using the standard model view controller (MVC) code or by implementing the standard REST API and AngularJS. I’ve used seed/dummy data and display by using the MVC code in this example.
- Created the “view model and named it “OrderHistoryExtensionView.”
- Then, added the property “OrderNumber,StoreNumber,DeliveredBy.”
- Next, added the seed data and returned it as an object model when returning the partial view.
- Refer to the below code snippet
Refer to the below code snippet which I have created to demonstrate to show data on the custom page we have created under the Optimizely B2B commerce admin console :
OrderHistoryController.cs

You can view the “List.cshml” view below:

Below is the admin view:

All the above steps will work on the Optimizely B2B Commerce SDK framework without depending on the Optimizely support team. to learn more about our extensive Optimizely expertise and strong partnership.