
Alongside Node.js, we need to have node-sass installed as well so that we can compile scss files.
Here is how you can easily do that in the Alloy Demo project.
First, we need to create these three files: webpack.config.js, package.json and babel.config.json place it in /Static the folder:
- webpack.config.js is the webpack configuration file where we define the entry point, loaders, and libraries.
- package.json – build/run configurations and used libraries.
- babel.config.json – configuration file for Babel JS options. In this case, we are configuring what version to use in the project.
Create app.js file and place it in /Static/js folder:
- app.js – This is the main JS file, the entry point for all scripts.
Create two folders (empty for now) under the /Static folder : dist and scss.
Edit and add these lines to the webpack.config.js.
const path = require('path');
const fs = require("fs");
const webpack = require("webpack");
const { CleanWebpackPlugin } = require('clean-webpack-plugin');

module.exports = {
    entry: './js/app.js',
    output: {
        path: path.resolve(__dirname, './dist'),
        filename: 'alloy.bundle.js'
    },
    //watch: true, // this line will enable watcher for the js and scss changes (real time)
    module: {
        rules: [
            {
                test: /\.css$/,
                use: ['style-loader', 'css-loader']
            },
            {
                test: /\.scss$/,
                use: ["style-loader", "css-loader", "sass-loader"]
            },
            {
                test: /\.js$/,
                exclude: /(node_modules|bower_components)/,
                use: ["babel-loader"]
            },
            {
                test: /\.(eot|gif|otf|png|svg|ttf|woff)(\?v=[0-9]\.[0-9]\.[0-9])?$/,
                use: ['file-loader']
            }
        ]
    },
    stats: {
        colors: true
    },
    devtool: 'source-map',
    plugins: [
        new CleanWebpackPlugin(),
        // jQuery globally
        new webpack.ProvidePlugin({
            $: "jquery",
            jQuery: "jquery",
            "window.jQuery": "jquery"
        })
    ]
};
This is the standard webpack config settings:
- entry – entry point / main JS file
- output – path to the compiled JS file
- modules – list of the used modules. Here we have definitions for the CSS, js, and scss file loader. We need this to read js, css, and scss files. If you have images linked inside your scss/css, then the file-loader is needed too.
- Plugins – list of used plugins. We are using `CleanWebpackPlugin` to clean the previously compiled files before the new compile is started, and here we must define global variables for the jQuery library so that we can use the global variable
$in all the scripts that are defined and used viaapp.js.
Edit and add these lines to the package.json.
{
  "name": "static",
  "version": "1.0.0",
  "description": "",
  "main": "webpack.config.js",
  "dependencies": {
    "bootstrap": "^4.5.0",
    "bootstrap-slider": "^11.0.2",
    "bootstrap-validate": "^2.2.0",
    "jquery-match-height": "^0.7.2",
    "popper.js": "^1.16.1",
    "slick-carousel": "^1.8.1",
    "underscore": "^1.10.2"
  },
  "devDependencies": {
    "@babel/core": "^7.10.3",
    "@babel/preset-env": "^7.10.3",
    "axios": "^0.19.2",
    "babel-loader": "^8.1.0",
    "clean-webpack-plugin": "^3.0.0",
    "css-loader": "^3.6.0",
    "expose-loader": "^1.0.0",
    "file-loader": "^6.0.0",
    "jquery": "^3.5.1",
    "sass": "^1.26.9",
    "sass-loader": "^8.0.2",
    "style-loader": "^1.2.1",
    "webpack": "^4.43.0",
    "webpack-cli": "^3.3.12"
  },
  "scripts": {
    "dev": "webpack --mode development",
    "build": "webpack --mode production",
    "compile-scss": "node-sass ./scss/main.scss ./css/main.css --source-map true --source-map-contents sass --output-style compressed && node-sass ./scss/editor.scss ./css/editor.css --source-map true --source-map-contents sass --output-style compressed && node-sass ./scss/editmode.scss ./css/editmode.css --source-map true --source-map-contents sass --output-style compressed"
  },
  "keywords": [],
  "author": "Perficient",
  "license": "ISC"
} 
All these packages will be installed when you run npm install in the command line in /Static folder. Under the ‘scripts’ section, we have three build/run options:
- dev – compile js files in development mode; use
npm run devin the command line - build – compile js files in production mode; use
npm run buildin the command line - compile-scss – compile all scss files. We are using
node-sassfor compiling scss files with options/switches. In the Alloy project, we have three css files:main.css,editor.cssandeditmode.css; usenpm run compile-scssin the command line
Edit and add these lines to the babel.config.json.
{
  "presets": [
    "@babel/preset-env"
  ]
}
Edit and add these lines to the app.js.
"use strict";

import 'bootstrap';
Alloy projects use bootstrap and jQuery only, so we don’t have any additional JS code here.
Now because the Alloy project already contains JS and CSS files that are bundled in the Initialization module ( BundleConfig.cs ) we need to make some changes so that we can use those files with webpack:
- create
vendorfolder under the\Static\jsfolder and move all js files from the Alloy project there. - create
scssfolder under the\Staticfolder and move all files fromcssfolder to thescssfolder.- Create three new files
main.scss, andeditmode.scss. - Rename
editmode.cssto theeditmodealloy.css. 
- Add this code to the
main.scss@import"bootstrap","bootstrap-responsive","media","style";@import "bootstrap", "bootstrap-responsive", "media", "style";@import "bootstrap", "bootstrap-responsive", "media", "style"; - Add this code to the
editor.scss@import"bootstrap","style";@import "bootstrap", "style";@import "bootstrap", "style"; - Add this code to the
editmode.scss@import"editmodealloy";@import "editmodealloy";@import "editmodealloy";
- Create three new files
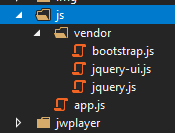
To check if we have done everything right, we can run these two commands in the command line in /Static folder: npm run dev and npm run compile-scss. If everything is OK, in the solution explorer (VS) you will have this file structure

Now we need to update the main template view – _Root.cshtml file.
<head>
      ...

      @*@Styles.Render("~/bundles/css")
      @Scripts.Render("~/bundles/js")*@

      <link rel="stylesheet" href="~/Static/css/main.css">
      @if (PageEditing.PageIsInEditMode)
      {
          <link rel="stylesheet" href="~/Static/css/editor.css">
      }

      ...

</head>
We need to comment (or delete) the bundle lines and add the link to the newly created css files. We added to check if the page is rendered in Edit mode so that we can load editor.css only when we edit the page.
<body>
     ...

     <script type="text/javascript" src="~/Static/dist/alloy.bundle.js"></script>
</body>
Add the link to the webpack generated js file.
And that’s it!
Additional note
If you want to webpack build and compile js and scss files when you build the project in VS, just add these lines in .csproj file.
<Target Name="CompileSass" AfterTargets="Build">
    <Message Text="Compiling Front-End assets" />
    <!-- always -->
    <Exec Command="npm run compile-scss" IgnoreExitCode="false" WorkingDirectory="$(SolutionDir)/AlloyDemo/Static" />
    <!-- local dev -->
    <Exec Command="npm run dev" Condition="'$(Configuration)' == 'Debug'" IgnoreExitCode="false" WorkingDirectory="$(SolutionDir)/AlloyDemo/Static" />
    <!-- release -->
    <Exec Command="npm run build" Condition="'$(Configuration)' == 'Release'" IgnoreExitCode="false" WorkingDirectory="$(SolutionDir)/AlloyDemo/Static" />
</Target>
Just replace AlloyDemo with the name of your project.