Since Microsoft Teams utilizes multiple services within Office 365 (i.e. Office 365 groups, Exchange, SharePoint and OneDrive), it can often incorporate a lot of the functionality from those services that you might not have thought possible. Microsoft Teams is all about productivity and teamwork, so after learning today’s Teams tip, you’ll find that it’s something you can’t live without. Gone will be the days of forwarding emails to your colleagues and having to manage the plethora of responses on the thread that eventually flood your inbox and get lost in the abyss. Instead, we’ll take a look at a handy way to manage your emails in Teams, so you can reference a single location and increase your productivity and organization in the process.
Not to mention, it only takes three simple steps:
Step 1: Open your channel in Teams
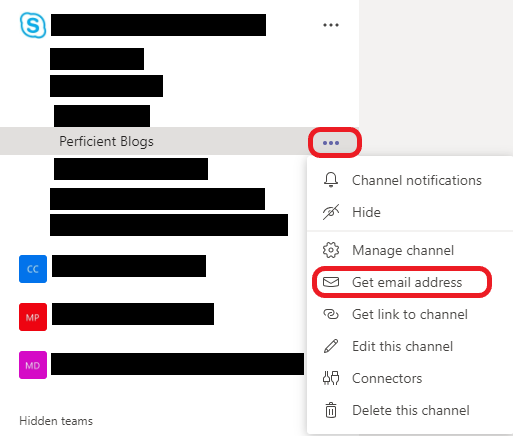
This one may seem obvious, but in order to send/forward emails to a team’s channel, you’ll need to know what the email address of that channel is! Easy enough, open up Teams and then find the Teams and channel you want to email. With that channel selected find the 3 dot ellipses and select the “Get email address” option.
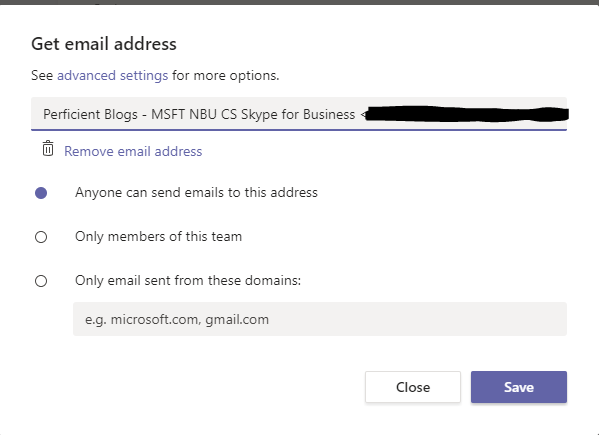
Step 2: Copy the email address for the channel
Now go ahead and copy that email address by selecting the “Copy” option. There are some additional “advanced settings” options for your to choose from as well if you’d like to lock down the sending of emails to that email address.
Step 3: Test it!
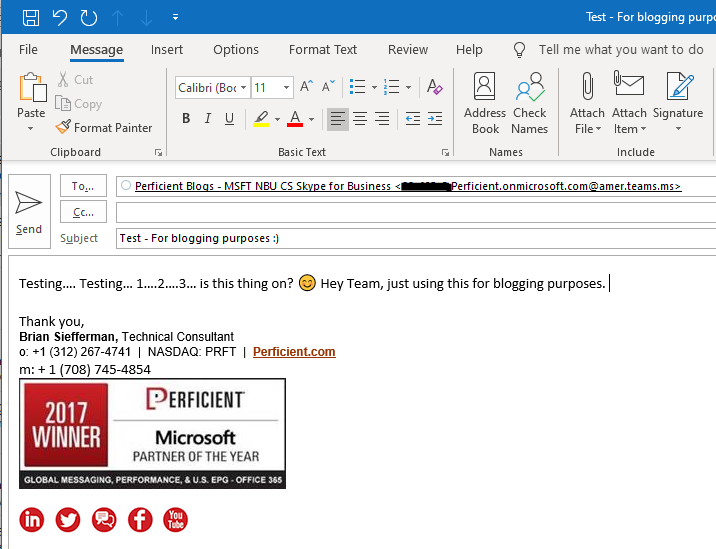
Time to test it out! Go ahead and open Outlook (or another email client of your choice) and send an email to the email address you just copied.
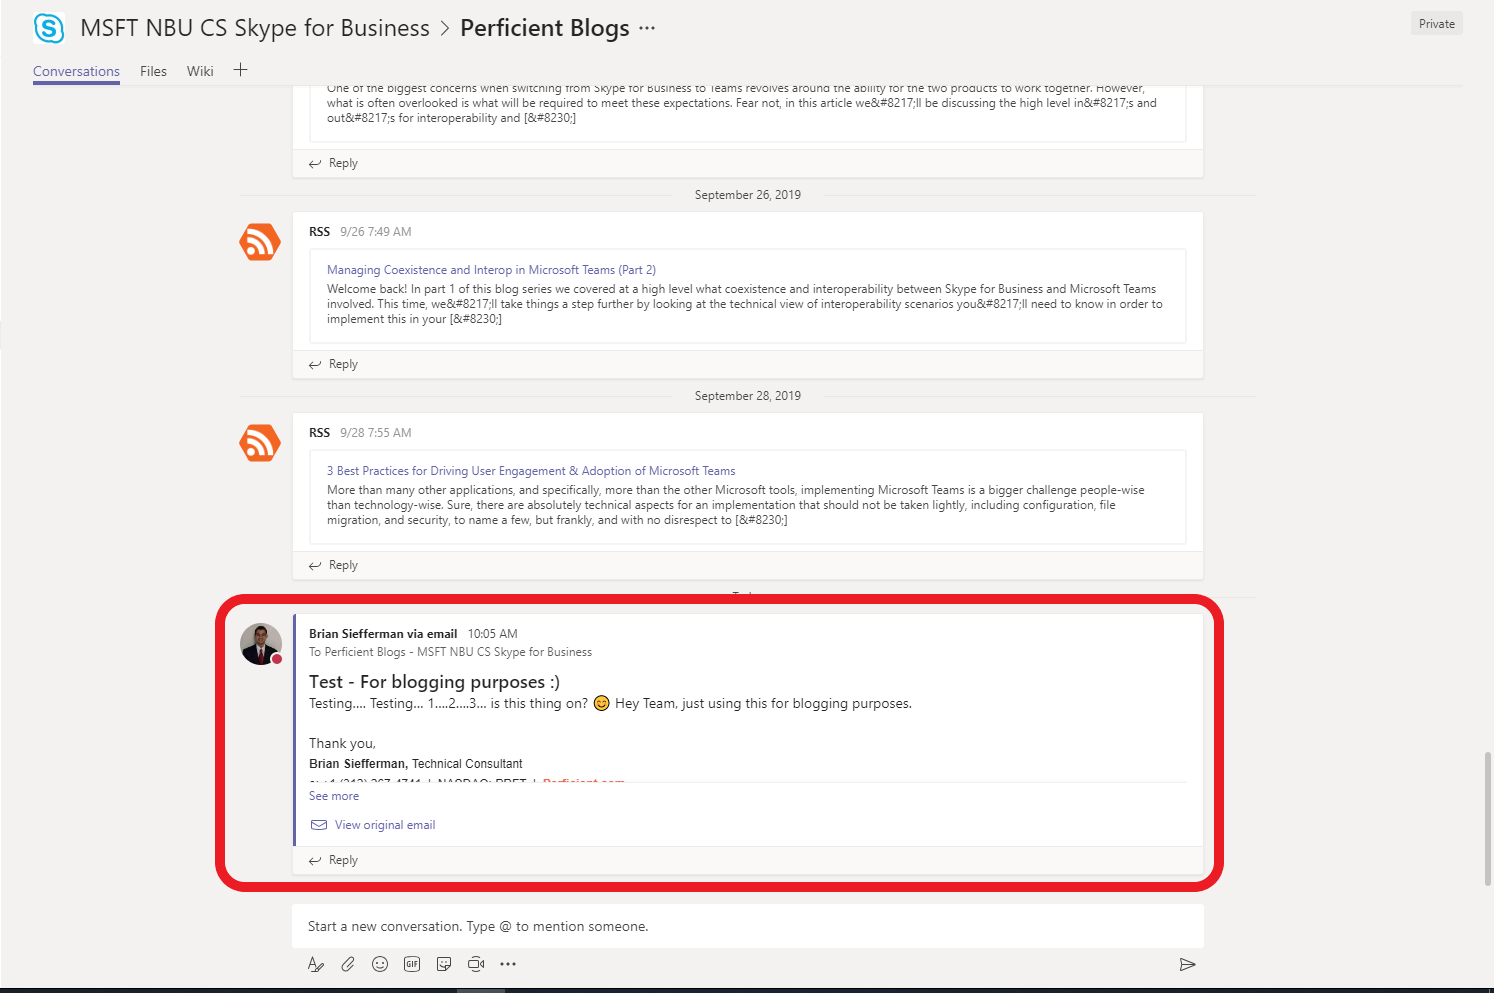
So, what does it look like on the Teams side of things? Well let’s hop back over to our Teams client and take a gander! Sure enough, we see the email appear within that channel!
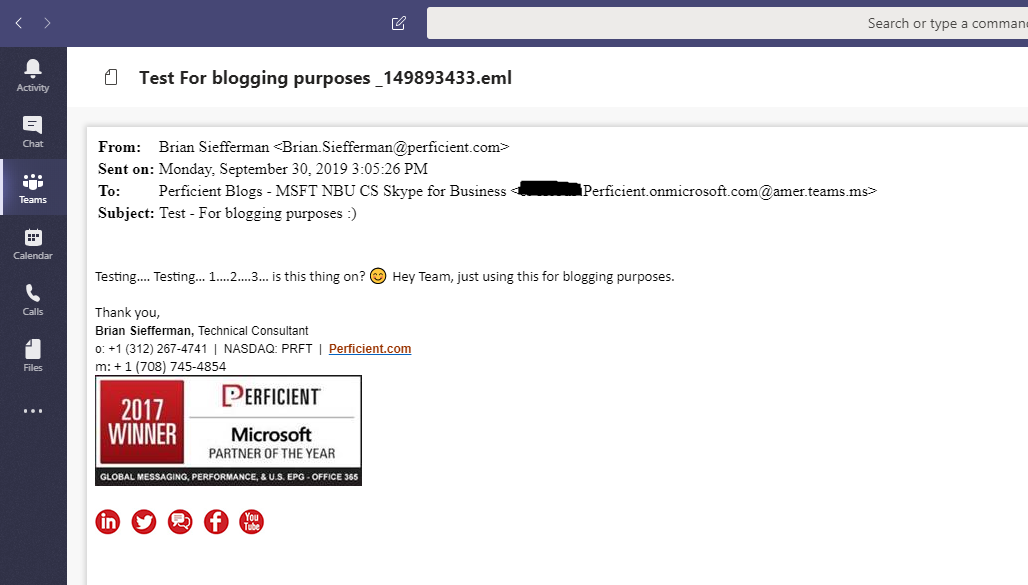
Additionally, if you go to the “Files” tab of that channel, you’ll see a folder called “Email Messages”. If you open that folder you’ll see an .eml file that you can open to view the email within Teams!
Teams Client View
.EML file view in Teams client
Lastly, what you may not know is that all of these emails will be available within the SharePoint site as well, which was created upon the creation of the channel. Within SharePoint this will be stored in the document library entitled “Documents” within a folder called “Emails”. Any attachments (i.e. photos, documents, etc.) will also be stored in the document library for the channel.
There you have it! 3 quick and easy steps to help you avoid email inbox hell, all while giving you a single location to manage your communications! Start using this process on your projects and you’ll have a clean inbox in no time 😉 Well okay… I admit that is pretty wishful thinking. Let’s go with a “cleaner” inbox 🙂 . Nevertheless, I hope you have found this quick blog post helpful and I encourage you to check back regularly, as I will be doing more of these quick tip blogs in the near future!
