Hopefully you all had a chance to check out my recent blog posting “Getting to know Oracle’s Oracle Data Integrator (ODI).” If you haven’t checked it out yet, I urge you to check it out. Well to continue on the topic of Oracle Data Integrator (ODI), I wanted to put together a few posts on showing how to build a simple interface, how to create an ODI package, how to create ODI load plans and scenarios, and how to schedule ODI load plans and scenarios. So in the next couple days, please be on the look out for these great posts. But let me get started on how to show you how to build a simple ODI interface that takes source data and loads it to its target, so let’s get started.
Before you can get started you need to make sure all your source and targets models have been added to ODI.
To add your source and target models you will need to locate model folder. In this example our model folder is called, “Source_and_Target_Data.”
Within your model folder you should have your source and target models. Now within this example, our source and target models will be Oracle DB. Once you have located your models you will need to import the DB table definitions. To do this, double click on the model.
Once the model is open you will want to select “Selective Reverse-Engineering” as this will allow you to bring in your source or target definitions.
Once you’re in “Selective Reverse-Engineering” tab, you will need to select the following check boxes, New Datastores, Existing Datastores and finally Objects to Reverse Engineer.
Once the following are checked you will see a list of tables coming from your model. Here you can select all your tables or just the specific one you want to work with. Once you determine which model you would want to import click on the Reverse Engineer button on the top left corner.
This will import your table definition.
For more detail information and introduction to ODI models visit, 5 Creating and Using Data Models and Datastores.
Now that you have imported your source and target definitions you can now move forward and create your ODI interface.
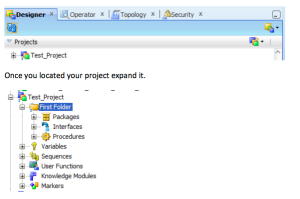
Now before you can get started to create your ODI interface you will need to make sure your project has already been created.
Once you located your project expand it.
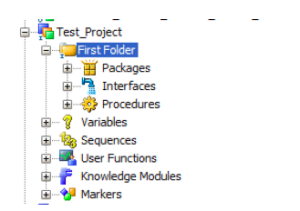
From there you will find the sub ODI components. Locate “Interfaces.” Highlight “Interfaces” and right mouse click. There you will have two options. Select “New Interface”
When you select “New Interface” this will allow you to create your ODI interface.
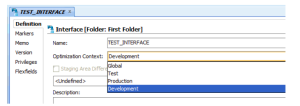
When creating your interface you will need to enter a name for your interface and select “Optimization Context.” Lastly, if selected, deselect the Staging Area Different From Target check box. Within this blog posting we will leave it undefined and have ODI decided while we add our source and target.
Now that you have added the ODI definition, you will need to click on Mapping tab on the lower left hand corner.
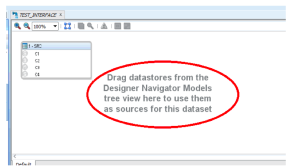
Now you have a blank slate in which you can add your source and target. First navigate to Models tab and locate your source and target datastores.
Once you have located your source datastore, drag it to the middle of your design canvas.
Once you have added your source datastore you will need to add your target datastore. You will want to drag this in the “<Temporary Target Datastore > section of the ODI designer canvas.
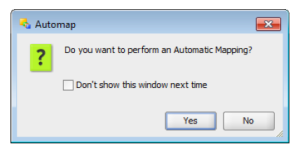
Once you drag your target, ODI it will ask you if you want to perform and automatic mapping from your source to target. If your source columns and target columns are named the same click YES as ODI will be able to map these columns automatically. If you do not want ODI to map your source to target columns click No.
After you clicked NO, select the “Quick Edit” tab
This will allow you to map your source to target columns add any lookup targets and look up conditions and etc. Here in this example we will simply be mapping 1 source column to the 1 target column.
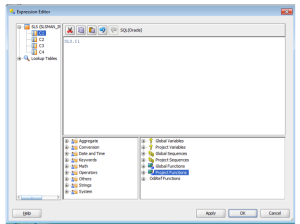
To map the source column to target column expand “Mappings” within the Quick Edit tab. Here you will map your source columns to its target column. To do this, select “Mapping Expression” for each target column. In this example we only have 1 target column.
Once you opened up the mapping expression, here you can select your source column in which you would want to populate your target column. In addition, you can also apply conversion rules to your source column before loading it to the target. Here in this example I will be only passing the source column as is.
Once you are done click the “Apply” and than “OK” button. Once you have mapped all your source columns to its target column, then you will need to click on the “Flow” tab.
While clicking the flow tab you will be able to update your source and target properties.
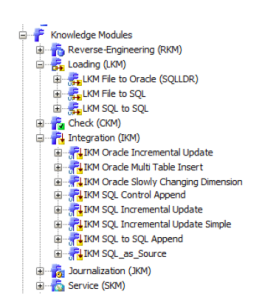
Now while updating your source and target properties you will need to make sure you have a few knowledge models (KM) available for loading your data. Knowledge Modules (KMs) are code templates. Each KM is dedicated to an individual task in the overall data integration process. The code in the KMs appears in nearly the form that it will be executed except that it includes Oracle Data Integrator (ODI) substitution methods enabling it to be used generically by many different integration jobs. The code that is generated and executed is derived from the declarative rules and metadata defined in the ODI Designer module[1].
Now in this ODI interface example, we will be using the KM LKM file to SQL for the source data and KM IKM SQL Control append for our target.
For more information on ODI knowledge models (KM) check out the following, Introduction to Knowledge Modules.
In addition, in this example I will be leaving in all the ODI default options for target properties.
Now that our settings for our source and target have been set we can now run our ODI interface. To run the ODI interface click the Execute button on the top left hand corner.
Once you click on the execute button the execution settings will appear. Here you will need to select the “Context. Logical Agent, and Log Level.”
Once you have selected the Context, Logical Agent, and Log Level you will need to click “Ok.” This will execute your ODI interface.
While clicking OK a pop up will appear letting you know your session has started.
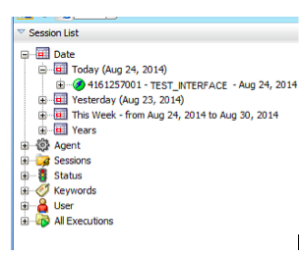
As the interface is extracting and loading data to its target you can view the progress of the load by click on the operator tab and viewing the session list.
Once the load is complete your interface within the session list will be highlighted green with a check mark.
Now to check to see if your source data has been loaded to its target within ODI you will need to click on the “Mapping” tab. Once done so locate your target and right click the mouse. You will have a few options. Either click on Data or Number of rows. This will show you either the data count or a few records you have loaded within your target.
Well hopefully this blog post helped you build your very own ODI interface, Stay tuned as I will be dropping a post on how to create an ODI package.
[1] http://docs.oracle.com/cd/E21764_01/integrate.1111/e12645/intro.htm












good stuff….
Hi,
Can you guide me how to ignore datatype/length issue records and send them as log. Load condition satisfied records into target. Means ODI job should success and send the error records as log