A metadata model is “a gathering of Meta information that includes both physical information and business information for one or more datasources and is the foundation for both future modelling and report development within an organization”.
Meta-model flexibility can be defined as the ability of a (Meta) model to:
- Easily expand and grow (to support other reporting needs) and
- Be extremely easy to use (when generating query or report requests).
In a business reporting environment, IBM Cognos Framework Manager is “the” metadata modeling tool that solves for this. Framework manager enables performance management on normalized and de-normalized relational data sources and a variety of OLAP data sources.
With only a little foresight and planning, a “framework manager model developer” can deliver large gains by creating models that grow with users and are easy to use, support and maintain.
So let’s “kick the tires”.
In Framework Manager, you work in the context of a “project”, which holds all of the “objects” that you organize for your users to use. To create a project:
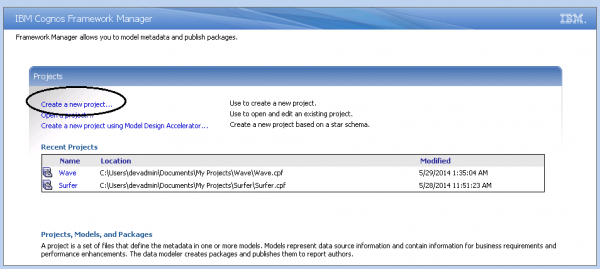
From the Welcome page, click Create a new project.
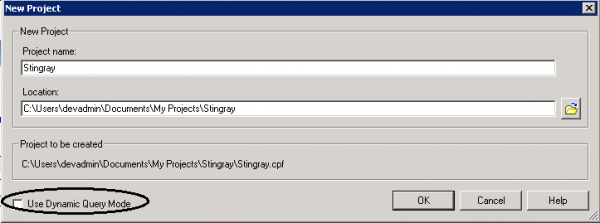
In the New Project page, specify a name and location for you project (mine is the “Stingray” project), and click OK.
Hint – if this is your first project with Framework Manager, clear the Use Dynamic Query Mode checkbox! – You’ll then be asked to select the design language for the project and click OK. The Metadata Wizard displays next where you can select an existing datasource, create a new one or skip this step entirely. A data source connection supplies the information that IBM Cognos BI needs to connect to a database. You can customize data source connections to meet the needs of users.
Let’s setup a new datasource, so, select “Data Sources” and click Next, then select New… You’ll see the “Welcome – New Data Source wizard” (again, click Next) and then specify a name and description for your datasource.
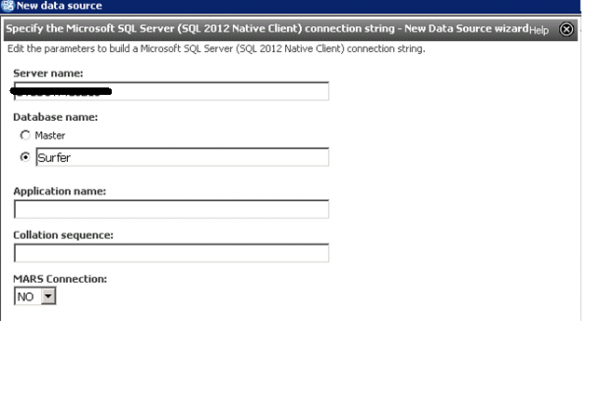
Click Next, then you specify your connection information (mine is a 2012 SQL database, so I selected “SQL 2012 Native Client”), then clicked Next:
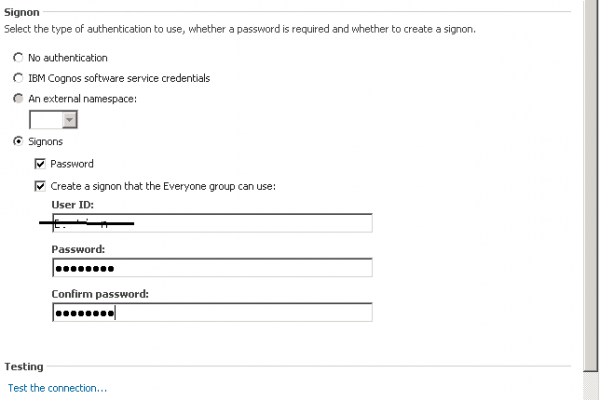
You’ll then provide the server name, database name (mine is named “Surfer”) and a user name and password that will be used to access the database:
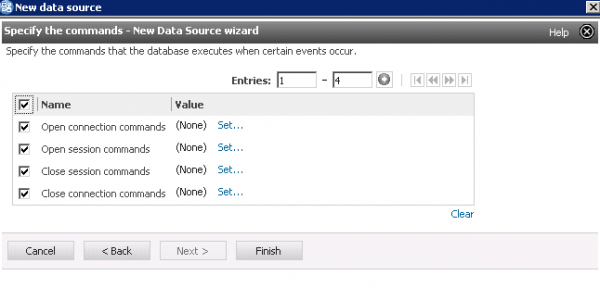
Before proceeding, always test your connection! After you’ve verified a “successful connection”, you can set the DB commands you want to allow and click Finish!
Success! We’ve got a datasource for our project:
Next, select the database objects you want to include in your project:
Click Next. The Generate Relationships dialog will be presented, for my project; I left the default selections (you can check the product documentation for specifics on each setting). Click Import:
Framework Manager will tell you when it completes the import processing and you can then click Finish.
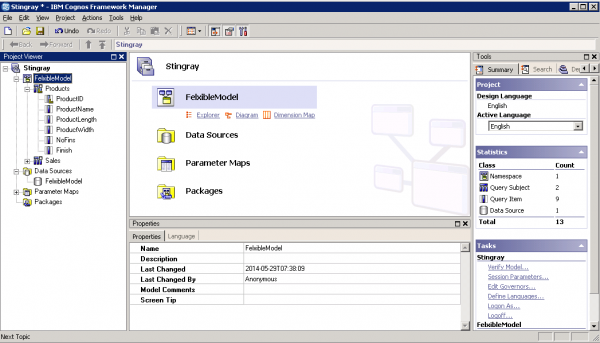
We now have a new project (Stingray) which includes a relational datasource. All projects are displayed in the project page, where you design, package, and publish project metadata:
If you’d like, you can add additional datasources to yourproject or just begin your modeling. Before starting though, you should understand proven practices around naming and namespaces and be familiar with the new Framework Manager feature, object validation — but you’ll have to wait for the next post for that (I’ll walk through the basic framework operational features as well and tell you all about my latest project involving IBM Cognos Framework Manager!).
Thanks for reading.
