With the new version of Office 365 on the Exchange 2013 platform, Microsoft really recommends using Autodiscover for client configuration and connectivity. There may be some instances during coexistence where Autodiscover cannot be changed/redirected. The following are the steps in order to gather and configure Outlook manually. This manual configuration is on a per user basis by obtaining the user’s ExchangeGUID using PowerShell.
- Open the Windows Azure Active Directory Module for Windows PowerShell and log into your tenant.
- Type the following to retrieve a detailed output of all users (managed and federated) created or synchronized.
Get-Recipient –ResultSize unlimited | Export-CSV C:\MBXNames.csv
- Open the MBXNames.csv. Search for the user in the CSV and scroll over to the column titled ExchangeGUID.
- Copy the ExchangeGUID.

Open Mail within Control Panel
Create a New Outlook profile
On the Account Setup page, select “Manual setup or additional server types”. Click Next.
Select the default service “Microsoft Exchange Server or compatible service”. Click Next.
Next to Server, past the ExchangeGuid previously copied. Add your domain at the end.
Type in the Username (UPN). Click on More Settings.

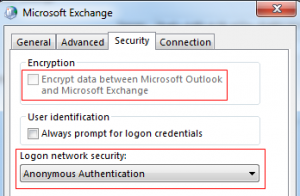
Click on the Security tab. De-select “Encrypt data between Microsoft Outlook and Microsoft Exchange”.
Change the “Logon network security” from Negotiate to Anonymous. (Outlook 2010 SP1 must be installed in order to select Anonymous.)

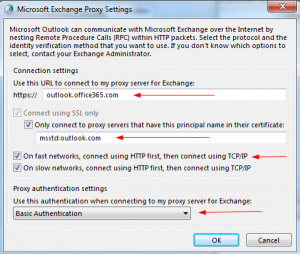
Click on the Connection tab. Select “Connect to Microsoft Exchange using HTTP”. Click on Exchange Proxy Settings.

Under Connection settings, type the following:
Proxy URL https:// > outlook.office365.com
Proxy Connection > msstd:outlook.com
Select “On fast networks…”
Change Proxy Authentication settings to Basic
Click OK. Click Apply/Ok. Click Next

Click Next.

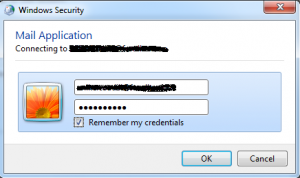
In the Windows Security pop-up, type in the user’s credentials (email address/Password). Select “Remember my credentials”. Click Ok.

Click on Finish.
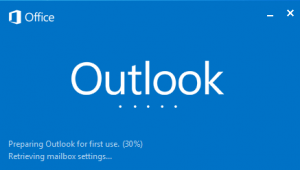
Launch Outlook and away you go!


Thanks very much! This information was perfect, unlike a ton of outdated articles telling you to go to OWA, click the question mark then “About” (which no longer exists) to retrieve the manual server setup. A workaround I used in the past was to set up the external autodiscover record then modify the workstation DNS to discover the 365 server. However, this works perfectly! Thanks again.
Thank you very much for posting this, I’ve been looking for this solution for couple of days now
My “Get-Recipient command is not recognized as the name of a cmdlet,… I did copy/past from your article. Went to Step 8 as in http://theucguy.net/connect-office-365-using-powershell/ and Get-Recipient is not part of the msocmdlets. Is an import of some Exchange Server 2013 powershell module required?.I’m missing something…
In order to use the Exchange Online cmdlts, such as Get-Recipient, you will need to create a remote PowerShell session in order to connect to Exchange Online. The following is a snippet from a login script I personally use.
$user = “user@domain.onmicrosoft.com”
# This will pop-up a dialog and request your password
$cred = Get-Credential -Credential $user
#Imports the Local Microsoft Online PowerShell Module Cmdlets and Connect to O365 Online
Import-Module MSOnline
Connect-MsolService -Credential $cred
#Establishes a Remote PowerShell Session to Exchange Online
$msoExchangeURL = “https://ps.outlook.com/powershell/”
$session = New-PSSession -ConfigurationName Microsoft.Exchange -ConnectionUri $msoExchangeURL -Credential $cred -Authentication Basic -AllowRedirection
Import-PSSession $session
Thanks you for this, saved my life when we had trouble with amending our DNS and could not get autodiscover working
Thank you! This was exactly what I was looking for. 🙂