
 The Content Editor in Sitecore contains the ability to type a placeholder name when adding a component to presentation details. But was the correct name ‘three-left-col’ or ‘three-col-left’ or ‘three-left-column’? To see the list of available placeholders, we have to close the add window, navigate the content tree to find the placeholders, then go back to add the component. It would be much easier if the input box was a dropdown list of the placeholders available on this site.
Below is an example of how to do this in any version of Sitecore 8. Be sure to follow these five steps and use my code as an example. Your version of Sitecore 8 may be slightly different.
Step 1: Register Placeholders
- Create definition items for your placeholders in Sitecore.
- The default path in the content tree is ‘/sitecore/Layout/Placeholder Settings’.

Step 2: Decompile Sitecore Assemblies
- Install JetBrains dotPeek. You only need the standalone version. Make sure to check the boxes to integrate with Visual Studio.
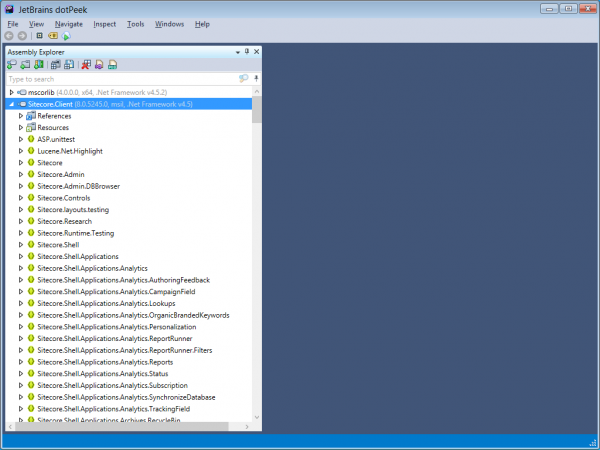
- In the Assembly Explorer, open the ‘Sitecore.Client.dll’ assembly. It is typically located in c:\inetpub\wwwroot\<YourProject>\Website\bin. It will get added to the list of assemblies in the Explorer window.

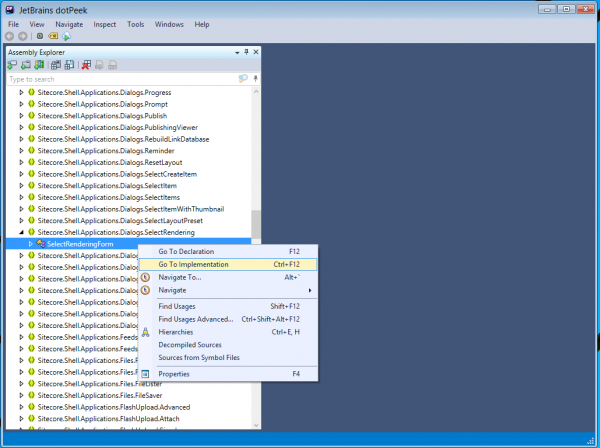
- Expand the node for ‘Sitecore.Client’ and find ‘Sitecore.Shell.Applications.Dialogs.SelectRendering’.
- Expand the node for ‘Sitecore.Shell.Applications.Dialogs.SelectRendering’. Right click on ‘SelectRenderingForm’ and choose ‘Go to Implementation’.
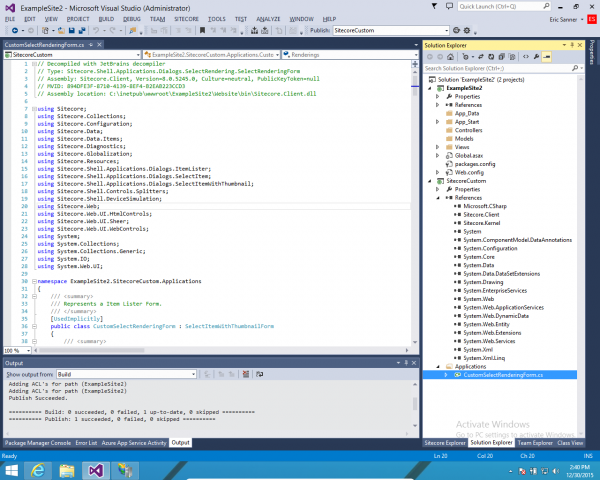
- The decompiled code is displayed. Make sure that ‘Show Compiler Generated Code’ is off (or you will get compile errors later). Copy and paste this code and save as a file named ‘CustomSelectRenderingForm.cs’.


Step 3: Add Sitecore Assemblies To Your Project
- Create a folder named ‘Libraries’ in the root folder of your solution.
- Copy ‘Sitecore.Kernel.dll’ and ‘Sitecore.Client.dll’ from c:\inetpub\wwwroot\<YourProject>\Website\bin to the ‘Libraries’ folder.
Step 4: Create A Custom Sitecore Project
- Create a new project in your solution. I used the name ‘SitecoreCustom’. It is an empty .NET web application.
- Remove the web.config from this project so you don’t overwrite Sitecore’s web.config when you publish.
- Create a folder named ‘Applications’.
- Add the ‘CustomSelectRenderingForm.cs’ file to the ‘Applications’ folder and include this file in the project.
- Add project references to ‘Sitecore.Client.dll’ and ‘Sitecore.Kernel.dll’ in your ‘Libraries’ folder.
- Make the following changes to the ‘CustomSelectRenderingForm.cs’.
- Change the namespace to match your project.
namespace Sitecore.Shell.Applications.Dialogs.SelectRendering
namespace ExampleSite2.SitecoreCustom.Applications
- Rename the class to ‘CustomSelectRenderingForm’.
public class SelectRenderingForm : SelectItemWithThumbnailForm
public class CustomSelectRenderingForm : SelectItemWithThumbnailForm
- Add the ‘Listbox Placeholders’ variable with get/set properties between ‘PlaceholderNameBorder’ and ‘GetFilter’.
/// <summary> /// Gets or sets the listbox. /// </summary> /// /// <value> /// The listbox with placeholder keys. /// </value> [UsedImplicitly] protected Listbox Placeholders { get; set; } - Add the ‘LoadPlaceholders’ method at the bottom of the file.
/// <summary> /// Populates the placeholder listbox /// </summary> private void LoadPlaceholders() { string path = "/sitecore/layout/Placeholder Settings"; //add the default list item ListItem listItem = new ListItem(); this.Placeholders.Controls.Add(listItem); listItem.ID = Sitecore.Web.UI.HtmlControls.Control.GetUniqueID("ListItem"); listItem.Header = "Select a Placeholder"; listItem.Value = ""; Sitecore.Data.Database master = Sitecore.Configuration.Factory.GetDatabase("master"); Sitecore.Data.Items.Item root = master.GetItem(path); foreach (Sitecore.Data.Items.Item descendant in root.Axes.GetDescendants()) { if (descendant.Template.Key == "placeholder" && descendant["Placeholder Key"].ToLowerInvariant() != "__invisible") { listItem = new ListItem(); this.Placeholders.Controls.Add(listItem); listItem.ID = Sitecore.Web.UI.HtmlControls.Control.GetUniqueID("ListItem"); listItem.Header = descendant["Placeholder Key"].ToLowerInvariant(); listItem.Value = descendant["Placeholder Key"].ToLowerInvariant(); } } } - Adjust the ‘path’ variable to the correct placeholders path in your content tree.
- Call the ‘LoadPlaceholders’ method before the ‘SetOpenPropertiesState’ line at the end of the ‘OnLoad’ method.
this.LoadPlaceholders();
this.SetOpenPropertiesState(renderingOptions.SelectedItem);
- The ‘Placeholders’ variable is automatically bound to the element in the xaml UI because the variable name and the element ID are the same.
- Change the namespace to match your project.
- Compile and publish this project to the same location as your website. It will create ‘SitecoreCustom.dll’ in c:\inetpub\wwwroot\<YourProject>\Website\bin.

Step 5: Modify SelectRendering.xml
- Create the folder path ‘Applications\Dialogs\SelectRendering\’ inside c:\inetpub\wwwroot\<YourProject>\Website\sitecore\shell\Override.
- Create a folder named ‘debug’ inside c:\inetpub\wwwroot\<YourProject>\Website\sitecore\shell\Override.
- Copy c:\inetpub\wwwroot\<YourProject>\Website\sitecore\shell\Applications\Dialogs\SelectRendering\SelectRendering.xml to the ‘Override\Applications\Dialogs\SelectRendering’ folder.
- Make the following changes to ‘Override\Applications\Dialogs\SelectRendering\SelectRendering.xml’
- Change the ‘CodeBeside’ item. The first parameter is the FQN of the ‘CustomSelectRenderingForm.cs’ file (without the .cs extension). The second parameter is the name of the dll created by publishing the ‘SitecoreCustom’ project (without the .dll extension).
<CodeBeside Type="Sitecore.Shell.Applications.Dialogs.SelectRendering.SelectRenderingForm,Sitecore.Client"/>
<CodeBeside Type="ExampleSite2.SitecoreCustom.Applications.CustomSelectRenderingForm,SitecoreCustom"/>
- Change ‘GridPanel’ to 4 columns.
<GridPanel Columns="3" Width="100%">
<GridPanel Columns="4" Width="100%">
- Hide the ‘PlaceholderName’ edit box and removed widths.
<Edit ID="PlaceholderName" Name="PlaceholderName" GridPanel.Width="100%" class="scQuirksBoxModel" Width="100%" />
<Edit ID="PlaceholderName" Name="PlaceholderName" class="scQuirksBoxModel" Type="Hidden" />
- Add the ‘Placeholders’ listbox that updates the ‘PlaceholderName’ on change. Note the " inside the javascript call. Quotes must be the escaped inside another set of quotes in xml. Do not add ListboxItems in this xml file.
<Listbox ID="Placeholders" Name="Placeholders" SelectionMode="Single" GridPanel.Width="100%" onchange="javascript:document.getElementById("PlaceholderName").value = this.value;"> </Listbox>
- Change the ‘CodeBeside’ item. The first parameter is the FQN of the ‘CustomSelectRenderingForm.cs’ file (without the .cs extension). The second parameter is the name of the dll created by publishing the ‘SitecoreCustom’ project (without the .dll extension).
Using The Dropdown
- Open the Content Editor.
- Open an item.
- Click the ‘Presentation’ tab.
- Click ‘Details’.
- Edit either the ‘Shared Layout’ or the ‘Final Layout’.
- On the controls tab, click the ‘Add’ button.
- The placeholder input box has been replaced with a dropdown. The dropdown contains all of the placeholders registered on your site.


If you have problems and are still seeing the input box, stop IIS, wait, then start IIS. This causes Sitecore to trigger the app_start action and rebuild the view cache.
Download the source code