Google Cloud Pub/Sub is a fully managed messaging service on Google Cloud Platform, facilitating asynchronous communication between applications in real time.
Google Cloud Platform serves as the foundation for creating, enabling, and utilizing all Google Cloud services. This includes managing APIs, enabling billing, managing collaborators, and configuring permissions for Google Cloud resources.
Refer to Part 1 – Basic Concepts to get more clarity before implementing Pub/Sub.
Prerequisites for Setting up Pub/Sub on Google Cloud
- Create a Google account
- Set up a Cloud Console project
Let’s implement PUB/SUB
Step 1: Create a Project
- Navigate to the Manage Resources page in the Cloud Console.
- From the Select Organization drop-down list at the top of the page, select the organization in which you want to create a project. (This list does not appear for a free trial user)
- Click Create Project.
- Enter a project name in the New Project window and select a billing account as applicable. A project name can contain only letters, numbers, single quotes, hyphens, spaces, or exclamation points and must be between 4 and 30 characters.
- In the Location box, specify the parent organization or folder, which will act as the hierarchical parent of the new project.
- Once all details are entered, click Create.
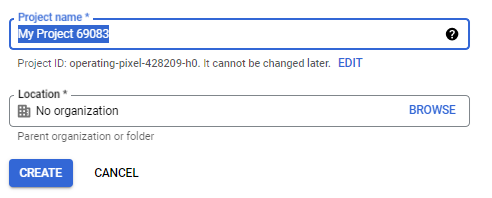
Step 2: Create a Topic
- Go to the Pub/Sub topics page in the Cloud Console.
- Click Create Topic.

- In the Topic ID field, provide a unique topic name, for example, My_NewTopic
- Click Save.
Leave the default values for the remaining options or set them as required, and then click Create.
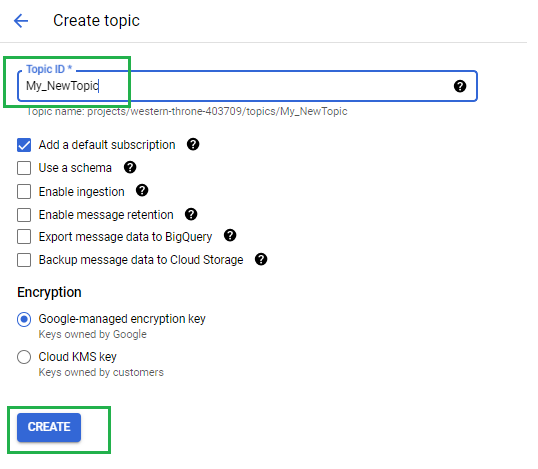
You see the success message: ‘A new topic and subscription have been created successfully’.
That’s it—you’ve just created a Pub/Sub topic!

Step 3: Add a Subscription
Now, create a subscription on the previously created topic
- Once a Pub/Sub topic is created, add a subscriber to this. Click: Create subscription
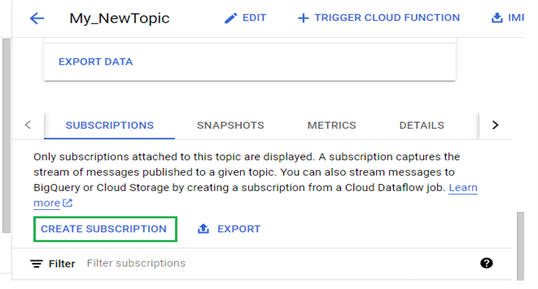
- Display the menu for the topic you just created and click New Subscription.
- Type a name for the subscription, such as My_NewTopic-Sub.
- Leave the delivery type as Pull.
- Select 7 Days for Message retention duration.
- Click Create
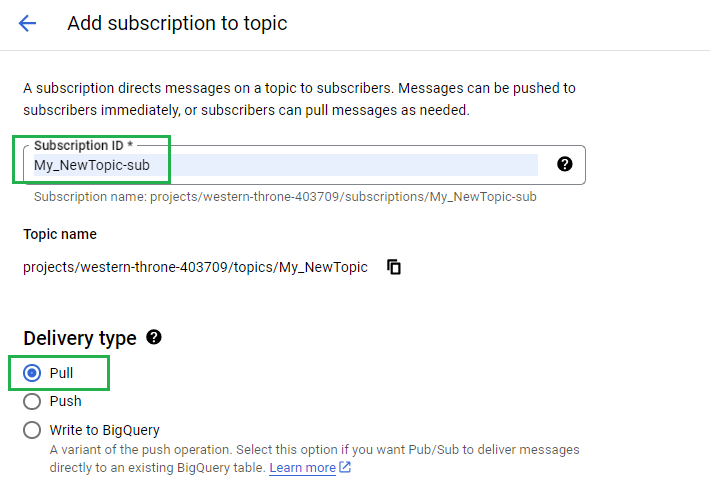
You see the success message: ‘Subscription successfully added’.
You have just created a topic called My_NewTopic and an associated default subscription, My_NewTopic-sub

Step 4: Publish a Message on the Topic
To publish a message on the topic:
- Go to the Topic details page for the topic you just created.
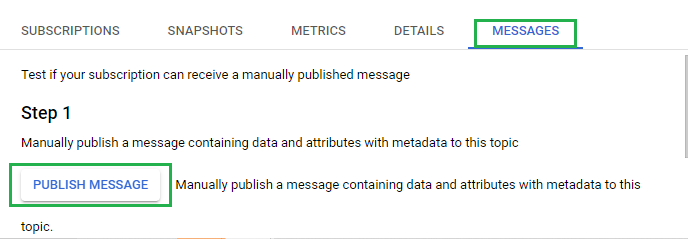
- Click the Messages tab near the bottom of the page, then click Publish Message.
- Enter a suitable message in the Message.
- You can Add attributes as needed, in terms of parameter -value pair, such as Job-id = 1
- Click Publish.
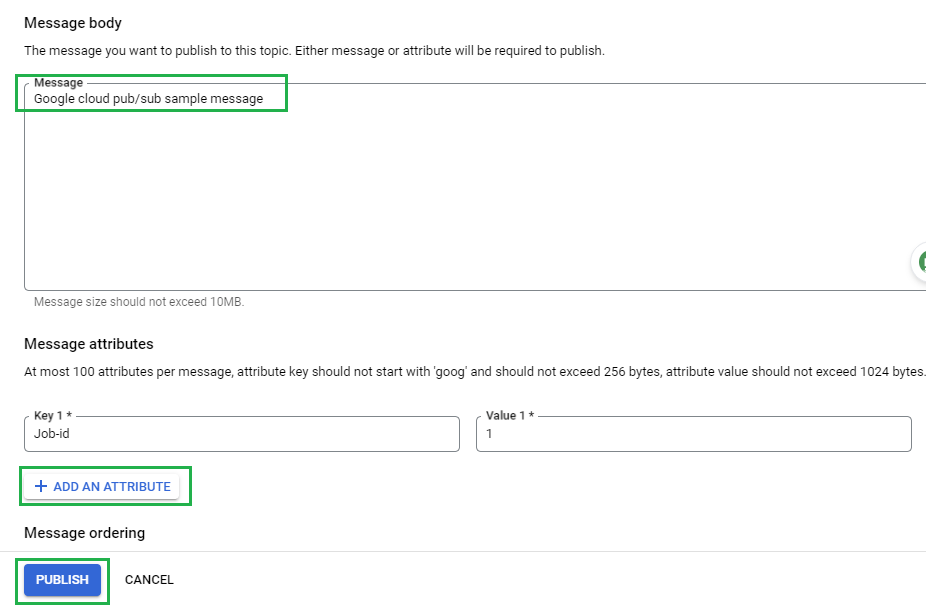
Now, you have successfully published the message.
You see the success message: ‘Message published’.
Step 5: Pull a message from Subscription
- In the Cloud Console, go to the Pub/Sub subscriptions page.
- Click the subscription ID.
- In the Subscription details page, click View messages.
- Click Pull.
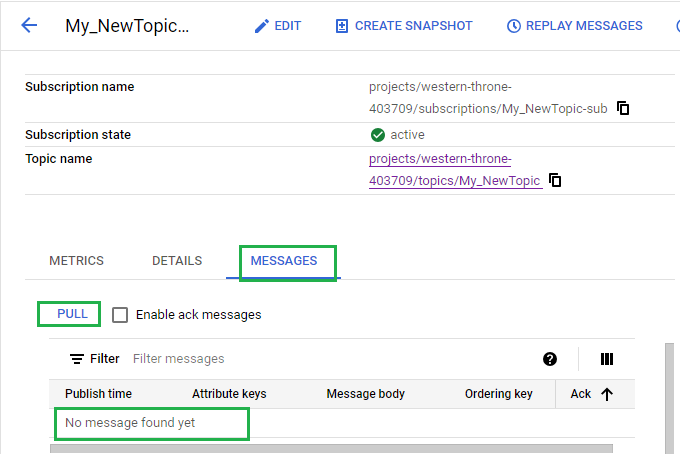
After pulling the message, you will see the published message details on the page.
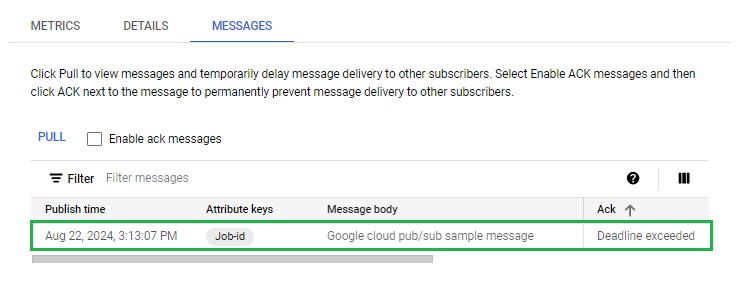
In essence, Google Cloud Pub/Sub streamlines the establishment and setup of managed message brokers, providing capabilities such as topic organization for data streams and versatile delivery options, including publish and pull methods.
Let’s do some hands-on here.


Thank you for sharing good information.