
Webpack is an amazing bundler for JavaScript and, with the correct loader, it can also transform CSS, HTML, and other assets. When a new AEM project is created via the AEM Project Archetype and the front-end module is set to general, Adobe provides a Webpack configuration to generate the project’s client libraries.
Introducing Vite
Vite is a new build tool that has recently come onto the scene. You can check the NPM trends here.
Compared to Webpack,
- Vite provides significantly faster build times and hot reloading during development.
- Vite utilizes Rollup. Rollup generates small bundles by utilizing optimizations like tree shaking, ES6 modules, scope hoisting, minification, code splitting, and a plugin ecosystem.
Avoid Configuration Challenges With Vite
If you have any experience with Webpack, you know the challenges of configuring different loaders to preprocess your files. Many of these configurations are unnecessary with Vite. Vite supports TypeScript out of the box. Vite provides built-in support for .scss, .sass, .less, .styl, and .stylus files. There is no need to install Vite-specific plugins for them. If the project contains a valid PostCSS configuration, it will automatically apply to all imported CSS. It is truly a game-changer.
Project “Jete”
“Vite” comes from the French word for “fast”. In music, the term “Vite” refers to playing at a quickened pace. For the following tutorial, I have chosen the music term “Jete” for the name of our project. “Jete” refers to a bowing technique in which the player is instructed to let the bow bounce or jump off the strings. Let us take a cue from this musical term and “bounce” into our tutorial.
Migrating From Webpack to Vite Tutorial
Create an AEM Project via the AEM Project Archetype:
mvn -B archetype:generate -D archetypeGroupId=com.adobe.aem -D archetypeArtifactId=aem-project-archetype -D archetypeVersion=49 -D aemVersion=cloud -D appTitle="Jete" -D appId="jete" -D groupId="com.jete" -D frontendModule=general -D includeExamples=n
Once your project has been created, install your project within your AEM instance:
mvn clean install -PautoInstallSinglePackage
After verifying the Jete site in AEM, we can start migrating our frontend project to Vite.
Backup the existing ui.frontend directory:
cd jete/

mv ui.frontend ../JeteFrontend

From within “jete” run:

npm create vite@latest
Use “aem-maven-archetype” for the project name, select Vanilla for the framework, and “TypeScript” for the variant.
Rename the directory “aem-maven-archetype” to “ui.frontend”. We chose that project name to match the name generated by the AEM Archetype.
mv aem-maven-archetype ui.frontend
Let’s put the pom.xml file back into the frontend directory:
mv ../JeteFrontend/pom.xml ui.frontend
Since we are updating the POM files, let’s update the Node and NPM versions in the parent.
pom.xml file.

<configuration>

  <nodeVersion>v20.14.0</nodeVersion>

  <npmVersion>10.7.0</npmVersion>

</configuration>
We will be using various Node utilities within our TypeScript files. Let us install the Node Types package.
npm install @types/node --save-dev

Add the following compiler options to our tsconfig.json file:

"outDir": "dist",

"baseUrl": ".",

"paths": {

  "@/*": [

    "src/*"

  ]

},

"types": [

  "node"

]
These options set the output directory to “dist”, the base url to the current directory: “ui.frontend”, create an alias of “@” to the src directory, and add the Node types to the global scope.
Let’s move our “public” directory and the index.html file into the “src” directory.
Create a file named “vite.config.ts” within “ui.frontend” project.
Add the following vite configurations:
import path from 'path';

import { defineConfig } from 'vite';

export default defineConfig({

  build: {

    emptyOutDir: true,

    outDir: 'dist',

  },

  root: path.join(__dirname, 'src'),

  plugins: [],

  server: {

    port: 3000,

  },

});
Update the index.html file within the “src” directory. Change the reference of the main.ts file from “/src/main.ts” to “./main.ts”.
<script type="module" src="./main.ts"></script>
Run the Vite dev server with the following command:
npm run dev
You should see the following page:
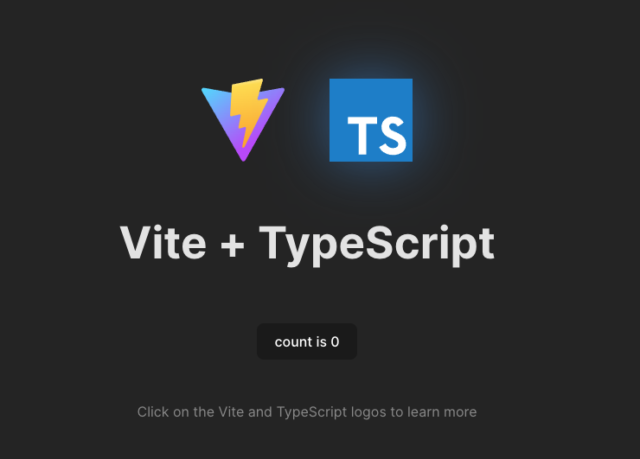
We are making progress!
Let us make some AEM-specific changes to our Vite configuration.
Change “outDir” to:
path.join(__dirname, 'dist/clientlib-site')
Add the following within the build section:
lib: {

  entry: path.resolve(__dirname, 'src/main.ts'),

  formats: ['iife'],

  name: 'site.bundle',

},

rollupOptions: {

  output: {

    assetFileNames: (file) => {

      if (file.name?.endsWith('.css')) {

        return 'site.bundle.[ext]';

      }

      return `resources/[name].[ext]`;

    },

    entryFileNames: `site.bundle.js`,

  },

},
These configurations set the entry file, wrap the output within an immediately invoked function expression (to protect against polluting the global namespace), set the JavaScript and CSS bundle names to site.bundle.js and site.bundle.css, and set the output path for assets to a directory named “resources”. Using the “iife” format requires setting the “process.env.NODE_ENV” variable.
Add a “define” section at the same level as “build” with the following option:
define: {

  'process.env.NODE_ENV': '"production"',

},

Add a “resolve” section at the same level as “define” and “build” to use our “@” alias:

resolve: {

  alias: {

    '@': path.resolve(__dirname, './src'),

  },

},

Add the following “proxy” section within the “server” section:

proxy: {

  '^/etc.clientlibs/.*': {

      changeOrigin: true,

      target: 'http://localhost:4502',

  },

},
These options inform the dev server to proxy all requests starting with /etc.clientlibs to localhost:4502.
It is time to remove the generated code. Remove “index.html”, “conter.ts”, “style.css”, “typescript.svg”, “public/vite.svg” from within the “src” directory. Remove everything from “main.ts”.
Move the backup of index.html file to the src directory:
cp ../JeteFrontend/src/main/webpack/static/index.html ui.frontend/src/
Edit the index.html file. Replace the script including the “clientlib-site.js” with the following:
<script type="module" src="./main.ts"></script>
Save the following image to “src/public/resources/images/”:
Add the following element within the head section of the index.html file:
<link rel="icon" href="./resources/images/favicon.ico" type="image/x-icon" />
While we are updating favicons, edit the
ui.apps/src/main/content/jcr_root/apps/jete/components/page/customheaderlibs.html file.
Add the following to the end of the file:
<link rel="icon" href="/etc.clientlibs/jete/clientlibs/clientlib-site/resources/images/favicon.ico" type="image/x-icon" />
Run the Vite dev server once more …
npm run dev
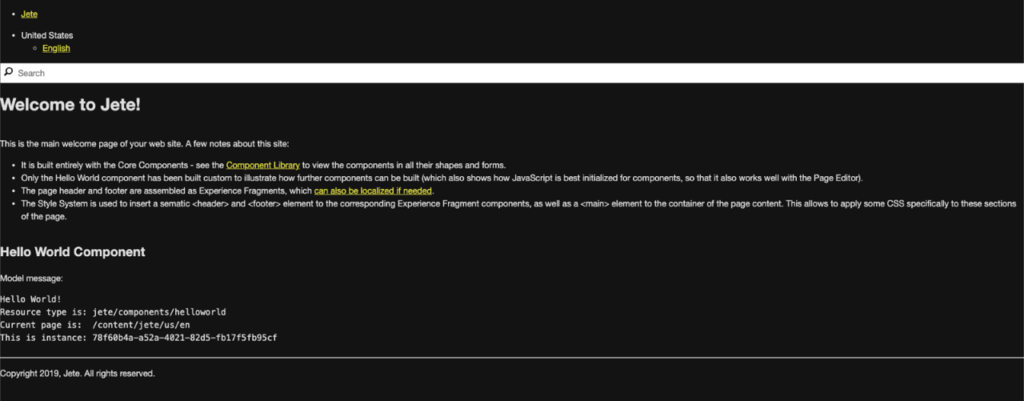
You should see the following:

It is not very attractive. Let us add some styling. Run the following command to install “sass”.
npm i -D sass
Create a “main.scss” file under the “src” directory.
touch main.scss
Edit the main.ts file and add the following line to the top of the file:
import '@/main.scss'
Copy the variables stylesheet from the frontend backup to the “src” directory:
cp ../JeteFrontend/src/main/webpack/site/_variables.scss ./ui.frontend/src/
Edit the _variables.scss file and add the following:
$color-foreground-rgb: rgb(32 32 32);
Copy the base stylesheet from the frontend backup to the “src” directory:
cp ../JeteFrontend/src/main/webpack/site/_base.scss ./ui.frontend/src/
Include references to these files within main.scss:
@import 'variables';

@import 'base';
Run the Vite dev server once more …
npm run dev
You should see the following:
Things are getting better, but there is still more work to do!
Copy the component and site stylesheets from the frontend backup to the “src” directory:
cp -R ../JeteFrontend/src/main/webpack/components ./ui.frontend/src/


cp -R ../JeteFrontend/src/main/webpack/site/styles ./ui.frontend/src/
Add the following to the main.scss file:
@import './components/**/*.scss';

@import './styles/**/*.scss';
Run the Vite dev server …
npm run dev
No luck this time! You will probably see this error:
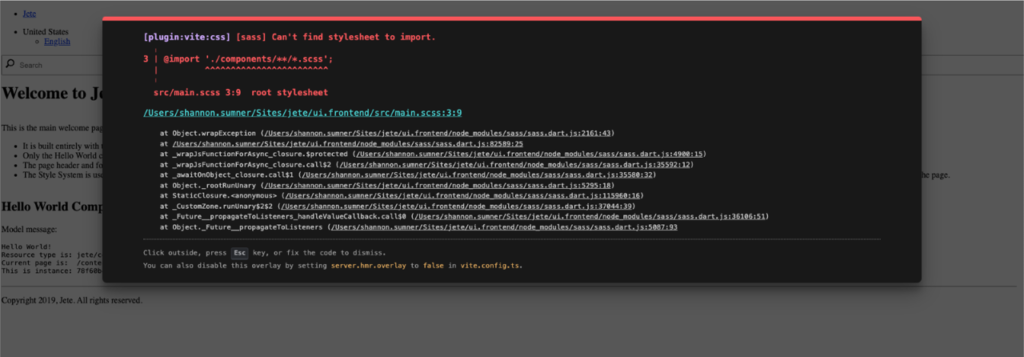
Vite doesn’t understand “splat imports”, “wildcard imports”, or “glob imports”. We can fix this by installing a package and updating the Vite configuration file.
Install the following package:
npm i -D vite-plugin-sass-glob-import
Update the vite.config.ts file. Add the following to the import statements:
import sassGlobImports from 'vite-plugin-sass-glob-import';
Add “sassGlobImports” to the plugins section:
plugins: [sassGlobImports()],
Now, let’s run the Vite dev server again.
npm run dev
You should see the following:
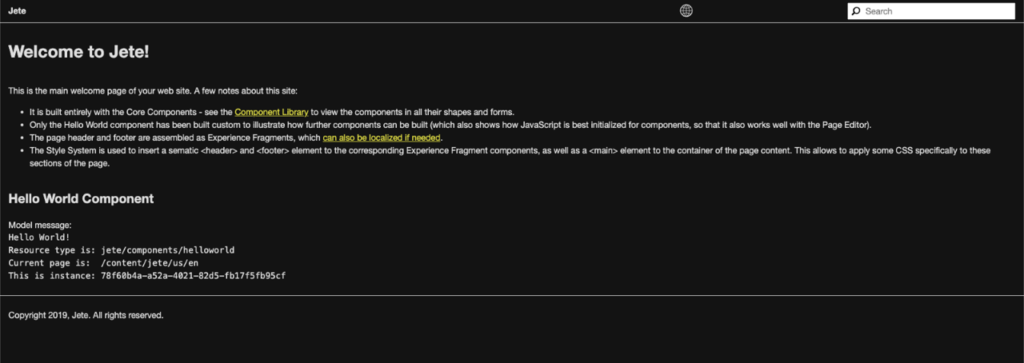
Much better. The front end is looking great! Time to work on the JavaScript imports!
TypeScript has been working well for us so far, so there’s no need to switch back to JavaScript.
Remove the “helloworld” JavaScript file:
rm -rf src/components/_helloworld.js
Grab the TypeScript from this URL and save it as src/components/_helloworld.ts: https://raw.githubusercontent.com/PRFTAdobe/jete/main/ui.frontend/src/components/_helloworld.ts
To see the results of this script within our browser, we have to include this file within main.ts. Importing splats won’t work on a TypeScript file. So we can’t write: “import ‘@/components/**/*.ts’”. Instead, we will write:
import.meta.glob('@/components/**/*.ts', { eager: true });
Now, let’s run the Vite dev server.
npm run dev
You should see the following in Chrome DevTools:
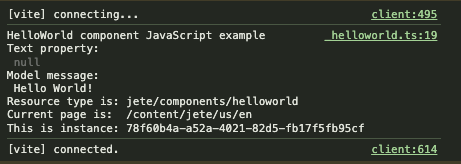
Very good! The JavaScript is working as well!
The following section is optional, but it is good practice to add some linting rules.
Install the following:
npm i -D @typescript-eslint/eslint-plugin @typescript-eslint/parser autoprefixer eslint eslint-config-airbnb-base eslint-config-airbnb-typescript eslint-config-prettier eslint-import-resolver-typescript eslint-plugin-import eslint-plugin-prettier eslint-plugin-sort-keys eslint-plugin-typescript-sort-keys postcss postcss-dir-pseudo-class postcss-html postcss-logical prettier stylelint stylelint-config-recommended stylelint-config-standard stylelint-config-standard-scss stylelint-order stylelint-use-logical tsx
Save the following URLs to ui.frontend:
https://raw.githubusercontent.com/PRFTAdobe/jete/main/ui.frontend/.eslintrc.json
https://raw.githubusercontent.com/PRFTAdobe/jete/main/ui.frontend/.postcssrc.json
https://raw.githubusercontent.com/PRFTAdobe/jete/main/ui.frontend/.prettierrc.json
https://raw.githubusercontent.com/PRFTAdobe/jete/main/ui.frontend/.stylelintrc.json
Add the following to the “script” section of package.json:
"lint": "stylelint src/**/*.scss --fix && eslint . --ext ts,tsx --report-unused-disable-directives --max-warnings 0"
Let’s try out our new script by running:
npm run lint
You should see a fair amount of sass linting errors. You can fix the errors manually or overwrite your local versions with the ones from the git repo: https://github.com/PRFTAdobe/jete/tree/main/ui.frontend/src
We are ready to move on from linting. Let’s work on the AEM build.
Install the following:
npm i -D aem-clientlib-generator aemsync
Save the following URLs to ui.frontend:
https://github.com/PRFTAdobe/jete/blob/main/ui.frontend/aem-sync-push.ts
https://github.com/PRFTAdobe/jete/blob/main/ui.frontend/clientlib.config.ts
https://github.com/PRFTAdobe/jete/blob/main/ui.frontend/aem-clientlib-generator.d.ts
https://github.com/PRFTAdobe/jete/blob/main/ui.frontend/aemsync.d.ts
The files with the “d.ts” extensions are used to provide typescript type information about the referenced packages.
The “clientlib.config.ts” script, creates a client library based on the JS and CSS artifacts created during the build process. It also copies the artifacts to the “clientlib” directory within “ui.apps”.
The “aem-sync-push.ts” script takes the clientlib created above and pushes it to a running AEM instance.
It is time to update the “script” section of package.json.
Remove the existing “build” and “preview” commands. Add the following commands:
"build": "tsc && npm run lint && vite build && tsx ./clientlib.config.ts && tsx ./aem-sync-push.ts",

"prod": "tsc && npm run lint && vite build && tsx ./clientlib.config.ts",
Let’s try out the build command first:
npm run build
If the command has been completed successfully, you will see messages indicating that the “generator has finished” and the “aem sync has finished”. You will also notice the creation of a “dist” directory under “ui.frontend”.
Our last step is to copy over the “assembly.xml” file from the backup we made earlier.
cp ../JeteFrontend/assembly.xml ui.frontend/
With that file in place, we are ready to rerun the AEM build:
mvn clean install -PautoInstallSinglePackage
Congratulations!
The build should be complete without errors. You have successfully migrated from Webpack to Vite!
Make sure to follow our Adobe blog for more Adobe solution tips and tricks!
This article is very much helpful and I hope this will be a piece of useful information for the needed one. Keep on updating these kinds of informative things