
The fusion of HTML template engines with Node.js has sparked a transformative wave in web development, reshaping the landscape of dynamic web application creation. These engines give developers an efficient means of dynamically generating HTML content, effectively elevating the readability and manageability of code repositories. Over the course of this blog post, we will embark on an exploration of three leading HTML template engines tailored for Node.js: Pug, EJS, and Handlebars. Our journey will encompass not only the integration of these engines into a Node.js application but also elucidating their practical usage through illustrative examples. Moreover, we’ll guide you through the process of building a Node.js application from scratch, detailing the integration of each template engine and exploring their advanced functionalities.
Understanding HTML Template Engines
Before we embark on exploring the distinctive traits of individual template engines, it’s vital to grasp the foundational significance of template engines in the landscape of Node.js web development.
HTML template engines streamline the process of generating dynamic HTML content by seamlessly integrating HTML markup with dynamic data and logic. They streamline the process of generating HTML by providing mechanisms for embedding variables, conditionals, loops, and partials directly within HTML files. This segregation between presentation and logic fosters enhanced code reusability and maintainability, facilitating smoother development processes.
Step 1: Setting Up the Node.js Application
We’ll kickstart the process by initializing a fresh Node.js application and configuring the essential dependencies.
mkdir node-template-engine-app
cd node-template-engine-app
npm init -y
Step 2: Installing Dependencies
In this step, we’ll incorporate Express.js, a speedy, unopinionated, and minimalist web framework designed for Node.js. It offers a comprehensive suite of features tailored for web and mobile applications.
npm install express
Step 3: Creating the Folder Structure
Create a views folder in the project’s root directory. This folder will contain the template files for each template engine.
mkdir views
Step 4: Creating Template Files
Create template files for each template engine – index within the views folder index.pug, index.ejs, and index.handlebars.
Let’s explore each of these template engines in detail.
1. Pug (formerly Jade)
Pug, formerly known as Jade, is a feature-rich template engine for Node.js and browsers. It boasts a concise and expressive syntax, utilizing indentation and line breaks to define HTML structure, thus eliminating the need for verbose HTML tags.
Installation:
npm install pug
Example:
doctype html
html(lang="en")
  head
    title My Website
  body
    h1 Welcome to My Website – Pub HTML Template Engine
    p#intro Hello, #{name}!
Advanced Features of Pug:
Pug offers advanced features such as mixing, includes, and filters, enabling developers to create reusable components and effortlessly extend functionality.
Create a new file named header.pug in the view’s directory:
header.pug:
header
    nav
        ul
            li Home
            li About
            li Contact
This header.pug file defines a header section with a navigation menu containing links to Home, About, and Contact pages.

Create a new file named footer.pug in the view’s directory:
footer.pug:
footer
    p © 2024 My Website. All rights reserved.
This footer.pug file defines a footer section with a copyright notice.
Now, you can include header.pug and footer.pug in your index.pug file to create a complete webpage layout.
index.pug:
doctype html
html(lang="en")
  head
    title Welcome to My Website – Pub HTML Template Engine
  body
    include header.pug
    main
      h1 Welcome #{name} to My Website
    include footer.pug
The Pug code snippet provides a concise and expressive structure for an HTML document, starting with a declaration of the doctype and defining the language attribute for the HTML tag. The document includes a header section, a main content area featuring a welcoming heading with dynamic interpolation of the name variable (e.g., #{name}), and a footer section. The use of indentation signifies the nesting of elements, enhancing readability and maintaining a clean visual structure. The include directive seamlessly incorporates separate Pug files for the header and footer sections, promoting code modularity and reusability. Overall, the Pug code succinctly organizes the components of the HTML document, facilitating efficient development and maintenance of web pages.
2. EJS (Embedded JavaScript)
EJS, or Embedded JavaScript, is a simple and powerful template engine for Node.js. It allows developers to embed JavaScript code directly within HTML markup, making injecting dynamic data and logic into templates easy.
Installation:
npm install ejs
Example:
<!DOCTYPE html>
<html lang="en">
  <head>
    <meta charset="UTF-8" />
    <meta name="viewport" content="width=device-width, initial-scale=1.0" />
    <title>My Website</title>
  </head>
  <body>
    <h1>Welcome to My Website</h1>
    <p id="intro">Hello, <%= name %>!</p>
  </body>
</html>
Advanced Features of EJS:
EJS supports dynamic templates and conditional rendering, allowing developers to easily create dynamic and responsive layouts.
index.ejs:
<!DOCTYPE html>
<html lang="en">
  <head>
    <meta charset="UTF-8" />
    <meta name="viewport" content="width=device-width, initial-scale=1.0" />
    <title>My Website</title>
  </head>
  <body>
    <% if (loggedIn) { %>
    <h1>Welcome <%= username %></h1>
    <% } else { %>
    <h1>Welcome Guest</h1>
    <% } %>
  </body>
</html>
The EJS code snippet presents an HTML document structure where dynamic content is seamlessly integrated using Embedded JavaScript syntax. It includes conditional logic to display a personalized welcome message based on the loggedIn status. If the user is logged in, their username is dynamically inserted into the heading, otherwise, a default “Welcome Guest” message is displayed. EJS’s capability to embed JavaScript code directly within HTML markup simplifies the process of generating dynamic content, making it a powerful tool for building responsive web applications.
Handlebars
Handlebars is a semantic templating engine with a minimal syntax and powerful features. It adopts a logic-less approach, emphasizing simplicity and user-friendliness. Handlebars templates leverage helpers to extend functionality.
Installation:
npm install express-handlebars
Example:
<!DOCTYPE html>
<html lang="en">
<head>
  <meta charset="UTF-8">
  <meta name="viewport" content="width=device-width, initial-scale=1.0">
  <title>My Website</title>
</head>
<body>
  <h1>Welcome to My Website</h1>
  <p id="intro">Hello, {{name}}!</p>
</body>
</html>
Advanced Features of handlebars:
Handlebars provide helpers for extending functionality, enabling developers to implement complex data manipulation and conditional rendering. Furthermore, we’ll introduce the notion of a default layout utilizing a main.hbs file acts as the overarching framework shared among all web pages.
Create a file named main.hbs in a folder named layouts (or any suitable folder name of your choice):
layouts/main.hbs:
<html lang="en">
<head>
<meta charset="UTF-8" />
<meta name="viewport" content="width=device-width, initial-scale=1.0" />
<title>{{title}}</title>
</head>
<body>
<header>
<nav>
<ul>
<li>Home</li>
<li>About</li>
<li>Contact</li>
</ul>
</nav>
</header>
<main>
{{{body}}}
</main>
<footer>
<p>© 2024 My Website. All rights reserved.</p>
</footer>
</body>
</html> This HTML template provides the foundation for a web page structure, comprising a header displaying a welcoming message and navigation menu, a main content section designated for dynamic content insertion, and a footer exhibiting copyright information. Harnessing the power of Handlebars templating syntax, the {{ title }} placeholder dynamically populates the page title, while the {{{ body }}} placeholder seamlessly incorporates the main content, facilitating the seamless integration of dynamic data. Consequently, this template is a cornerstone for constructing dynamic web pages, empowering developers to craft responsive and engaging user experiences effortlessly.
index.handlebars:
<html lang="en">
  <head>
    <meta charset="UTF-8" />
    <meta name="viewport" content="width=device-width, initial-scale=1.0" />
    <title>My Website</title>
  </head>
  <body>
    {{#if loggedIn}}
      <h1>Welcome {{username}}</h1>
    {{else}}
      <h1>Welcome Guest</h1>
    {{/if}}
  </body>
</html>
The Handlebars code snippet defines the structure of an HTML document with dynamic content rendered using Handlebars syntax. It incorporates conditional logic to display a personalized welcome message based on the loggedIn status, seamlessly integrating variables and control structures within the HTML markup. Handlebars’ logic-less templating paradigm promotes simplicity and readability, allowing for efficient data manipulation and rendering of dynamic content. This concise and expressive approach streamlines the development process, making Handlebars an effective choice for building dynamic web applications.
Step 5: Integrating Template Engines in the Node.js App
Now that we’ve set up our Node.js application and integrated various HTML template engines, let’s create separate app.js files for each template engine along with explanations.
For Pug:
app.js:
const express = require("express");
const app = express();

// Set Pug as the view engine
app.set("view engine", "pug");

// Define routes
app.get("/", (req, res) => {
  // Render index.pug with data
  res.render("index", { name: "John" });
});

// Start the server
app.listen(3000, () => {
  console.log("Server is running on port 3000");
});
Explanation:
In this app_pug.js file, we set Pug as the view engine using app.set(‘view engine’, ‘pug’). Then, we define a route for the root path (‘/’) that renders the index.pug template and passes it some data (in this case, the title ‘Pug Example’). Lastly, we initiate the server and set it to listen on port 3000.
For EJS:
app.js:
const express = require("express");
const app = express();

// Set EJS as the view engine
app.set("view engine", "ejs");

// Define routes
app.get("/", (req, res) => {
  // Render index.ejs with data
  res.render("index", { loggedIn: true, username: "John" });
});

// Start the server
app.listen(3000, () => {
  console.log("Server is running on port 3000");
});
Explanation:
In this app_ejs.js file, we set EJS as the view engine using app.set(‘view engine’, ‘ejs’). Then, we define a route for the root path (‘/’) that renders the index.ejs template and passes it some data (in this case, the loggedIn status and the username). Lastly, we initiate the server and set it to listen on port 3000.
For Handlebars:
app.js:
const express = require("express");
const exphbs = require("express-handlebars");
const app = express();

// Set Handlebars as the view engine
app.engine(
  "handlebars",
  exphbs.engine({
    extname: "handlebars", // Set Handlebars file extension to '.hbs'
    defaultLayout: "main", // Set the default layout file
    layoutsDir: __dirname + "/layouts", // Specify the directory for layout files
  })
);
app.set("view engine", "handlebars");

// Define routes
app.get("/", (req, res) => {
  // Render index.handlebars with data
  res.render("index", { loggedIn: true, username: "John", title: "Home" });
});

// Start the server
app.listen(3000, () => {
  console.log("Server is running on port 3000");
});
Explanation:
In this app_handlebars.js file, we set Handlebars as the view engine using app.engine(‘handlebars’, exphbs()) and app.set(‘view engine’, ‘handlebars’). Then, we define a route for the root path (‘/’) that renders the index.handlebars template and passes it some data (in this case, the loggedIn status and the username). Lastly, we initiate the server and set it to listen on port 3000.
These distinct app.js files exemplify the process of configuring and executing a Node.js application utilizing various HTML template engines, highlighting the versatility and seamless integration capabilities provided by each.
Step 6: Running the Node.js Application
Now, let’s run our Node.js application.
node app.js
To observe the output of our application, simply open your web browser and visit localhost:3000. This will display the rendered content generated by our Node.js application.
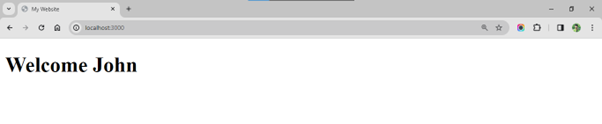
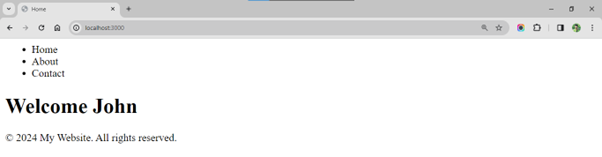
Output:
Pug:

EJS:
Handlebars:
Choosing the Right HTML Template Engine for Node.js
Each HTML template engine has its unique syntax, features, and advantages. The selection of which template engine to utilize hinges on various factors, including project specifications, individual preferences, and team expertise. Nonetheless, Handlebars is an outstanding option if it prioritizes simplicity and user-friendliness, owing to its logic-less methodology and straightforward syntax. It achieves a perfect equilibrium between adaptability and simplicity, positioning it as an ideal choice for addressing diverse application requirements.
Conclusion
In summary, HTML template engines serve as pivotal components in Node.js web development, streamlining the generation of dynamic HTML content. Whether you choose Pug, EJS, Handlebars, or another template engine, each provides robust features to optimize your development workflow. By comprehending their intricacies and adeptly integrating them into your Node.js applications, you can bolster productivity and deliver outstanding results.