Introduction
Custom fields are a powerful tool for extending functionality and improving ease of use. This article will explore creating, organizing, and implementing custom JavaScript Sitecore fields with an iframe. By using an iframe to load a separate HTML document, you can cleanly contain all of the necessary CSS, JavaScript, and HTML files. We’ll walk through the steps for setting up such a field using this technique and I’ll give you some reasons right now as to how this can be useful.
- FED-only developers can now build out a Sitecore field with little knowledge besides Javascript/HTML/css
- If you have complex field functionality that you would like, writing SPEAK components or writing your own front-to-back custom field would take deep expertise about the inner workings of Sitecore.
- Field output can be developer-friendly and Content Author friendly.
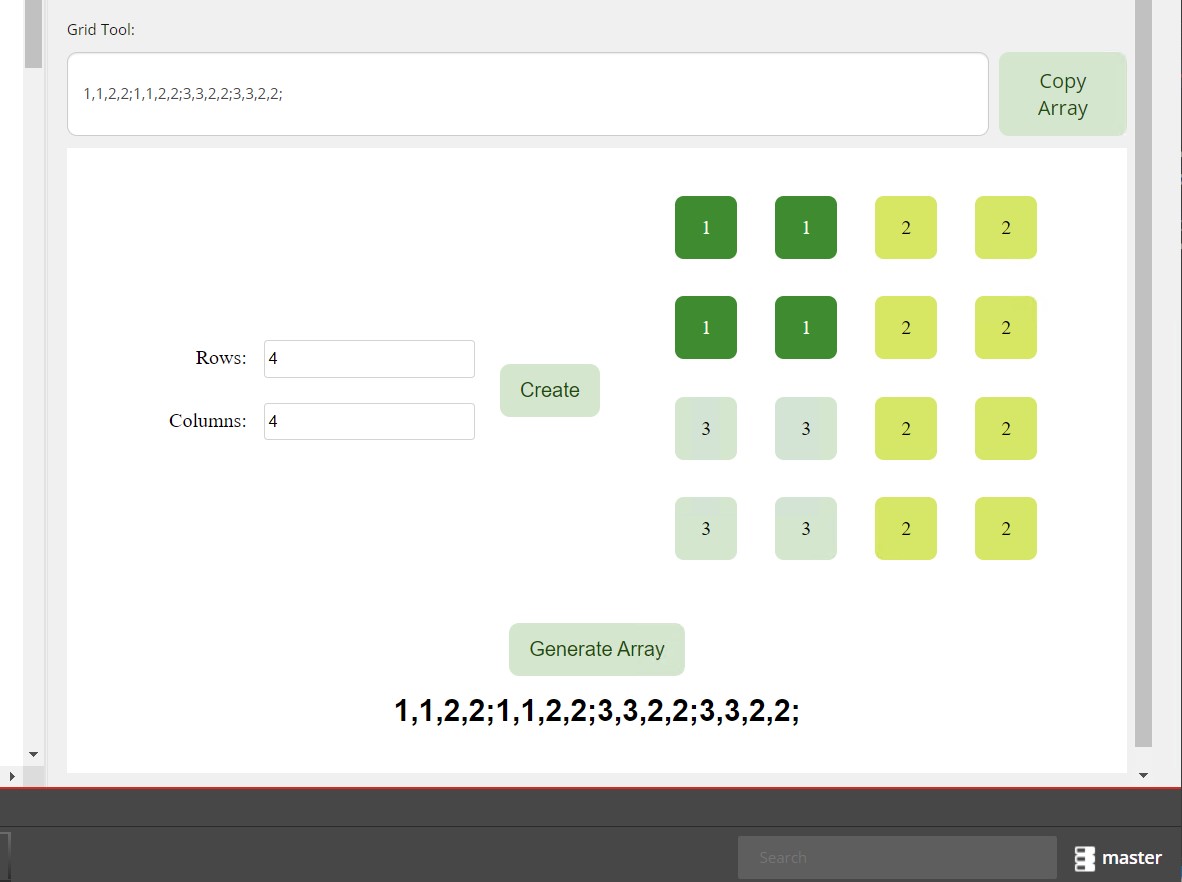
- Since you have access to a full JavaScript toolkit, whatever output you place into the field can be, like in our case, a comma and semicolon-separated array that means very little, but the visual representation of it can be right below.
- Upgrade-friendly
- As the field will run almost entirely on JavaScript, and only connects to Sitecore through the input field, future Sitecore upgrades would be unlikely to require much modification.
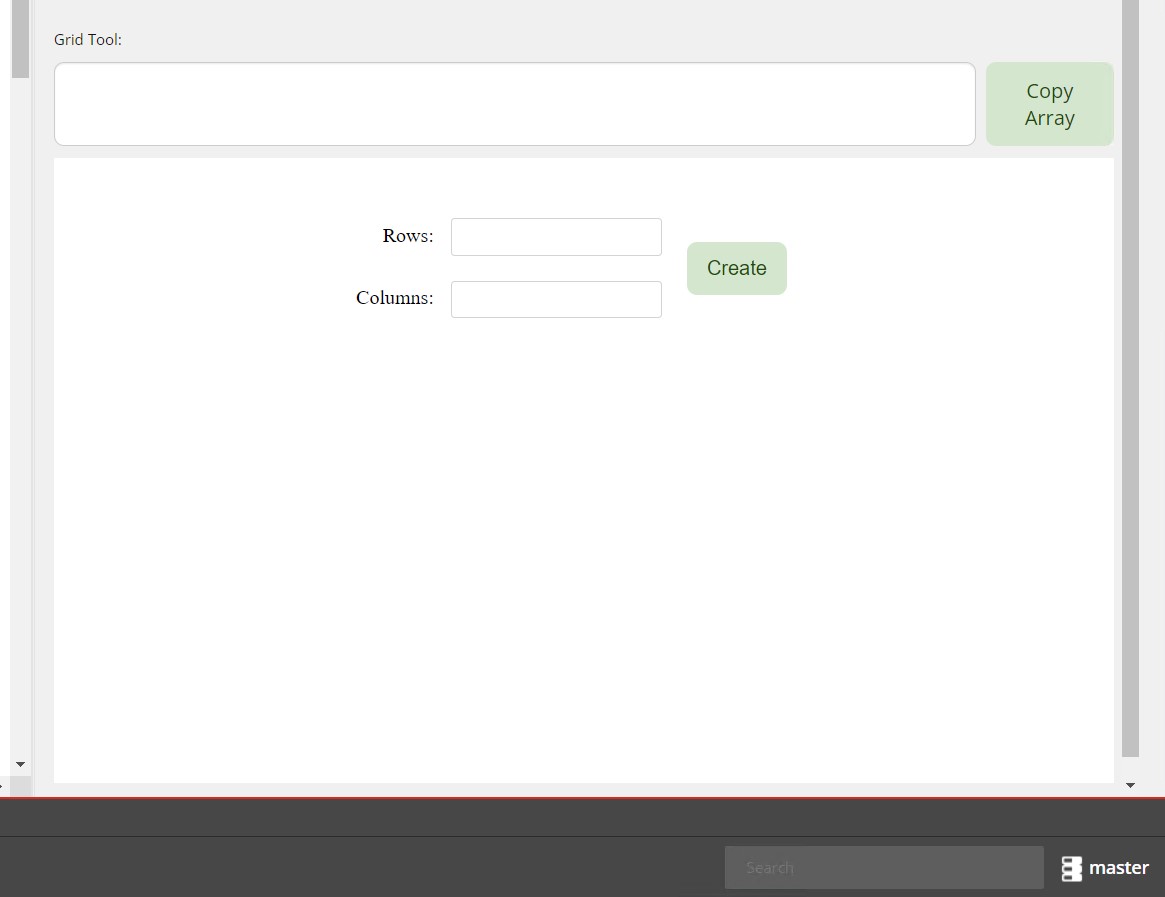
While I won’t be showing the full code, it is possible to have something this pretty and functional right inside your datasource!


This is a visual tool for generating syntax that specifies the format of a grid. Alone, properly constructing the array of numbers would be confusing and difficult. With the iframe, it’s easy, intuitive, and simple to maintain.
Custom Sitecore Field Work
Let’s knock out the basic structure of how this will work. In order to create a custom field in Sitecore, you will need to extend the single-line text field C# class. This allows us to add our iframe hack. Once you have extended the single-line text field class, create a new data type in the Sitecore core database. This will allow you to use your custom field in the content editor and specify which templates it should be available on. If you are using a serialization tool like Unicorn or TDS, you will need to include your custom field in the serialization process. This ensures that your field deploys properly across environments. I am only showing the extended class, check out the documentation if you have questions about doing this in general.
Extend the C# Class
namespace Project.Place.This.Goes
{
    public class GridMakerTextInput : Sitecore.Shell.Applications.ContentEditor.Text
    {
        protected override void DoRender(HtmlTextWriter output)
        {
            string uniqueID = Guid.NewGuid().ToString();
            WriteSitecoreElement(output, uniqueID);
            WriteIframe(output, uniqueID);
        }

        private void WriteSitecoreElement(HtmlTextWriter output, string uniqueID)
        {

            var htmlFormat = "<div class=\"input-cont\"><input " + ControlAttributes + " data-uid=\"" + uniqueID + "\"/><button class=\"grid-buttons\" id=\"" + uniqueID + "\">Copy Array</button></div>";
            output.Write(htmlFormat);
        }

        private void WriteIframe(HtmlTextWriter output, string uniqueID)
        {
            output.Write("<iframe id=\"frame" + uniqueID + "\" src=\"/sitecore/shell/Controls/your-folder/grid.html\"></iframe>");
        }
    }
}
DoRender must be overwritten, the other methods are abstractions to help readability. Of note, the ControlAttributes must be added to an input element. That is the default behavior for a single line text field. The data-uid, unique ID, and button element are additional and allow us to interact with the iframe. The unique ID is important for several reasons, first and foremost to allow multiple Grid Maker fields on one template. Additionally, the JavaScript utilizes the IDs to access the iframes, buttons, and input elements.
Create Custom Field Type
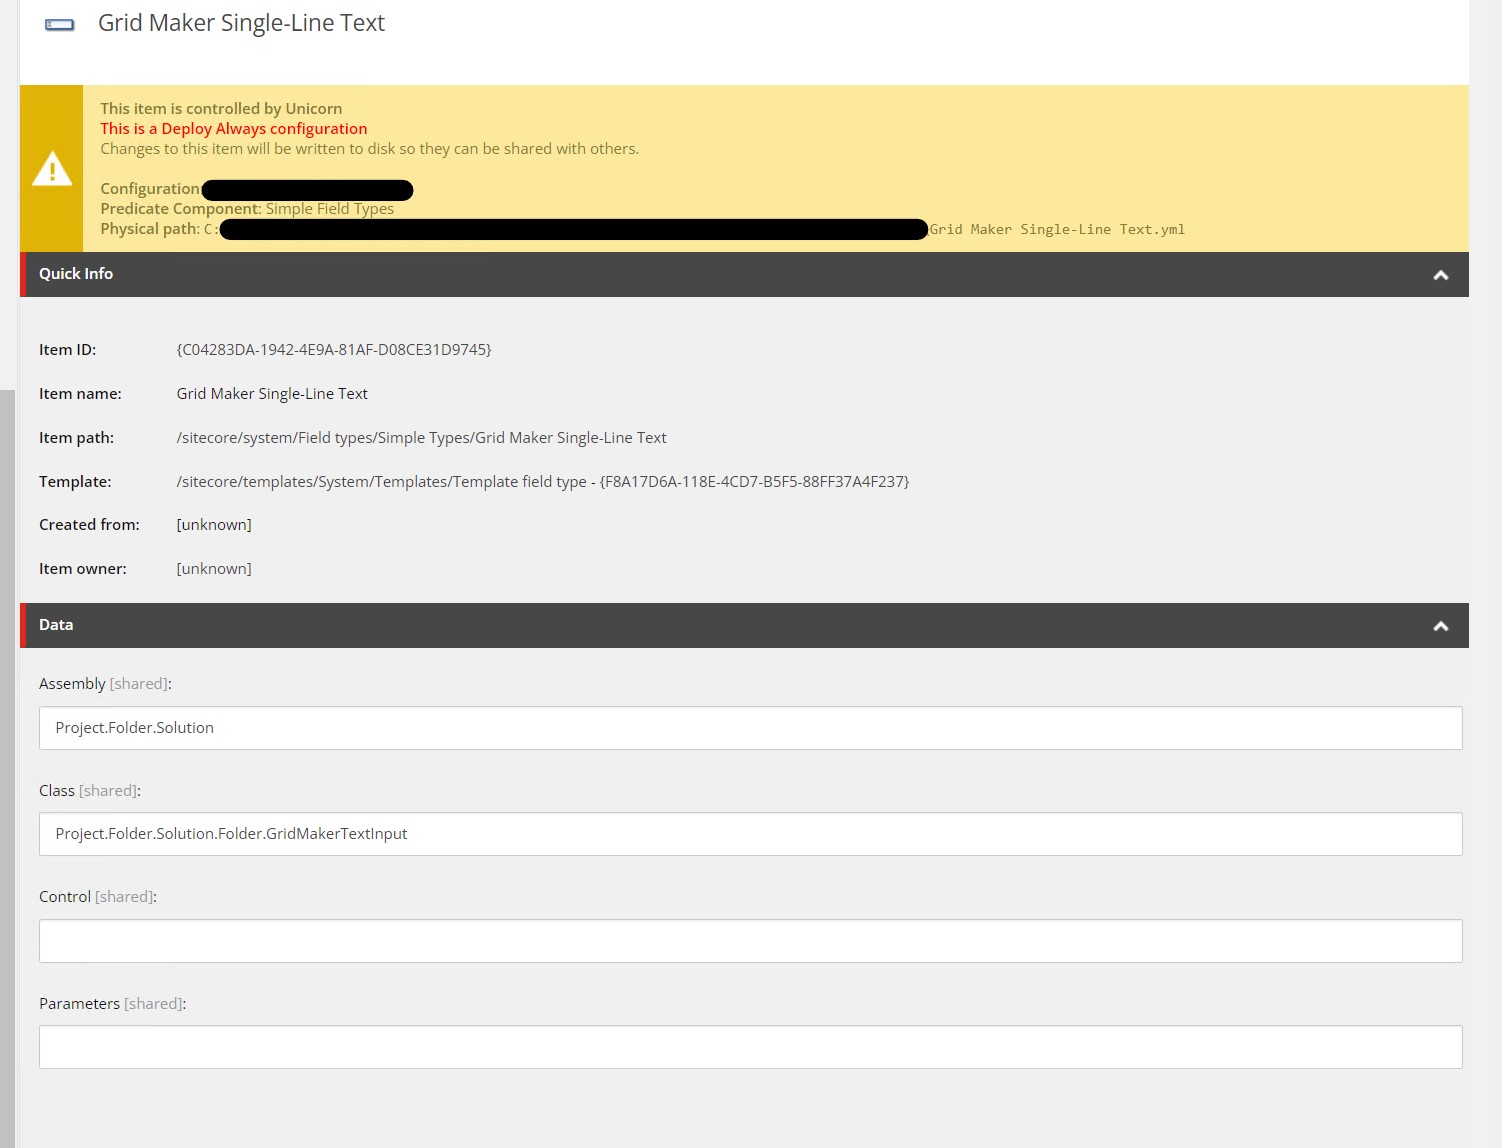
Go into the core database, duplicate the single line text field, and point it to the extended class. When finished, the data type looks like this:

JavaScript Integration
To host the HTML, CSS, and JavaScript for your custom field, create a new folder under the sitecore/shell/controls directory. This will allow you to easily access the necessary files from the iframe src attribute. In your extended C# class, you can use the HTMLTextWriter class to write the HTML for your iframe element. The src attribute of the iframe should point to the location of the HTML file you created. In the extended class above, that is this line:
output.Write("<iframe id=\"frame" + uniqueID + "\" src=\"/sitecore/shell/Controls/your-folder/grid.html\"></iframe>");
The folder structure looks like this:
/ sitecore
--- / shell
------ / controls
--------- / your-folder
------------ / grid.js
------------ / grid.html
------------ / grid.css
------------ / general.css
The general.css is injected into the head by the JavaScript, and is responsible for the style change of the input and button. Everything inside the iframe is controlled by the grid.css. The HTML file will contain whatever HTML you need for your custom field, and needs to reference the styles and Javascript like this:
<body>

    <head>
        <link href="./grid.css" rel="stylesheet">
    </head>
    <div id='main'>
        . . .
    </div>
</body>

<script src='./grid.js'></script>
JavaScript Fine-Tuning
There are a few issues with throwing your own html and JavaScript onto the page. I recommend making sure the following issues do not affect your own implementation, but if they do the fixes are simple.
Button Submit
One of the buttons used exists outside the iframe. Call preventDefault() on the button when it is clicked. The default behavior submits the whole page as a post request, and Sitecore throws an error if this happens.
allButtons[i].addEventListener("click", (e) => {
     e.preventDefault();
}
allButtons in this case would be initialized by querying for the ‘grid-buttons’ class we gave the extended button.
Same-Origins Benefit
Since the iframe and the parent document are on the same origin (i.e., they are hosted on the same domain), you can access the parent document from within the iframe using JavaScript. This will allow you to grab the generated data from the iframe and place it into the single-line text field. Access the iframe like so:
let frame = parent.document.querySelector("#frame" + uid);
Static Button Tracker
If the Javascript is going to listen to any element outside of the iframe, that element would be accessed by each JavaScript iframe placed on the same template. Three extended fields then equals three listeners. To eliminate this, add an attribute to the button, initially set to false, that is set to true upon having a listener added. Simply check that attribute when attempting to add a listener.
if (allButtons[i].dataset.listener != 'true') {
        allButtons[i].dataset.listener = 'true';
        allButtons[i].addEventListener("click", (e) => {
. . .
If you wish to inject a <link> tag for styles in the head element as I did, you will additionally need to declare a static class with a boolean and check the state of the class before injecting the link. Otherwise you will end up injecting as many links as there are fields.
Closing
Using an iframe to host your custom JavaScript Sitecore field allows you to take advantage of the power and flexibility of JavaScript while keeping it contained and easy to maintain. Though this approach may be a hack, it is quick and easy, and relatively simple to maintain and edit. For example, directly editing the JavaScript in the hosted folder eliminates compile and build time. Additionally, if you have many custom fields that you want to implement using this technique, you can create structures and processes to make it easier to maintain and update them all.

