Vocabulary is important when trying to understand a new product. Understanding Sitecore Personalize requires understanding its vocabulary. When you start digging in you’ll note that both “Web Experiences” and “Web Experiments” have both “Web” and “Full Stack” Options.
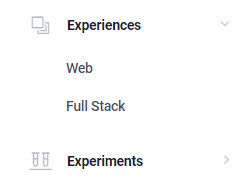
While the big difference between “Experiences” and “Experiments” is the additional setup needed to properly evaluate the results and compare variants, the way “Web” and “Full Stack” work are largely the same. And since “Full Stack” allows for both “Triggered” and “Interactive” experience types, that means there are really three types of “Experiences” you can setup and use.
Web Experiences
Web experiences are probably what you think of when you think of how AB Testing and Personalization work in Sitecore Personalize. These give you the ability to inject configurable “Web Templates” into pages of your website.
Web Templates can be created in the library and shared across experiments and experiences. They need to be setup by a developer to make it easy for a marketer to replace images, text and other aspects of the markup, CSS and JavaScript.
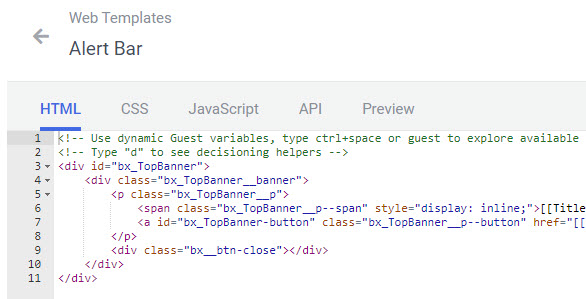
A developer makes things configurable by defining marketer friendly parameters using the template parameter syntax as follows:
"[[parameter_name | type | default_value | {config1: value1, config2: value2 } ]]"
This can be used not only in the HTML markup, but in the CSS and JavaScript tabs, allowing you to provide a lot of flexibility to marketers to configure how the content will look and behave.
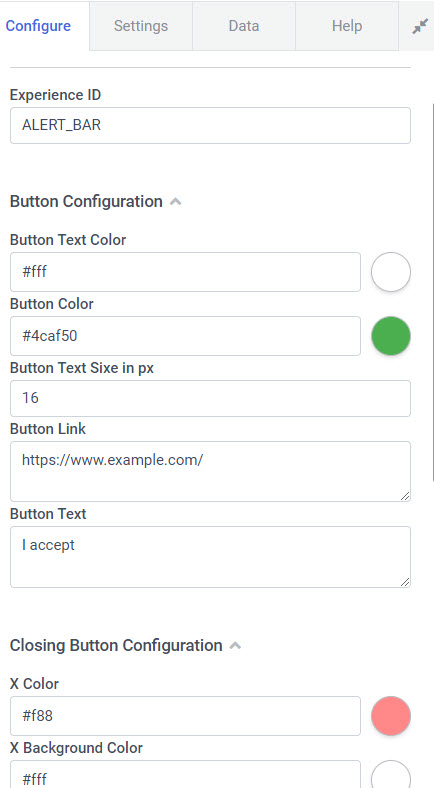
Your experience or experiment configuration will determine when and on what pages your template will be executed.
Triggered Experiences
Triggered experiences are designed to react to something happening. Whether it’s an event that is raised on the web site like a “Goal” being fired, the Session ending, A cart being abandoned, or any other custom event you manually raise in JavaScript. It could also be triggered from other sources when pushing data into Personalize or CDP using streaming or other API’s.
When Sitecore Personalize detects that an event has been fired, a Triggered experience can make a call to a third party api or web hook sending custom data as needed to have it do something. This could be like calling an API to send an email, or Text message or to a backend system.
In order to do this, first you need to define a “Connection.” Connections tell Sitecore personalize where and how to send data. They can be Data Systems (Bi-directional), AI Models or Destinations.
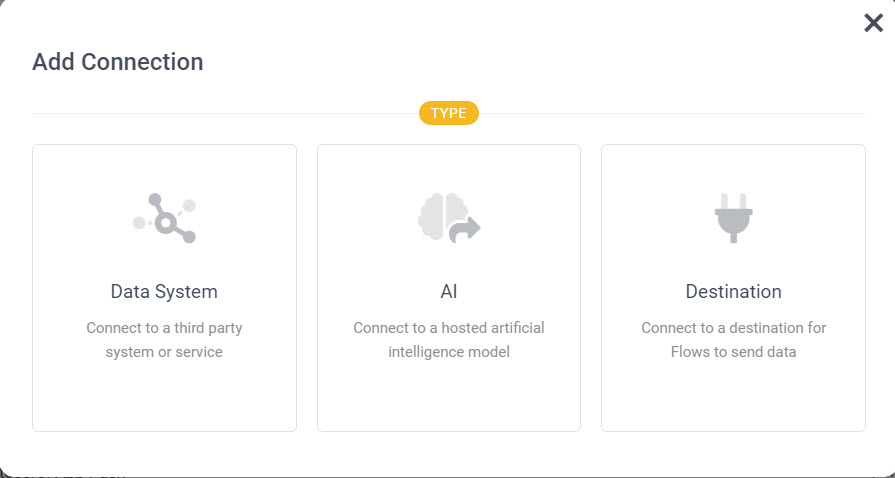
For triggers, a destination type is most appropriate as there’s no real need to map the results back to anything being returned from the API. To configure the endpoint, there is a five step wizard where you can specify the endpoint, action (Post or Put), headers and “test” sending a sample request body.
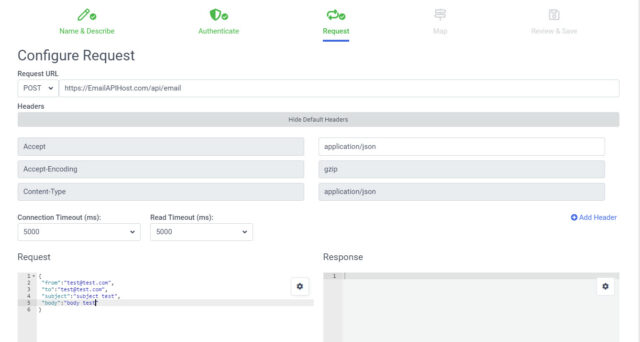
Then in a triggered experience, you can map the fields in your request body to information you know about the current visitor, parameterizing their email and name and other fields that you are tracking.

On the Headers tab, you can confirm which connection to use and map any additional headers as needed. Then when your trigger is fired, Sitecore Personalize will generate the API payload based on your configured Freemarker template and then send it to the configured connection to allow it to send an email, text or anything else you want it to do when the experience is triggered.
Interactive Experiences
The term “Interactive” is actually pretty confusing. It really should be called “API Experiences”, because that’s really what it is. It allows you to use Sitecore Personalize to return variants of Json Payloads to a calling application. In order to actually run an “Interactive” experience or experiment, you need to call the Sitecore Personalize API, get the resulting Json data and do something with it.

This has obvious applicability to mobile apps, where you could use this to determine what content or configuration to use for rendering native components. It can also come in handy if you’re leveraging a front end framework like React or Angular and rather be fed Json data then have a Web Template be injected after the fact.
Freemarker, the templating language allows you to access guest data, data from decision models and more when composing the Json that will be returned from your API variant.
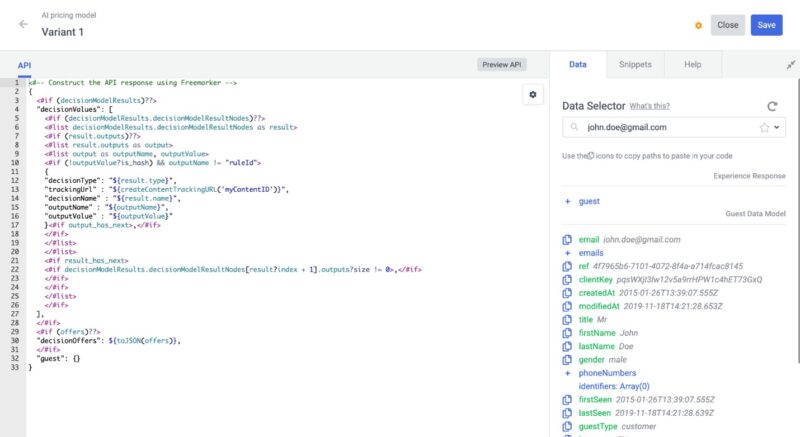
Using this approach, you can design your “Interactive” experience to produce the exact Json you need and populate it with user data from the session or CDP if you’re leveraging it pretty easily. You can even feed additional parameters when calling the “experience” that can be used when putting the Json together programmatically, giving you even more flexibility to provide data.
Wrapping Up
Sitecore personalize gives you the ability to define three types of experiences: “Web Experience”, “Triggered Experience” and “Interactive Experience,” with the latter two types being grouped in the “Full Stack” Category. All three types can be implemented alone or as an experiment, which allows you to tie things to performance goals and evaluate effectiveness more easily.
While you’ll need development support to setup all three types of experiences, Web Experiences and their Web templates allow developers to make things parameterized such that a marketer can use a template without needing to be in the weeds of the markup, CSS and JavaScript.
For triggered experiences you’ll need a developer to setup the connection, the payload/headers and trigger the events/goals that will trigger that experience.
For interactive experiences, you’re really defining a custom object that will be returned to a calling application that can use that payload however it likes.
Hopefully that helps clear up confusion about what each experience type is and how it can be used. Keep in mind this only scratches the surface of what you can do with each of these types of experiences. Integrating Decision Models, data from CDP and other sources can provide very powerful options for creating very targeted experiences and results.
If you’re interested in getting started with Sitecore Personalize, We’d love to help. Reach out to me on LinkedIn, Twitter or fill out our contact form.

