This mini-series is about using Power Platform to help streamline healthcare providers’ work and increase patient safety.
Part 2 of this mini-series covered using Power Automate to extract lab result values from a response object and used them to check which entity conditions are true and send them to the Power App. Part 1 covered how to set up your database – creating entity tables.
In this section, you will be using Power Apps to build out this app’s front end. You will create a dialog box pop up for the user to enter patient information, which will trigger the Power Automate flow. Once the flow has completed its run, it will return the patients’ lab work results. The Power App will then display the results and display a dynamic checklist of directions for the healthcare provider.
You can find links to previous parts below:
- Applying Power Platform to the Healthcare Industry – Part 1: Setting Up Entities in Microsoft Dataverse
- Applying Power Platform to the Healthcare Industry – Part 2: Using Power Automate to create back-end logic.
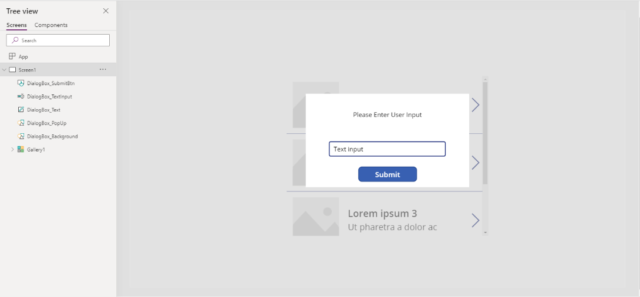
Setting up the dialog box:
- Insert rectangle to cover the whole screen
- Change the color > transparency property to slight transparency so you can see what is under the rectangle.
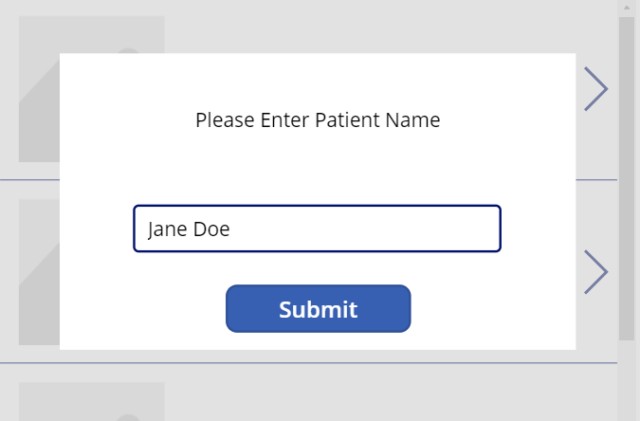
- Insert another rectangle but smaller and centered. This will be the actual dialog pop-up.
- Set color> transparency property to opaque
- Insert a text box, a text input, and a button
- In this example, the text property on the button is set to “Submit.”
- Make sure to set the default text property on the Text Input.
It should look something like the screenshot below.
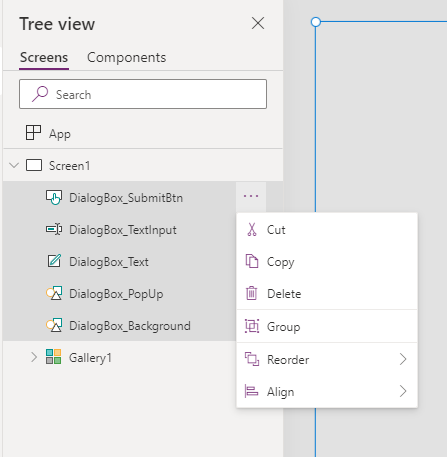
To have all the dialog box elements appear and function as one, you will need to select all the elements from the Tree View panel and group them together. Once you do this, you can control the entire “Dialog Box” element as one. This is an alternative to using Components since you won’t be reusing the dialog box in this example.
Next, you will want to set the visible property for your new group to your choosing variable.
- You will get an error because the variable has not been defined yet. To fix this, click on the App icon in the Tree view and in the formula bar for OnStart.
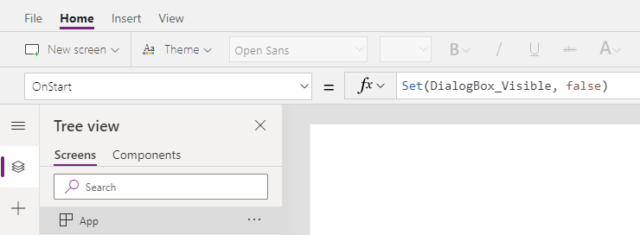
Note: You will make the dialog box conditionally visible later in this section
Call the flow on Dialog Submit and Pass in User Input:
Now that you have a dialog box, you want to take in user data and submit it to the flow.
- First, you will connect the power automate to our Power App.
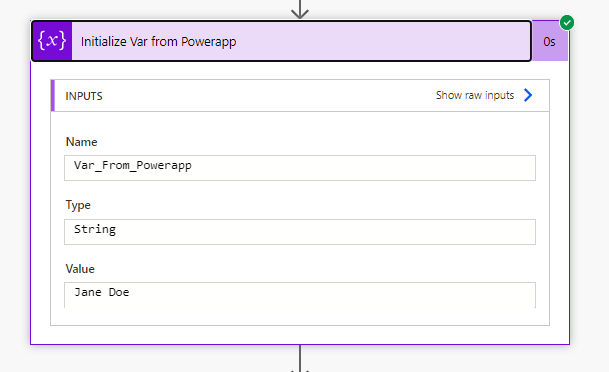
- You need to go to your power automate and initialize a variable. This will let the Power App know you need parameters in your Flow.Run() call
- Set its value to “Ask in Power App” from the Dynamic Content Pop up
- You can initialize as many variables as you need. This will let Power App know how many parameters to require.
- Next, in your Power App go to Action > Power Automate.
- Find your flow from the list of existing flows and select it.
- Fill in the parameter with the dialog box’s text input.
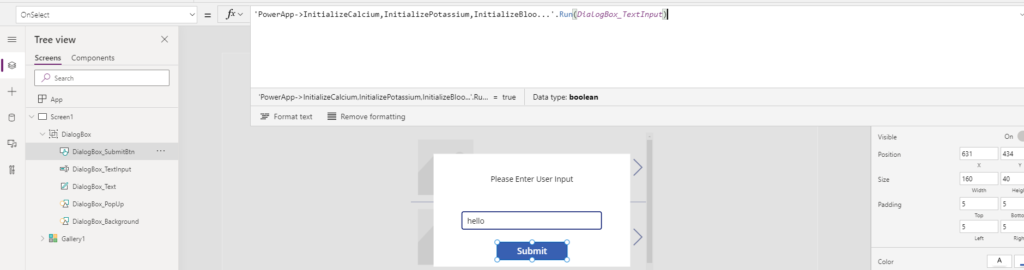
When you click the submit button, this will trigger the flow, and the inputted text will be passed into the Power Automate flow and stored as the variable you initialized.

Note: In this example, you are getting input as a string. If you need to process this value as a float or integer in the Power Automate, please refer to Part 2, which covers this in detail: Applying Power Platform to the Healthcare Industry – Part 2: Using Power Automate to create back end logic.
- If you want your dialog box to disappear after clicking submit, make sure you set your DialogBox_Visible Boolean variable to false after running the flow in the buttons OnSelect property.

Displaying the Data from Power Automate:
Now that you are triggering the flow, this section will show you how to display the lab results from Power Automate inside the PowerApp and process the condition set values to show the correct directions in a checklist.
- To easily work with the values returned from the power automate, you should set what is returned by the Flow.Run() function in a variable. This way, you can easily access each returned variable

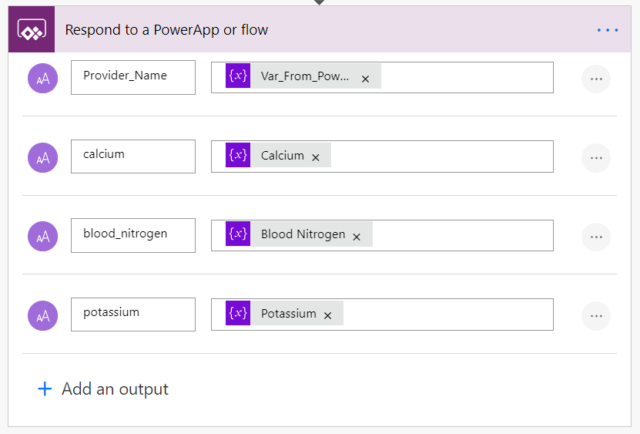
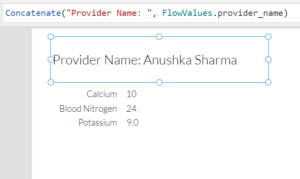
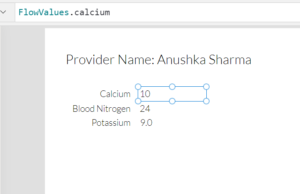
- Next, you want to set up our Power App to display values from the Power automate. In this example, the values returned from the Power Automate are stored in the variable called FlowValues. You simply need to use dot-notation to access the variables outputted by the Power Automate.
Create a dynamic checklist of directions to display conditional directions from Power Automate:
Now you want to display the correct set of directions, depending on values returned from the flow. You will do this by using Power App’s local collections and the built-in Collect() functions.
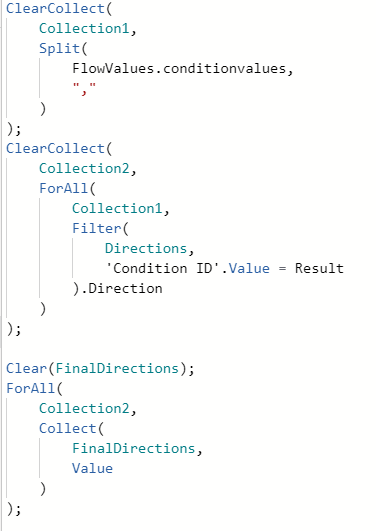
Inside the submit buttons OnSelect property, after the flow.Run() call you will be processing the results returned from the flow, aka the FlowValues.condition values.
- Split the comma-separated values and delimit them by the comma
- ClearCollect into your first collection, let’s call it collection1
- Loop through collection1 and filter all the Direction Entity where ‘Condition ID.’Value = Result and store the Direction value in a new Collection (let’s call it collection2)
Now that you have the data from the power automate processed let’s understand what exactly happened.
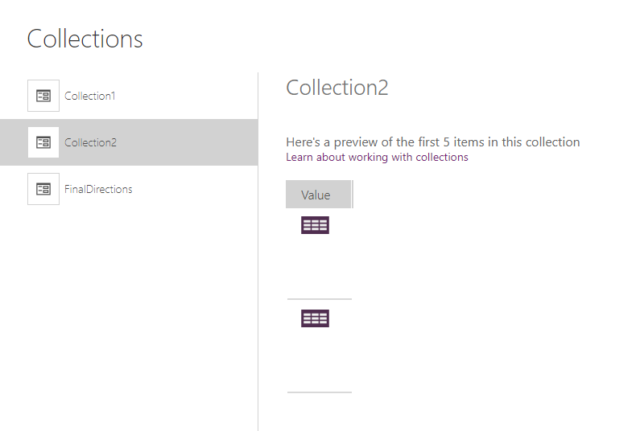
Run the app and submit a patient’s name. Then go to File > Collections to see what was stored in our new collections:
- In Collection1, you can see two values were returned from the flow 01 and 09. These correspond to high calcium and high Blood Urea Nitrogen (BUN) values.
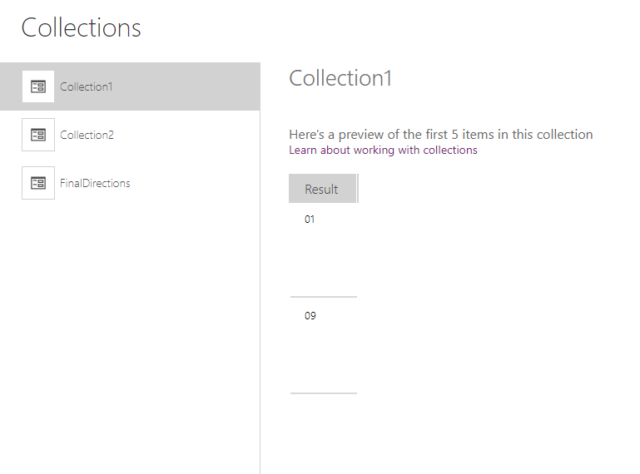
- In Collection 2, you can see that there are tables stored in the value columns. This is because, in collection2, you iterated through each item in collection1 and filtered the Directions entity for each value where the Condition ID column value equals the current item being iterated on from Collection1. The filter function returns a table.
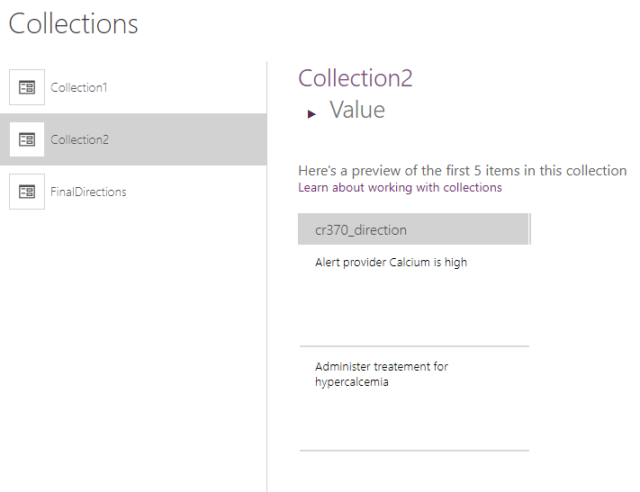
- Drill down into the first item in Collection2. You can see that this table contains two items, the Directions values where Direction.ConditionID = 01 (aka high calcium). In our entity, 2 such rows satisfy this condition, so you have these two values.
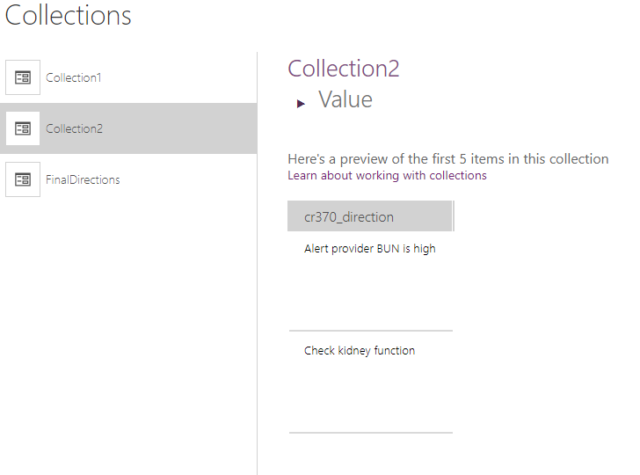
- In the second table in Collection2, you can see similarly where Direction.ConditionID = 09 aka high Blood Urea Nitrogen (BUN)
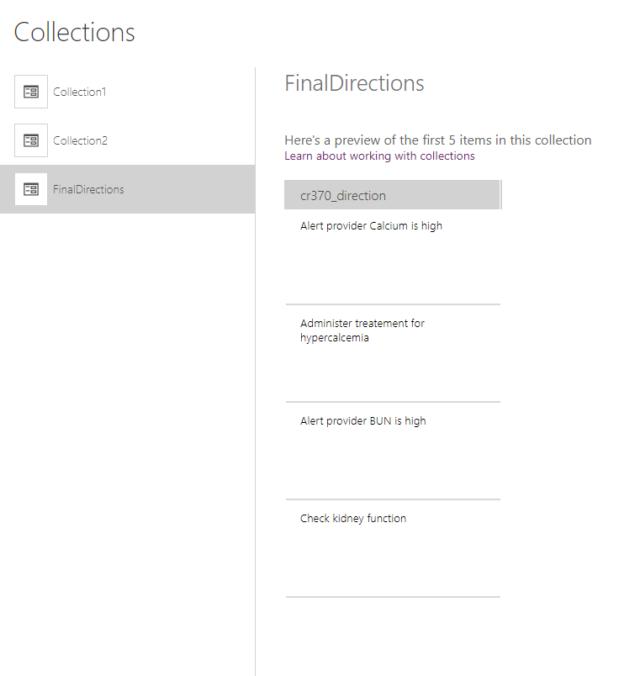
- In the last Collect, you extracted the Values from Collection2 and stored them in another Collection called FinalDirections so you can easily access these directions in the next step.
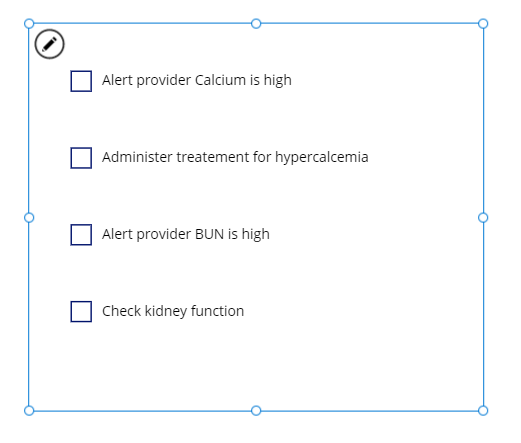
In this final section, you will display the dynamically built list of directions stored in the collection (in this example, FinalDirections) in a checklist.
- First, insert a blank vertical gallery object with FinalDirections as the data source.
- Add Checkboxes inside the gallery with ThisItem.Direction as the text property
- It should look something like the screenshot below (where each item in FinalDirections has its own checkbox)
There you have it! You’ve built a Power App that displays various healthcare values and a dynamic checklist of directions based on inputted values using entities and Power Automate.