Now that we have covered what a workflow is in Sitecore, let’s jump into configuring workflow states in a custom workflow. Again, the number of workflow states you need is entirely up to the requirements of your business process for getting content approved. This post will walk through the creation of a simple workflow. This workflow will contain three states: Draft, Awaiting Approval, and Approved. This means that at any one time, a piece of content in Sitecore will ALWAYS be in one of these three states (if workflow is applied to that item).
Configuring the Simple Workflow
In the Content Editor, navigate to /System/Workflows. Right-click the root Workflows item and insert a Workflow.
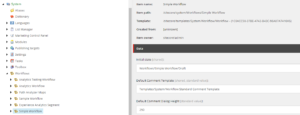
Set the Default Comment Template and the Default Comment Dialog Height to the values used in the screenshot above. Those values will come into play in a separate blog post later in this mini-series. The Initial State field will be set to be the first state a content item will start at when progressing through this workflow. Be sure to set this value to Draft state after we create them in the next subsection.
Configuring the Three Workflow States
On your newly created Simple Workflow item, right-click and insert the three states and name them: Draft, Awaiting Approval, and Approved.
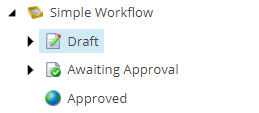
On the final Approved state item, be sure to check the Final checkbox field. This indicates to Sitecore that an item in the Approved state is allowed to be published to the CD server.
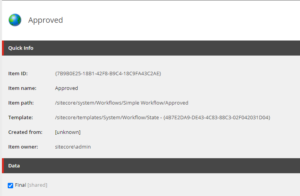
Progressing Content through the Workflow States
Now that we have the three states configured, we need to configure commands content authors can take to push content from one state to the next. To create commands, simply right-click the workflow state and insert a command. For the Draft State, we will create two commands: the Submit command and the Submit and Approve command.

On each command item, we will need to configure what state to move the content to after performing the command. The Submit command will move the content to the Awaiting Approval state. The Submit and Approve command will move the content to the Approved state. In a later blog post, we will configure what users can perform which commands. Some will only be able to submit content for approval while others will be able to directly get the content to the final approved state.
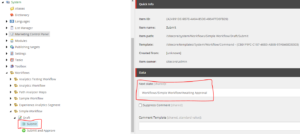
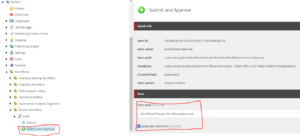
The main difference between the two commands is the state in which the content moves to after performing the command. Another difference I made here is checking the Suppress Comment field on the Submit and Approve command but not on the Submit command. This will be explored in a later blog post.
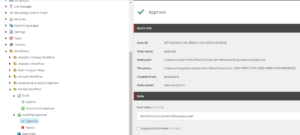
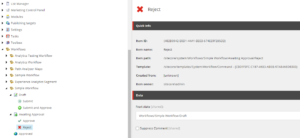
Now that we have created the commands that can get a piece of content out of the Draft state, we will now create two commands for content that is in the Awaiting Approval state. We will allow for two commands to be performed here: Approve and Reject. These commands will be set to be visible to only content authors with the power to approve and reject content in a later blog post. If the Approve command is performed, we will move the content to the Approved State. If the Reject command is performed, we will move the content back to the Draft state for a content author to make further necessary changes before approval.
Conclusion
And that’s a wrap! That’s all you need to do to configure the workflow items in Sitecore. Stay tuned for future blog posts that dive into what this workflow looks like in action.

