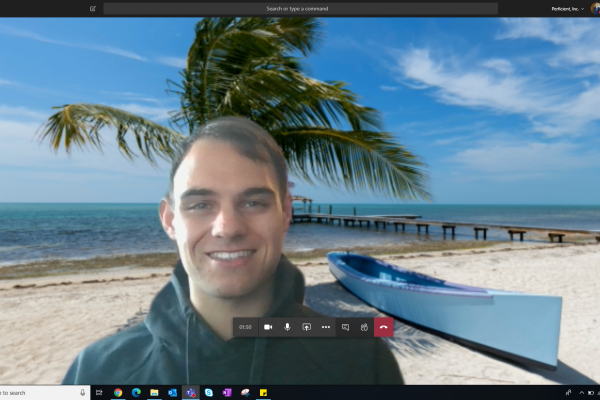
I may be stuck at home right now, but at least I can pretend I’m on a beach somewhere!
Earlier this month (April), Microsoft announced the roll-out of background effects in Teams meetings. It finally seems like this feature has made its way to almost all tenants, which means you can start using it today! In this article, we’ll go over how to apply one of Microsoft’s pre-selected images as well as a nifty trick to upload custom backgrounds in Microsoft Teams!
Applying Microsoft’s Pre-selected Images
As of the time of this writing, Microsoft provides 24 pre-selected images to choose from. This will likely increase in the future but for now, you’ll have to use one of these…or do you? We’ll show you how to apply a custom background next but for now, let’s show you how to apply one of the pre-selected images. First things first, we’ll need to create a Microsoft Teams meeting. This can be a scheduled meeting or an ad-hoc Meet Now meeting. There are two different ways you can turn on the background effects:
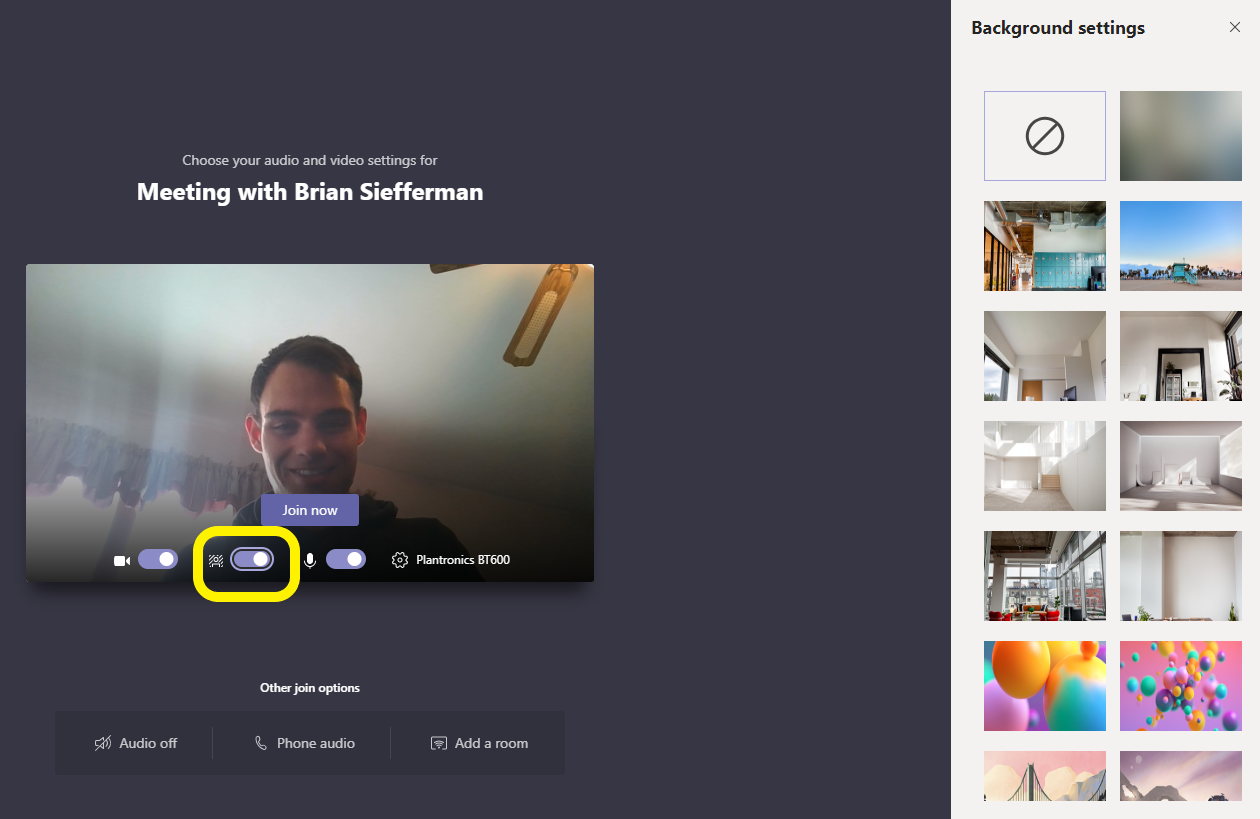
- When joining the meeting you’ll see the option to toggle on/off the background settings feature (your video toggle will need to be on as well). Toggle this on and then you’ll be presented with a list of backgrounds on the right-hand side of your meeting window.
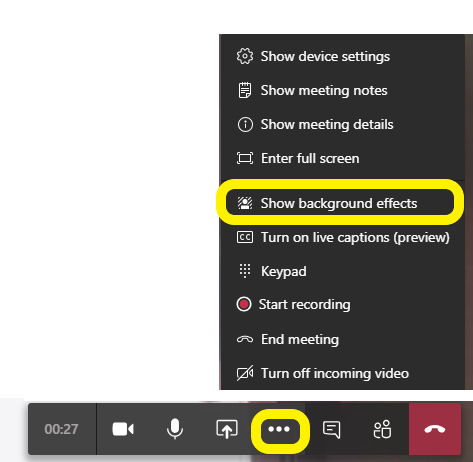
- After joining the meeting you’ll just need to click on the ellipses “…” and then you should see the option to “Show background effects”.

Once you’ve selected this, you’ll see the different background options available on the right-hand side of your meeting window.
Applying Custom Images
Let’s say the pre-selected images just aren’t doing it for you and you want to choose from your own set of images? You can do that as well! To do this, open up File Explorer and paste in the path below:
%APPDATA%\Microsoft\Teams\Backgrounds\Uploads

Once there, just upload any of the images you’d like to this folder. Now, join a meeting and go to Background settings again. You should now be able to select one of the background images you just placed in the Uploads folder. 
Easy as that! Custom backgrounds can be a cool way to stand out from your typical backgrounds that your team members may be using, but just remember to keep them “PG” people! Check back soon where I’ll cover how you can use Snap Camera to apply a lens to your face while in a Teams meeting!
READY TO GROW YOUR MICROSOFT CAREER?
At Perficient, we continually look for ways to champion and challenge our talented workforce with interesting projects for high-profile clients, encourage personal and professional growth through training and mentoring, and celebrate our people-oriented culture and the innovative ways they serve Perficient and the community.
Learn more about what it’s like to work at Perficient at our Careers page.
Go inside Life at Perficient and connect with us on LinkedIn, YouTube, Twitter, and Instagram.