So I’m hoping you all read my previous post on “Creating an Oracle Data Integrator (ODI) Interface” and hopefully it was simple to follow. Today, I want to show you how to take your interface and bundle it into a ODI package with other ODI components in which will all you to run more than 1 interface at time. Now the ODI Package is the largest unit of execution in Oracle Data Integrator. A Package is made up of a sequence of steps organized into an execution diagram[1].
Each step can either succeed or fail its execution. Depending on the execution result (success or failure), a step can branch to another step.
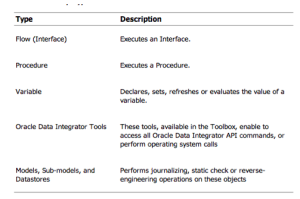
Now within ODI a package consists of the following different types of steps.
In todays blog I will be showing you how to create a simple ODI package containing some of the following steps. So lets get started!
Before you can create your ODI package, make sure you are logged into ODI and locate within Designer your project.
Once you located your project highlight “Packages” and right click your mouse. You will have 2 options to choose from, select “New Package.”
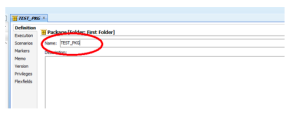
Once you have done the following you will now be able to create your ODI package. Before doing so, you will need to enter a name for your ODI package.
Once you have added the name for your ODI package, click on the “Diagram” tab on the left corner.
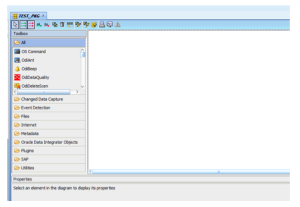
Once you have clicked the Diagram tab you will now be able to add the ODI steps that will create your package.
Now that you’re ready to create your package I want to go over ODI package toolbar.
Within the toolbar you have your “Free Choice” which is your pointer I like to call it. This allows you to drag and drop your ODI steps.
The two green lines allow you to view hidden links between steps after a successful step.
The two red lines allow you to view hidden links between steps after a failed step.
The OK green line will allow the ODI package to move to the next step once the pervious step has ran successfully.
The KO red line is the link in which will allow the ODI package to move to the next step once the pervious step has ran unsuccessfully or failed.
The next option allows you to duplicate and steps you make have within your package.
The trashcan is used to delete any steps.
The next step after the trashcan is the reorganized option in which allows you to organize the steps within your package.
The pencil option allows you to edit linked objects.
The next option allows you to execute a single step.
The thunderbolt within the yellow box will allow you to execute your package.
The next 3 options will allow you to print your package, make page configurations and will show you any warnings within your package that will need to be addressed.
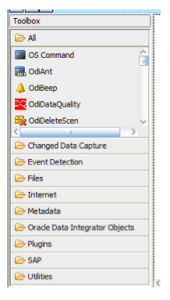
Before creating your ODI package, one thing I want to mention is the “Toolbox” section on the top left hand corner. ODI offers a lot of functions in which you can use for your package. A few of my favorites that I like to mention are;
ODIFileAppend – Append multiple flat files into 1.
ODIFtpGet – Obtain flat files on your server for loading.
ODISendMail – Send an email once your package has complete or failed.
Here in this example we will be using the following.
Now that you have your blank canvas you can now start creating your ODI package. Now first rule of thumb I always say is add your variables first. In our example, I have created a simple SYSDATE variable in which we will be using in our package.
To add the variable to your ODI package just simply drag and drop the variable to your ODI package. In addition, I will also drag over the interface I created in the previous blog posting.
Now that I have added two steps you will need to identify which step you would like to execute first. Now to do this select the step in which you would like to execute first, then right mouse click. A list of options will appear. Select “First Step.”
Now that you have your first step identified lets then link our steps together. Now there are two ways to do this.
- Click on the Ok option in your tool bar and link your steps.
- Second option will be for you to click on the “Advance” tab and select “Execute Step” and then select the next step you would like to be executed after a success of the prior step.
Your ODI package should look like the following so far.
Next we will be adding ODIBeep to our package. This can be located in the ODI Toolbox. The ODIBeep plays a default beep or sound file on the machine hosting the agent. The following file formats are supported by default[2]. We will be using this beep to notify us of our successful links and unsuccessful links.
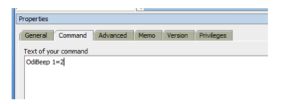
In our ODIBeep command I will be adding the following command.
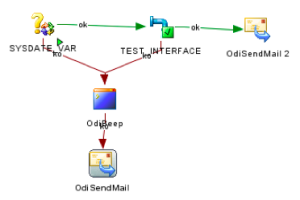
Next, I will then link all the 2 steps, SYSDATE_VAR and TEST_INTERFACE to the ODIBeep. But I will only be linking based on a failure. Now to do this you can do this in two ways.
- Click on the ko option in your tool bar and link your steps.
- Second option will be for you to click on the “Advance” tab and select “Execute Step” under the processing after failure and then select the ODIBeep.
Your package should look like the following so far.
The last step I will add, in which I recommended be added to all packages is the ODISendMail step. I will add two of these so that I am notified of a successful completion of my package or a failure within my package load.
Now that you dragged two ODISendMail steps to your package before we configure these steps add a successful link from TEST_INTERFACE to one of your ODISendMail steps and add a unsuccessful link from ODIBeep to one of your ODISendMail steps. Your package should look like the following.
Next you will need to configure your ODISendMail steps. To do this highlight one of these steps and click on the General tab. Here you will need to add all the necessary configurations. One thing you will notice is that I also added my variable in the subject line as this will call out the SYSDATE variable in our package.
Once you have configured your ODISendMail steps make sure you SAVE your package. Once done you can now execute your ODI package. You can do this in two ways.
- Within the ODI toolbar you can click on the thunderbolt within the yellow box will allow you to execute your package.
- Or you can click on the Green play button.
Next you will need to follow the same final loads steps as outlined in my pervious post, Creating an Oracle Data Integrator (ODI) Interface. This will complete this instructional post. For more information on ODI packages visit “Working with Packages – Oracle Documentation.” Please stay tuned as I will be putting together a new post on how to create ODI Load Plans and Scenarios.
[1]http://docs.oracle.com/cd/E17904_01/integrate.1111/e12643/packages.htm#CJAHIDFB
[2] http://gerardnico.com/doc/odi/webhelp/en/ref_tools/snpsbeep.htm











please provide step by step mail configuration