
 This is my third blog article covering Windows 10 IoT Core.
Part 1: https://blogs.perficient.com/microsoft/2016/01/windows-10-iot-editions-explained/.
Part 2: https://blogs.perficient.com/microsoft/2016/01/iot-development-with-windows-10-and-raspberry-pi-what-you-need/
By now we got development environment all set up (installed Windows 10 production release, enabled development mode, installed Visual Studio 2015 and IoT templates). We also set our mind on specific board which we’ll be using: Raspberry Pi 2 model B. Now it’s time to do some shopping.
Fortunately, my local electronics store had everything that I needed to get Raspberry Pi up and running. I got:
- Board itself (Raspberry Pi 2 model B).
- Generic micro USB wall charger 5V 2.1A output.
- 16 Gb micro SD HC card, class 10 (8 Gb was enough, but I found 16 Gb for a good price).
- Raspberry Pi transparent case
- SD/microSD USB card reader
- TP-Link TL-WN725N wireless USB dongle (I made sure it’s in the list of supported equipment by Microsoft 10 IoT Core)


Now its time to burn Windows 10 IoT core image into SD card. There are more than one way to do it, but by far the easiest one is to download Windows IoT Core Dashboard application from there: http://go.microsoft.com/fwlink/?LinkID=708576.
After you install IoT dashboard, insert micro SD card into reader and set dashboard application. You’ll see something like that: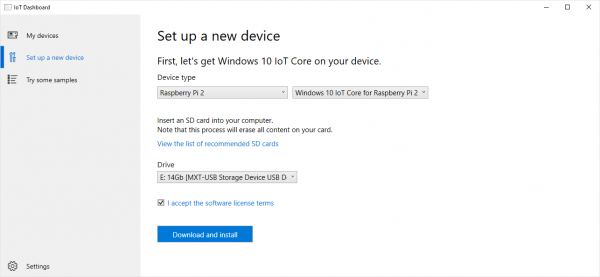
Select your board type (Raspberry Pi 2), Windows version and your SD card. Then click “download and install”. Application will download Windows image and write it to the card.
Then, insert card into Raspberry PI, put board into enclosure, plug in WiFi dongle (or Ethernet cable).
Where are two ways of interfacing with Windows 10 IoT core: “headed” and “headless”. “Headed” mode means that device is connected to HDMI monitor, USB keyboard and mouse. “Headless” means that device is only connected to network and you are interfacing with it through web interface and/or Powershell.
I’m going to be using headless mode because I don’t have HDMI monitor available at the moment. But even if I did, headed mode is not that useful unless you planning to build an application with UI: Windows 10 IoT Core doesn’t have a system UI, or rather has a very simplistic version of it which is only good for setting some options, like choosing which WiFi network to connect to. Any of these options could be set through web interface or powershell.
So, I assembled Raspberry Pi, plugged it to network and plugged in power. The board started booting up.
Finally, I navigated to “My devices” tab on dashboard and after some time (about 5 minutes or so) my board came up in the list of devices. Note that it’s important that your development computer and IoT board to be on the same network (wired or wireless). If they are not on the same network then you’ll not be able to connect to board.
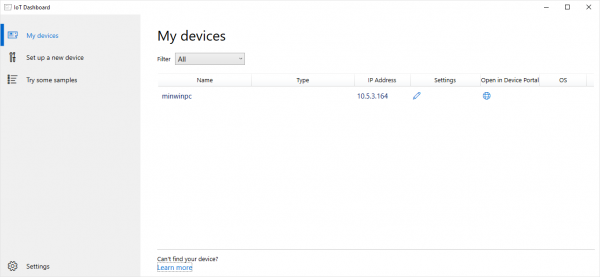
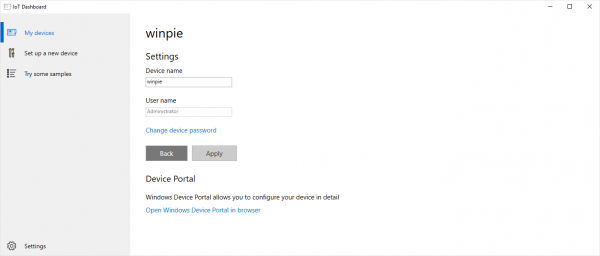
By default freshly installed Windows 10 IoT Core device is named “minwinpc”. In IoT dashboard you have an option to rename device (edit settings icon) or navigate to device web interface page (globe icon). I renamed my device to “winpie”:
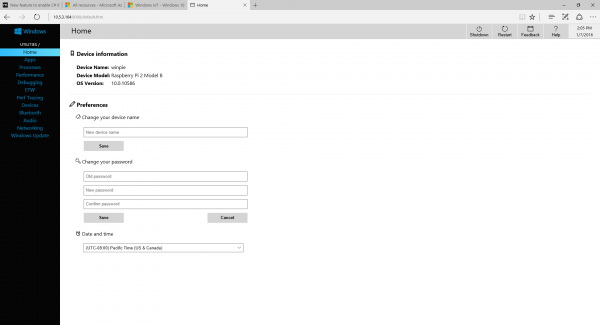
And then I headed to device web portal and changed Administrator password from default p@ssw0rd to something unique:
This is it. Now you have a Windows 10 IoT core device running on your network and ready for you to start development on it!
In my next blog post I’m going to go through developing a first application for Raspberry Pi.