
In my previous blog https://blogs.perficient.com/2024/07/01/sitecore-personalize-close-event-logic/, I shared a method for using cookies to enable the user to dismiss an alert banner. This process involved writing the cookie when the user clicks the close icon and checking for the cookie when the experience is displayed. This approach worked well because the entirety of the javascript code could be stored in the web template. This ensures the code to check for the cookie can’t be missed or forgotten when the template was used. Unfortunately, this had an unintended side effect. Personalize still executed the experience and counted it in the analytics and performance metrics even though the javascript never added the elements to the screen. This lead to overinflated metrics and the inability to use the data for accurate forecasting. This problem can be overcome with advanced page targeting.
Advanced Page Targeting
Advanced page targeting allows you to run client side javascript to decide if an experience should execute. Since the javascript runs client side, you can read the url and query string parameters, you can access the console to log messages, you can access the document object to query selectors on the page, and of course read cookies. Advanced page targeting javascript runs after the page loads, but before the experience loads which allows us to prevent the experience from executing and overinflating analytics. Be sure to keep your script as lean and performant as possible to reduce the possible screen flicker of loading the experience after the page has loaded.
Checking Cookies with Advanced Page Targeting
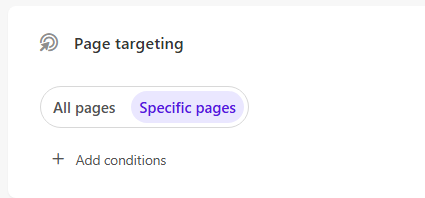
In order to use advanced page targeting, you must select the “specific pages” setting under “Page Targeting”.
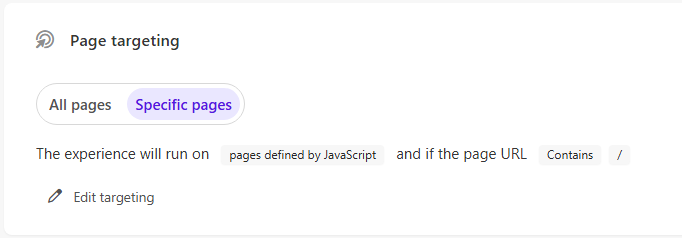
Enable page targeting on specific pages to enable advanced page targeting
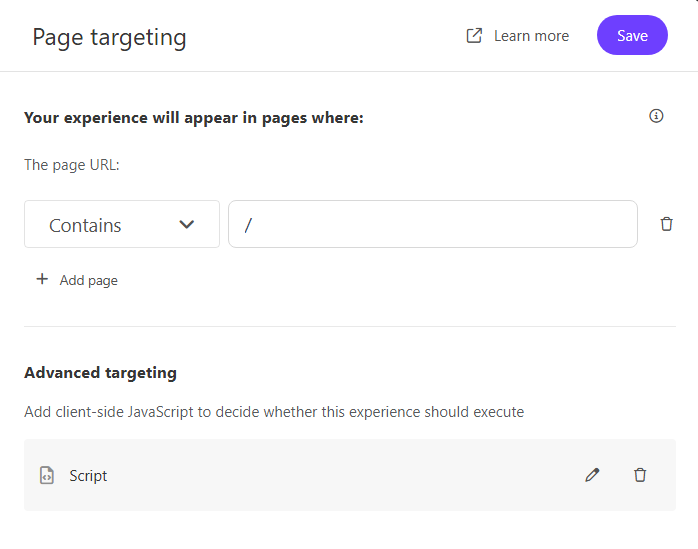
In the flyout window for page targeting, add any filters for pages where you want the experience to display. If you want the experience to display on all pages, simply use the contains “/” rule. In the advanced targeting section, click the “add script” button.

Configure advanced page targeting

In the advanced targeting code editor, enter the following code.
(function() {
   // console.log(new Error().stack);

    var cookies = document.cookie.split(';');
    for (var i = 0; i < cookies.length; i++) {
        var cookie = cookies[i].trim();
        if (cookie.indexOf('pers-' + selectedVariant.ref + '=clicked') === 0) {
            return false;
        }
    }

    targetingPassed();
})();
In my previous blog, I created the cookie using the variant.ref as part of the cookie name. This adds the guid of the current experience id to the name of the cookie making it unique even when the web template was reused. Advanced targeting does not have access to the variant.ref property. So it doesn’t work with the close event logic idea I came up with before. However, there is a selectedVariant.ref property that you can use. Using selectedVariant.ref works for both experiences and experiments as it can dynamically get the correct guid of the current variant at run time.
When personalize evaluates this block of javascript code, it only continues processing the flow of execution for the experience if the “targetingPassed()” function is called. If you want to stop the flow of execution, return false. In our case, we want to stop the flow of execution if the cookie is found. Otherwise we can call the targetingPassed() function and allow the experience to display to the user.
Once you have added advanced targeting javascript, you can edit the script by clicking the pencil icon.
Edit advanced page targeting settings
Edit advanced page targeting script
Things to Know About Advanced Page Targeting
As mentioned, this solution solves the problem of overinflating analytics. The downside is the advanced page targeting settings and code cannot be saved with the web template. So the marketer or content author must remember to enable this setting and add the javascript code to the experience. If the code is not added, the user will be able to close the experience, but it will display on the next page load since the code to check for the cookie is missing. One other thing to note, if you change your page targeting settings back to “all pages”, the advanced targeting script is deleted from the experience. In both cases, ensure that it is easy for content authors to find and reuse.