
Continuing our Plop.js journey from the last blog. Be sure to go back and read the previous installment in this series.
In our previous discussion, we explored an introduction to Plop.js and its installation in a Next.js project. Additionally, we looked at a basic skeleton of plopfile.js.
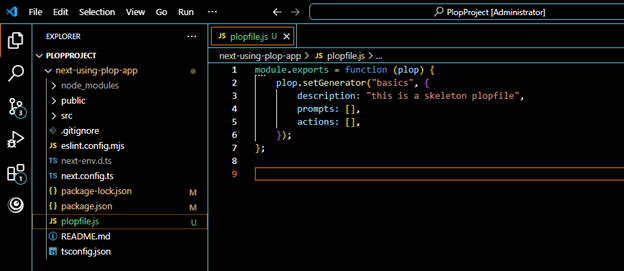
Understanding the Components of plopfile.js
As we saw earlier, the plopfile.js consists of key elements that define the generation. Let’s break them down again for clarity:
- The “setGenerator” creates a plop generator. Here, plopfile.js has a single generator called “basics.”
- The “description,” as the name suggests, describes the purpose of the generator.
- The “prompts” is an array of prompts. This could be added to your created generator.
- The “actions” take the user’s information to each prompt. It is an array of where each action is an object. This is an important step and requires creating some templates.
Creating Our First Template
Before creating a template, understand the concept of actions inside “setGenerator.” After all, this is where the real magic happens. Let’s write a generator to create a new component.
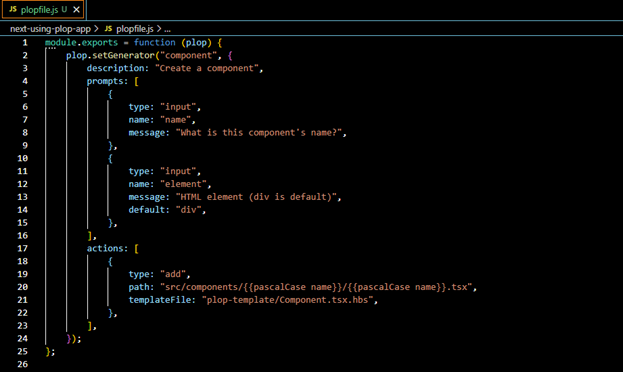
plop.setGenerator("component", {
  description: "Create a new React component",
  prompts: [
    {
      type: "input",
      name: "name",
      message: "What is this component’s name?",
    },
  ],
  actions: [
    {
      type: "add",
      path: "src/components/{{pascalCase name}}/{{pascalCase name}}.tsx",
      templateFile: "plop-template/component.hbs",
    },
  ],
});
Breaking Down the Code
- In the above example, we use the “add” action type, which creates a file at the specified “path” and fills it with a skeleton defined in “templateFile.”
- Plop relies on Handlebars (Handlebars.js), a templating engine for generating structured text like HTML or JavaScript files.
- Notice that the “templateFile” ends with a .hbs extension, which signifies a Handlebars template.
Exploring More Actions
Apart from “add”, there are several other built-in actions like:
- “addMany”
- “modify”
- “append”
- “custom” (for fully customized actions)
You can explore the complete list here: Plop.js Built-in Actions.
Organizing Templates in a Folder
Now that we understand actions, let’s organize our template files.
- First, create a new folder called plop-template at the root of your project.
- Inside this folder, create different Handlebar templates for various file types, such as:
- .tsx for React components
- .scss for styles
- .md for documentation
- .test.tsx for test cases
Handlebars Syntax Example
In Handlebars, variables are enclosed within double curly braces {{}}. Moreover, built-in helpers like “pascalCase” allow the formatting of variables.

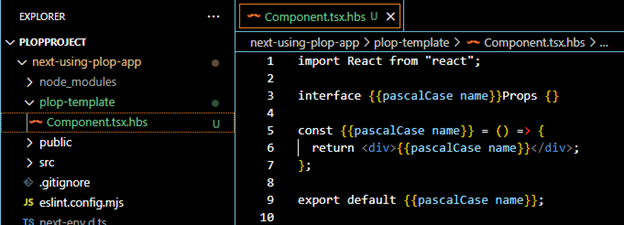
const {{pascalCase name}} = () => {
  return <div>{{pascalCase name}} Component</div>;
};

export default {{pascalCase name}};
In addition to “pascalCase,” you can also use:
- “camelCase”
- “snakeCase”
- “lowerCase”
Check out the complete list here: Plop.js Built-in Helpers.
Running the Generator Using Plop
After setting everything up, we are now ready to run our generator! There are two ways to do this:
1. Using CLI Command
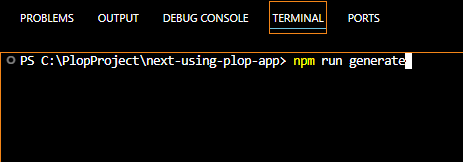
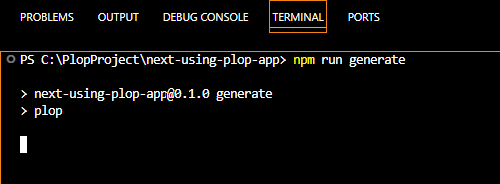
2. Using VS Code Script Runner
Alternatively, you can open the package.json file, hover over “generate script,” and click “Run Script” in your editor.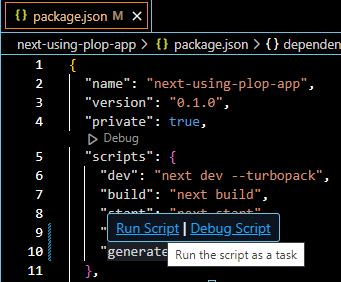
Generating Our First Component with Plop
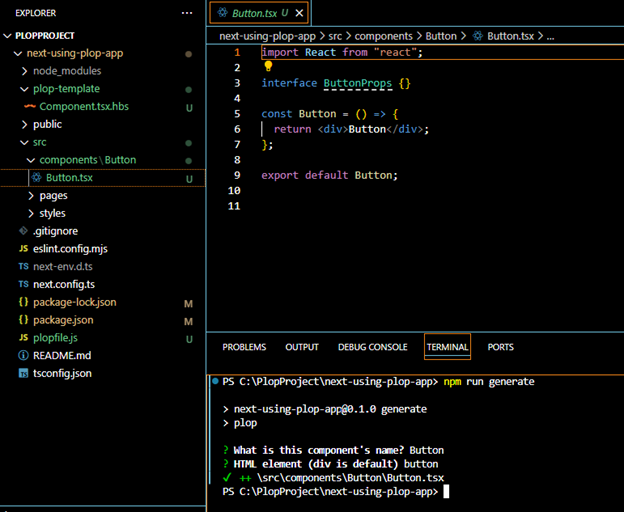
Next, let’s create our first real component, “Button,” using the plop command npm run generate (with either of the two options mentioned above). After you run the command, the terminal will show prompts as mentioned in the plopfile.js
This will prompt you with questions as per plopfile.js, such as:
- What is this component’s name? → Button
- HTML element (default is div)? → button
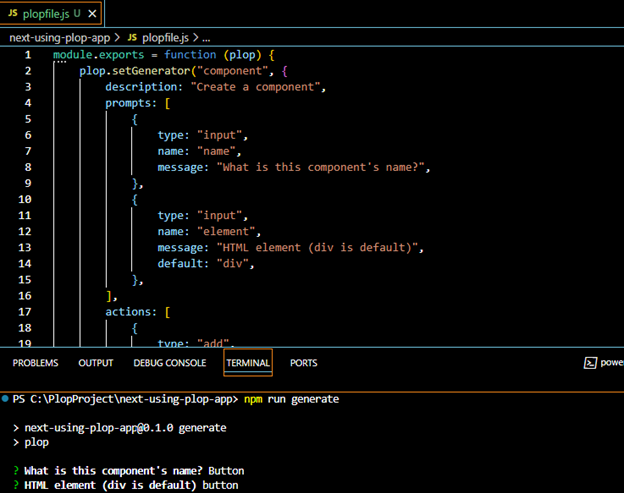
Once you provide the inputs (refer to the above screenshot to understand better), the component gets created at the specified location, and you will see a success message in the terminal.
Final Thoughts
As you can see, Plop.js simplifies component creation by automating file generation and reducing repetitive tasks. By setting up structured templates, we ensure consistency and boost productivity across the project.
In the upcoming blog, we will explore:
- Other key Plop.js methods (beyond “setGenerator”)
- Built-in and custom actions
- More practical examples
So, stay tuned!