Welcome to a deeper journey into the JEST React Testing Library world! We’ll explore advanced methods and tricks that enhance your testing expertise here. If you’re new to JEST, don’t worry! We’ve got you covered with “Exploring JEST React Testing Library: A Complete Overview,” which helps you understand basic and advanced insights, ensuring a comprehensive understanding of JEST Testing. Go and check this out right here.
Now, let’s start exploring advanced features and techniques.
1. Simulating User Interactions
JEST React Testing Library allows you to simulate user interactions with your components. This feature lets you test how your components respond to different user actions. Here are some examples:
a. Simulating button clicks
The below code defines a simple functional component named “Button” that takes a prop named “label” and renders a button element with the provided label.
Button.js:
import React from "react";
const Button = ({ label, onClick }) => {
  return <button onClick={onClick}>{label}</button>;
};
export default Button;
Button.test.js:
import React from "react";
import { render, screen, fireEvent } from "@testing-library/react";
import Button from "./Button";
test("button click triggers an action", () => {
  const handleClick = jest.fn();
  render(<Button label="Click me" onClick={handleClick} />);
  const buttonElement = screen.getByText(/click me/i);
  fireEvent.click(buttonElement);
  expect(handleClick).toHaveBeenCalledTimes(1);
});
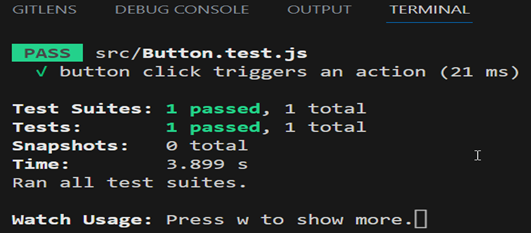
In this example, we define a mock function “handleClick” using “jest.fn()”. We pass this function as a prop to the “Button” component. After rendering the component, we simulate a button click using “fireEvent.click” and assert that the “handleClick” function is called once. Below is a screenshot of the output showing the successful execution of the test cases:

b. Simulating Input value change
The below code defines a simple functional component named “LoginForm” that includes a controlled input field for capturing a username. The “useState” hook manages the username state, and the input is associated with a label, allowing users to input their username. Any changes trigger the “handleInputChange” function, keeping the username state synchronized with the input value.
LoginForm.js:
import React, { useState } from "react";
const LoginForm = () => {
  const [username, setUsername] = useState("");
  const handleInputChange = (e) => {
    setUsername(e.target.value);
  };
  return (
    <div>
      <label htmlFor="username">Username:</label>
      <input
        type="text"
        id="username"
        value={username}
        onChange={handleInputChange}
      />
    </div>
  );
};
export default LoginForm;
LoginForm.test.js:
import React from "react";
import { render, screen, fireEvent } from "@testing-library/react";
import LoginForm from "./LoginForm";
test("Typing in username field updates the value", () => {
  render(<LoginForm />);
  const usernameInput = screen.getByLabelText(/username/i);
  fireEvent.change(usernameInput, { target: { value: "testuser" } });
  expect(usernameInput.value).toBe("testuser");
});
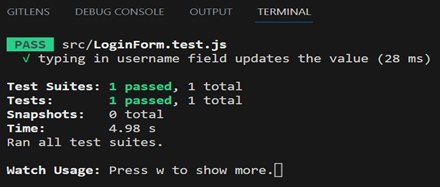
In this example, we render a “LoginForm” component that contains an input field for the username. We use “screen.getByLabelText” to find the input field and “fireEvent.change” to simulate the change in input value in the field. Finally, we assert that the input field’s value is updated correctly. Below is a screenshot of the output showing the successful execution of the test cases:

2. Testing Asynchronous Behaviour
The “ProductInformation” component is a React functional component that fetches product data from “https://fakestoreapi.com/products/1” using the “fetchProductData” function. The data is stored in the data state using “useState”. The “useEffect” hook ensures data fetching occurs when the component mounts. The component conditionally renders either the “title” of the data or a “Loading…” message based on the data’s availability.
ProductInformation.js:
import React, { useEffect, useState } from 'react';
const ProductInformation = () => {
  const [data, setData] = useState(null);
  const fetchProductData = async () => {
    const response = await fetch('https://fakestoreapi.com/products/1');
    const data = await response.json();
    setData(data);
  };
  useEffect(() => {
    fetchProductData();
  }, []);
  return (
    <div>
      {data ? (
        <div>
          <p>title: {data.title}</p>
        </div>
      ) : (
        <p>Loading...</p>
      )}
    </div>
  );
};
export default ProductInformation;
ProductInformation.test.js:
import React from "react";
import { render, screen, waitFor } from "@testing-library/react";
import ProductInformation from "./ProductInformation";

test("displays fetched data", async () => {
  render(<ProductInformation />);
  const loadingElement = screen.getByText(/loading/i);
  expect(loadingElement).toBeInTheDocument();
  await waitFor(() => {
    const dataElement = screen.getByText(/title: /i);
    expect(dataElement).toBeInTheDocument();
  });
});
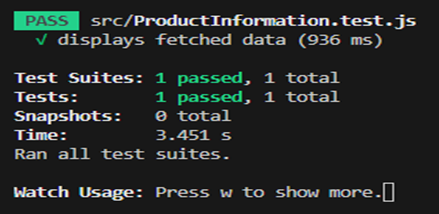
In this example, we render the “ProductInformation” component, which fetches data asynchronously. Initially, we expect to see a loading message. Using “waitFor” and “await”, we wait for the data to be fetched and then assert that the data is displayed. Below is a screenshot of the output showing the successful execution of the test cases:

Conclusion
In this second part of our guide, we delved into advanced features and techniques of the JEST React Testing Library. We explored simulating user interactions and handling asynchronous behaviour. Combining the knowledge from both parts of this guide allows you to write comprehensive tests for your React components, ensuring their reliability and robustness.

