
Introduction:
In the second installment of our Spring Boot blog series, we delve into the fundamental concepts that form the backbone of any Spring Boot application. From managing dependencies with Maven or Gradle to working with data using Spring Data and mastering the intricacies of RESTful web services, we leave no stone unturned. So, fasten your seatbelts as we embark on a journey through Dependency Management, Spring Data, and the depths of RESTful Web Services.
Dependency Management with Maven or Gradle
Introduction to Build Tools
In the realm of Spring Boot development, build tools play a crucial role in managing dependencies, compiling source code, and packaging applications. Two popular build tools in the Java ecosystem are Maven and Gradle.
Maven
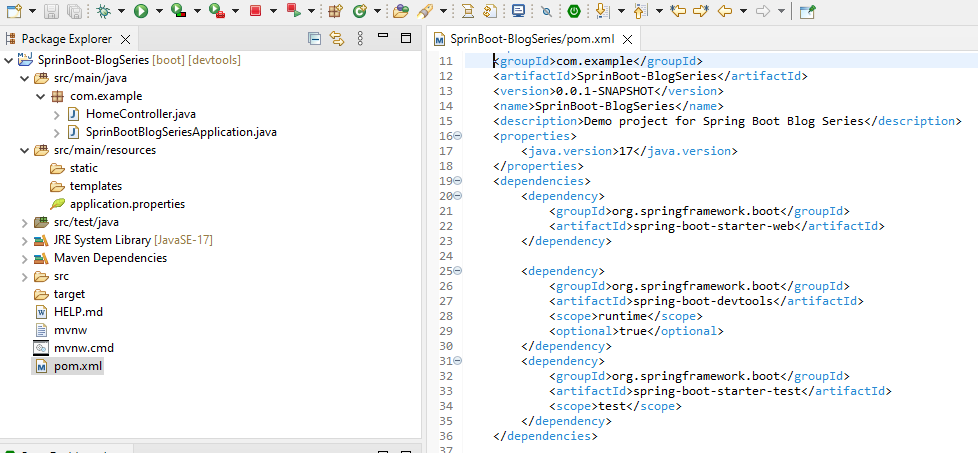
Maven is a widely used build automation and project management tool. It uses a declarative approach to define project configurations and dependencies in an XML file named pom.xml. Maven simplifies the build process by providing a standardized structure for projects and a central repository for downloading dependencies.
Follow the below steps for Maven:
Import a maven project in Eclipse
- Open Eclipse.
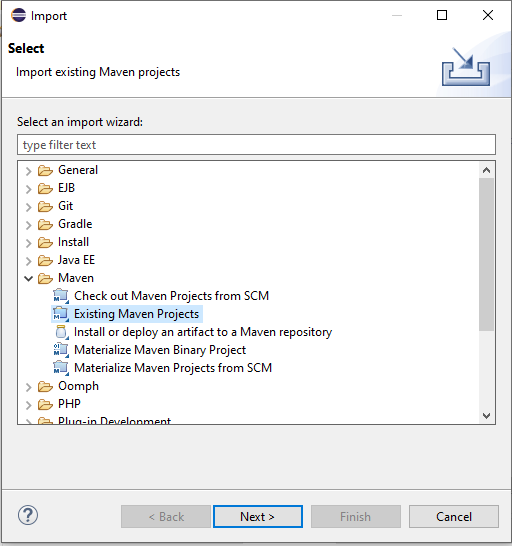
- Select File > Import > option.
- Select Maven Projects Option. Click on Next Button.
- Select the Project location, where a project was created using Maven. I have created a Java Project SpringBoot-Blog Series in the previous part.
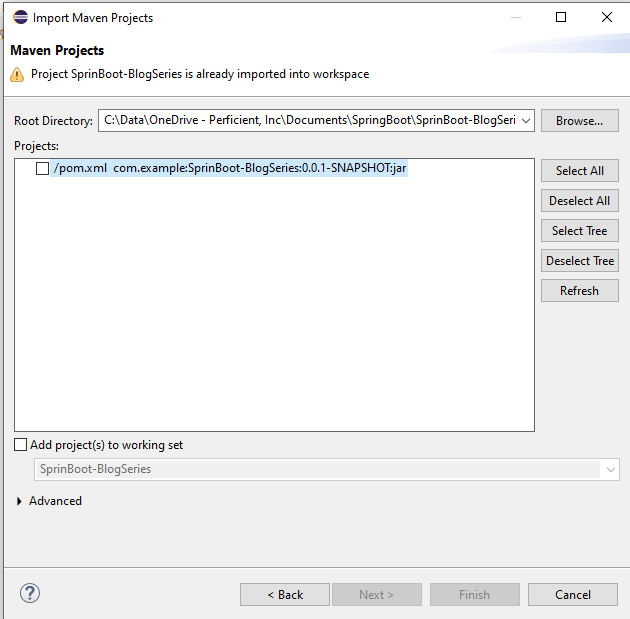
- Click the Finish Button.
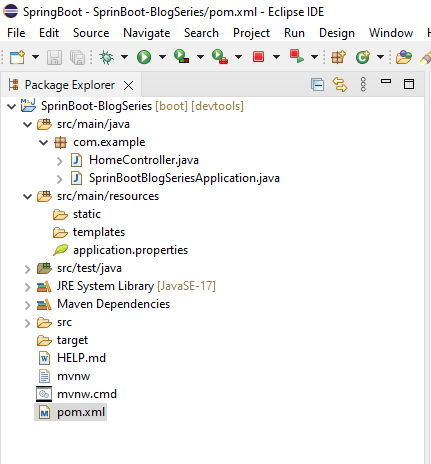
Now, you can see the Maven project in eclipse.
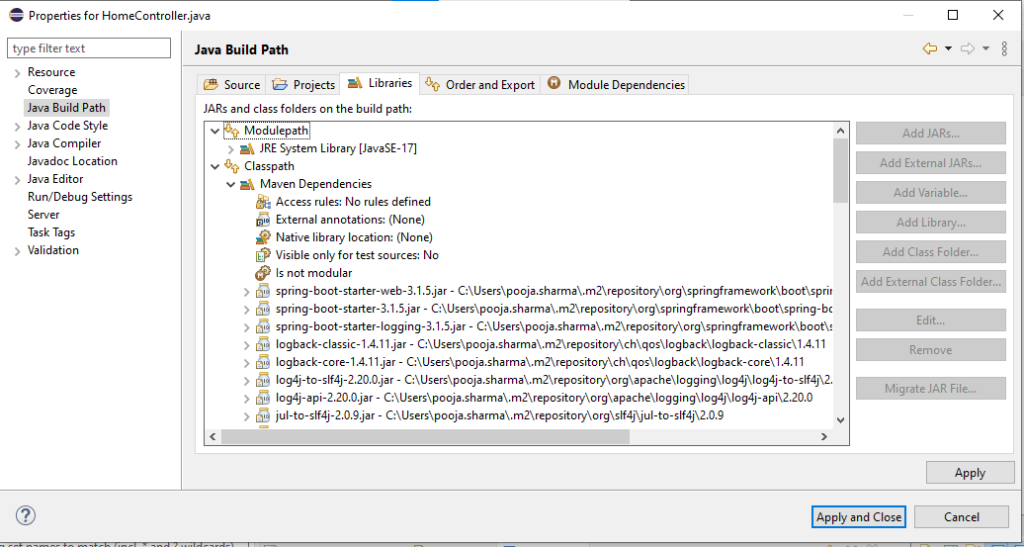
Now, have a look at Spring Boot Blog Series project properties. You can see that Eclipse has added Maven dependencies to java build path.
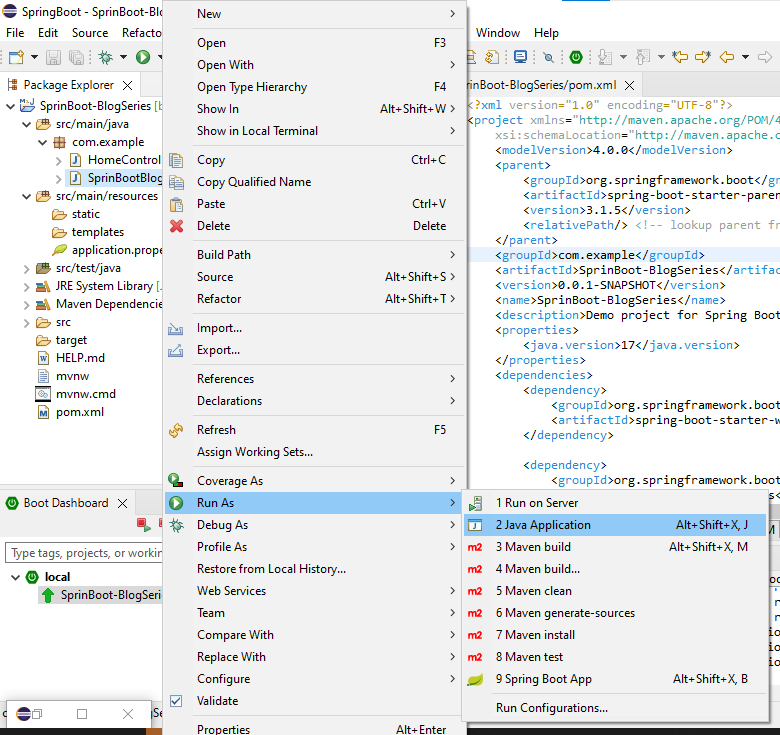
Now, it is time to build this project using the maven capability of Eclipse.
- Right-click on the Spring Boot Blog Series project to open the context menu.
- Select Run as an option.
- Then maven package option. Check the console for logs.
- Maven will start building the project
Now, right-click on HomeController.java. Select the Run As option. Then select Java Application.
You will able to see the output in the console.

Gradle
Gradle is another powerful build tool that offers flexibility and extensibility. It uses a Groovy or Kotlin-based DSL (Domain-Specific Language) for building scripts. Unlike Maven, Gradle allows developers to write concise and expressive build scripts. It also supports incremental builds, making it efficient for large projects.
First of all, we have to add Java plugin to the build script, because, it provides the tasks to compile Java source code, run the unit tests, create a Javadoc, and create a JAR file.
Use the following line in build.gradle file.
apply plugin: ‘java’
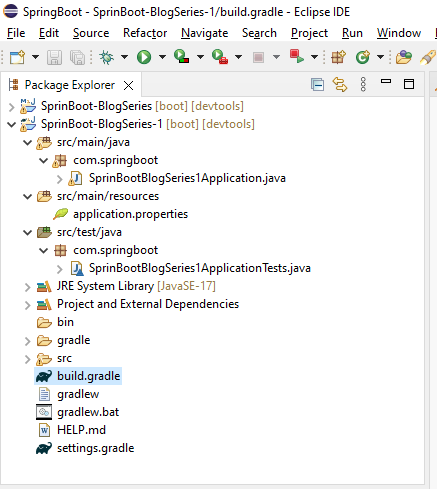
Java Default Project Layout
Whenever you add a plugin to your build, it assumes a certain setup of your Java project (similar to Maven). Take a look at the following directory structure.
- src/main/java contains the Java source code.
- src/test/java contains the Java tests.
If you follow this setup, the following build file is sufficient to compile, test, and bundle a Java project.
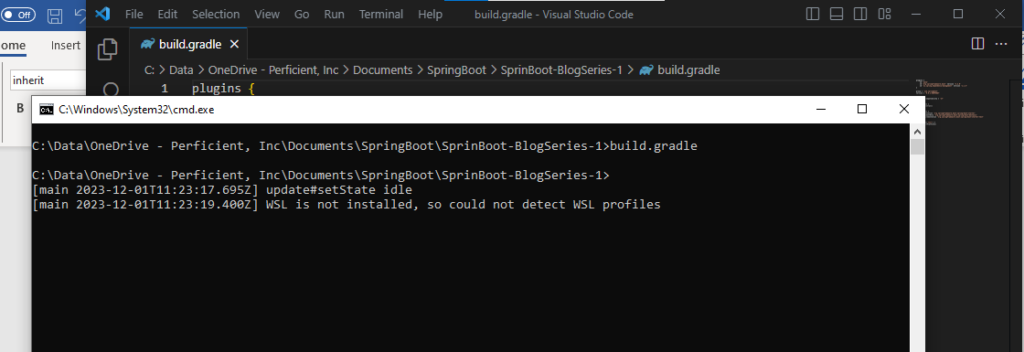
To start the build, type the following command on the command line after navigating to your project path.
Command: build.gradle

init Task Execution
Gradle does not yet support multiple project templates. But it offers an init task to create the structure of a new Gradle project. Without additional parameters, this task creates a Gradle project, which contains the gradle wrapper files, a build.gradle and settings.gradle file.
When adding the –type parameter with java-library as value, a java project structure is created and the build.gradle file contains a certain Java template with Junit. Take a look at the following code for build.gradle file.
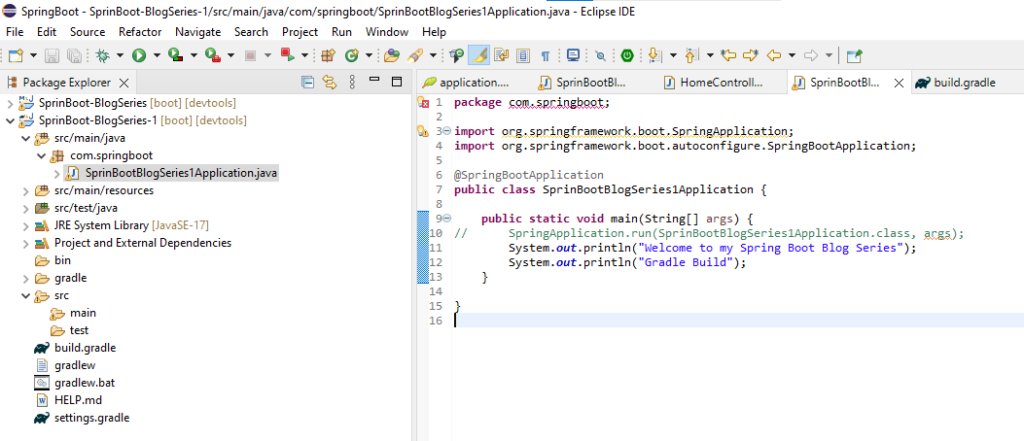
Execute both the files main as well as test.
Path: /SprinBoot-BlogSeries-1/src/main/java/com/springboot/SprinBootBlogSeries1Application.java
Path: /SprinBoot-BlogSeries-1/src/test/java/com/springboot/SprinBootBlogSeries1ApplicationTests.java
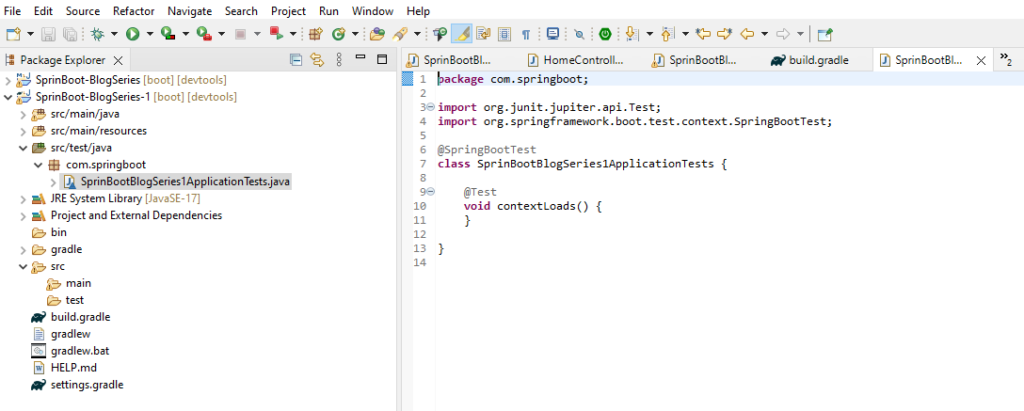
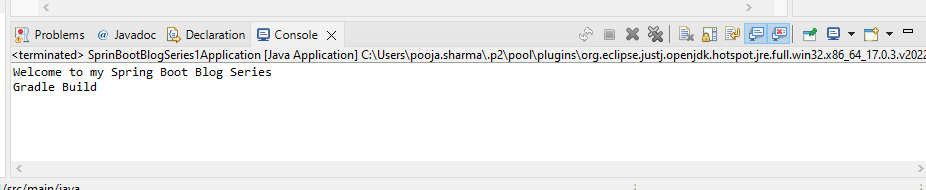
Now, right-click on SprinBootBlogSeries1Application.java. Select the Run As option. Then select Java Application.
You will be able to see the output in the console.
Configuring Dependencies
Both Maven and Gradle make dependency management seamless. Developers declare dependencies in the build configuration files, and the build tool takes care of downloading and managing them. For Spring Boot projects, dependencies are specified for various components, such as Spring Core, Spring Web, Spring Data, etc.
For example, adding the Spring Web dependency, and Spring boot dev tools dependency to a Maven project looks like this in pom.xml file:
Managing Plugins
Build tools often use plugins to extend their functionality. In Spring Boot projects, plugins can be employed for tasks like packaging the application into an executable JAR or WAR file. The plugins are configured in the build tool’s configuration file.
Working with Data in Spring Boot
Introduction to Spring Data
Spring Data simplifies data access in Spring applications. It provides a consistent programming model and abstraction over various data stores, including relational databases, NoSQL databases, and more. Spring Data aims to reduce boilerplate code and streamline common data access tasks.
Setting up Spring Data JPA
Spring Data JPA (Java Persistence API) is a part of the Spring Data umbrella that simplifies the development of data access layers using JPA. It allows developers to interact with databases using standard JPA annotations and queries. Configuring Spring Data JPA involves defining a data source, setting up entity classes, and configuring repositories.
<dependency>
<groupId>org.springframework.boot</groupId>
<artifactId>spring-boot-starter-data-jpa</artifactId>
</dependency>
Enter the above code in pom.xml to add Data JPA dependency.
Creating Repositories and Entities
Repositories in Spring Data provide a high-level abstraction for data access operations. They eliminate the need for writing boilerplate code for CRUD (Create, Read, Update, Delete) operations. Entities represent the data model and are typically annotated with JPA annotations to map them to database tables.
As the name suggests,
- CREATE Operation: Performs the INSERT statement to create a new record.
- READ Operation: Reads table records based on the input parameter.
- UPDATE Operation: Executes an update statement on the table. It is based on the input parameter.
- DELETE Operation: Deletes a specified row in the table. It is also based on the input parameter.
For creating repositories with crud operation please click here .
RESTful Web Services in Depth
Request Mapping and Controllers
RESTful web services are a key component of modern web applications. In Spring Boot, creating RESTful APIs is simplified using annotated controllers. Controllers handle HTTP requests and define the structure of the API. Annotations like @RestController and @RequestMapping are used to map URLs to methods.
Request and Response Bodies
RESTful services often deal with data in JSON or XML formats. Spring Boot supports automatic conversion between Java objects and these data formats. Request bodies can be automatically mapped to Java objects using @RequestBody annotation, while @ResponseBody annotation helps convert Java objects to the appropriate response format.
@RequestBody annotation
The @RequestBody annotation links the HTTPRequest body to the domain object, in layman’s words. Using HTTP Message Converters, the Spring framework automatically de-serializes incoming HTTPRequests and converts them to Java objects.
To resolve the method argument based on the content type of the request, we send the body of the request via a HttpMessageConverter. If the preceding definitions appear confusing, the @RequestBody annotation allows us to get the request’s content and transform it into a Java Object automatically.
Now, let’s create a controller and explain where exactly @RequestBody annotation is used.
package com.example;
import org.springframework.web.bind.annotation.GetMapping;
import org.springframework.web.bind.annotation.PathVariable;
import org.springframework.web.bind.annotation.PostMapping;
import org.springframework.web.bind.annotation.PutMapping;
import org.springframework.web.bind.annotation.RequestBody;
import org.springframework.web.bind.annotation.RestController;
@RestController
public class ProductAPIController {
@GetMapping
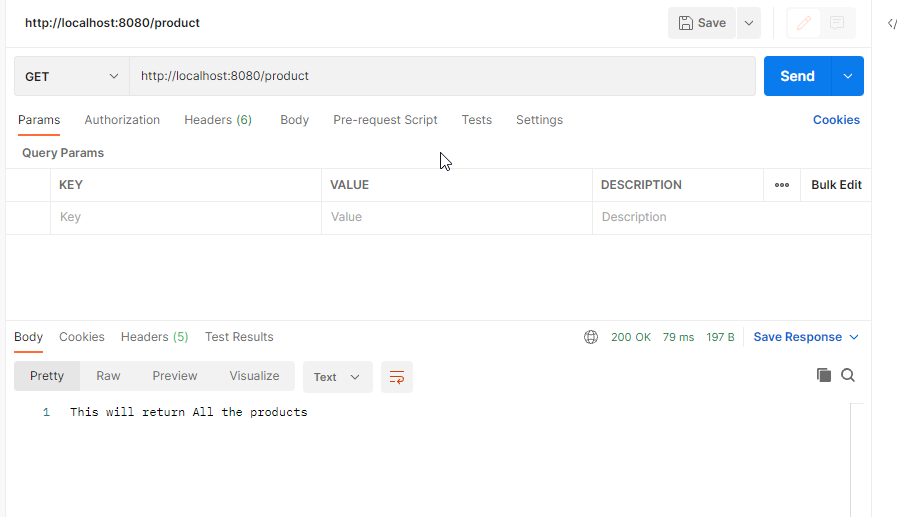
public String getAllProducts() {
// code to get all product goes here
return "This will return All the products";
}
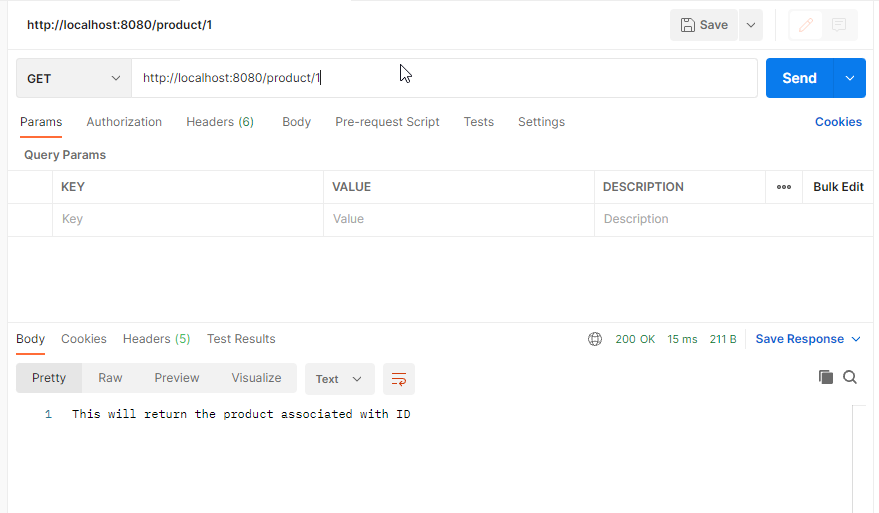
@GetMapping(value = "{id}")
public String getProduct(@PathVariable Integer id) {
// code to get the product by ID goes here
return "This will return the product associated with ID";
}
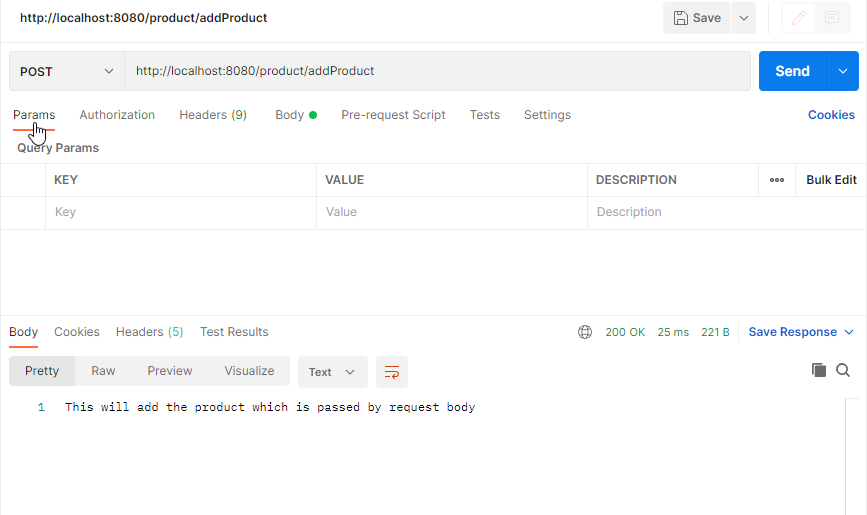
@PostMapping(value = "addProduct")
public String addProduct(@RequestBody Product product) {
// code to add the product goes here
return "This will add the product which is passed by request body";
}
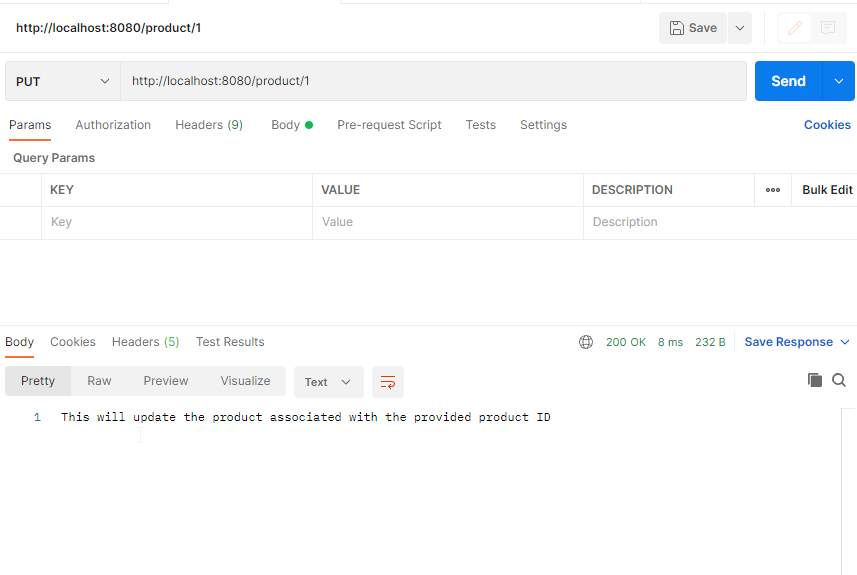
@PutMapping(value = "{id}")
public String updateProduct(@RequestBody Product product, @PathVariable Integer id) {
// code to update product associated with the given id will go here
return "This will update the product associated with the provided product ID";
}
}
As seen in the code above, the Product object is annotated with @RequestBody which means the PostRequest has a body that contains the JSON format of the Product object which is captured as a parameter by the method addProduct via our @RequestBody annotation.
Java will automatically deserialize the incoming JSON into a Product object if the JSON is valid and as per the Object naming conventions. This all is done by our annotation.
If we test our application via Postman we can see our output as below got Get, Post, and Put methods,
@ResponseBody annotation in Spring MVC
- To put it another way, @ResponseBody instructs the Spring framework to serialize a return object into JSON or XML and return it as part of the HTTPResponse.
- When interacting with the REST API in Spring 4.x, we should use @RestController on a class level rather than @ResponseBody on a method level.
- @RestController is a constructed annotation with @Controller and @ResponseBody that is itself a meta-annotation.
- In the previous example, our addProduct function returns a Product object, which we want to deliver in the HTTPResponse as JSON. We may still specify the content type that our function returns when we use the @ResponseBody annotation.
- The generated property of the @RequestMapping may be used for this.
Note that annotations like @PostMapping, @GetMapping, etc. define aliases for that parameter. - As seen in our controller above, we have @RestController annotation so we don’t need @ResponseBody anymore. The @RestController will automatically add @ResponseBody when needed.
If you haven’t gone through the Basics of SpringBoot and Environment setup Click here to Read.
Conclusion
In conclusion, mastering these essential Spring Boot concepts, including build tools, data access with Spring Data, and the intricacies of RESTful web services, lays a solid foundation for developing robust and scalable applications. These concepts empower developers to efficiently manage dependencies, interact with databases, and create well-designed and resilient APIs.
Thank you for sharing good information.