As we learned in the last blog, how do we create Virtuoso Journeys and their checkpoints. In this blog, we will see some essential commands and how to use them in Virtuoso to write tests in Natural Language Syntax and by targeting a specific element.
Virtuoso Tests
Following the creation of Journey, test cases can be written in two ways: in plain English and by targeting specific elements on the page using selectors like Hint, XPath, ID, and JS Path.
When test steps are written in the natural English language, the page element automatically generates a Hint selector based on the text of the target element.
For example:-‘Click, on ‘Name.’ ‘
By including more selectors in the target elements, you can also improve the chances of interacting with the target element higher.
For example – Consider a scenario where the user wants to navigate to the Perficient home page from “https://www.perficient.com/contact” via the ‘Perficient’ logo on the page’s footer. So here, if the user enters ‘Click on ‘Perficient’ ‘ Virtuoso will click the very first link on the page found with the Hint ‘Perficient’ from the two links, hence if we write using selectors, i.e., ‘Click on “//div[@class=’footer-container-logo’]//a[@aria-label=’Go to Perficient home page’]” ‘ Virtuoso will target the specific link user wanted to click from the footer.
Virtuoso Commands
To write Virtuoso test steps in the checkpoint, hover over the checkpoint where you need to write the step and click on ‘Add Step’; this will create a new input field inside a checkpoint to add a test step.
Let us see some important commands which help us in writing the test steps:
1. Navigate
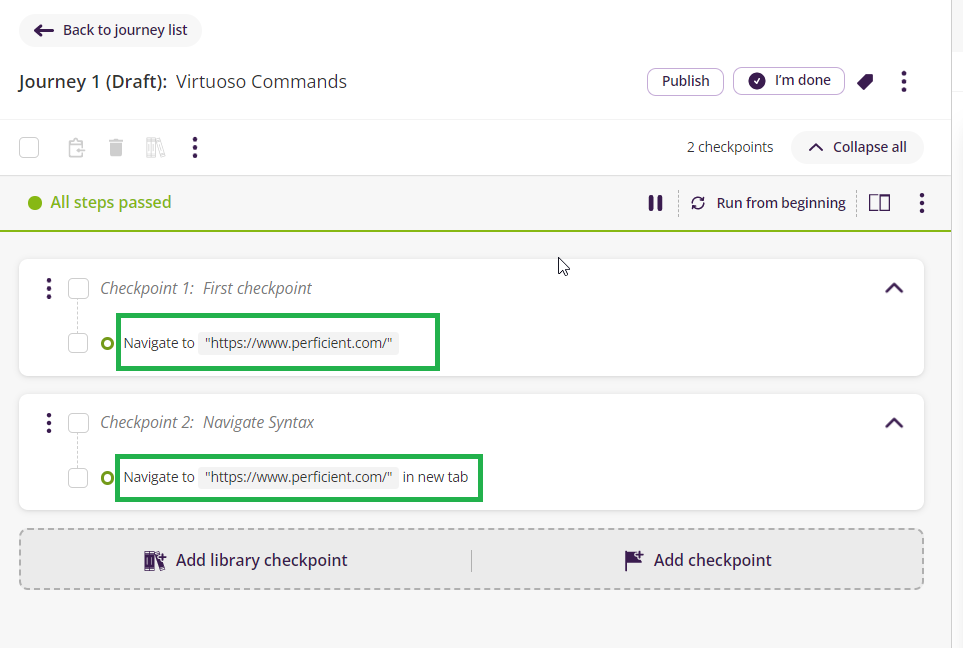
The ‘Navigate’ command is used to navigate to a specific URL defined by the user. By entering any of the below syntaxes, Virtuoso will automatically understand the natural language and change it to ” Navigate to ‘URL’ ”
Examples-
- Navigate to “https://www.perficient.com/.” Refer first selection below the screenshot.
- Open “https://www.perficient.com/”
- Go to “https://www.perficient.com/”
If you want to Navigate to the URL on a new tab –
- Navigate to “https://www.perficient.com/” in the new tab. Refer second selection below the screenshot.
2. Write
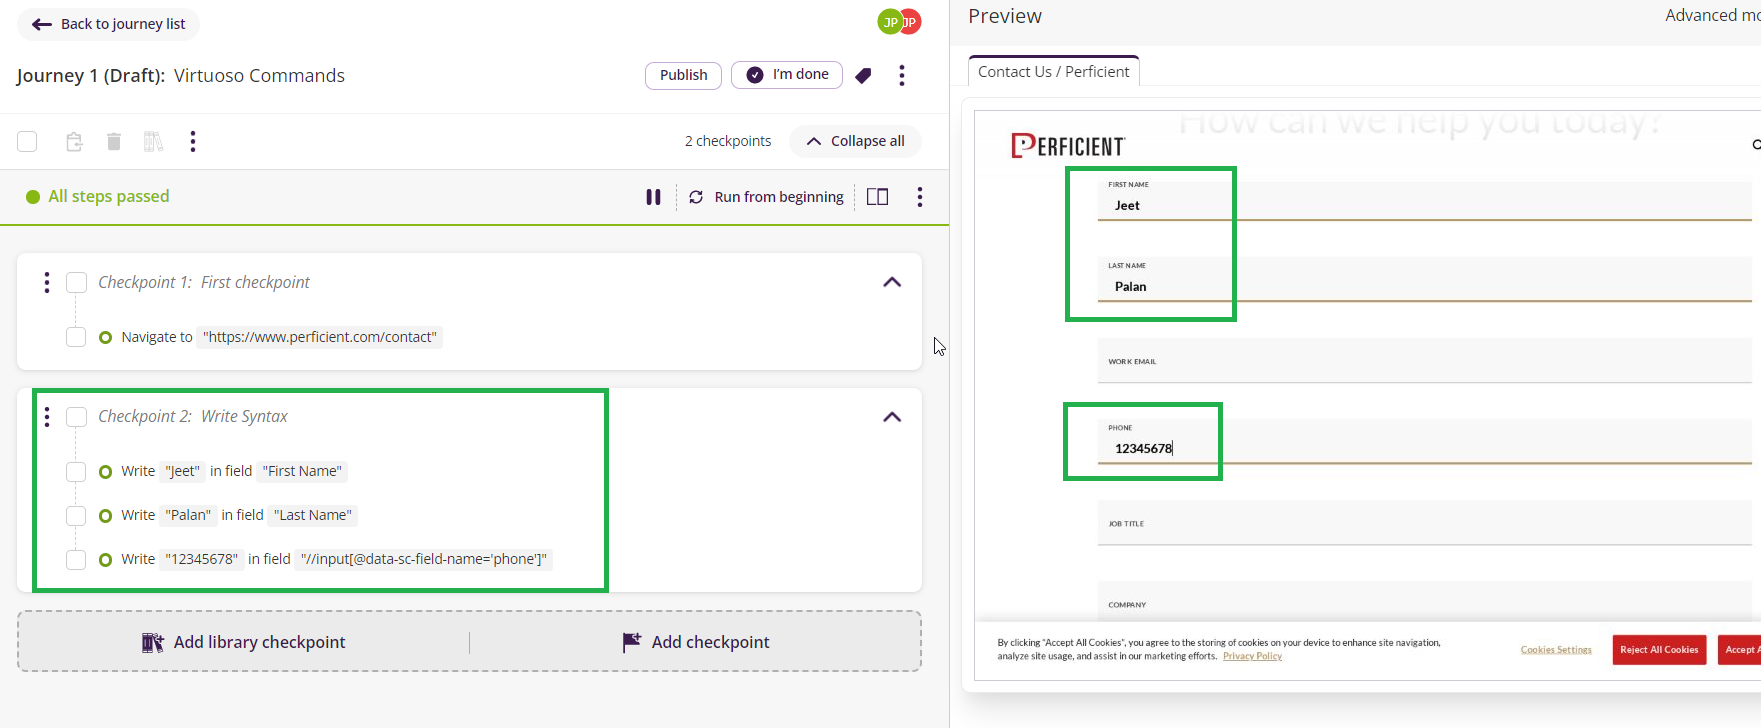
The ‘Write’ command enters text or values into an input field using natural language terms like Type, Enter or Write. The user will also need to define with which element the Write command should interact.
Examples-
- Write “Jeet” in “FIRST NAME”
- Type “Palan” in “LAST NAME”
- Write “12345678” in the field “//input[@data-sc-field-name=’phone’].”
3. Click
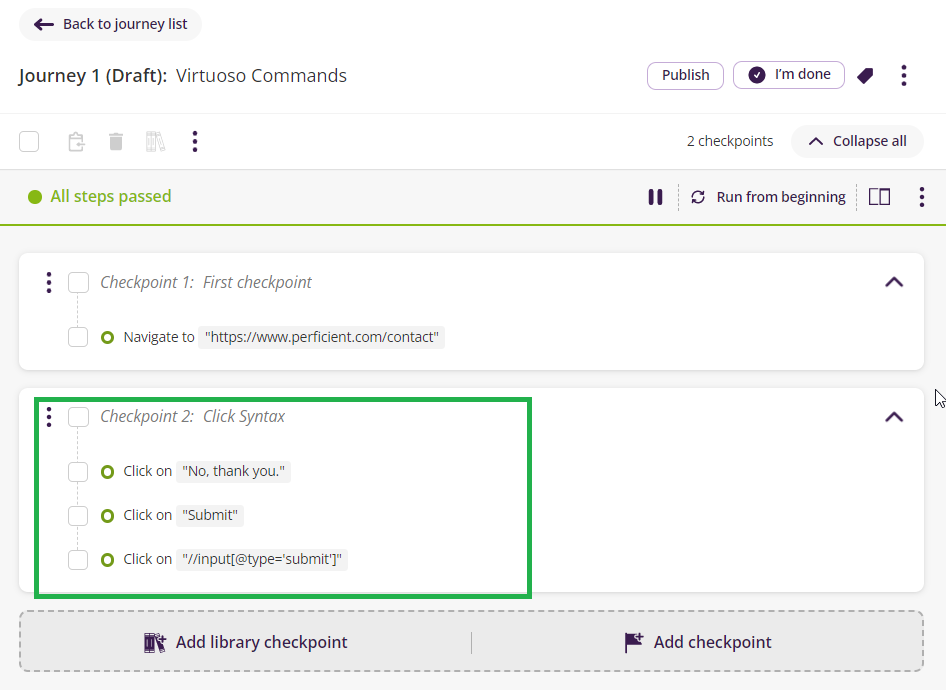
The ‘Click’ command clicks on an element user wants to interact with.
Examples –
- Click on ‘Submit’ – by hint.
- Click in ‘No, thank you.’ – by hint.
- Click on ‘//input[@type=’submit’]’ – by XPath.
4. Wait
In Virtuoso, there are 2 types of wait – Static and Dynamic.
Static wait
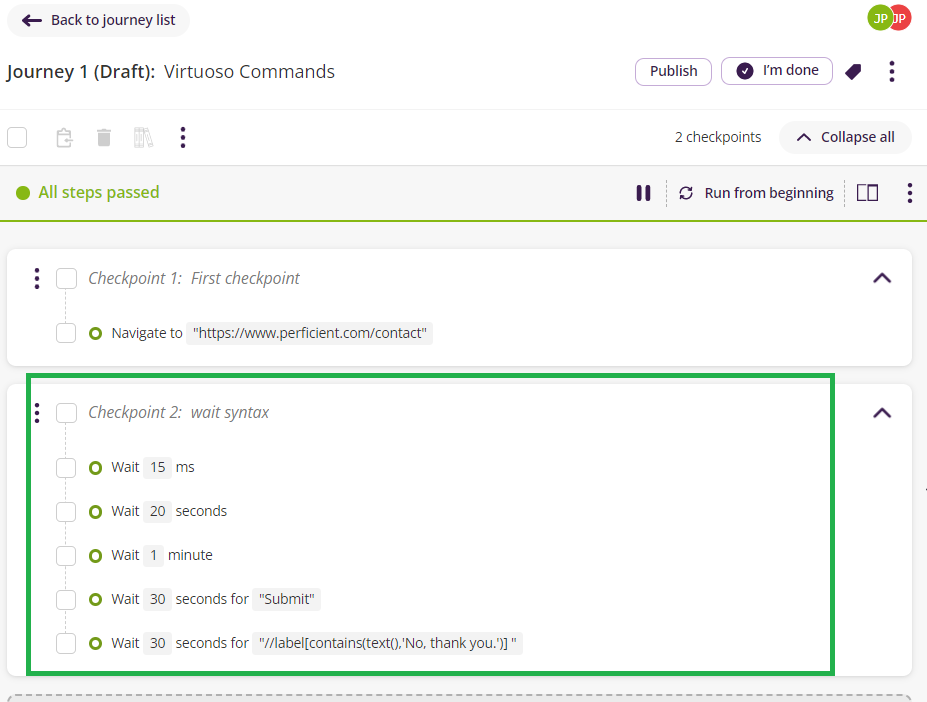
When a user wants to pause the execution for a specific period, a static wait command can be used.
Example-
- Wait 20 seconds – In this type of wait, the execution will wait for 20 seconds, and then it will resume with the next step.
Dynamic wait
Dynamic wait is used when a user wants a specific element to appear on the screen.
Example-
- Wait 30 seconds for ‘Submit’ – by hint.
- Wait 30 seconds for ”//input[@type=’submit’]’ – by XPath
The execution of this command will be paused for 30 seconds. Virtuoso will proceed to the next step if the ‘Submit’ button becomes visible at any moment within 30 seconds. If the ‘Submit’ button doesn’t appear within 30 seconds, then Virtuoso will fail the step.
5. Store
The ‘Store’ command stores a value, or the details of an element, into a new variable.
Examples-
- Store element text of “Submit” in $var1 – Storing a value.
- Store element text of “//input[@type=’submit’]” in $var2 – Storing a value using xpath.
- Store element details of “//input[@data-sc-field-name=’phone’]” in $var3 – Storing element details.
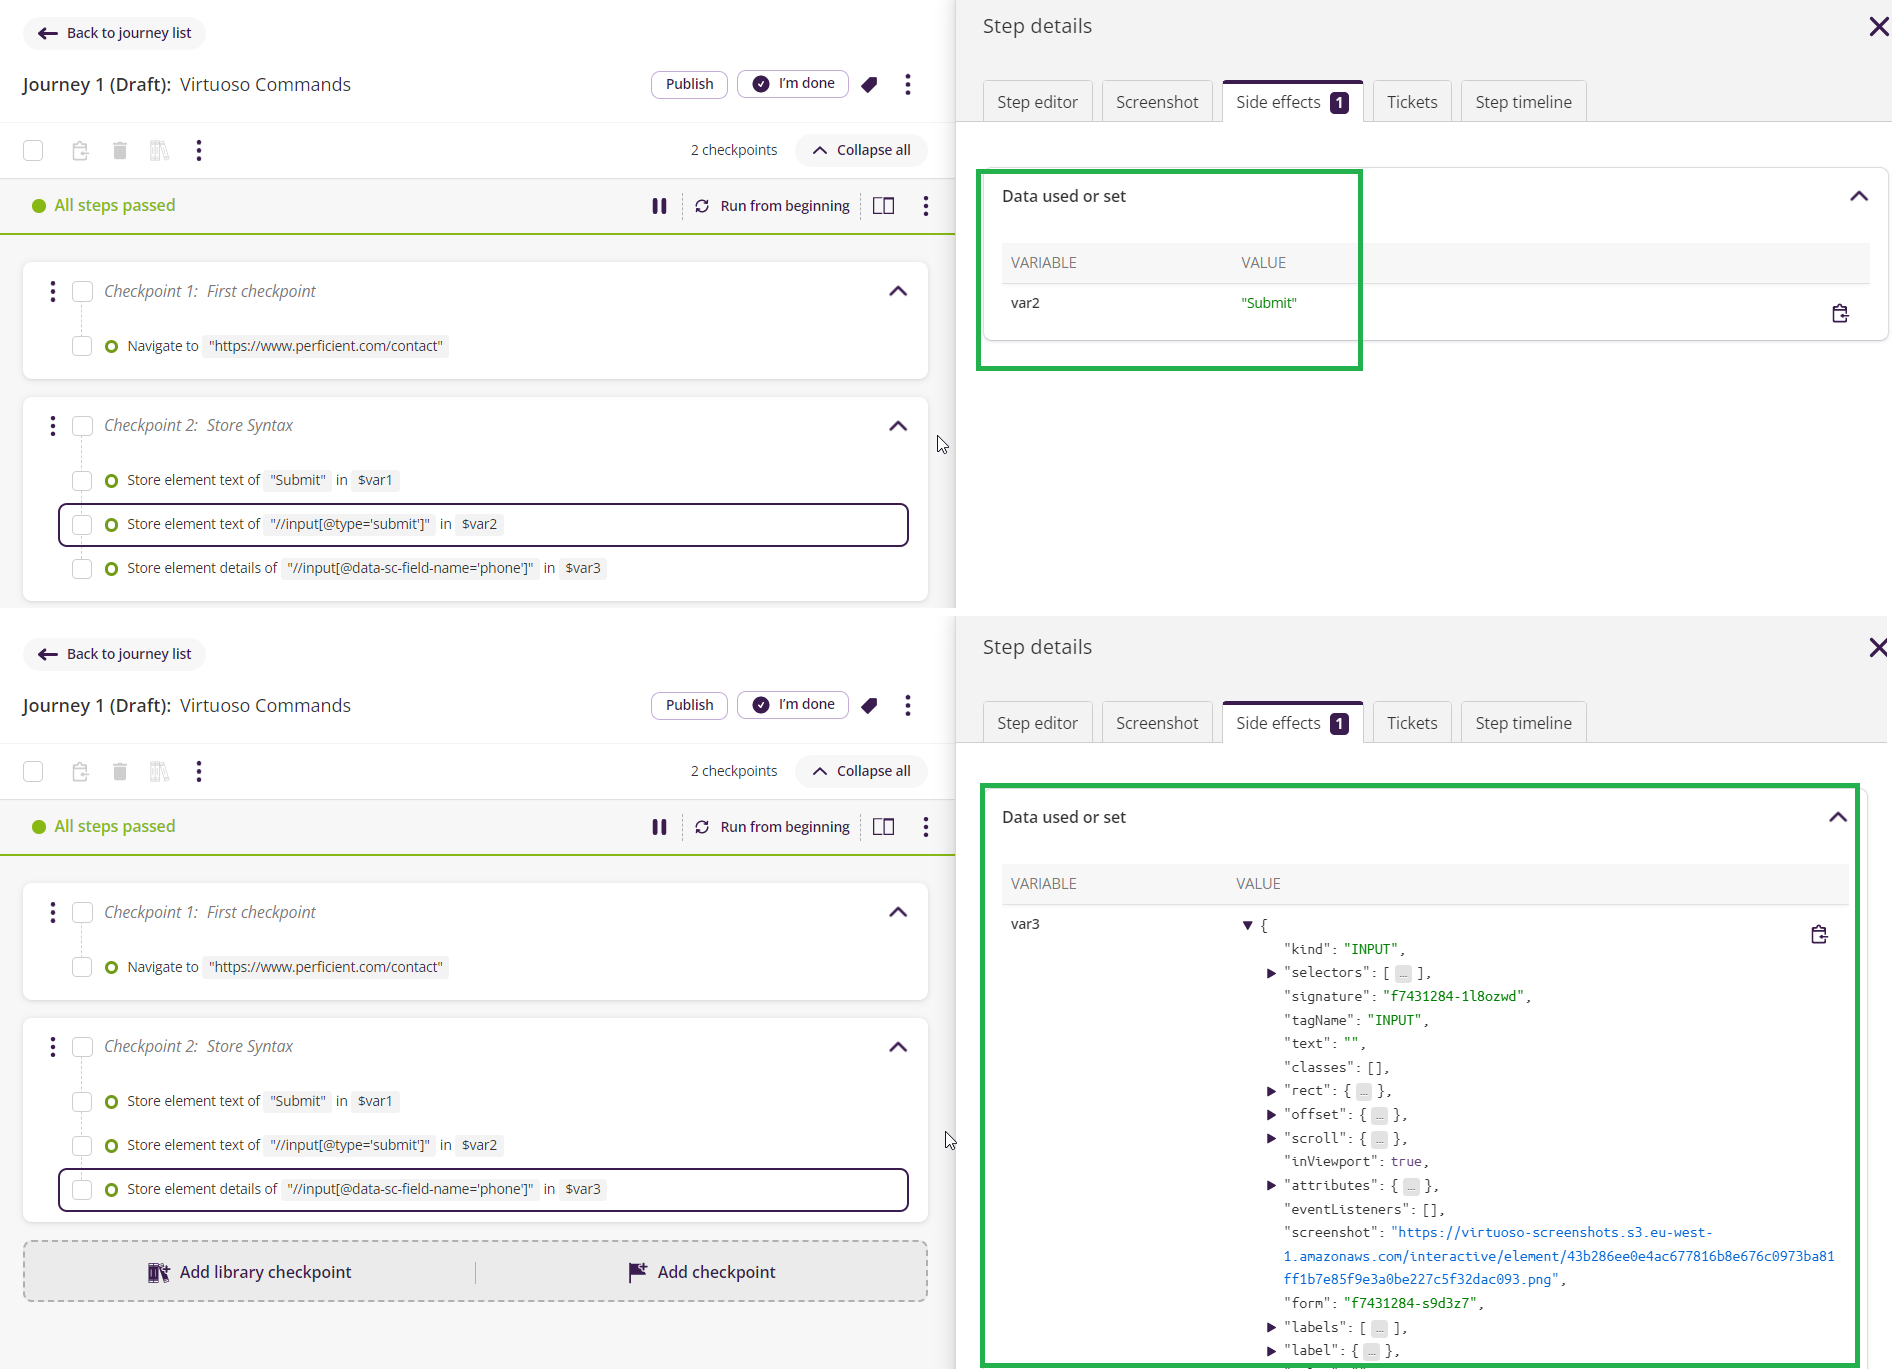
The above screenshot shows that after executing the step with the store command, the data stored in the variables starts displaying under the ‘Side effects’ tab.
6. Scroll
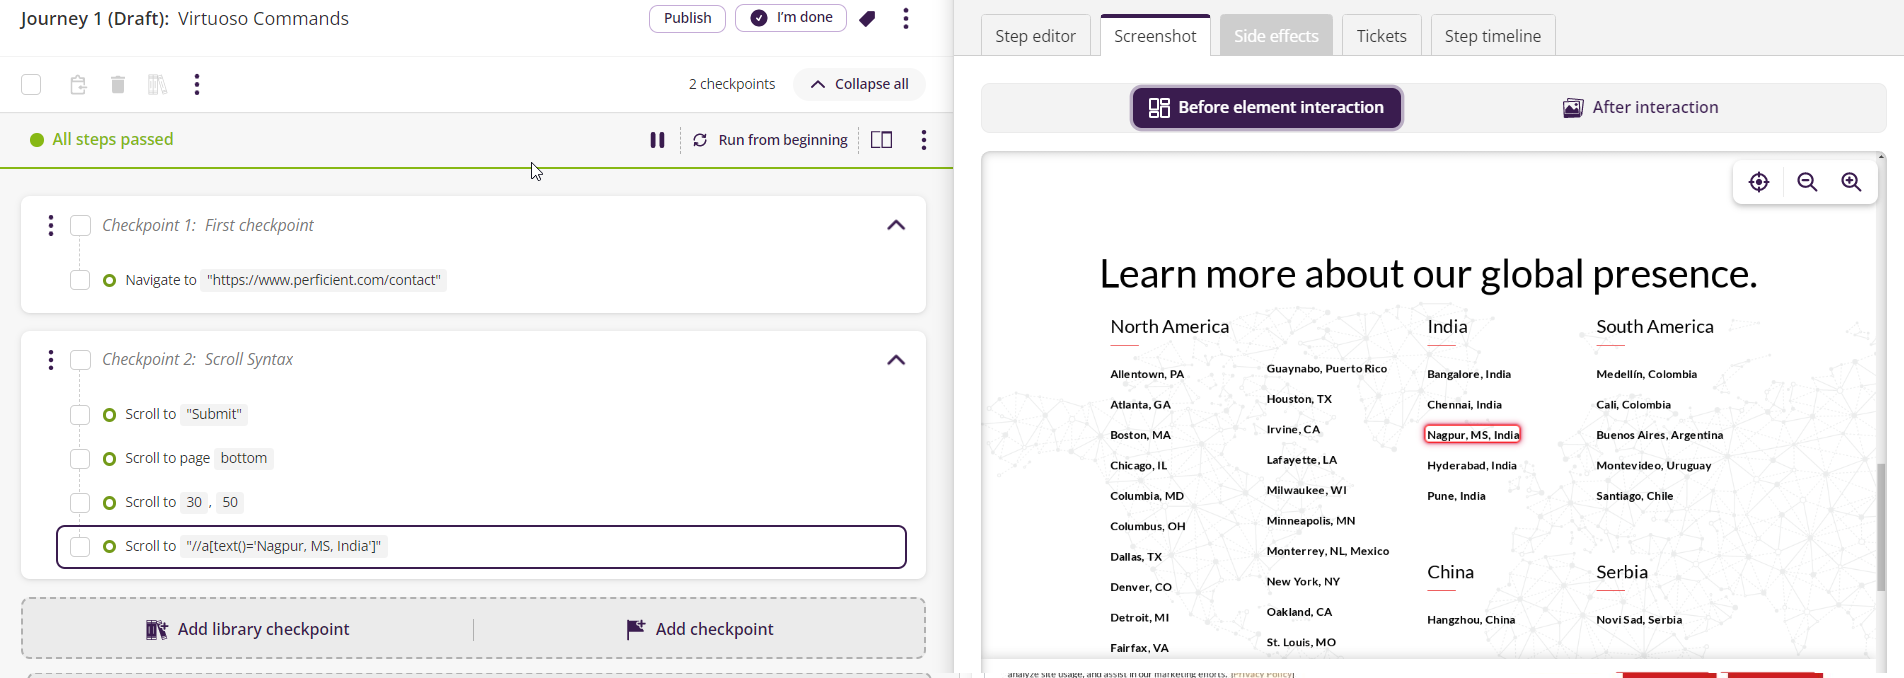
The ‘Scroll’ command moves the page to a specific element, coordinate, or page position.
Examples-
- Scroll to ‘Submit’ – by hint.
- Scroll to the page bottom – by location.
- Scroll to ‘//a[text()=’Nagpur, MS, India’]’ – by XPath.
- Scroll to 30,50 – by Coordinates.
7. Select /Pick
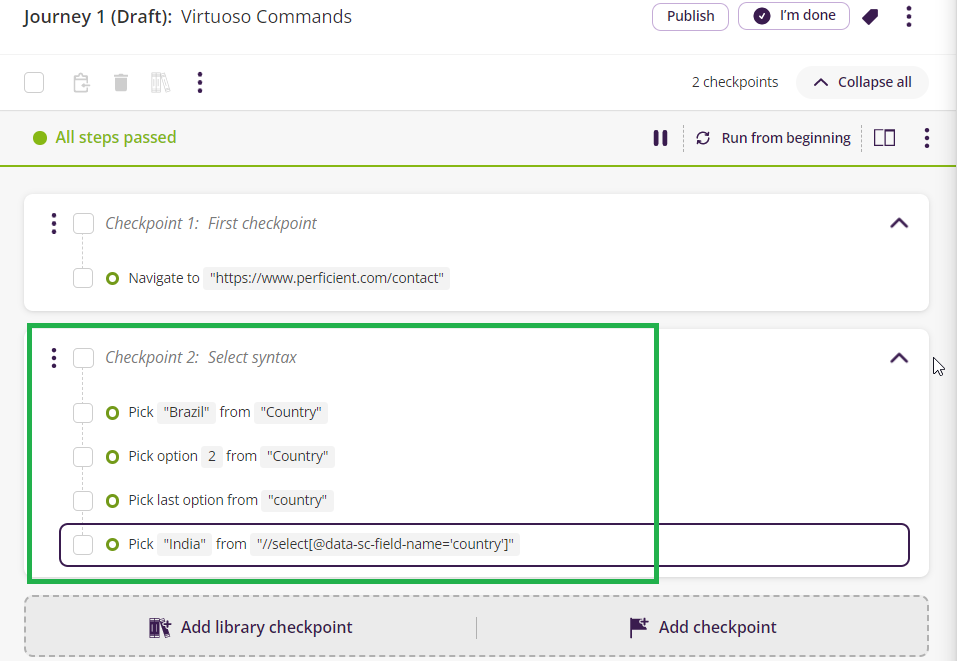
The ‘Select’ command in Virtuoso is used to select/pick a value from a drop-down user wants to select. Drop-down value can be chosen using Index, Visible text, or value.
Examples –
- Pick “Brazil” from “Country” – by value
- Pick option 2 from “Country” – by index
- Pick the last option from “country” – by index
- Pick “India” from “//select[@data-sc-field-name=’country’]” – by value
8. Switch
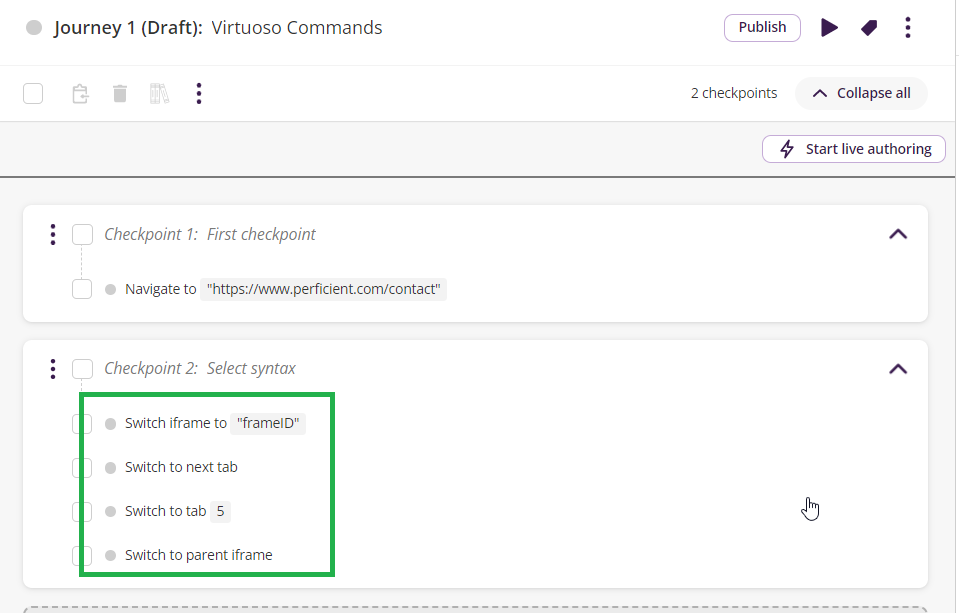
The ‘Switch’ command in Virtuoso is used to transfer control of execution from one frame to another frame. The ‘Switch’ command can be used with an index number, parent id frames, and next & previous for window tabs.
Examples-
- Switch iframe to ‘frameID.’
- Switch to the next tab.
- Switch to tab 5.
- Switch to parent iframe.
9. Assert
The Assert command is used to verify whether the values displayed are expected or not. Many types of asserts can be implemented in Virtuoso, listed below.
a. Assert exists / not exists
The Assert exists command is used to verify whether the required element is available on the active page.
Examples-
- Look for “Job Title’
- Look for “//label[text()=’Job Title’]”
- Assert that “//label[text()=’Job Title’]” on page.
- Assert exists “Job title.”
Like ‘assert exists,’ we also have ‘assert not exists.’ In the latter case, a command is used to verify that the value is not present on the page.
Example –
- Assert not exists “Job location.”
b. Assert Equals/ not equals
This command is used in Virtuoso to verify if the displaying value for the element is expected.
Example-
- Assert ‘First name’ equals ‘jeet.’
- Assert ‘Last name’ == ‘palan’
- Assert ”//input[@data-sc-field-name=’phone’]” equals ‘12345678’
Like ‘Assert equals,’ we have ‘Assert not equals.’ In the latter case, the command is used to verify if the element’s value is not expected.
Example-
- Assert ‘Work Email’ not equals ‘jeet@test.com’
- Assert that ‘Work Email’ != ‘jeet@test.com’
c. Assert greater than / less than
Like ‘Assert equals/assert not equals,’ Virtuoso has a command to verify if the element’s value is greater or lesser than the expected value.
Example-
- Assert ‘Phone’ is greater than ‘0.’
- Assert that ‘Phone’ is less than ‘9999999.’
- Assert ‘Phone’ is greater than or equal to ‘1111111.’
- Assert ‘Phone’ < 900000
d. Assert using Variables
Using variables also, Virtuoso allows you to verify data stored in variables. To verify these, Virtuoso also offers more phrases like starts with, ends with, contains, equals, etc.
Examples-
- Assert $var1 equals ‘Submit.’
- Assert $var2 not contains ‘login.’
- Assert $var3 starts with ‘S.’
Using these Variables, Virtuoso offers an option to create expressions as well.
Examples-
- Assert ${10 * 4} equals 40.
- Assert ${$var1 == $var2} is true.
- Assert ${$var1 + 4} is greater than ’20’.
- Assert ${page.title} == ‘Perficient’.
Conclusion
I hope this 5-minute read has helped the enthusiast inclined to know Virtuoso and get a broader view of how to create test steps using Virtuoso commands. Referring to this blog, users can learn how to write and execute an end-to-end flow using these important commands.


after I typed a test in a text box I needed to press enter key on the keyboard how to give this command in virtuoso
Hi Naveen,
You can use the below Command
Press ENTER in ‘#TextBoxName’
Similar to ENTER you can use TAB, SHIFT or Combinations like CRTL_SHIFT_X, SHIFT_A, etc.
Make sure these Commands are all in Caps.
I hope this helps. Thank you!