
In my previous blog, the focus was a Quick Tip for Thing Planning and this post will provide a Quick Tip for any Specialty Planning Solutions as the focus is the exporting and importing of register data.
Prior to providing instructions on how to customize the export and import process, I will demonstrate the default process which will occur with the GolfStream application and People Planning.
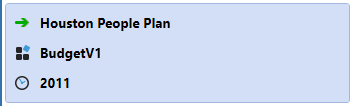
After logging into the application, set the Workflow POV to “Houston People Plan” -> “BudgetV1” -> “2011” which is accessible for “Cube Root Workflow Profile” GolfStream.
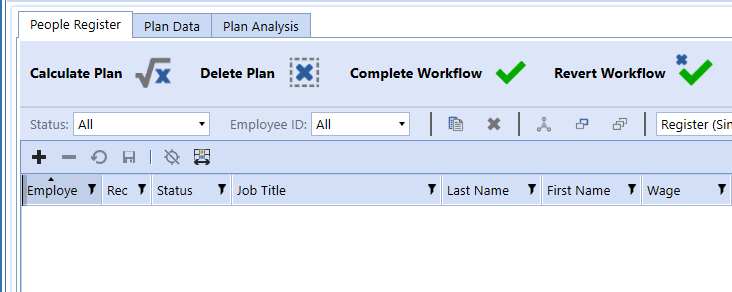
Select “People Planning”.

To export register data, select the “Export Register to a CSV File” ![]() icon.
icon.
![]()
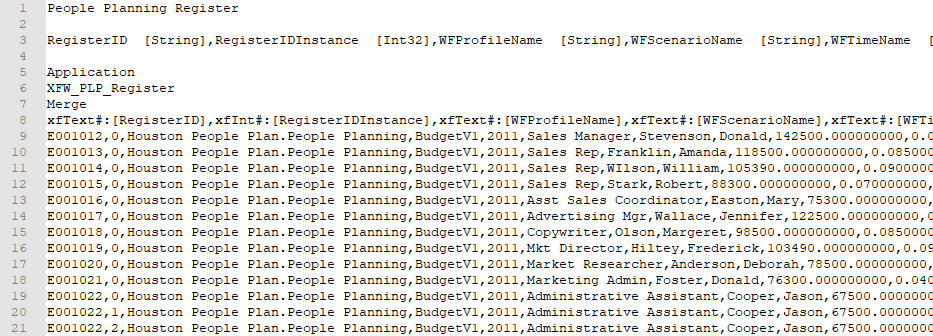
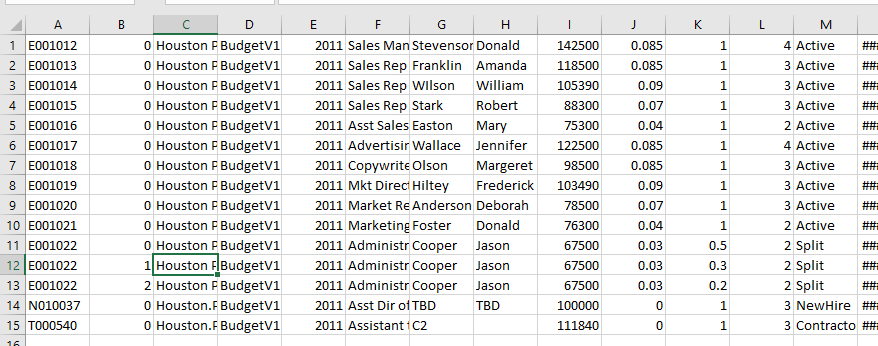
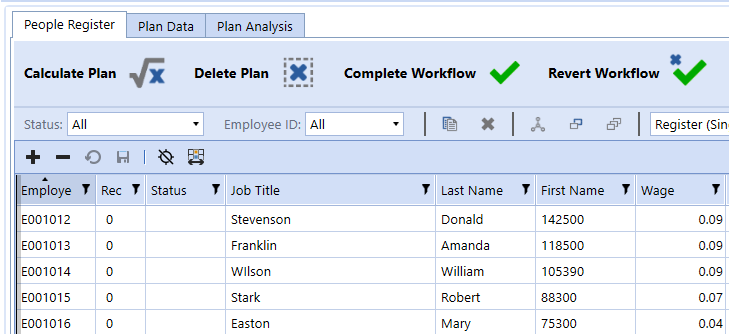
The previous selection exports all register fields to a comma-delimited file with header information. Starting on line 9, the data from the register is displayed which can be modified and imported back into the register using the “Import Register Items from an Excel File” ![]() icon. This process typically occurs if mass updates need to be made to register data.
icon. This process typically occurs if mass updates need to be made to register data.
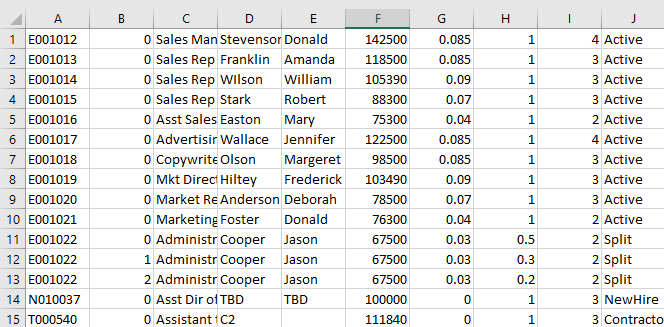
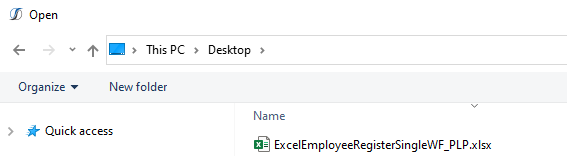
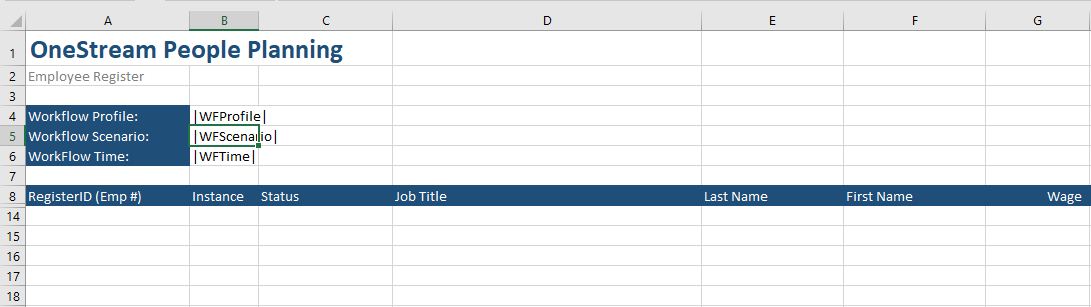
Prior to importing data, the register template should be downloaded. To download the register, select the “Download Register (Single WF) XLSX Import Template” ![]() icon. This selection will open the template which is displayed with the second image.
icon. This selection will open the template which is displayed with the second image.
![]()
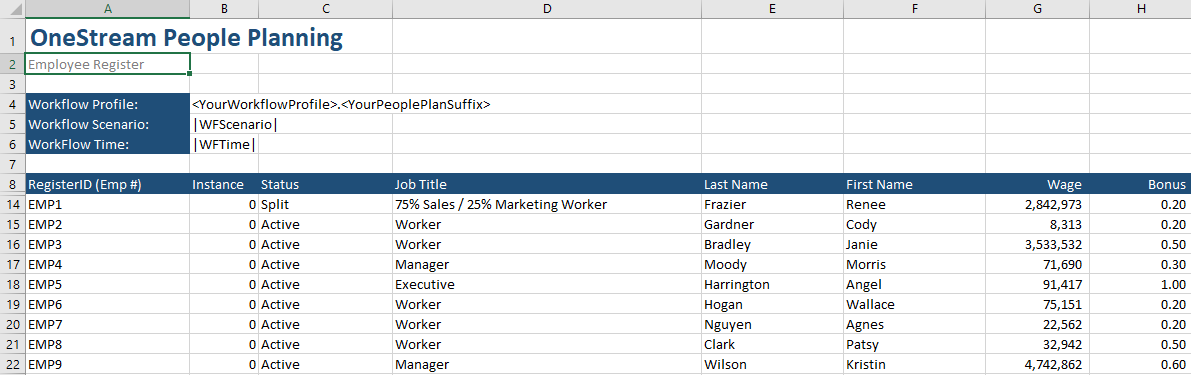
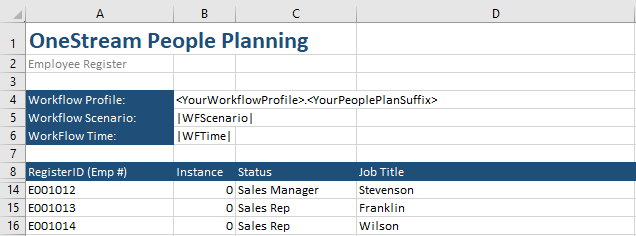
To import data using the template, delete the data starting with row fourteen to the last row of data. Note, the default template includes sample data.
Return to the CSV file and import the file into Excel.
Delete columns C, D, and E which are not needed for the import. Then cut column J and insert as column C which updates the current column C to column D and will align the columns in the Excel template with the exported data.
Select the exported data and then paste the data into the register. Once this is done, update cell B4 to “|WFProfile|” or key “Houston People Plan.People Planning” and then save the file.
Return to the register and select the “Open Delete Register Plan Dialog” ![]() icon.
icon.
![]()
Select the “Entire Register” option and then select “Execute Delete”.
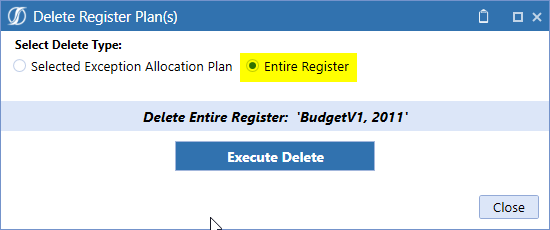
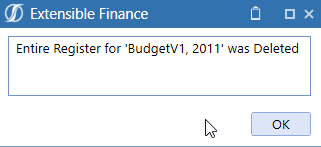
Select “OK” when the dialog box renders stating the data in the register has been deleted.
Select “Close”.
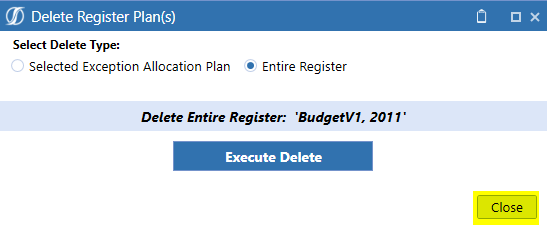
After the execution of the delete process has completed, the register will display without data.
Select the “Import Register Items from an Excel File” ![]() icon to begin the process of importing the Excel template. Once this is done, select “Open”. Note, the Excel file should be closed prior to selecting “Open”.
icon to begin the process of importing the Excel template. Once this is done, select “Open”. Note, the Excel file should be closed prior to selecting “Open”.
![]()
Navigate to the location of the Excel template and select the file. With the file, selected, click “Open” to import the contents of the Excel template.

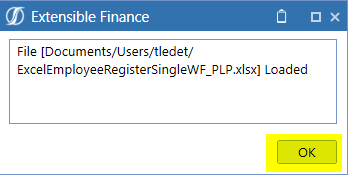
Select “OK” when the Extensible Finance dialog box renders, and the register will display the data which was imported.
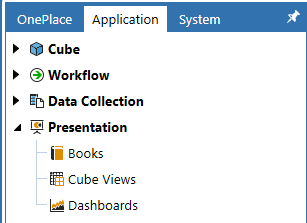
With the demonstration of the default process complete, I will transition to the Quick Tip which will consist of the following: modifying the Excel template to only display the columns which are displayed in the register as well as deleting the sample data, create an export which will also have the columns displayed, and for both the Excel template and export have the columns in the same order as the register display which simplifies the copying of data from the export to the Excel template. The customization process will begin with the Excel template; therefore, select “Application”. Prior to beginning the customization in this Quick Tip, a brief reminder that the customization of a MarketPlace Solution WILL impact a future upgrade of the solution and should occur when there is a business benefit which in this circumstance is a simplified export and import process.
![]()
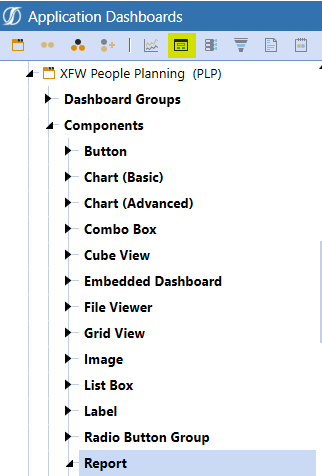
With Application specified, select / expand “Presentations” -> “Dashboards”.
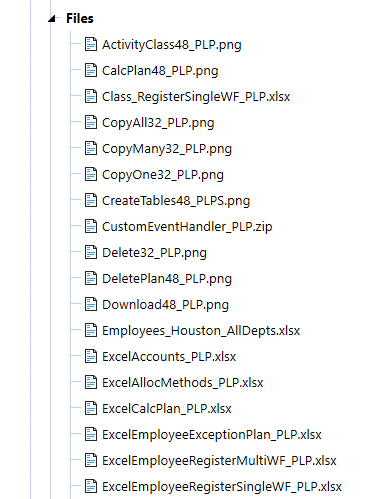
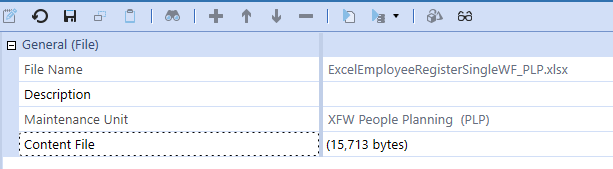
Navigate to Dashboard Maintenance Unit “XFW People Planning (PLP)” and select / expand “Files”. Once this is done, select “ExcelEmployeeRegisterSingleWF_PLP.xlsx”.
Select the “Download File” ![]() icon.
icon.

When the Save As dialog box displays, “Save” the file to the preferred location. Once this is done, open the file with Excel.

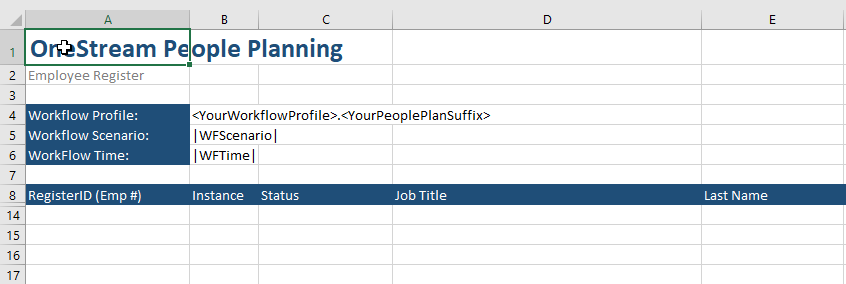
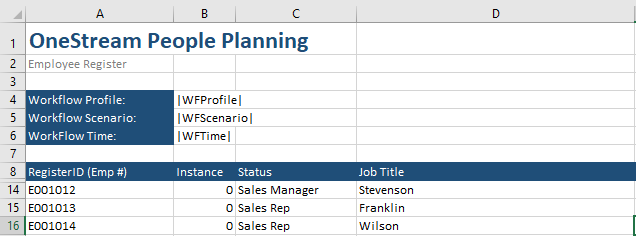
With the downloaded file opened in Excel, delete the sample data and then update cell B4 to “|WFProfile|”.

Next order the columns to have the same order as the register which can be done by selecting the entire column to move, cutting the column “Cut” and then inserting cut cells “Insert Cut Cells” in the appropriate order. Once this is done, hide the columns which are not displayed in the register.

With the columns reordered, row eight can be updated to reflect the Alias instead of the Register Field Name. For PLP make the following changes: OutCode to Salary Basis, InPeriod to In Per, Entity to Corp Entity, Code3 to Region, and Code1 to Dept. Once this is done, save and close the file.

With the template updated, return to the File component. Select the “Upload File” ![]() icon.
icon.

Navigate to and select the updated Excel template. Once this is done, select “Open”.

After the file uploads, select the “Save” icon.
With the Excel template updated, the next step will be to create a custom export. To begin the process, return to the PLP Dashboard Maintenance Unit. Select “Data Adapter” and then select the “Create Data Adapter” ![]() icon.
icon.
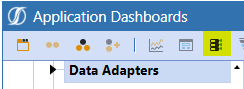
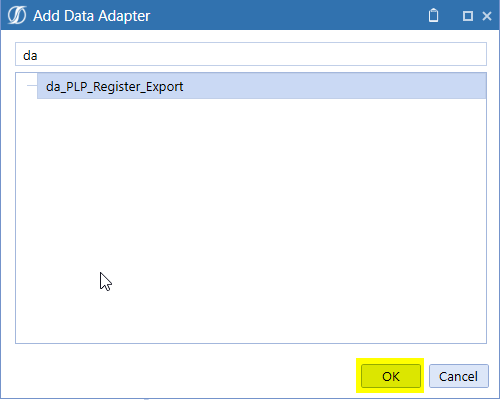
Key a name for the Data Adapter which in this example is “da_PLP_Register_Export”.
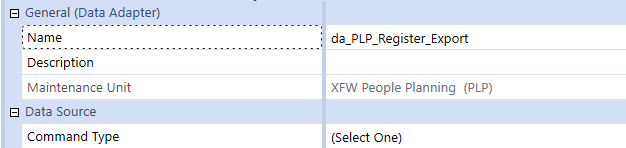
Update the Command Type to “SQL” and the Database Location to “Application”.
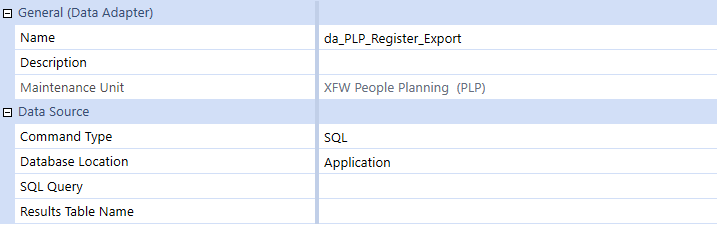
Select the “Edit” ![]() icon to develop the query for the export.
icon to develop the query for the export.

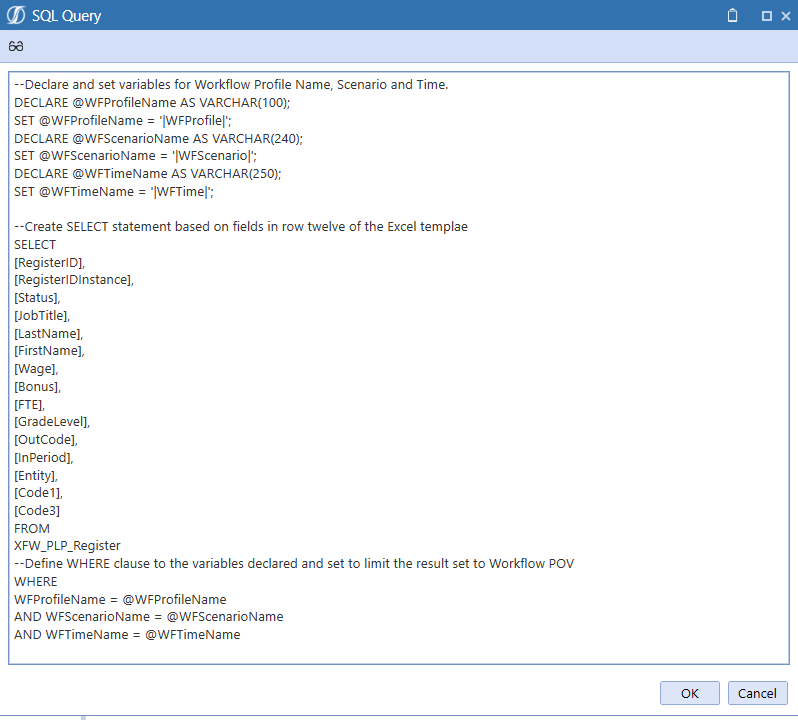
Create the SQL statement based on the Excel template adding variables for the Workflow Profile which are utilized in the WHERE statement. Once this is done, select “OK”.
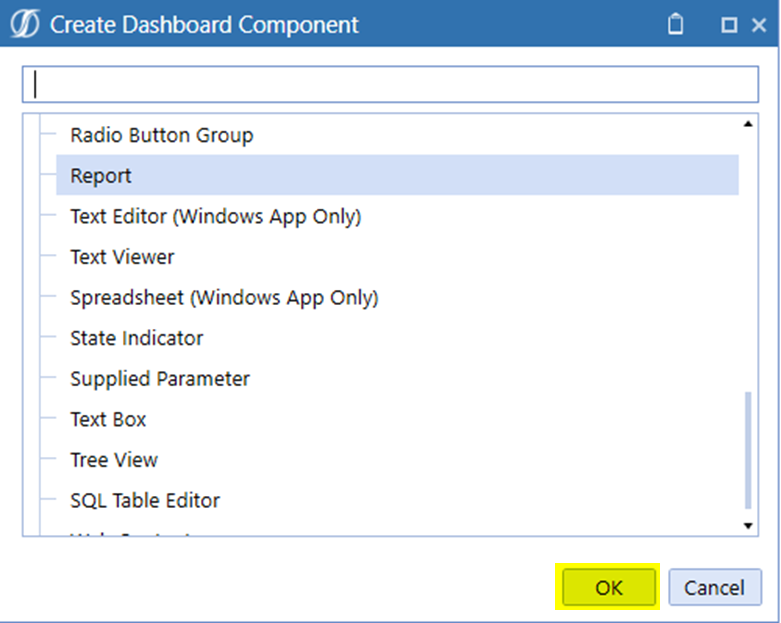
With the Data Adapter created, navigate to and select “Report” in the same Dashboard Maintenance Unit. Once this is done, select the “Create Dashboard Component” ![]() icon.
icon.
When the Create Dashboard Component dialog box renders, Select “OK” after confirming “Report” is selected.
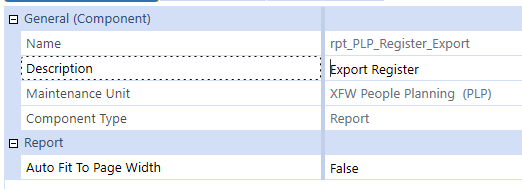
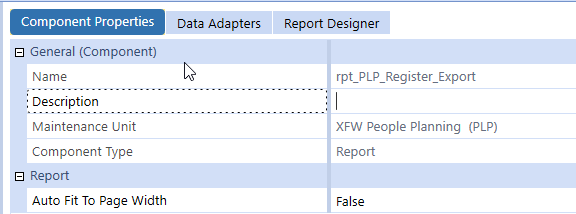
For the Name, key “rpt_PLP_Register_Export” and for Description key “Export Register”. Once this is done, select “Data Adapters”. Note, the description is displayed when the report is added to a dashboard.
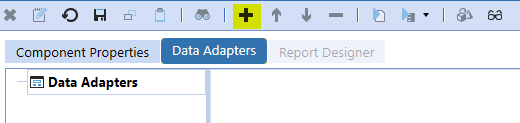
Add the Data Adapter “da_PLP_Register_Export” previously created by selecting the “Add Dashboard Component” ![]() icon. Once this is done, select the adapter from the list and then select “OK”.
icon. Once this is done, select the adapter from the list and then select “OK”.
With the Component Property and Data Adapter updated, select “Save”.

After the save has completed, select “Report Designer”.
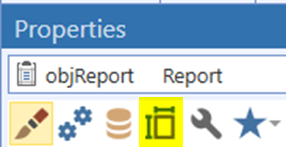
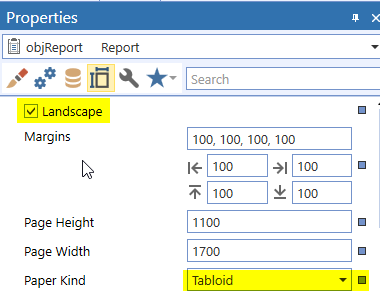
After the Report Designer renders, select the “Page Settings” ![]() icon.
icon.
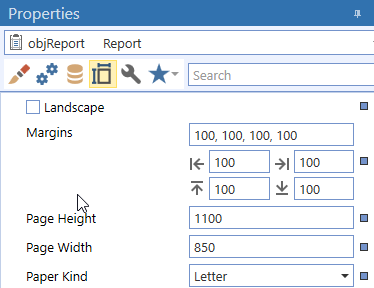
Update the Paper Kind from “Letter” to “Tabloid” and select the “Landscape” check box. Note, the report is intended to export not print; therefore, the maximum Paper Kind from a Width and Height perspective is selected.
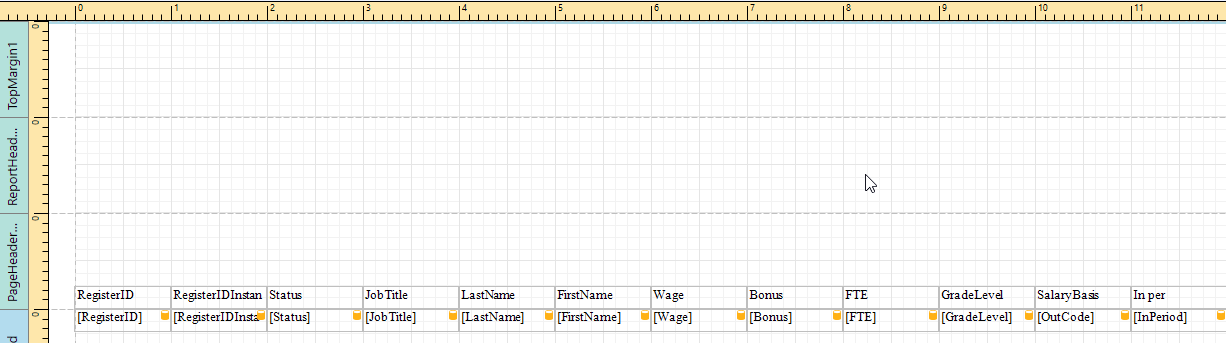
Next, the fields in order of the Display and Excel Template will be added to the “Detailed Band” This can occur by selecting a field from the Field List and then dragging and dropping it on the grid. Once the fields are added, select the “Save” ![]() icon.
icon.
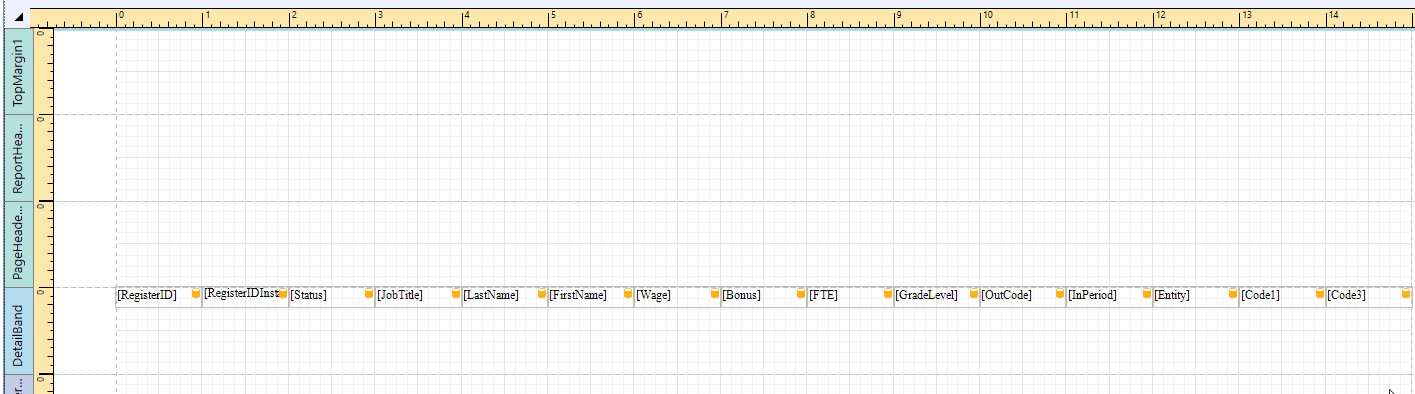
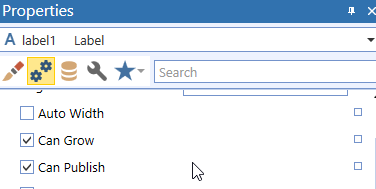
With the fields added, select all the fields. Once this is done, select the “Behavior” icon from Properties. Unselect “Can Grow”. This is done to prevent the data from wrapping to multiple rows in Excel.
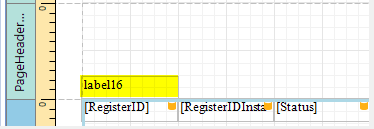
Next Labels for each Field will be added. Select the “Label” ![]() icon, drag it to the PageHeaderBand, and place it on top of the bottom band. Repeat this process for each field.
icon, drag it to the PageHeaderBand, and place it on top of the bottom band. Repeat this process for each field.

With the labels added, update the text to equal the Alias of the Field Name. The text can be changed by double-clicking the label and then typing the appropriate text. Repeat the process for every label added. Also, unselect the “Can Grow” property using the same method as was done for the detail band.
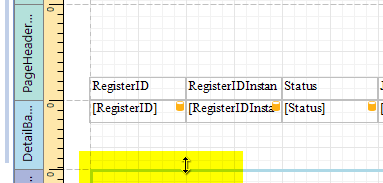
Remove the white space displayed in the DetailBand and PageHeaderBand which is done by selecting and dragging the DetailBand which is the line at the bottom of the band to the bottom of the Detail Band fields. Repeat this process for the PageHeaderBand first by moving the labels to the top of the band and repeat the process used for the DetailBand. Once this is done, select the “Save” icon.
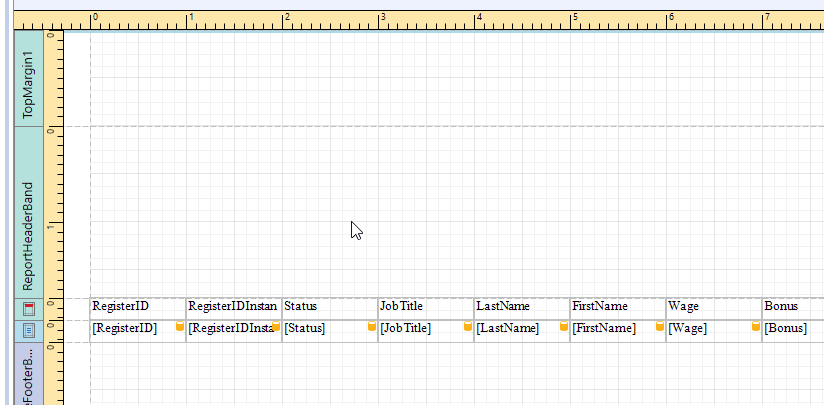
Delete bands, “ReportheaderBand” and “PageFooterBand”. This is done by selecting the band, right-clicking, and selecting “Delete”.
![]()
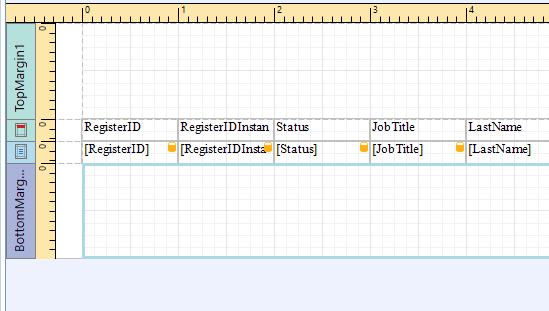
Minimize the size of “TopMargin1″ and “BottomMargin1″ which is done in the same manner that the “DetailBand” and “PageHeaderBand” were resized. With the report complete, select the “Save” icon.

With the component to export the register created, the final step will be to add the Report, rpt_PLP_Register_Export, to the People Planning tab. To begin this process, navigate and select dashboard, 3b2b_PeoplePlan_PLP.


With the Dashboard selected, click the “Dashboard Components” tab and then select the “Add Dashboard Component” ![]() icon.
icon.
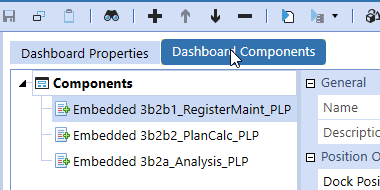
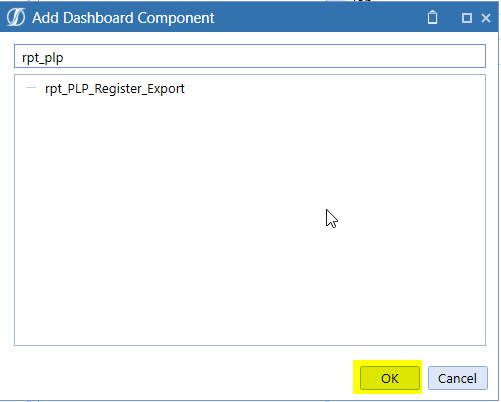
Navigate to add select the report, rpt_PLP_Register_Export, created to export register data. Once this is done, select “OK”.
With the report added, select the “Save” icon.

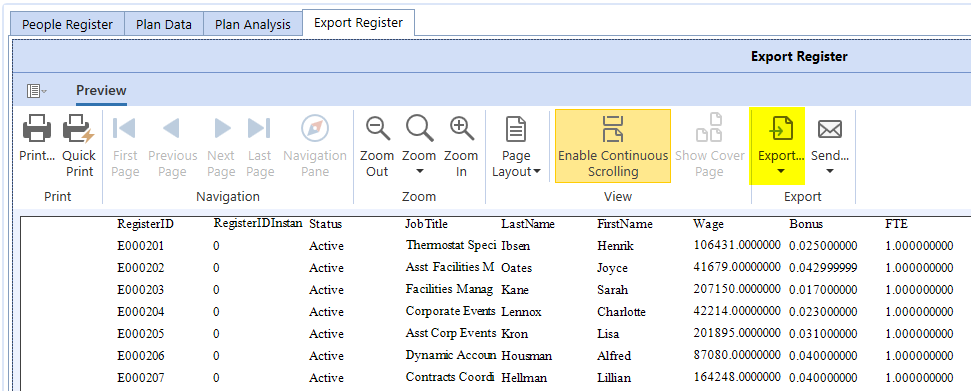
Return to OnePlace and refresh People Planning if needed. Once this is done, “Export Register” will be the fourth tab displayed which should be selected.
![]()
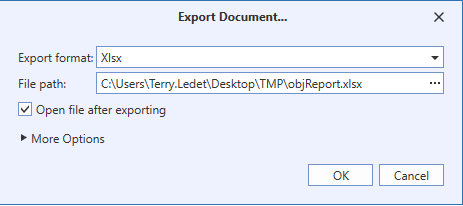
The data in the register based on the current Workflow Profile will be displayed and by selecting the “Export” ![]() icon data can be exported to Excel. After the “Export” icon is selected, click the “XLSX file” option from the “Export” dropdown.
icon data can be exported to Excel. After the “Export” icon is selected, click the “XLSX file” option from the “Export” dropdown.
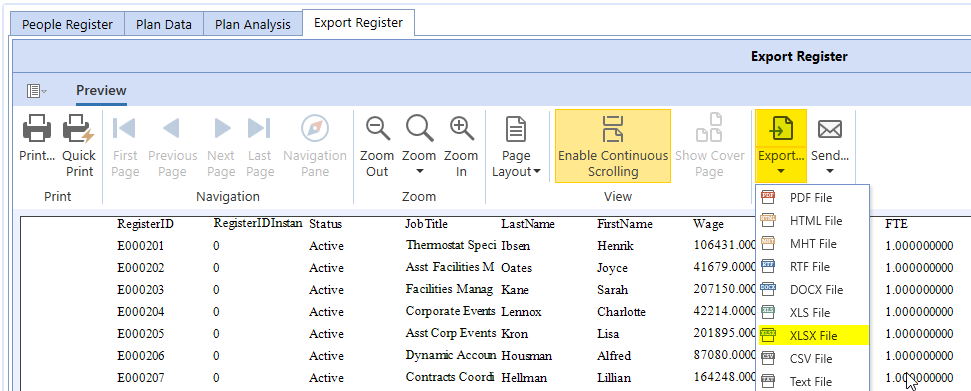
Select “OK” when the dialog box renders. Depending on your computer configuration, the file may open in Excel. If the file does not open automatically, open it with Excel.
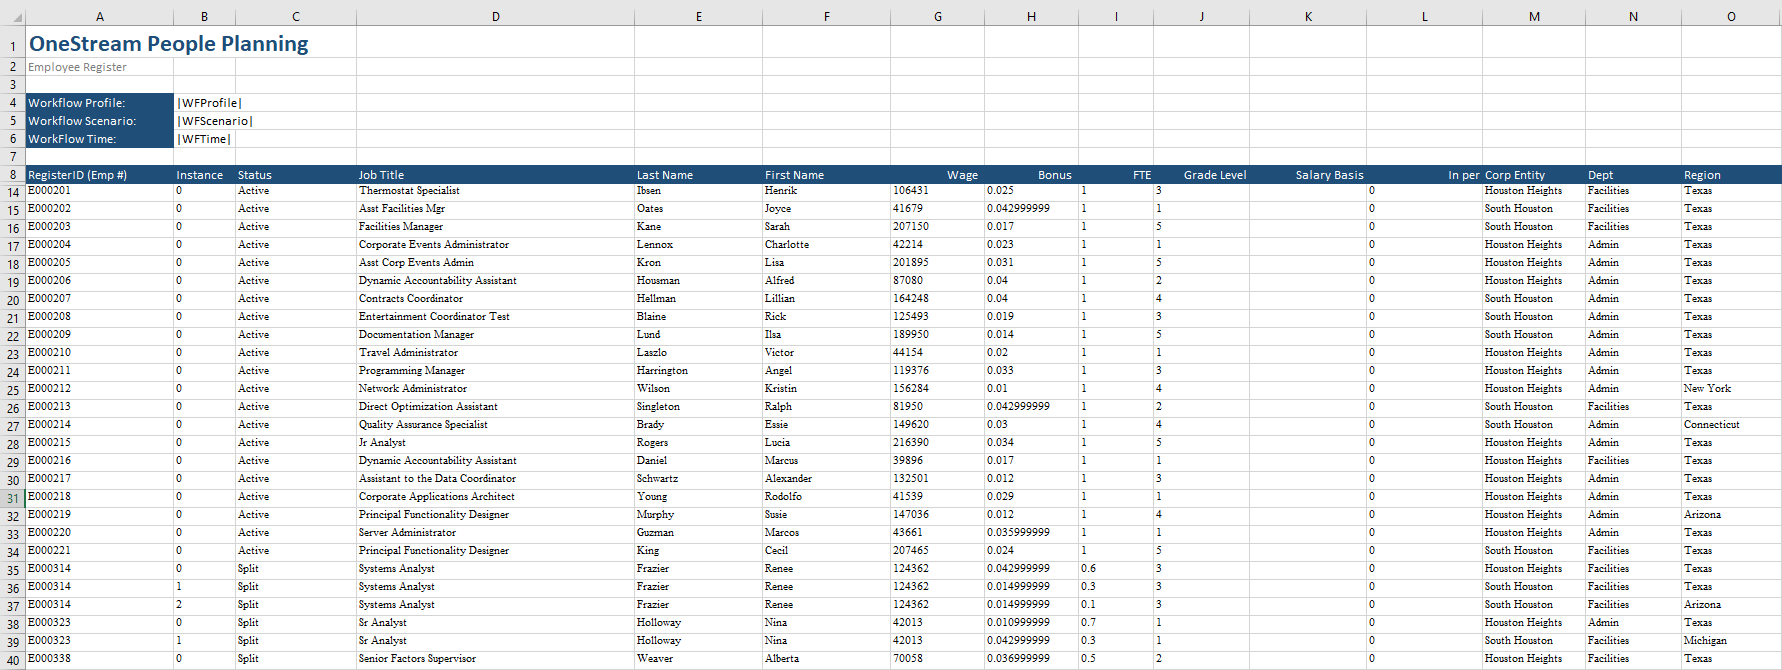
The register data will be displayed and is in the same order as the register display and Excel template.

At this point, the data without adjusting column order can be copied and pasted to the Excel template and then imported which concludes the Quick Tip.
Thank you for reading the blog. Should you have any questions, feel free to either post a comment or email me at terry.ledet@perficient.com.