
Since early December 2020, I have been working on a project which is utilizing MarketPlace Solution, Thing Planning, to enable the collection of information which will ultimately be summarized and pushed to a cube. As the project has progressed, the team has customized Thing Planning primarily to improve from the team’s perspective the end user and development experience when needed.
This quick tip will focus on how to enable editing of the setting, Register Field Order Position, as an alternative method to update the field order displayed in the register. A brief reminder, a customization of a MarketPlace Solution WILL impact a future upgrade of the solution and when deciding on whether the customization is in the best interest of the deliverable being developed always document and backup the customization to minimize the impact on future upgrades.
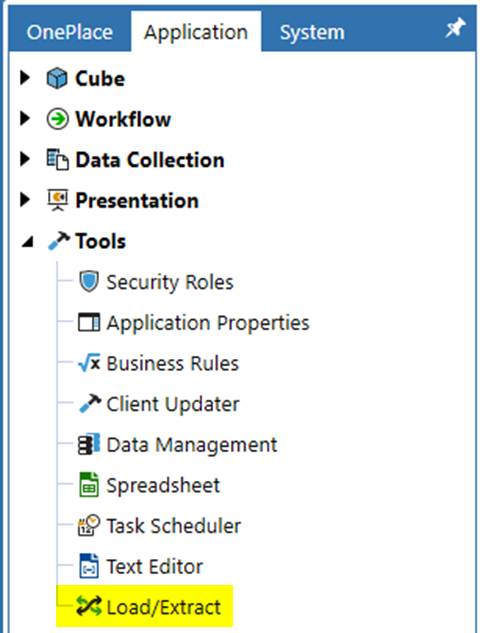
I will begin with the import and setup of Thing Planning and to begin the process log into a development application. After authentication, select and expand “Application” -> “Tools” -> “Load/Extract”.
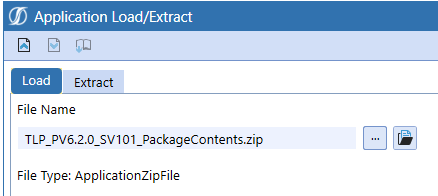
Navigate to and select the Thing Planning download which in this example is the current version released late last year which requires V6.2 or higher of OneStream XF. Once the file is selected, click the Load ![]() icon.
icon.
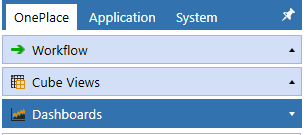
After the import has completed, select “OnePlace” -> “Dashboard” -> “Thing Planning” -> “Thing Planning”.

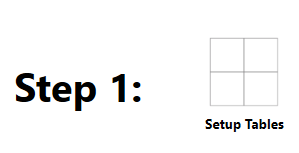
With this selection, Solution Setup will render for Thing Planning. Select “Setup Tables”. Note, this assumes the individual has the appropriate permissions to ancillary tables; otherwise, an error message will occur.
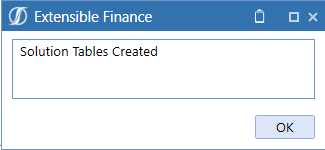
After a short period, select “OK” when the Solution Tables Created message is displayed.
Select “Launch Solution”.

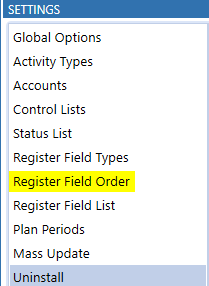
With “Launch Solution” selected, the Thing Planning SETTINGS list will display. Select “Register Field Order”.

Modern Accounting: How to Overcome Financial Close Challenges
Improvements in each of the following period-close core tasks can provide transformative change and are reviewed in this guide include closing the books and external reporting, periodic reconciliations, and managing the period-close process.
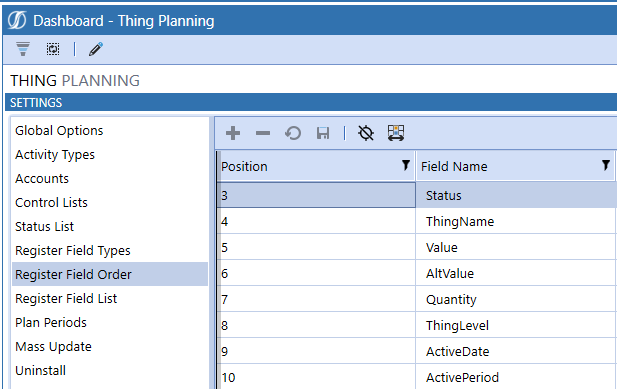
As mentioned in the introduction to this blog post, the Register Field Order Position cannot be edited by default, but the Register Field Order Field Name can be changed which occurs by double clicking the Field Name and using the drop-down to make an update. To begin the customization, proceed to Dashboards accessible from Application.
From Application Dashboards, select and expand Dashboard Maintenance Unit “XFW Thing Planning (TLP)”. Once this is done, expand “Components”.
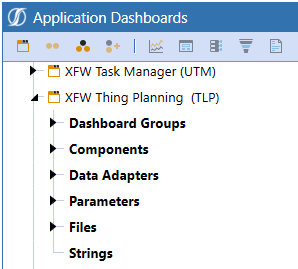
With the expansion of Components having occurred, select and expand “SQL Table Editor” and then click, “ted_RegisterFieldOrderList_TLPT” which is the component displayed when setting “Register Field Order” is selected.
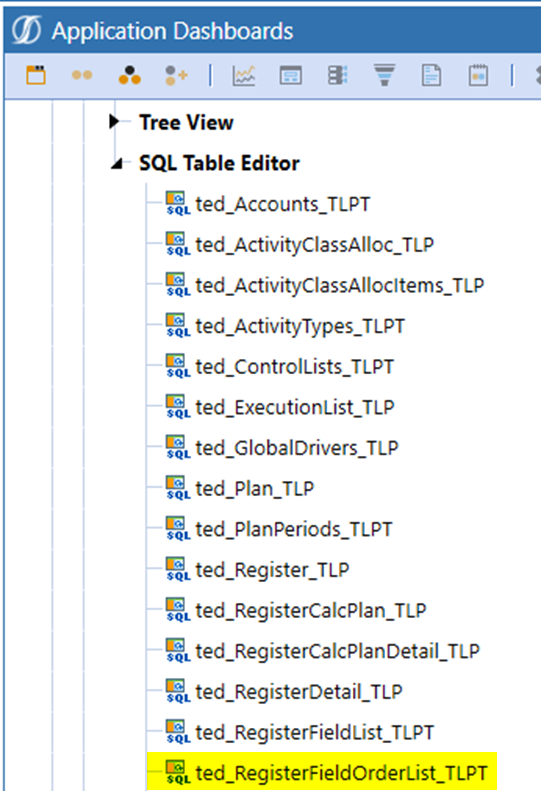
Navigate to “Column Format 3” which is listed in section, “SQL Table Editor Column Format”. Change “AllowUpdates = False” to “AllowUpdates = True” which will after saving allow changing of the Register Field Order Position. Select the “Save” icon and then return to the Thing Planning page.


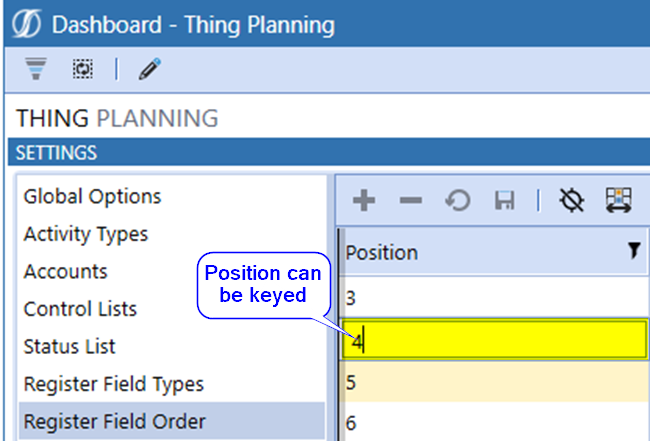
Select the “Refresh Page” ![]() icon and the Register Field Order Position can be edited which is demonstrated by clicking a Position value completing the Quick Tip. Note, the editing of the Position requires a two step process as the Position value must be between 3 and 43 and cannot have a duplicate. The requirement of 3 to 43 is due to the Column Format defined in SQL Table Editor, ted_Register_TLP. If you are interested in a demonstration of the two step process, please continue reading.
icon and the Register Field Order Position can be edited which is demonstrated by clicking a Position value completing the Quick Tip. Note, the editing of the Position requires a two step process as the Position value must be between 3 and 43 and cannot have a duplicate. The requirement of 3 to 43 is due to the Column Format defined in SQL Table Editor, ted_Register_TLP. If you are interested in a demonstration of the two step process, please continue reading.
To begin the Position update, select “Register Field Order” from SETTINGS.

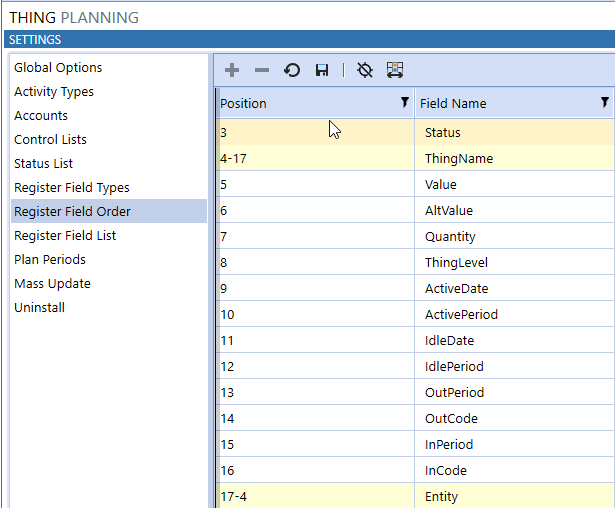
In this example, Entity is the Field Name which should display after Status. The first step in the two step process will be to change the position of ThingName from 4 to 4-17 and Entity from 17 to 17-4. Essentially the position of the Field Name which will be the updated position is appended to the current position and separated with a dash. Once this is done, select the “Save” icon. Note, position is stored as a text value.
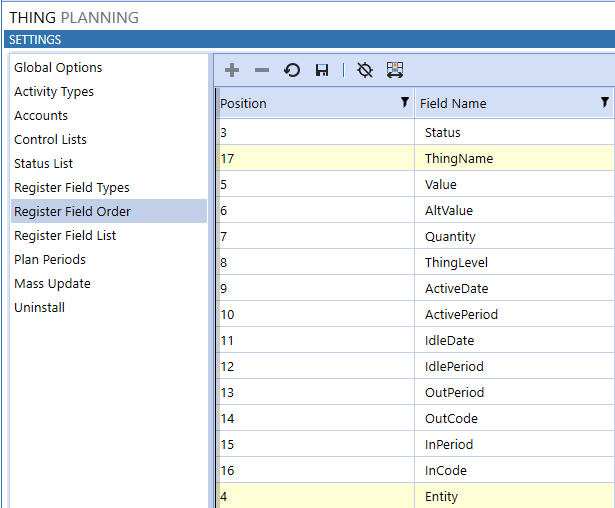
Next in the two step process is to change, 4-17 to 17 and 17-4 to 4. Select “Save”.
To verify the updated field order, select the “Show Thing Plan Page”![]() icon which will display Entity after Status “Status (Type)” as presented in the second image.
icon which will display Entity after Status “Status (Type)” as presented in the second image.


I hope this quick tip is helpful. If you have any questions, feel free to either post a comment to the blog or email me at terry.ledet@perficient.com.