The main purpose of automation within your business is to deploy your application into different environments such as Dev/QA/Production with the push of a button or without manual intervention. Automation reduces the risk of deployment errors, reduces the number of development hours for deploying code changes in multiple environments, and help to deploy the changes more frequently in development and QA environments and comprehensive testing as soon as possible after changes are made.
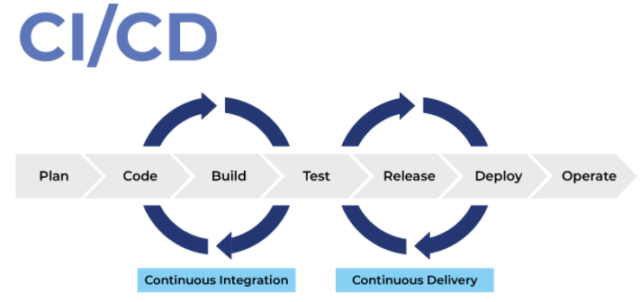
To deploy Episerver B2B Commerce Application into your Azure platform, you must start with understanding the setup of a CI/CD (Continuous Integration/Continuous Deployment) pipeline. A CI/CD pipeline is the backbone of the modern DevOps environment, as it bridges the gap between development and operations teams by automating the building, testing, and deployment of applications.
Below is a representation of a CI/CD pipeline setup and how it works.

To set up automated deployment, start with an automation tool, such as Azure DevOps. Azure DevOps provides us with various interfaces and tools in order to automate the entire process.
- The Git repository is where the development team will plan and commit to the code.
- The Build Pipeline is the interface with the entire job or specific task. You will take the latest code, and build and create an artifact.
- Finally, within the Release Pipeline, collect the latest artifact and deploy the changes to a different environment

Next, you will set up the build pipeline within Azure.
- Login into the Azure DevOps using the URL (https://dev.azure.com/).
- Select your project.

- Navigate and select “Pipelines”.

Note: This landing page will show the list of Build Pipeline’s you have created. A button will appear to create a new pipeline if no pipeline is created.
- Click the button, “New Pipeline” to create the new build pipeline.

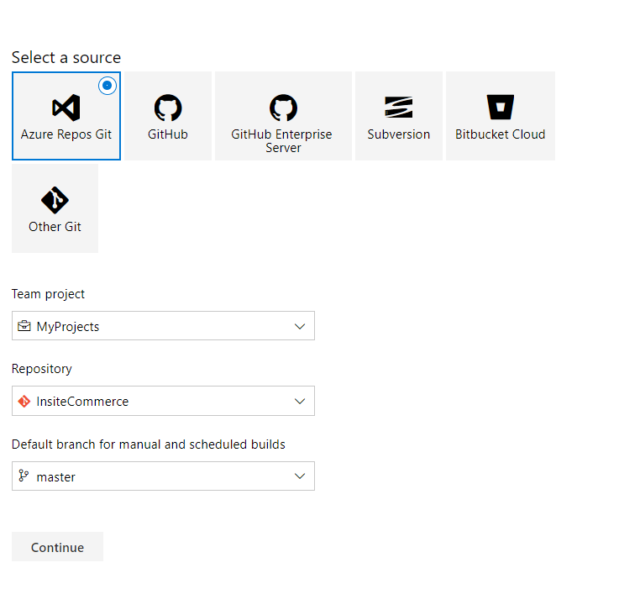
- Once you click on the new pipeline, it will then ask you to choose, “Where is your code”.

Note: There are two ways to create a build Pipeline, “Use the Classic Editor” or using the “YML” file. For this article, we will target the “Use the Classic Editor”
- On click to “Use the Classic Editor”, it will ask to select the “Source Control”.

- Select your Source Control, and click the “Continue” For this article, we are using the “Azure Repos Git”.

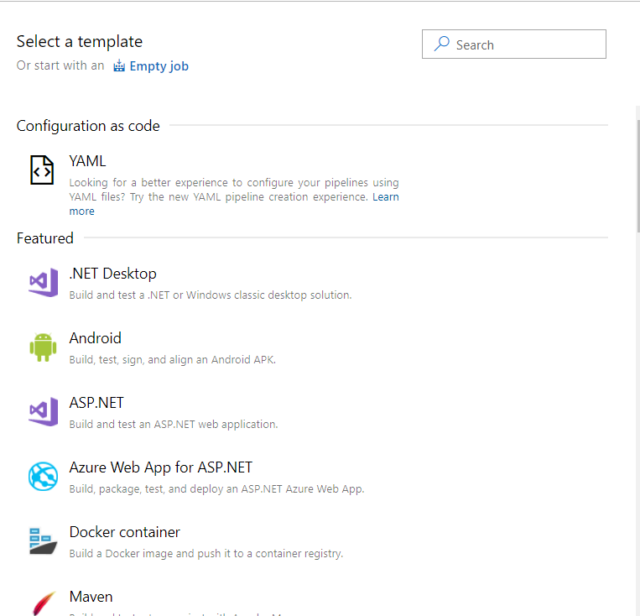
- After clicking continue, you will get an option to start from “Empty Job”, or the option to select “Template”. For this article, we are using the “Asp.Net”

- Once you have selected the configuration and template, pre-defined tasks will begin to load. In this pane, you can examine the various tasks for your build pipeline. This build pipeline performs various tasks such as fetching sources from the Git repository, restoring dependencies, compiling the application, run tests, and publishing outputs used for deployments.

- To add a new task, click on the “+” sign in the agent section. This will show you the list of tasks that you can select and add to your pipeline.

- Once all of the tasks are added successfully, click the “Save & Queue” to ensure that all the tasks are working and able to build code and create the publish artifacts.
This is Just the Beginning
Understanding the background information and these few steps opens up the timeline to implementing Episerver B2B Commerce Cloud into your Azure platform. Stay tuned for our next installation, where we explain the next steps of Episerver B2B Commerce Cloud configuration and the setup of a release pipeline. To find out more about our services, contact our experts today.


Congratulations Nitin,good blog!
Nice article Nitin
Great it’s very helpful for me