Microsoft introduced Azure Site Recovery (ASR) in 2014.This Disaster Recovery as a Service (DRaaS) offering allows on-premises workloads to be replicated into Azure. Azure Site Recovery orchestrates and manages disaster recovery for Azure VMs, on-premises VMs, and physical servers.
Azure site recovery support four types of Disaster Recovery as a Service:
- Azure to Azure site recovery
- VMware to Azure site recovery
- Hyper-V to Azure site recovery
- On-premises (physical server) to Azure site recovery
In this blog, I’m focusing on On-Premises (physical server) to Azure site recovery.
Requirements to set up an Azure Site Recovery
1. Azure recovery vault
It stores all the configuration, management, setup of configuration/process server, vault key, and replication of on-premises virtual machines (VMs) in Azure.
2. Configuration Server & Process Server
The configuration server is an on-premises Windows server [Windows Server 2012 R2 or Windows Server 2016] it has site recovery components, which includes configuration server, process server, and master target server.
Minimum required server configuration as below:
- CPU – 8vCPUs
- RAM – 8GB
- Disk – 500 GB minimum
- Network speed – 1.6 GB/s
More details about these requirements are available on Microsoft.com.
3. Replicated machines (Client servers)
We are using ASR to replicate below two on-premises windows physical servers.
- X-Web Server
- Y-DB Server
We have to setup the configuration and process servers in the same on-premises environment where the replicated servers reside. We can use an existing stage server or build separate dedicated servers that can communicate locally with the replicated machine using the private IP. Let’s suppose the name of this new configuration and process server is Z-Server.
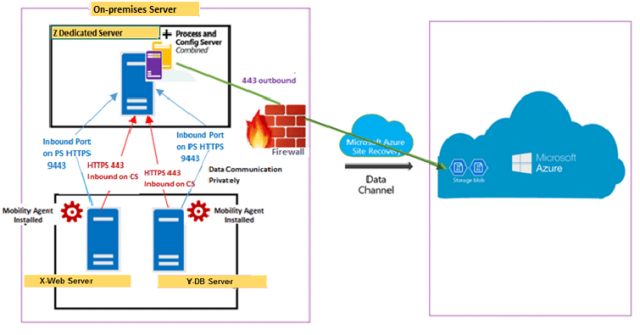
Below is the overview flow of our ASR disaster recovery setup.
Disaster Recovery – Process Diagram
- X-Web and Y-DB communicate with the configuration server (Z-Server) on port HTTPS 443 inbound, for replication management.
- X-Web and Y-DB send replication data to the process server (Z-Server) on port HTTPS 9443 inbound.
- The configuration server (Z-Server) orchestrates replication management with Azure over port HTTPS 443 outbound.
- The process server (Z-Server) receives data from source machines (X-Web and Y-DB), optimizes and encrypts it, and sends it to Azure storage over port 443 outbound.
Setup of the Azure Recovery Vault
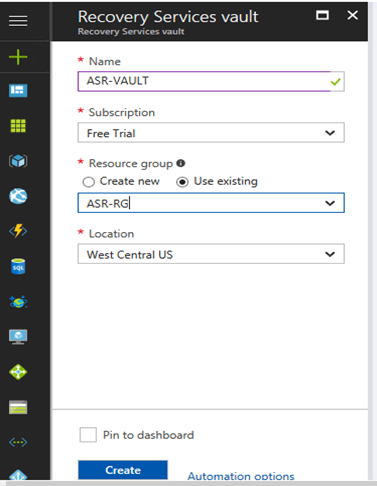
- First we need to create the Recovery Vault in Azure.
Fill the details and create the vault.
Once the vault is created, we can use it for the Azure ASR setup.
Azure ASR Setup for Disaster Recovery
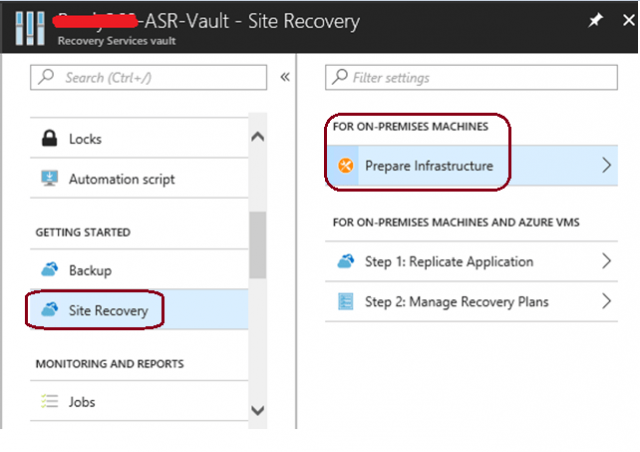
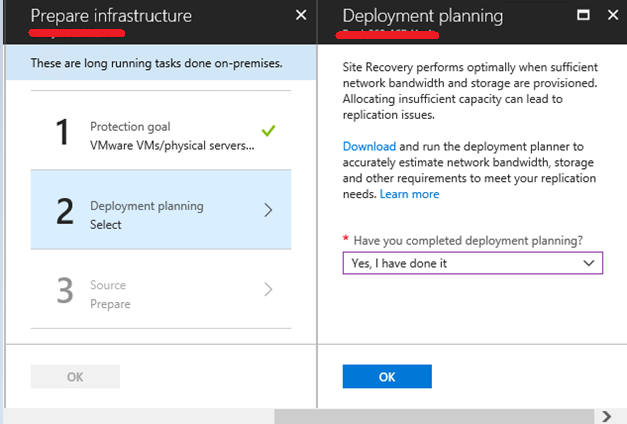
Open the Azure vault and go to Site Recovery.
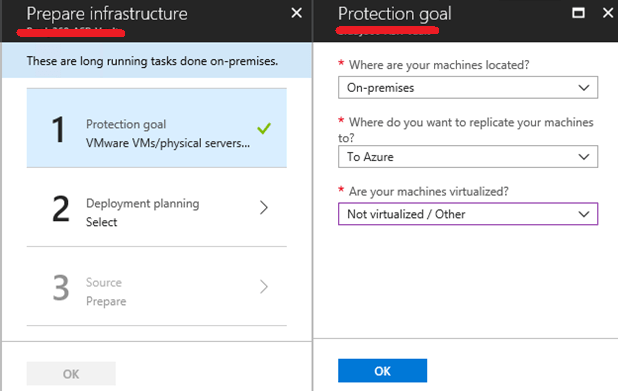
Select the on-premises location.
You can download the deployment planner and estimate the network bandwidth, storage, and other requirement. In my case, I have selected “Yes.”
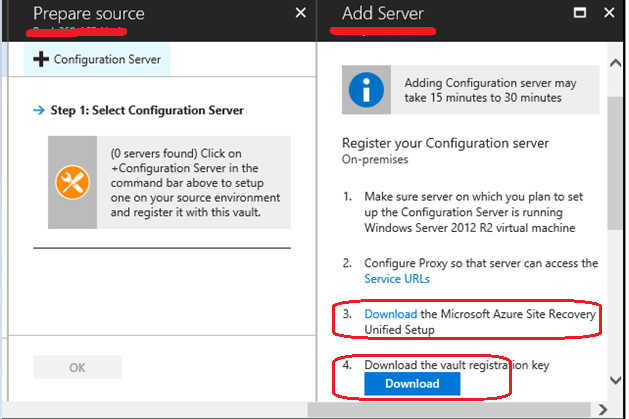
This the first step to build the configuration Server (Z- Server) in Azure.
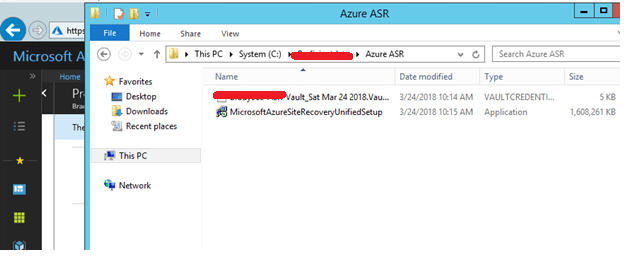
Download the setup file and vault registration key and copy them to the configuration/process server (Z-Server). Run this setup file: MicrosoftAzureSiteRecoveryUnifiedSetup
Installing the Configuration and process server
Click “I Accept” and install the third party license with MySQL.

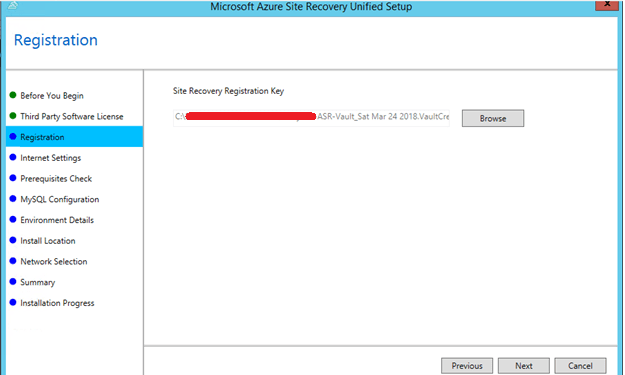
Select the registration key that we download from vault.
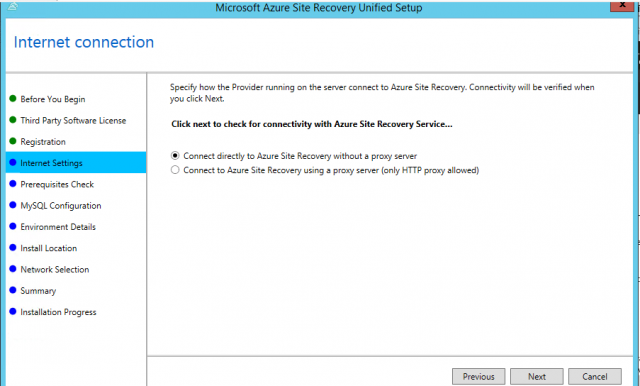
In Internet Settings, choose to connect directly if not using proxy.
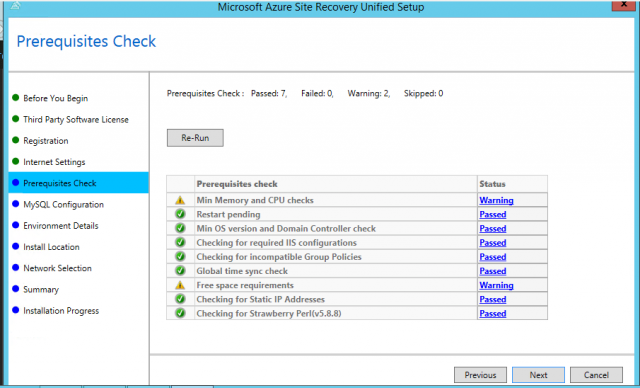
In Prerequisites, it will verify the server’s eligibility to have this setup file installed. Once all the prerequisites are passed, we can move further.
Create a MySQL password to login into the MySQL server.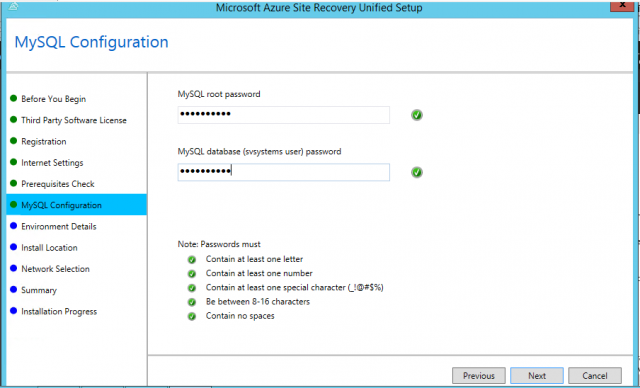
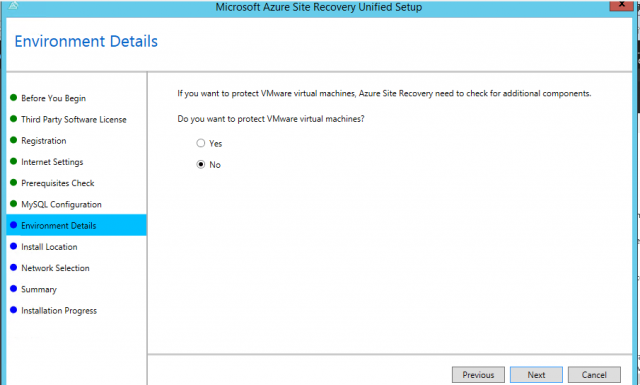
In Environment Details, select “No,” as we are not replication the VMware Server. We are replicating the physical servers.
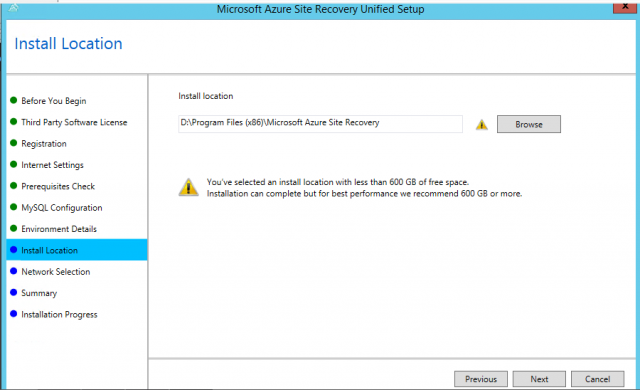
Select Install Location, to install the binaries and store the cache.
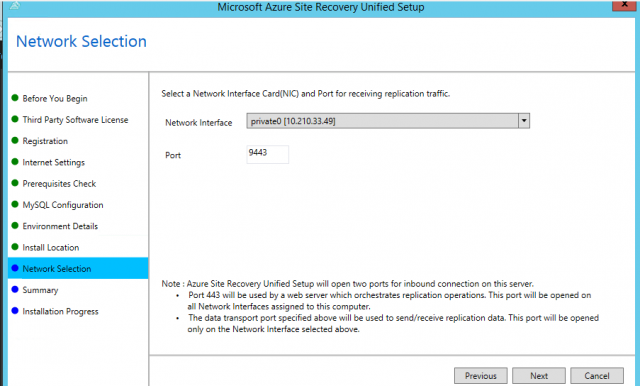
In Network Selection, select the private IP of the server. Port 9443 is the default port used for sending and receiving replication traffic.
Review the summary and click Install.
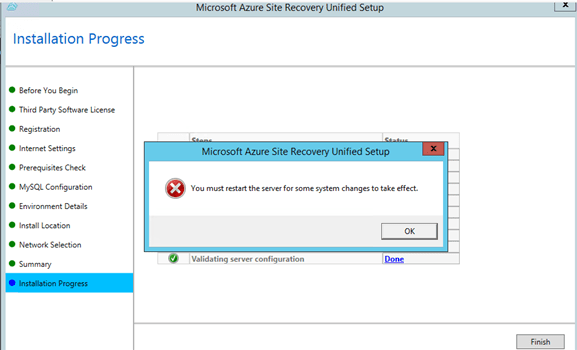
Once finished, you have to reboot the Server.
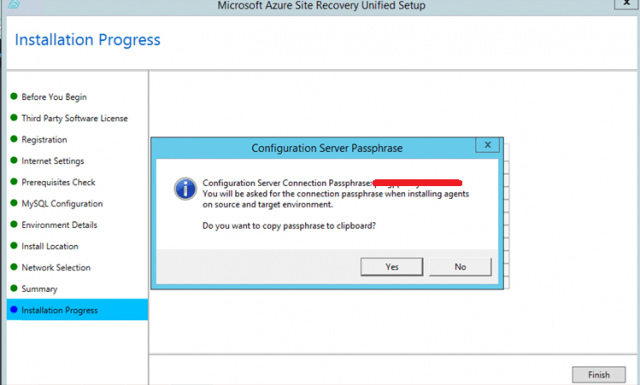
You need to copy the passphrase and keep it safe. You will use it to connect the config./process server (Z-Server) from on-premises servers (X-Web and Y-DB Server).
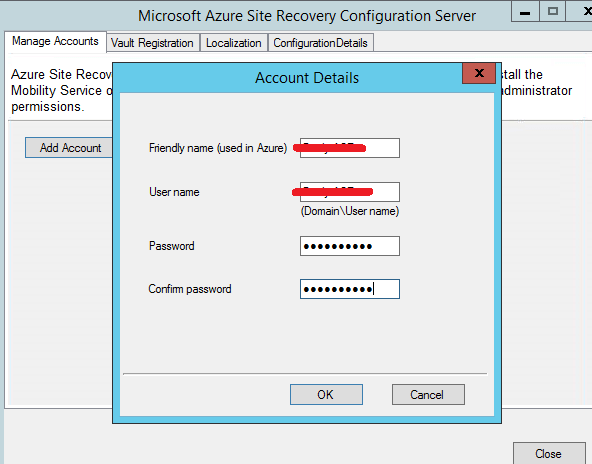
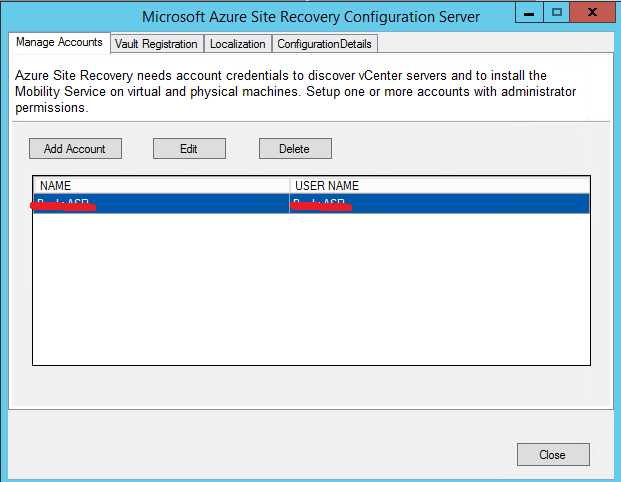
There are some additional steps to configure the config./process server. You’ll need to add an account.
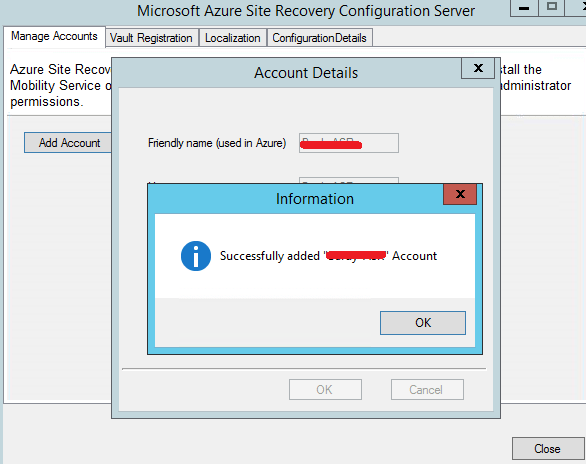
Account added successfully.
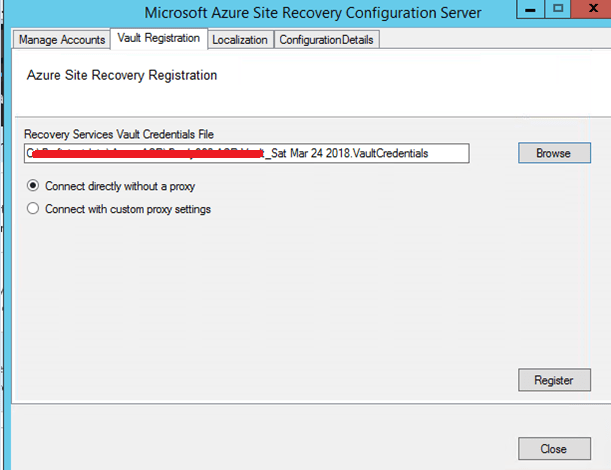
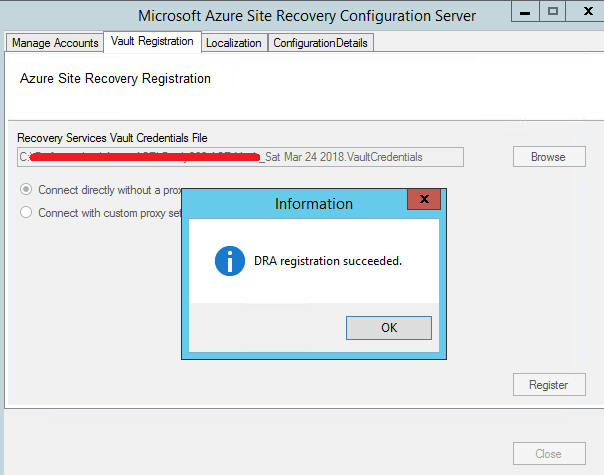
Select the registration key that we downloaded from the vault and connect directly.
Registration succeeded.
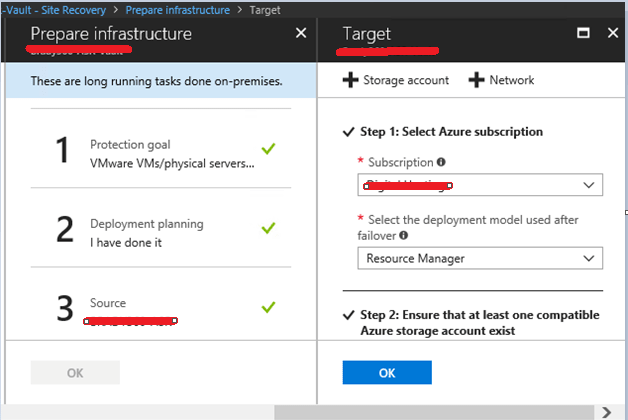
Once the setup of configuration server is over, we need to again move back to the Azure portal, into the Recovery Service Vault, for further configuration. Create a new storage account with standard performance and locally-redundant storage (LRS) replication.
For network selection, we can choose the existing network, ASR-VNET, or we can create a new one.
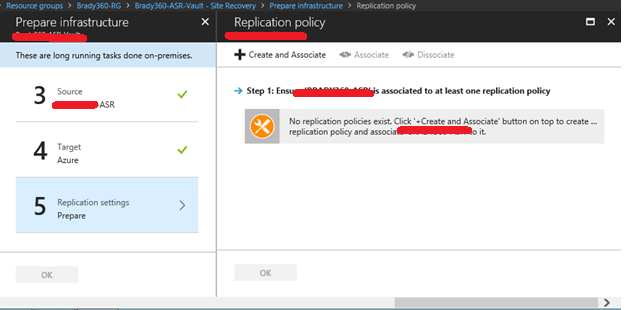
Create the replication policy.
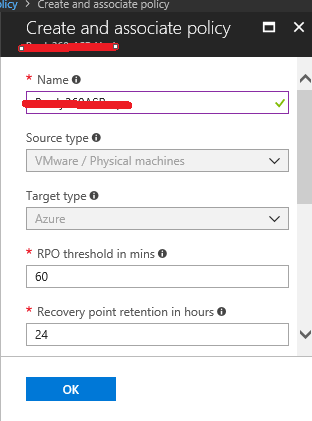
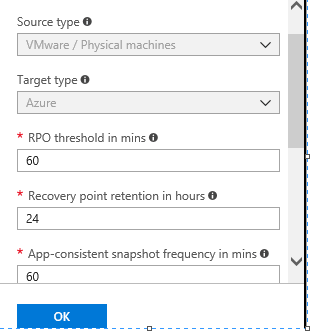
Set the RPO limit. This value specifies how often data recovery points are created. A minimum of 15 minutes is required.
Set the Recovery Point retention limit. It is used to specify how long (in hours) the retention window is for each recovery point.
24hr for premium storage disk and 72hr for standard storage.
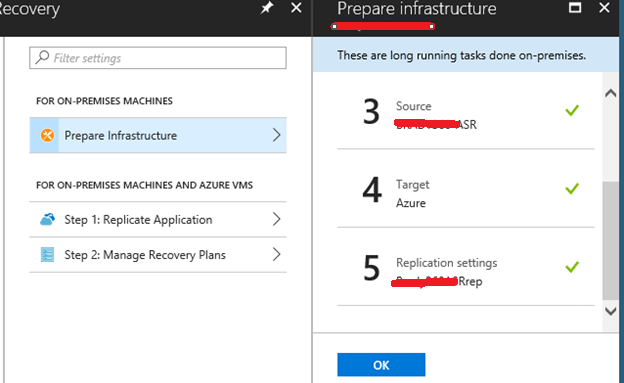
Replication policy is successfully created.
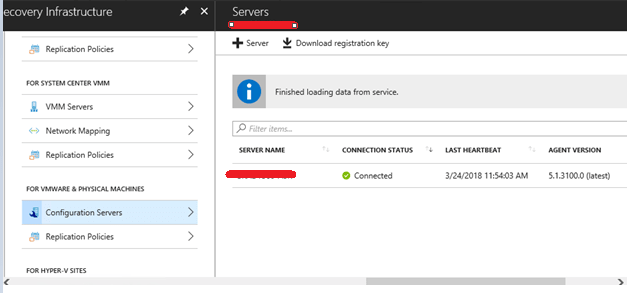
You have now finished preparing the infrastructure in Vault for the Configuration Server. You can see the configuration server’s connected status in the Recovery Service Vault.
Configuration Server is in Connected state.
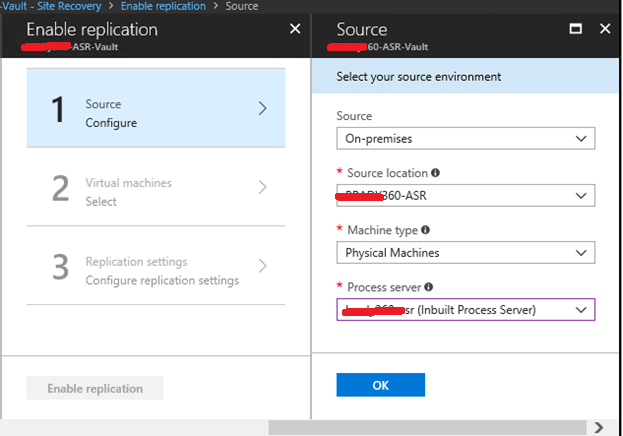
Now, we have to configure the on-premises machines and Azure VMs from the Recovery Service Vault.
In this configuration, we will add the on-prem [X-Web and Y-DB servers] to the config./process server (Z- Server).
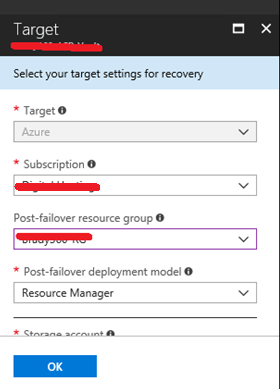
Assign the post-failover resources. This setting will take effect during the failover of the machine from on-premises to Azure.
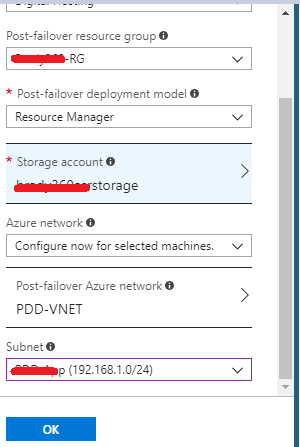
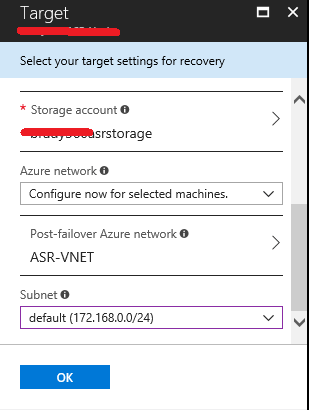
Assign the post-failover storage.
Assign the post-failover network.
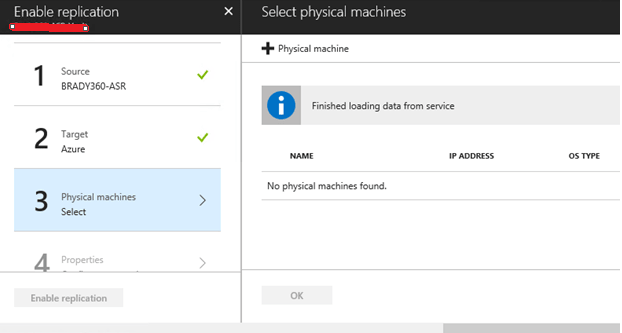
During this setup, no physical machine will be found because we have not connected any machine to the configuration server as a part of the protection.
To connect and protect a machine, we need to install the mobility agent on the on-premises machine that we need to protect. Once we install the agent on the machine, it will be available to configure further.
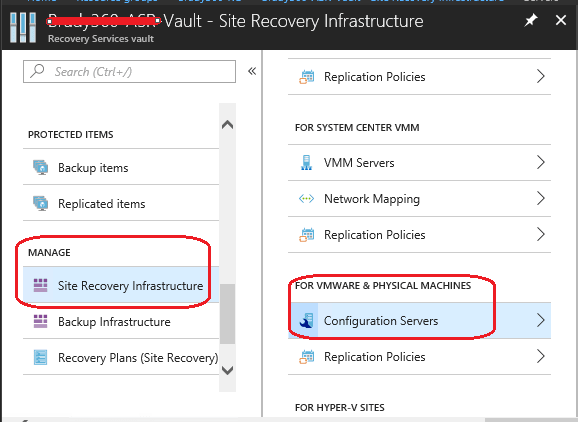
To get the mobility agent setup file, we need to follow the below steps. Go to Recovery vault > Site Recovery Infrastructure > Configuration Server in the portal.
Click on Configuration Server then Master Target Server and download the mobility client Agent file.
Download the agent.
Copy the mobility client Agent to the on-premises servers (X and Y Server).
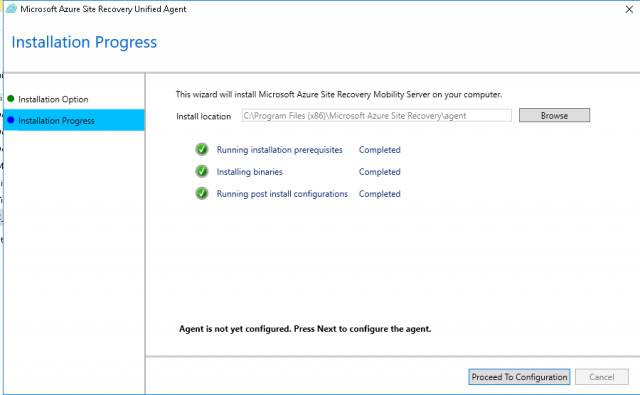
Run the setup file and select mobility service agent to install.
It will select the local path to install.
Once the installation is completed, it will ask you to connect the configuration server (Z Server). At this point, you need to use the passphrase we copied during the setup of the configuration server (Z Server).
Example: pM#######jHOKxNDX
If you do not have the connection passphrase or lost it, you can find it from the below location on the Z server.
C:\ProgramData\Microsoft Azure Site Recovery\private
Enter the Configuration Server private IP and passphrase. Make sure the Configuration Server and the on-prem servers that are going to be protected in Azure ASR will communicate privately.
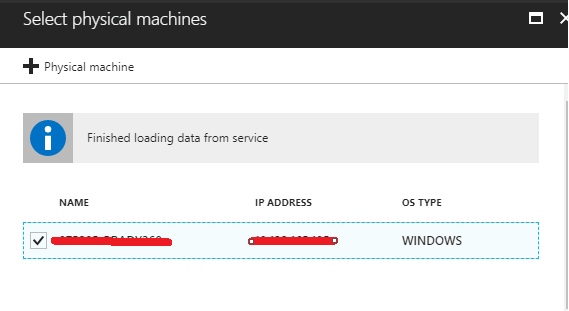
Once the on-prem server is connected to the config. server, it will appear in the vault to be protected.
Note: You’ll need to refresh the configuration server in the portal to catch the newly added server.
Once the refresh of the server is completed, the target server will be available to us for further configuration. This step refers to the previous steps where we could not find any server for protection. Now the server is available (X-Web Server).
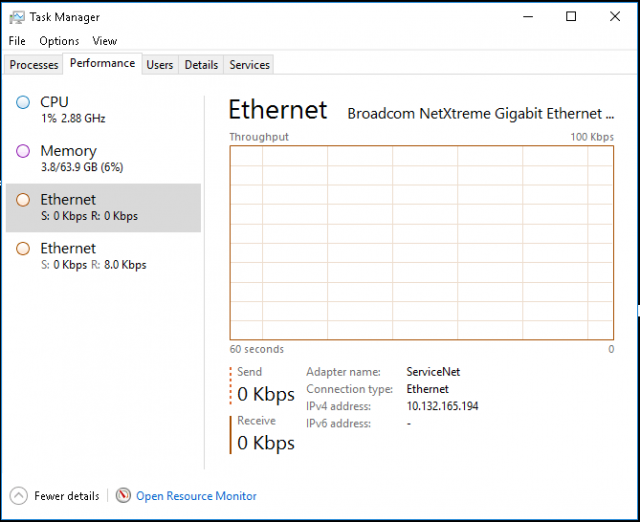
You can check the performance of the target server (X-Web Server) as below. At this point, it is normal.
The config. server (Z Server) performance is normal as well.
Move further on configuration for the target server (on-prem servers – X-Web Server).Apply the replication policy that we have already created.
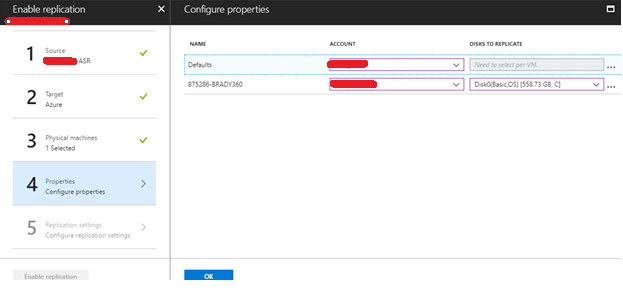
The X-Web server disk is now available.
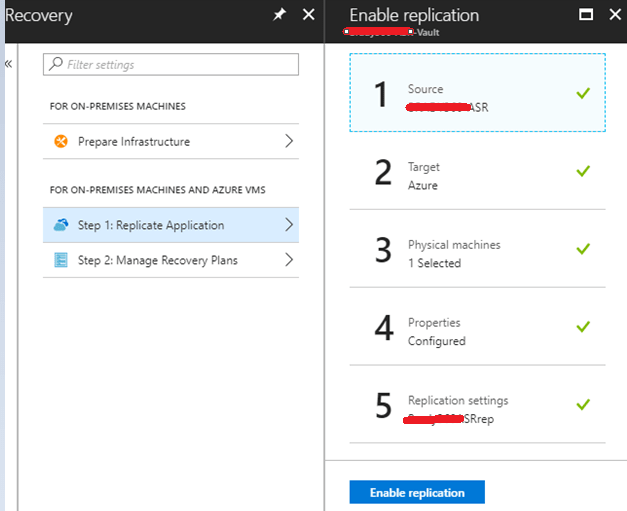
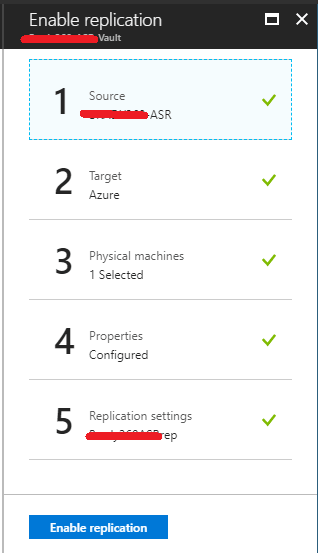
Now enable the replication.
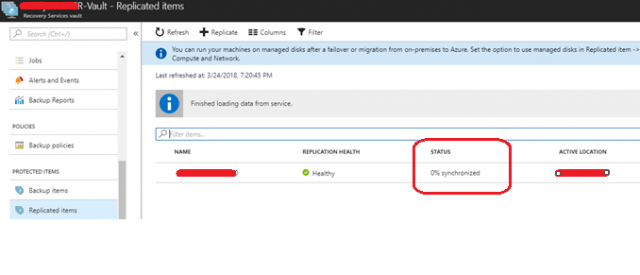
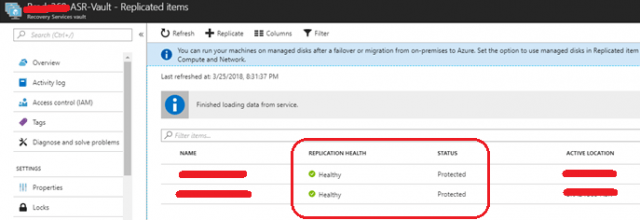
Finally, after enabling the replication, you will be able to see the protected server (X-Web Server) in the Replicated Items, which is in-sync.
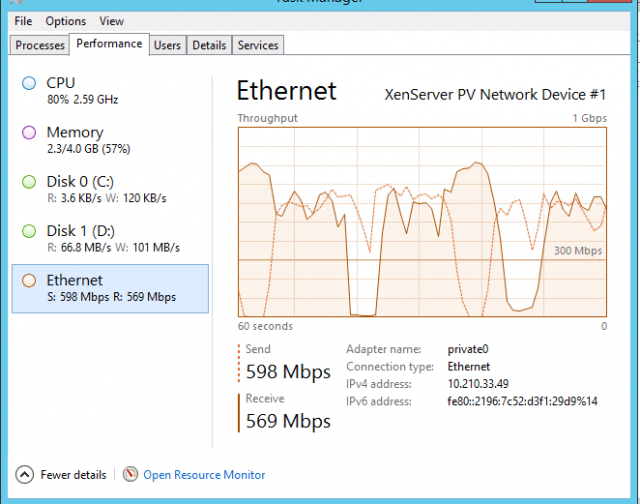
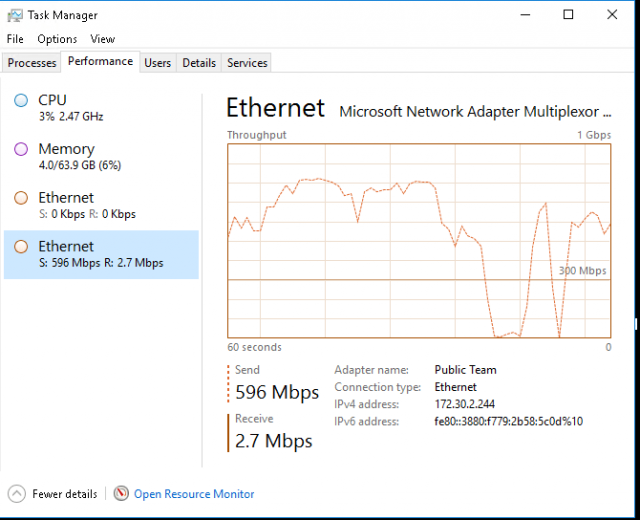
Config. server (Z-Server) performance after setup. Traffic increases with 598mbps.
X-Web Server performance after setup. Ethernet speed is at 596mbps.
In my case, the replication starts at 7:15PM IST and will end at 10:22PM IST.
It took four hours to complete replication of the X-Web Server, which totally depends on the network speed and the amount of data we have on the server. I have a single C-drive with 233 GB used out of 587 GB.
The server is now protected.
Follow the same steps to connect the Y-DB server.
The Y-DB server has four drives and all are connected with a similar replication policy.
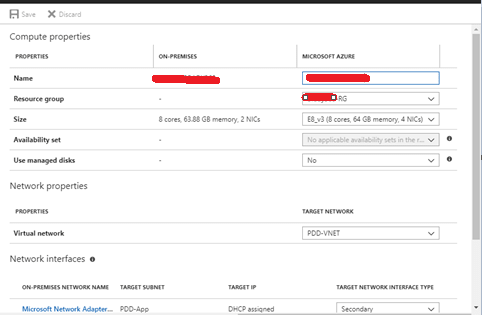
Below setting defines the post failover virtual machine setting in Azure (auto-predefine) which will take effect when the server gets failover to the Azure for the X-Web Server. It builds the similar configuration of the on-prem machine in Azure to accommodate all the server resources.
Click the replicated VM [X web Server] and you will be able to see Properties, Computer and Network, and Disks.
Computer and Network setting for post failover.
Virtual machine post-failover (Auto-predefine) configuration for Y-DB server.
Both X-Web and Y-DB are now fully synchronized to Azure ASR and are protected.
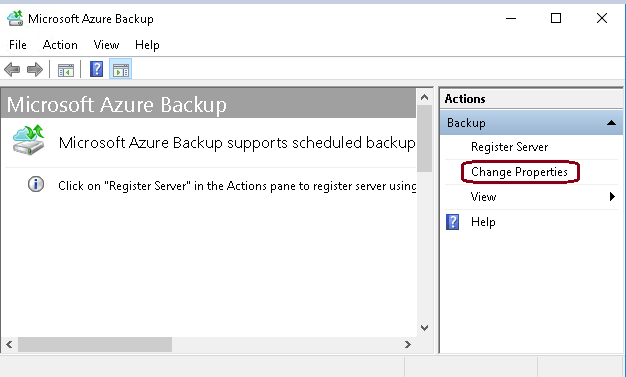
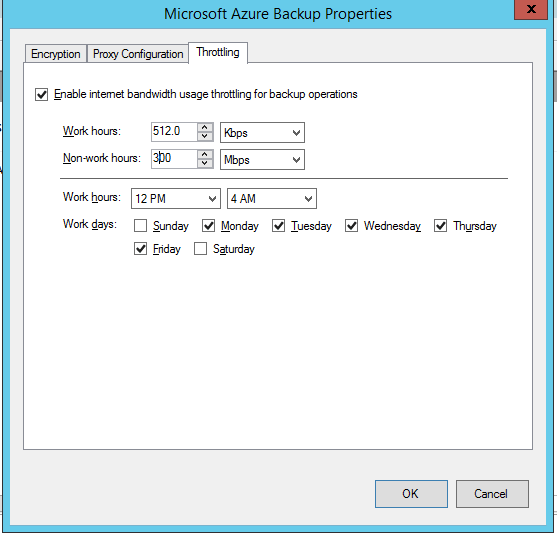
We can define the bandwidth usage on the config. server (Z server) as per the day as below.
Open the Microsoft Azure backup icon from desktop of the configuration server.
Save the setting in Throttling as per your need.
Additional Notes:
- On-premises Servers are added to Replication item under the Recovery Services vault in the Azure Portal
- The Process server perform the replication and reduces the total amount of data which send to azure vault with compression & encryption.
- Once replication is completed and a recovery point is created, the servers will show in “Protected” state and can be later used to perform a failover.
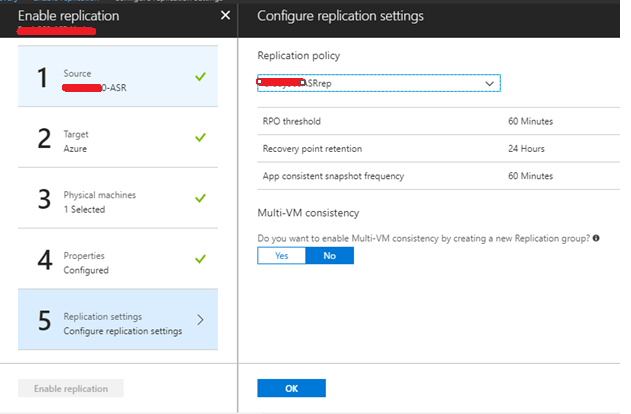
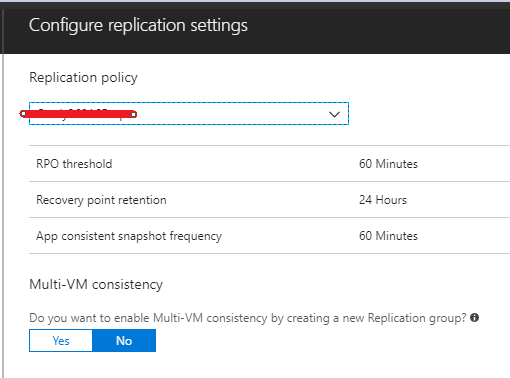
The overall replication of data through ASR can be controlled by the replication policy and it gives us ability to modify the parameters defined in the policy.
A replication policy consists of –
RPO threshold: It is used to specify the recovery point objective (RPO) limit. This value specifies how often data recovery points are created.
- In my case, the RPO threshold is set to 60minutes
Recovery point retention: It is used to hold the copy of the virtual machine in time with retention that is how long (in hours), the retention window can be kept for each recovery point of a virtual machine. The replicated virtual machines can be recovered to any point in this 24-hour window, and 24-hour retention is supported for machines replicated to premium storage.
- In my case, the recovery point retention is set to 24 hours.
App-consistent snapshot frequency: It is used to specify how often (in minutes) recovery points containing application-consistent snapshots will be created.
- In my case, the App-consistent snapshot frequency is set to 60 minutes.
For more information, visit:
https://docs.microsoft.com/en-us/azure/site-recovery/physical-azure-disaster-recovery
https://docs.microsoft.com/en-us/azure/site-recovery/vmware-azure-deploy-configuration-server#configure-settings

