Robotic automations can be used to automate the routine tasks which are repeated in a workflow. Pega robotics adds the ability to automate tasks using the user interface of existing applications. It can help speed up manual tasks by automating user actions.
Automations are created in Pega Robotic Studio. The latest version available is 8.0 and can be downloaded from PDN. The minimum requirements for running automations are PRPC 7.2.1 with Pega HFIX-29471 or PRPC 7.2.2.
There are two types of Pega robotic automations:
- Desktop Automation (RDA)
- Process Automation (RPA)
Pega Desktop Automation
Desktop automations are used to provide a unified desktop experience to users by integrating and automating desktop (or web applications) with Pega 7 applications. Desktop or web applications can be launched from flow actions and data can be transferred back and forth between the workflow and desktop applications.
Desktop automations can help reduce the redundant work that is required to copy and duplicate data in multiple applications. This can help reduce the time a CRM representative needs to spend with a customer on the phone and can also reduce data entry errors which can occur when entering the same data multiple times.
Legacy applications where APIs don’t exist or are not compatible with new Pega 7 applications can be integrated with the help of automations.
Pega Process Automation
Process automations are used for automating high-volume back-end repetitive work. Case assignments are routed to a robotic queue from where they are picked up by a robotic automation VM to perform the automations.
The working is similar to an agent but the processing is done by an automation instead of the Pega requestor processing the assignment. A new ‘type’ dropdown has been added in the work basket instance to specify a robotic automation work queue. If Robotic type is selected from the dropdown, two additional fields are displayed:
- Maximum queue length: This value is used to specify the maximum number of assignments that should be in the queue at a given time.
- Maximum automation execution time: The value is used to specify the maximum amount of time the VM is expected to take to run the automation.
Automation VM’s can be managed in Pega Robotic Automation Console. Robotic workbasket turns red when the number of assignments exceed the maximum queue length or the automation execution time. The automation console is packaged with a sample application and can be downloaded from the PDN link.
Installation and Configuration of Pega Robotic Studio
There are 2 installation options available:
- Run time only installation
- Pega Robotic Studio installation
The runtime client allows the users to run automations on a user’s desktop. The automation project can be loaded after launching the run time client and right clicking the run time icon in the task bar. During installation of the client enable RDA checkbox needs to be checked in order to enable the REST service (API) for handling automation requests from Pega 7 applications.
Pega Robotic Studio is built on top of Visual Studio. Robotic Studio is used for creating automations. The installation files and instructions can be found in Pega Robotic Automation Architect Essentials (8.0) course in Pega academy. The course also provides a sample application and step by step instructions on how to create an automation. Automations can also be invoked from a Pega application by running the debugger in robotic studio.
Both runtime and Robotic Studio have configuration files which need to be updated with Pega server base URL. At runtime, Config files are copied to the temp folder under C:/user/AppData/Roaming/OpenSpan. The files need to be updated or deleted from this folder every time the Config files are updated in order to pick up latest Config changes.
The installation and configuration instructions can be found here.
Creating a simple automation in Pega Robotic Studio
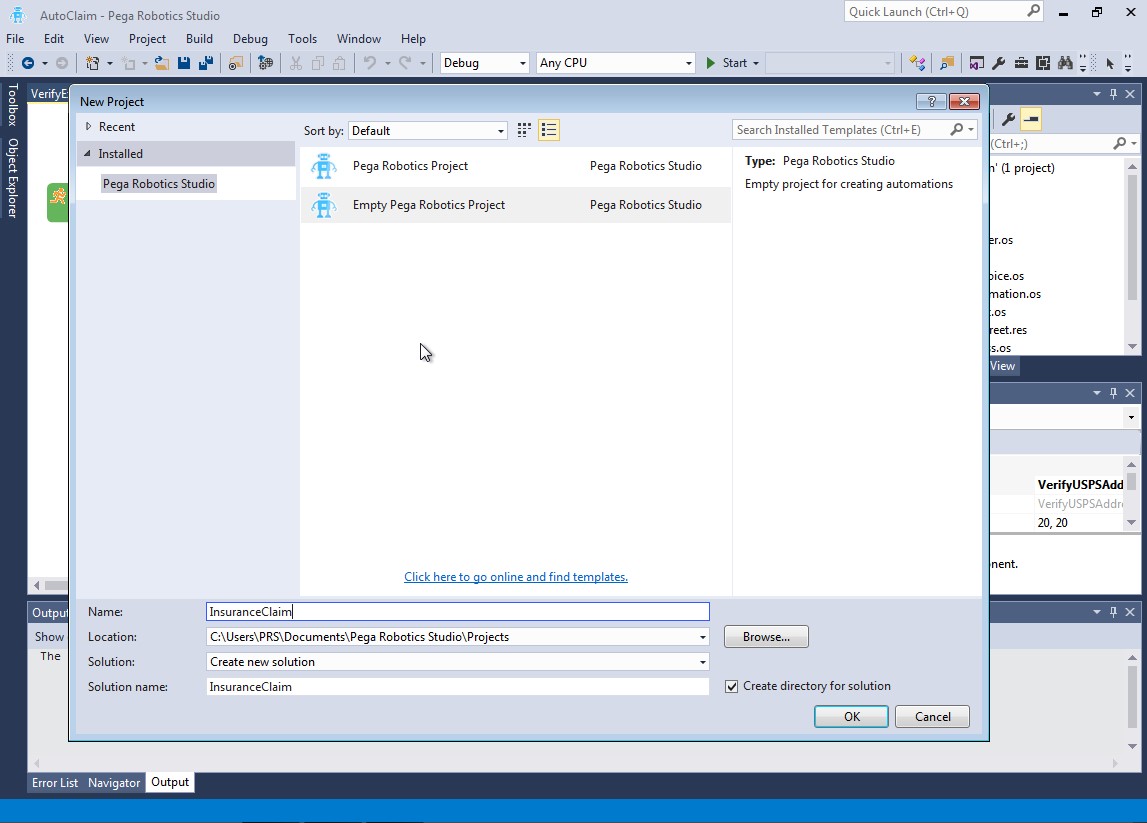
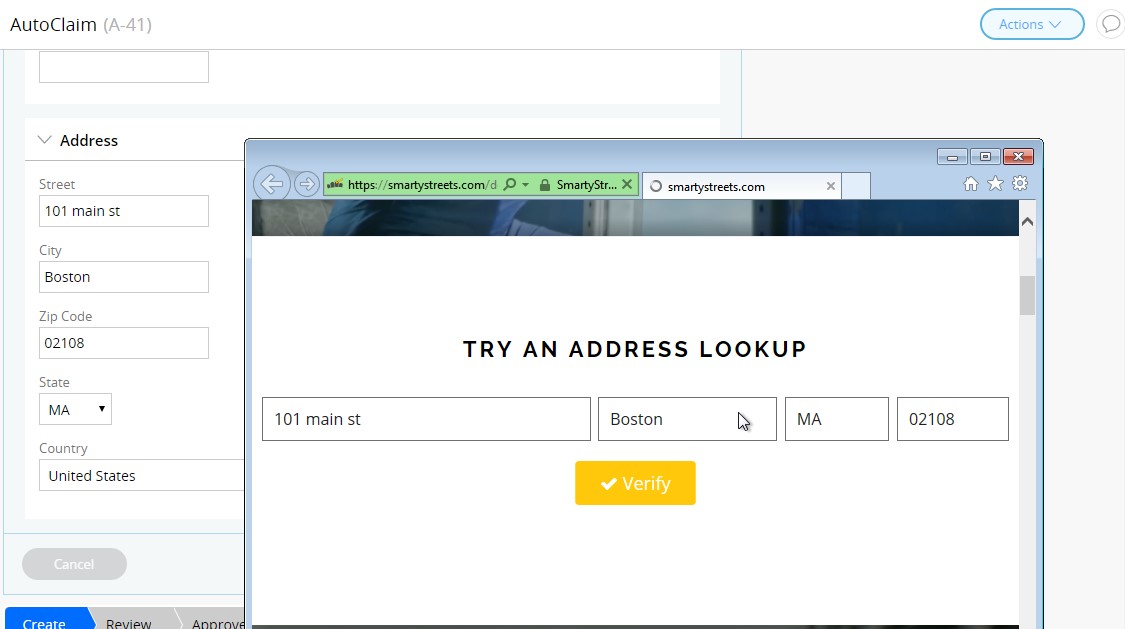
To create an automation, launch Pega Robotic Studio and create a new Pega Robotics Project (File>New). Enter a name for the project. For this example, we will create an automation for an insurance claim application. The automation will launch a website (smartystreets.com) and validate the address data entered by the user.

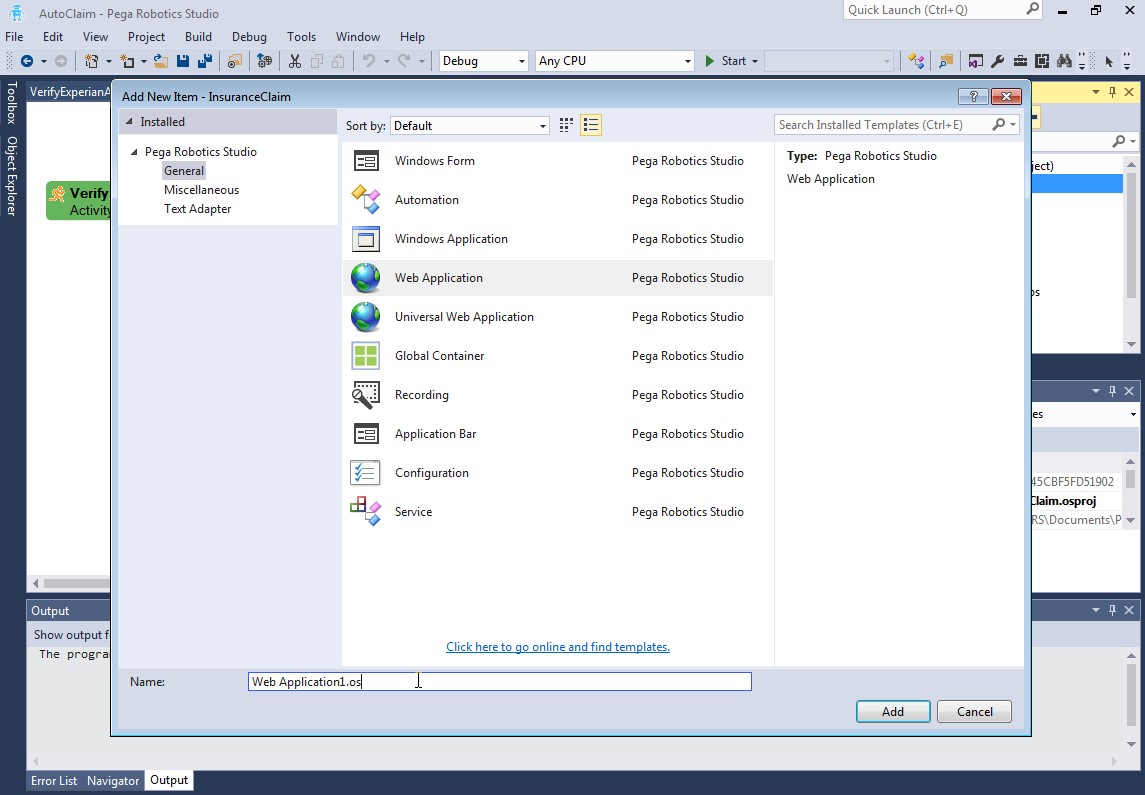
Add a new web application by right clicking the automation project and selecting add new web application. Enter the name for the new web application.
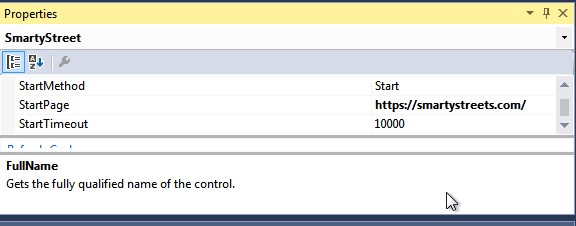
In the web application properties panel, update the design name, add the start page url and save the application. Set start my day property to automatic.
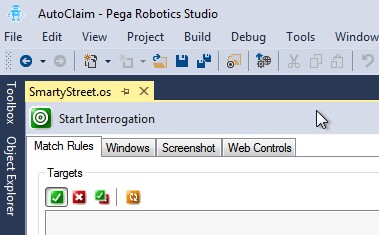
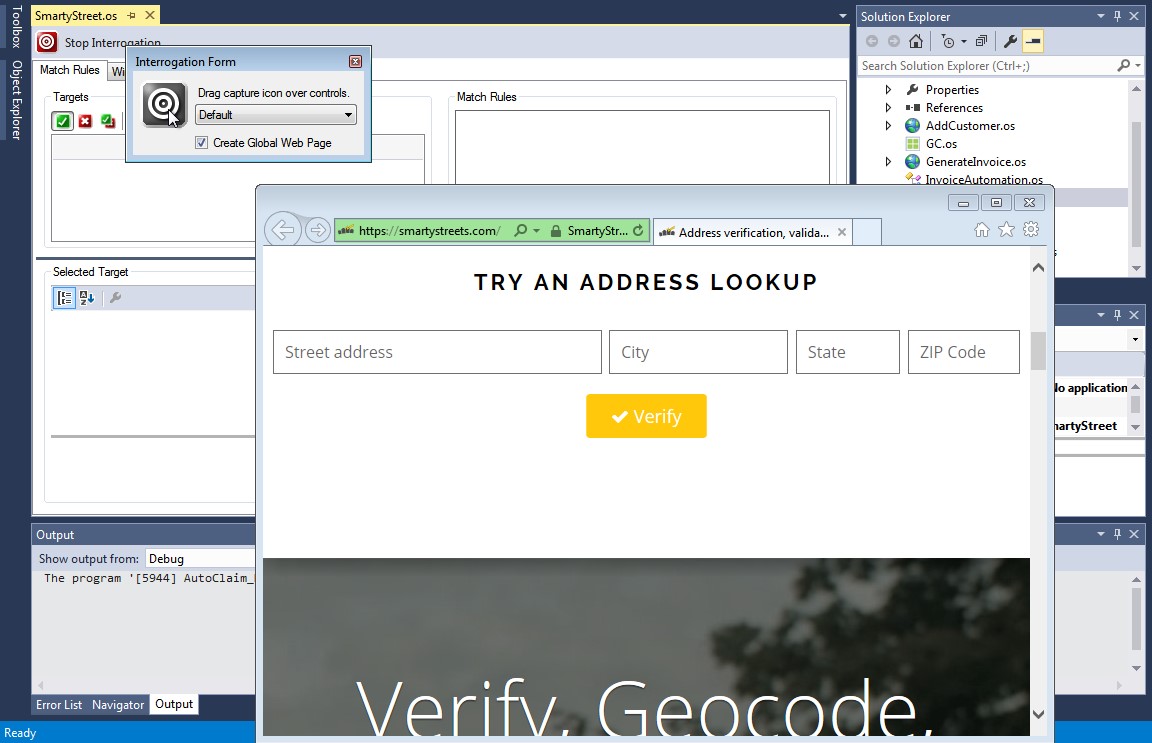
Click on start interrogation to launch the web site and capture the input fields using the drag capture tool. The controls captured are added in the object explorer. Design names for the controls can be updated in the properties panel.
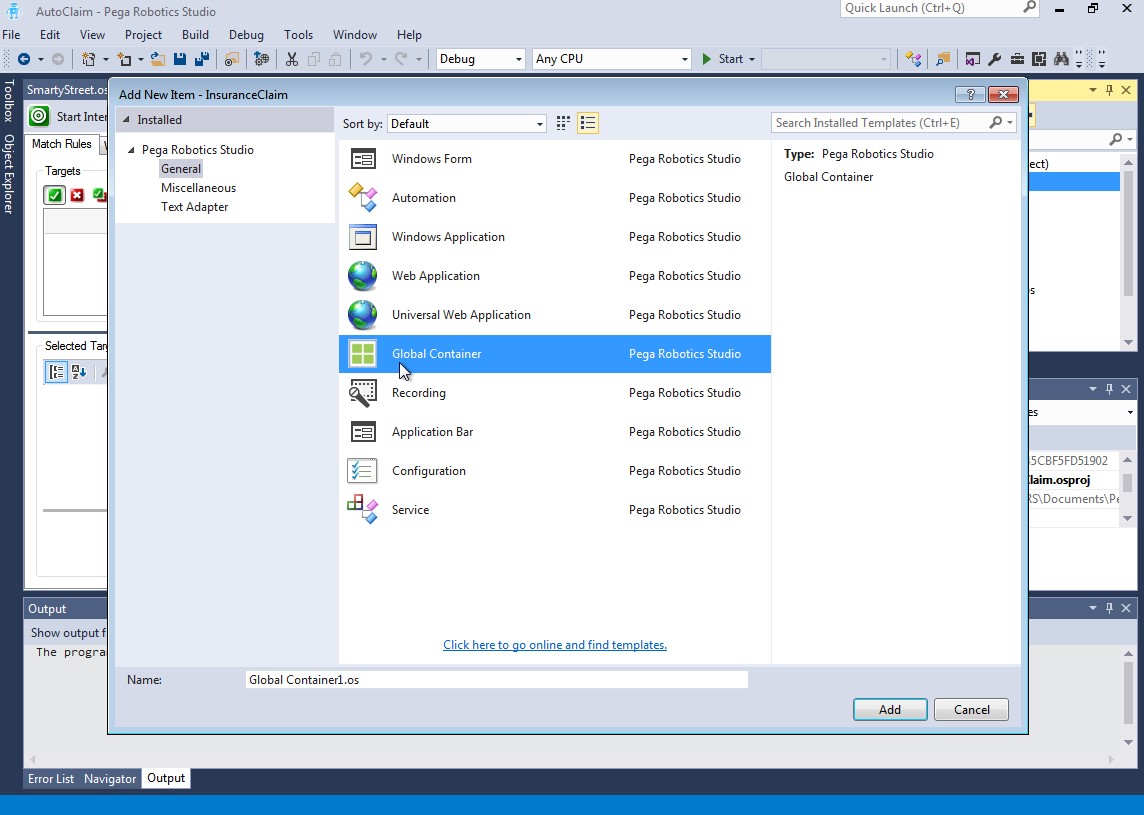
Add a new global container to the project for adding robotic components. These components can be reused in multiple automations.
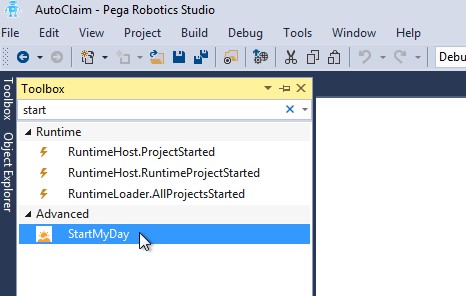
Drag a new start my day control to the global control and update the name in the properties panel. This control will be used in the automation to launch the web application.
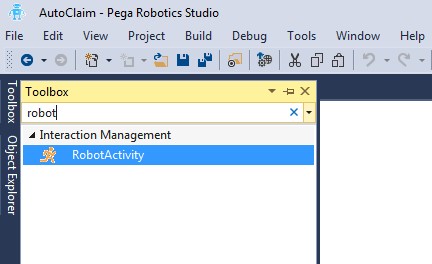
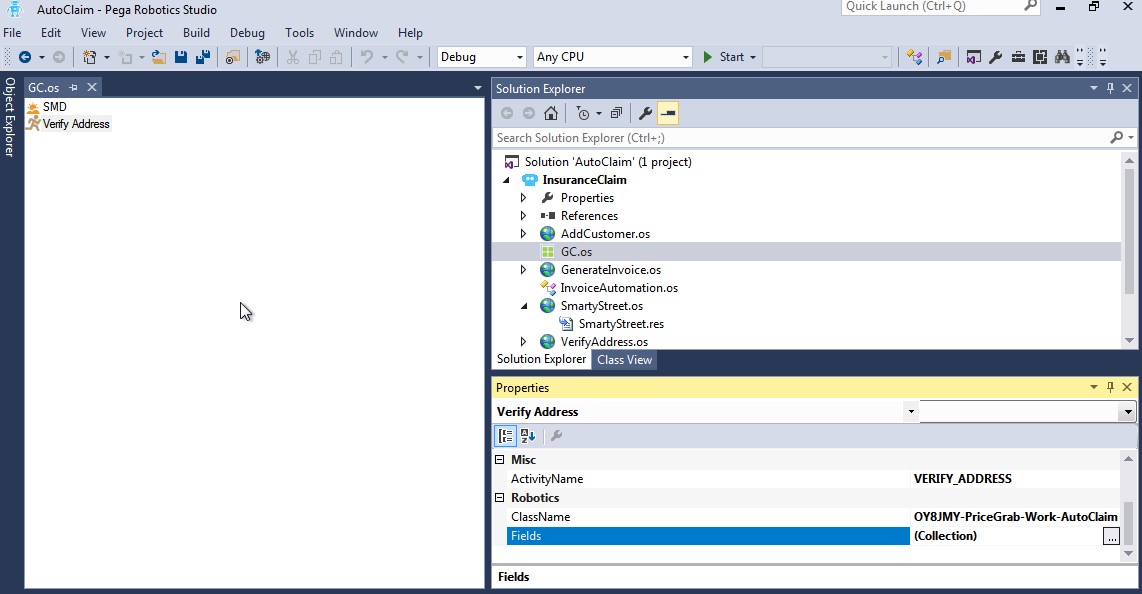
Add a new robot activity to the global container. Update the property name in the properties panel. Add a unique activity name. This robot activity name will be specified in the flow action (in PRPC).
Add the Pega class name to pull property values from the Pega case. Click on fields (collection ellipsis) to view the relevant properties for the class. Select the properties that will be used in the automation. Relevant properties for the class can be added in PRPC by going to Designer Studio menu>Application>Inventory>Relevant records.

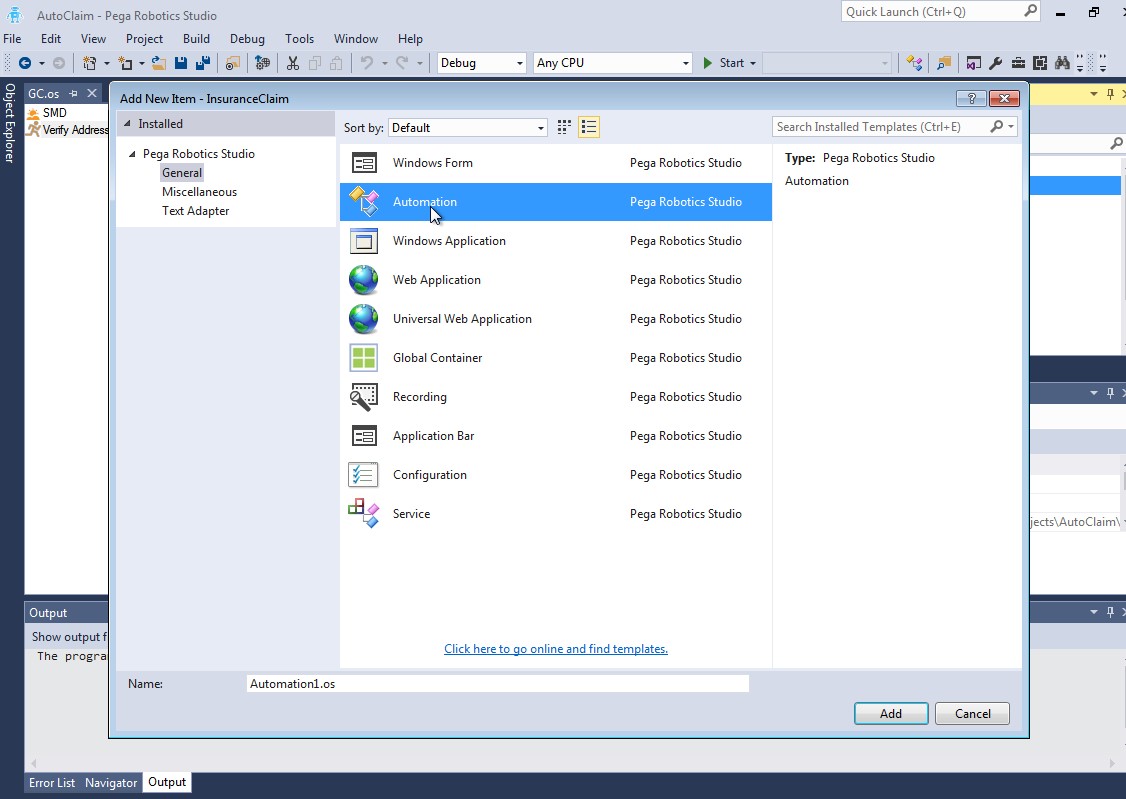
Next we add a new automation by right clicking the project and selecting add new automation.
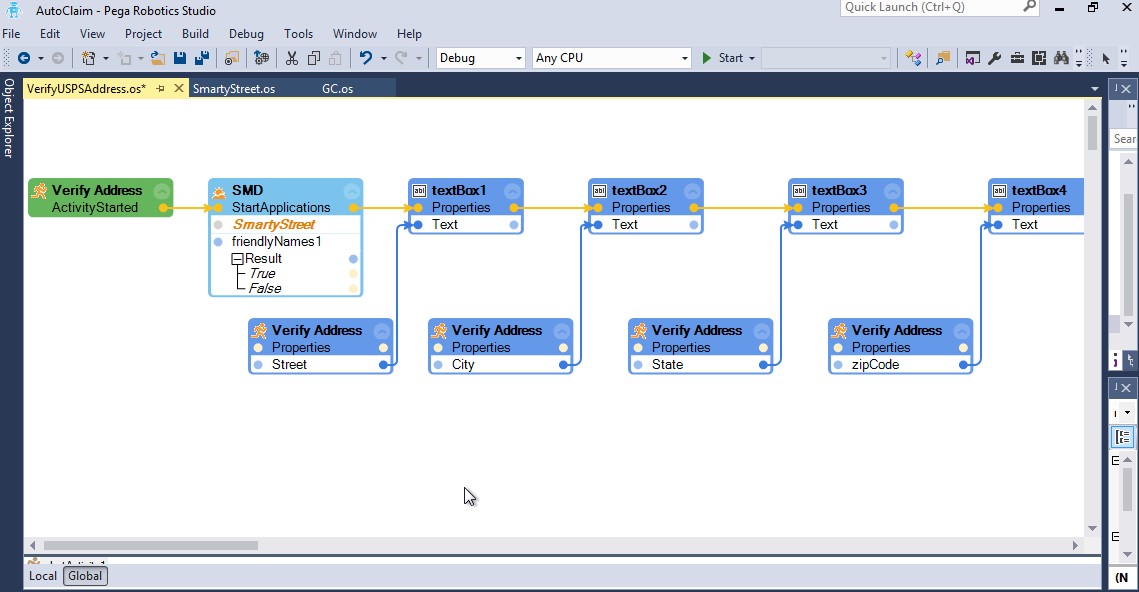
Add the following objects to the automation and connect them:
- Activitystarted event of the robotic activity
- Start my day object Start Applications method. Add the web application friendly name.
- Address text box components
- Address properties under robotic activity
- Perform click method for verify button
To invoke and test this new automation from the PRPC application, specify the robotic activity name in the flow action. The automation project can be tested by either debugging the project in robotic studio or loading the project using robotic runtime.
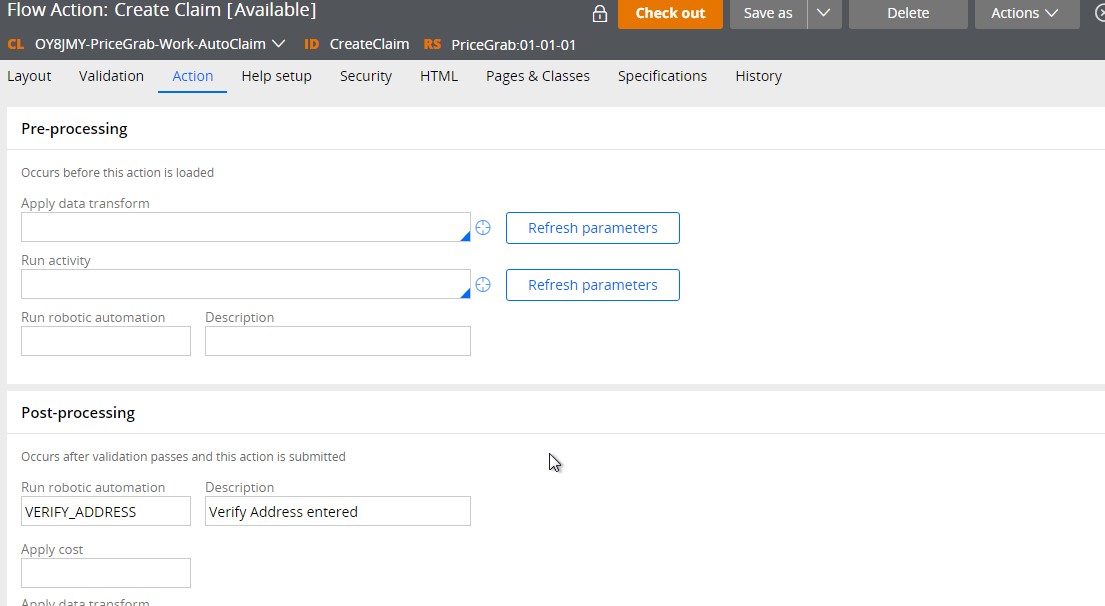
Automation will run when the flow action is submitted. Address data will be copied to the website address fields and verify button will be clicked (Perform Click method).
Automations can be triggered from either pre or post processing of a flow action. If an automation is not available or fails to run, a message is displayed at the top of the screen and an ignore and continue button is displayed instead of submit.
Did this work for you? What are your questions on RPA with Pega?
READY TO GROW YOUR CAREER?
Perficient continually looks for ways to champion and challenge our workforce, encourage personal and professional growth, and celebrating our people-oriented culture. Work on interesting projects for some of the world’s most recognizable clients and enjoy life while doing so.
Learn more about what it’s like to work at Perficient at our Careers page. See open jobs or join our community for career tips, job openings, company updates, and more!
Go inside Life at Perficient and connect with us on LinkedIn and Twitter.
Hi,
I am trying to install Pega Robotic Automation Studio, But i am getting Error.
Can you please provide me any Document to Install Pega Robotic Automation Studio.
Thanks,
Ravi Kumar.C
Hi Ravi,
You can find the installation instructions on PDN: https://pdn.pega.com/configuration-robotic-automation-pega-7-applications/configuration-robotic-automation-pega-7
Additionally, there is an installation guide in the self-study robotic automation architect course under Pega academy.
Hi Udy,
I am able to get class field values at robotic studio end but while calling robot activity from post processing of Flow Action I am getting “Unable to invoke robotic automation from this screen. The automation service is either unavailable or this system is not authorized to execute automations.” error message.
I have gone through all the articles available in pdn in order to resolve this issue but nothing worked.
RuntimeConfig.xml details :
Even I tried calling the robot activity by running the solution in debug mode but still getting the same error message.
Is there any way using which we can debug the rest service hosted by Runtime, so that we can test it at least once whether the rest service is up or not at runtime end before calling it directly through Flow-Action.
Thanks
Purushotam
RuntimeConfig.xml details :
baseUrl=”http://localhost:8080/prweb/api/v1/”
LocalApiService enabled=”true” SSL=”true” port=”9443″ allowedOrigins=”*”
Purushotam,
If you are running the solution in debug mode, make run the design time config file is updated. Your Run time config looks fine. Make sure to delete the config file under user>tempdata folder and try again. Also are you using using SSL? If not, change the flag to false. Go to the service package API in designer studio and uncheck use TLS/SSL also.
Udy
I hadn’t thought of using containers but that’s a great idea. Thanks so much for sharing!
HI I am unable to interrogate my crm application on windows 10. can you please help me.
Hi Ana,
I haven’t used Robotic studio in windows 10 but I would assume it will work the same way as Windows 7. Which version of Robotic Studio are you using? Version 8.0 should work on Windows 10.
Great information sharing about the RPA.Thanks for posting.I will take a note of your blog For More Information or new information about RPA.
Thanks & Cheers !!
Hi, Udy,
Thank you for sharing this whole process for the installation and configuration instructions, I was going to create my first automation in Pega Robotic Studio, and I found this, very helpful. You have explained every step very clear with the screenshots.
Keep posting. Would be waiting for more stuff from your side.
Cheers!
Good Article on rpa future
Very informative article regarding robotic automation process using pega.Thanks for updating.If anyone looking for training on different rpa tools like blue prism,uipath,automation anywhere plz check it.
HI I am unable to interrogate my crm application on windows 10. can you please help me.While opening interragate window it is closing immediately unable to perform the task.Kindly help me in this regards
Hi,
Please make sure that the path to crm.exe is correct. Also make sure no anti-virus software or firewall is blocking the interrogation window.
Hi Udy,
I’m unable to with cmd mainframe application in win-10 application, It’s showing the error
“The process start to fail in given time frame, continue waiting?” when I trying to interrogate.
I gave the proper path of the cmd.exe