Liferay provides the Kaleo Workflow engine to allow the user to define simple to complex business processes/workflows, deploy them, and manage them through a portal interface. Those processes will involve various types of users, groups, and roles.
In fact, you don’t have to write a single line of code to accomplish this: all you have to do is create a single XML document. Simple workflows can be maintained by using the default configuration and GUI tools, while more complex workflows can be created to meet the workflow management requirement in each kind of portal.
- How to Define a Kaleo Workflow
Before defining the workflow, we need to know some important components. There are seven types of nodes that you can add to a definition. A simple definition is made up of State, Transition, and Task. State, Transition, and Task are key parts to designing the workflow xml.
State represents a workflow state, such as created, rejected or approved.
Transition takes place between states, describing the next state.
Task represents a task that can be assigned, and we can configure Action, Notification and Assignments into Task.
Liferay provides a Kaleo designer along with the enterprise edition. For the CE version, there is a GUI tool available to create the workflow by visiting www.liferay.info. You can try to create a simple workflow that is comprised of 2 states and 1 task by dragging a node into a label and adding an action or notification. You can also configure assignments that you want to assign. Following are the detailed steps:
Step 1: Click new workflow and drag a Task into Panel

We can change the Task’name and description due to the needs.
Step 2: Configure Notification and Assignments in the review Task
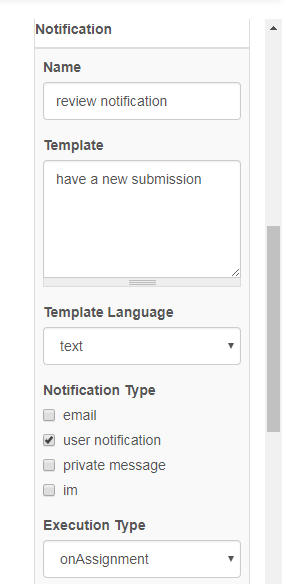
There are many attributes we can configure, We will explain the Execution Type a little bit here.
The execution-type could be onAssignment, onEntry or onExit.
onAssignment generates and sends the notification when the user is assigned the task in the workflow.
My Experience: onAssignment notification will not work if you wish to notify a user that is not part of the workflow.
onEntry generates and sends the notification when entering the workflow task or state.
onExit generates and sends the notification when exiting the workflow task or state.
My Experience: Your notification type and execution type should be a pair. You should not use an onExit execution type with a private message, because the user won’t receive that message until he or she logs back in. Generally speaking, email notifications work best with onExit or onAssignment, while IM or private message work better with onEntry.
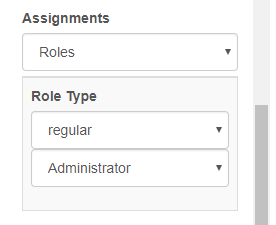
In this workflow, anyone who is capable of approving the content is notified onAssignment. This includes the regular administrator. The role-type tag helps the system sort out who should receive the notification based on the scope and can be set as community, organization or portal.
Step 3: Configure the end node and connect each node
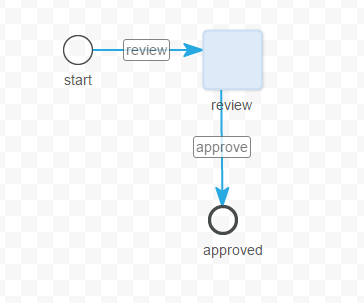
In the last step, we will define our end state. Remember states automatically run all actions that are assigned to them, so a script executes and sets the state of the content to approved. Workflow scripts are completely contained within XML workflow definitions. You could also write a customized script if there were actions outside the standard one that you need to perform on your asset (change the script-language). In this workflow, we use groovy to change the states, the code as below:

Now you can save the workflow source as an xml.
- How to Use Defined Workflow in Liferay Web
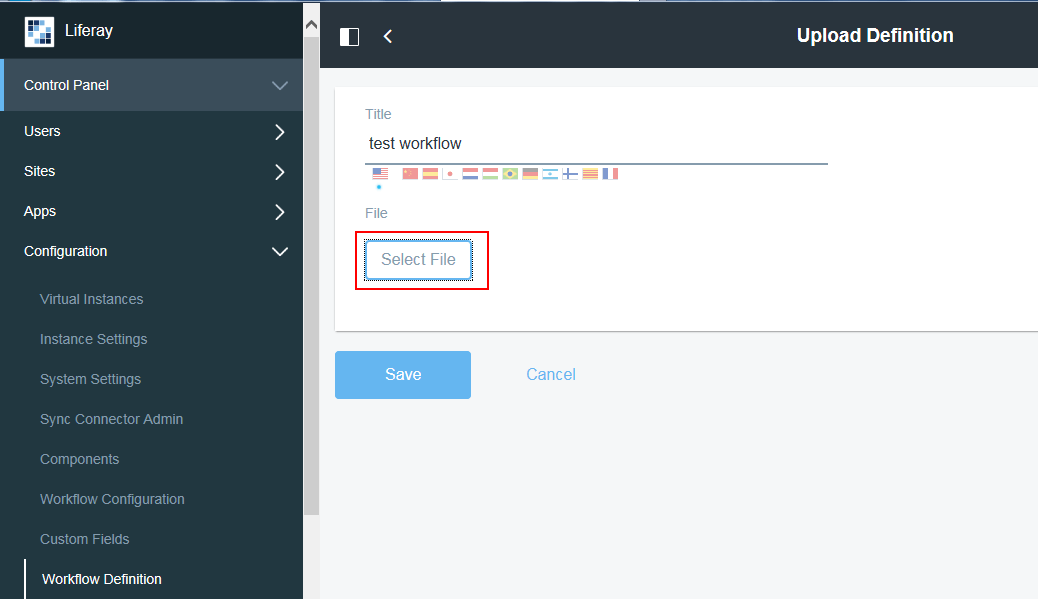
After creating the simple workflow definition, we can import it into our Liferay. Here are the steps to make the defined workflow work.
Step 1: Import Workflow Definition from Local
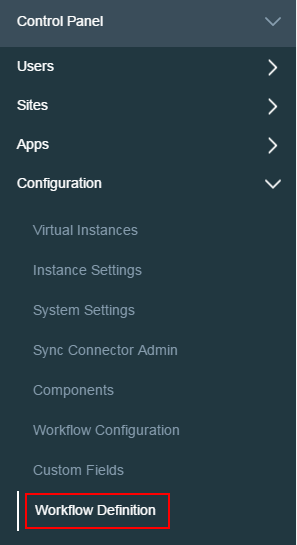
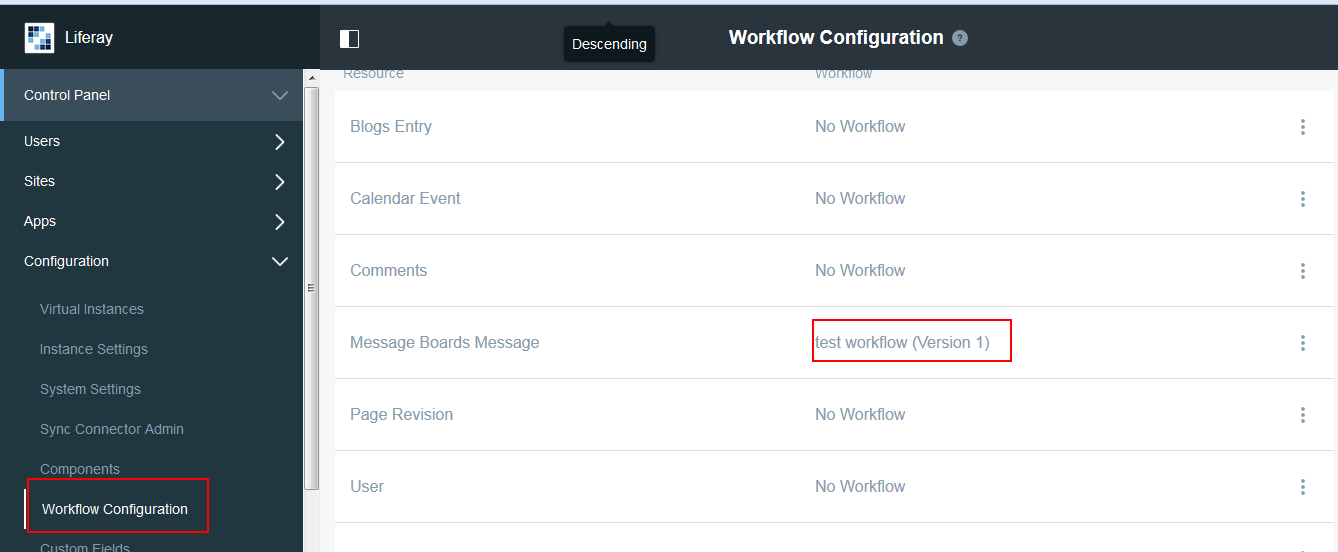
Step 2: Choose a workflow for a resource, we configure the workflow for message board there
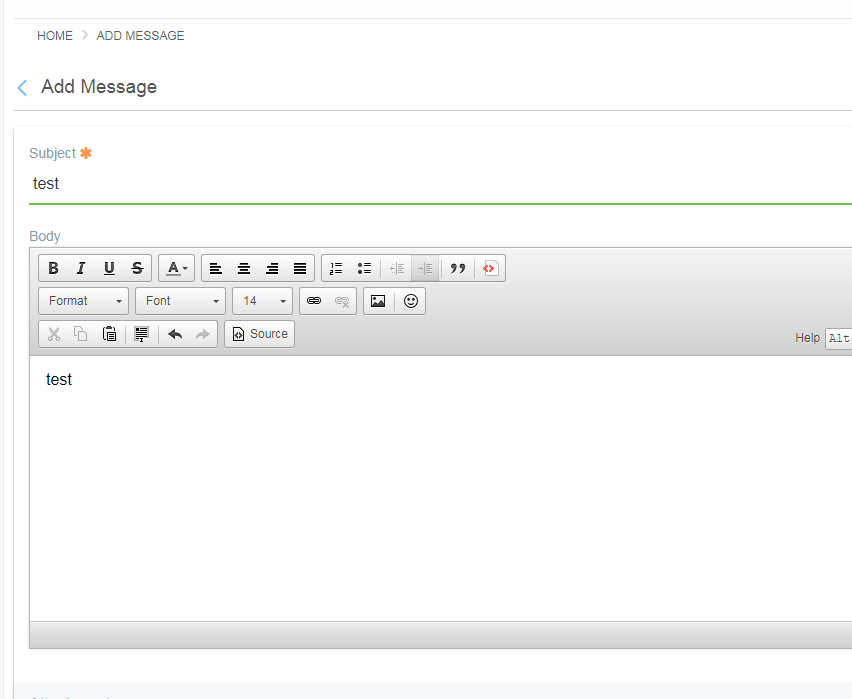
Step 3: Do a test – Post a new Message Thread and submit it for publication
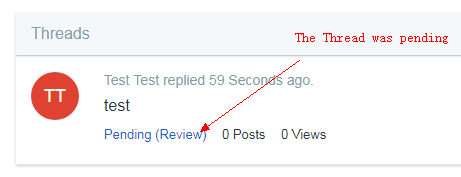
Well, now you can see the workflow is working as expected! The Message Thread is now waiting for the regular administrator to review. You can use the above steps to implement a Workflow in your project.
