
Recently I had to perform a familiar function: integrating Skype for Business with Exchange in order to allow IM and presence functionality inside of OWA (or “Outlook on the Web” as it is now known). While the process on the Skype for Business side has stayed the same, Microsoft has introduced a new way to configure the IM server and certificate on the Exchange side that is simpler and easier to manage. Gone are the days of modifying web.config files to make way for managing this via a few simple PowerShell commands. The following outlines the pieces of information needed to configure the environment and their values in our mock scenario:
Exchange OWA URL: owa.domain.com
Exchange Autodiscover URL: autodiscover.domain.com
Skype Front End Pool: fepool.domain.com
First, let’s review the steps needed to configure the Skype for Business environment. The process here has not changed from previous versions and is well documented in TechNet and other blogs. The Skype for Business Server needs to know where to find the autodiscover service, and this is set using the following command:
Set-CsOauthConfiguration -ExchangeAutodiscoverUrl "https://autodiscover.domain.com/autodiscover/autodiscover.svc"
Notice the URL ends with “.svc” and not “.xml”. The XML document is often used to verify access to the service, but in this case we are wanting to point to the service itself. Now we need to create a partner application for Exchange as well as a trusted application pool with a trusted application. This can be accomplished using the following three commands:
New-CsPartnerApplication -Identity Exchange -ApplicationTrustLevel Full -MetadataUrl "https://autodiscover.domain.com/autodiscover/metadata/json/1"
New-CsTrustedApplicationPool -Identity owa.domain.com -Registrar fepool.domain.com -Site 1 -RequiresReplication $false
New-CsTrustedApplication -ApplicationId OutlookWebAccess -TrustedApplicationPoolFqdn owa.domain.com -Port 5199
If you do not know the site number, run Get-CsSite and retrieve the value of SiteId. Also, the port is somewhat arbitrary, is just has to be unique within a Skype pool and cannot be reused with other applications. Finally, publish topology using Enable-CsTopoogy and verify there are no errors.
Next, let’s move onto the Exchange configuration. You will need to enable the instant messaging and the type of instant messenger on the OWA mailbox policies and virtual directories:
Get-OwaMailboxPolicy | Set-OwaMailboxPolicy -InstantMessagingEnabled $true -InstantMessagingType Ocs
Get-OwaVirtualDirectory | Set-OwaVirtualDirectory -InstantMessagingEnabled $true -InstantMessagingType Ocs

Yes, you are setting it to “Ocs”, which is the old name for Lync, which is the old name for Skype for Business. Also, setting the OWA virtual directory like this across servers in multiple sites can take a while, so be patient. After instant messaging has been enabled via the policies, create a partner application for Skype inside of Exchange. Unlike Skype, Exchange does not have a built-in PowerShell cmdlet to create a partner application, but a handy script is available in the “Scripts” directory where Exchange was installed:
.\Program Files\Microsoft\Exchange Server\V15\Scripts\Configure-EnterprisePartnerApplication.ps1 -AuthMetadataUrl "https://fepool.domain.com/metadata/json/1" -ApplicationType Lync
You will also need the certificate thumbprint that is currently assigned to IIS. This can be found using the Get-ExchangeCertificate PowerShell cmdlet.
The following steps are where Exchange 2016 diverges from previous versions. Instead of modifying the web.config file on each server, Exchange now uses the New-SettingOverride PowerShell cmdlet to set the IM server and IM certificate names.
New-SettingOverride -Name "IM Override" -Component OwaServer -Section IMSettings -Parameters ("IMServerName=fepool.domain.com","IMCertificateThumbprint=thumbprint") -Reason "Configure IM"
If you have configured OWA integration in the past, you will recognize the IMServerName and IMCertificateThumbprint attributes (note: in the above command, replace “thumbprint” with the actual Exchange certificate thumbprint). These were previously added to the web.config files. If you run the above command without the -Server parameter, the setting will apply to all Exchange 2016 servers in the Active Directory forest. If you need different settings for specific Exchange servers, use the -Server parameter. Once the IM server and certificate information has been added, refresh the IM settings on each of the Exchange server using the following PowerShell cmdlet:
Get-ExchangeDiagnosticInfo -Server ExchangeServer -Process Microsoft.Exchange.Directory.TopologyService -Component VariantConfiguration -Argument Refresh
Finally, reset IIS using iisreset command, and if needed, restart the Outlook on the Web web pool on each Exchange server using the following PowerShell cmdlet:
Restart-WebAppPool MSExchangeOWAAppPool
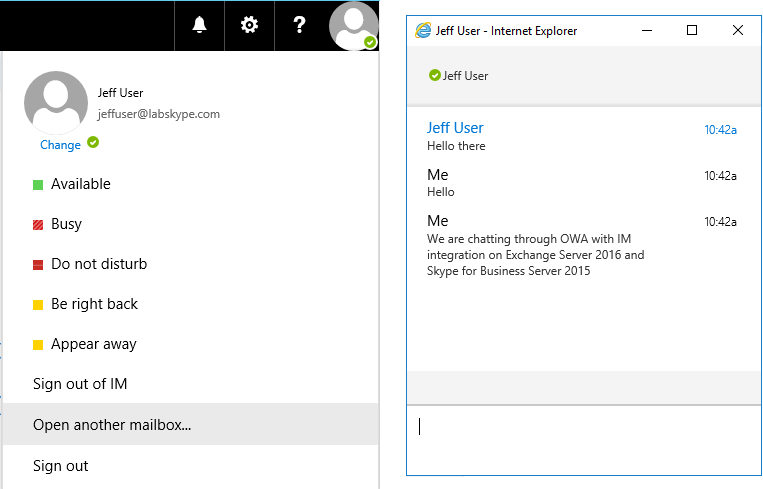
At this point, a Skype enabled used should be able to sign into OWA and message other users:
Did you find this article helpful? Leave a comment below or follow me on Twitter (@JeffWBrown) for more information on Skype for Business.